
Restoration Shaman Healing Spec, Builds, and Talents — 12.0.5
On this page, you will find out the best talents for your Restoration Shaman in World of Warcraft Patch 12.0.5. We also have default talent builds for various types of content, such as raiding or Mythic+. If you play with Warmode on, we have your PvP talents covered as well.
Best Midnight Talents for Restoration Shaman
In the current meta, both Hero Talent trees are viable, with 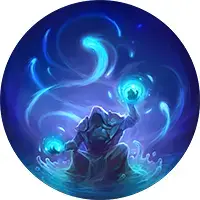 Farseer
no longer being dominant after the removal of
Farseer
no longer being dominant after the removal of ![]() Whispering Waves. Baseline
Whispering Waves. Baseline
![]() Healing Rain was changed to have almost double the cooldown and duration,
making it much easier to maintain for Farseer builds, and allowing it to come back
into the meta. Farseer casts are generally more impactful, but there is less passive
group healing happening than when playing Totemic.
Healing Rain was changed to have almost double the cooldown and duration,
making it much easier to maintain for Farseer builds, and allowing it to come back
into the meta. Farseer casts are generally more impactful, but there is less passive
group healing happening than when playing Totemic.
 Totemic builds are also strong, and much more forgiving for movement
heavy fights. This is due to having a larger amount of instant casts and the ability
to reposition
Totemic builds are also strong, and much more forgiving for movement
heavy fights. This is due to having a larger amount of instant casts and the ability
to reposition ![]() Surging Totem with
Surging Totem with ![]() Totemic Projection frequently.
Totemic gets a lot of free
Totemic Projection frequently.
Totemic gets a lot of free ![]() Chain Heal casts through
Chain Heal casts through ![]() Lively Totems,
allowing it to do more area healing than Farseer in most situations, at the cost
of having weaker spot healing.
Lively Totems,
allowing it to do more area healing than Farseer in most situations, at the cost
of having weaker spot healing.
Also, make sure to adjust these builds to include any utility needed for specific
encounters or dungeons, as the Shaman class tree is full of niche talents such as
![]() Tremor Totem which are usually useless, but can occasionally be invaluable.
Tremor Totem which are usually useless, but can occasionally be invaluable.
Quick Start Import Codes:
Restoration Dungeons - Totemic
Restoration Raid - Totemic
Restoration Delves - Farseer
 Totemic Raid Talents
While these are the baseline recommended talents, feel free to swap to different utility talents to suit your raid setup and boss-by-boss needs.
While ![]() Healing Tide Totem works well with Totemic due to the
new additional effect of
Healing Tide Totem works well with Totemic due to the
new additional effect of ![]() Splitstream and new
Splitstream and new ![]() Primal Catalyst talent,
Primal Catalyst talent,
![]() Ascendance has higher potential healing and allows for very
high single-target healing when active, while HTT is a pure raid healing cooldown,
making it a more flexible option.
Ascendance has higher potential healing and allows for very
high single-target healing when active, while HTT is a pure raid healing cooldown,
making it a more flexible option.
The higher ![]() Ascendance uptime thanks to
Ascendance uptime thanks to ![]() Deeply Rooted Elements
has great synergy with
Deeply Rooted Elements
has great synergy with ![]() Resurgence through the guaranteed double
Resurgence through the guaranteed double ![]() Healing Wave
crits on every cast, which are made faster by
Healing Wave
crits on every cast, which are made faster by ![]() Preeminence. Its alternative
talent,
Preeminence. Its alternative
talent, ![]() First Ascendant, is a strong swap on fights with 2-minute raid damage,
such as Vorasius intermissions.
First Ascendant, is a strong swap on fights with 2-minute raid damage,
such as Vorasius intermissions.
![]() Chain Heal and its support talents combo well with Totemic
Hero talents as you will be able to cast many of them for free with
Chain Heal and its support talents combo well with Totemic
Hero talents as you will be able to cast many of them for free with ![]() Lively Totems
whenever you use
Lively Totems
whenever you use ![]() Healing Stream Totem, which has a reduced cooldown thanks
to the new
Healing Stream Totem, which has a reduced cooldown thanks
to the new ![]() Totemic Momentum talent.
Totemic Momentum talent.
Finally, we skip ![]() Downpour in favor of
Downpour in favor of ![]() Riptide talents such
as
Riptide talents such
as ![]() Undercurrent and
Undercurrent and ![]() Wavespeaker's Blessing because they are easier
to use and do not represent a significant healing loss over perfect usages of Downpour.
Wavespeaker's Blessing because they are easier
to use and do not represent a significant healing loss over perfect usages of Downpour.
Totemic Mythic+ Talents
While these are the baseline recommended talents, feel free to swap to different utility talents to suit your group composition, target dungeon, and active weekly affixes.
The general idea behind these talents is to give you high baseline healing and
utility, including picking ![]() Acid Rain for extra passive DPS.
Acid Rain for extra passive DPS. ![]() Ancestral Vigor
is also a great talent to take to reduce the impact of burst damage on your allies.
Ancestral Vigor
is also a great talent to take to reduce the impact of burst damage on your allies.
![]() Chain Heal and its support talents combo well with Totemic
Hero talents as you will be able to cast many of them for free with
Chain Heal and its support talents combo well with Totemic
Hero talents as you will be able to cast many of them for free with ![]() Lively Totems
whenever you use
Lively Totems
whenever you use ![]() Healing Stream Totem, which has a reduced cooldown thanks
to the
Healing Stream Totem, which has a reduced cooldown thanks
to the ![]() Totemic Momentum talent.
Totemic Momentum talent.
While ![]() Flow of the Tides is usually good in Mythic+, the large amount of
Flow of the Tides is usually good in Mythic+, the large amount of
![]() Chain Heals cast automatically by totems tends to cause them to be removed
unexpectedly, making
Chain Heals cast automatically by totems tends to cause them to be removed
unexpectedly, making ![]() Ancestral Reach more consistent.
Ancestral Reach more consistent.
![]() Healing Tide Totem has good synergy with Totemic due to the
additional effect of the
Healing Tide Totem has good synergy with Totemic due to the
additional effect of the ![]() Splitstream and
Splitstream and ![]() Primal Catalyst hero
talents, heals for a large amount instantly, and allows you to DPS or heal with
your spells while active, making it a stronger pick than
Primal Catalyst hero
talents, heals for a large amount instantly, and allows you to DPS or heal with
your spells while active, making it a stronger pick than ![]() Ascendance
in the current meta.
Ascendance
in the current meta.
 Farseer Raid Talents
While these are the baseline recommended talents, feel free to swap to different utility talents to suit your raid setup and boss-by-boss needs.
Farseer has strong cast time healing due to ![]() Maelstrom Supremacy and
Maelstrom Supremacy and
![]() Windspeaker, which leads to high value per cast.
Windspeaker, which leads to high value per cast.
The higher ![]() Ascendance uptime thanks to
Ascendance uptime thanks to ![]() Deeply Rooted Elements
has great synergy with
Deeply Rooted Elements
has great synergy with ![]() Resurgence through the guaranteed double
Resurgence through the guaranteed double ![]() Healing Wave
crits on every cast, which are made faster by
Healing Wave
crits on every cast, which are made faster by ![]() Preeminence.
Preeminence.
The choice between ![]() Preeminence and
Preeminence and ![]() First Ascendant comes down
to whether the healing cooldown plan for the boss you are doing requires you to
press Ascendance more often than 3-minutes or not, but by default Preeminence has
better synergy with
First Ascendant comes down
to whether the healing cooldown plan for the boss you are doing requires you to
press Ascendance more often than 3-minutes or not, but by default Preeminence has
better synergy with ![]() Deeply Rooted Elements which we also spec.
Deeply Rooted Elements which we also spec.
Finally, we skip ![]() Downpour in favor of
Downpour in favor of ![]() Riptide talents such
as
Riptide talents such
as ![]() Undercurrent and
Undercurrent and ![]() Wavespeaker's Blessing because they synergize
better with Farseer talents, and Downpour heals for much less when used
with
Wavespeaker's Blessing because they synergize
better with Farseer talents, and Downpour heals for much less when used
with ![]() Healing Rain compared to
Healing Rain compared to ![]() Surging Totem.
Surging Totem.
Farseer Mythic+ Talents
While these are the baseline recommended talents, feel free to swap to different utility talents to suit your group composition, target dungeon, and active weekly affixes.
The general idea behind these talents is to give you high baseline healing and
utility, including picking ![]() Ancestral Vigor to provide extra health to your
party, reducing the impact of incoming burst damage.
Ancestral Vigor to provide extra health to your
party, reducing the impact of incoming burst damage. ![]() Acid Rain is skipped
because it does very low damage and requires
Acid Rain is skipped
because it does very low damage and requires ![]() Healing Rain, which is a relatively
weak button for Farseer in Mythic+ and can safely be skipped.
Healing Rain, which is a relatively
weak button for Farseer in Mythic+ and can safely be skipped.
![]() Flow of the Tides works well in keys as you will generally have
Flow of the Tides works well in keys as you will generally have ![]() Riptides
to spare since there are only 5 targets for them, allowing you to always buff your
Riptides
to spare since there are only 5 targets for them, allowing you to always buff your
![]() Chain Heal without losing a lot of potential Riptide healing.
Chain Heal without losing a lot of potential Riptide healing.
![]() Unleash Life allows for near-permanent uptime of one Ancestor, and is
a mandatory talent in Farseer builds, which tend to have better spread
and spot healing due to stronger
Unleash Life allows for near-permanent uptime of one Ancestor, and is
a mandatory talent in Farseer builds, which tend to have better spread
and spot healing due to stronger ![]() Healing Wave casts with
Healing Wave casts with ![]() Maelstrom Supremacy
and
Maelstrom Supremacy
and ![]() Windspeaker.
Windspeaker.
The choice between ![]() Preeminence and
Preeminence and ![]() First Ascendant comes down
to whether the key route you planned requires you to press Ascendance more often
than every 3 minutes, but by default, Preeminence has better synergy with
First Ascendant comes down
to whether the key route you planned requires you to press Ascendance more often
than every 3 minutes, but by default, Preeminence has better synergy with
![]() Deeply Rooted Elements which we also spec.
Deeply Rooted Elements which we also spec.
Farseer Delve Soloing Talents
While these are the baseline recommended talents, feel free to swap to different utility talents to suit the kind of Delve you are entering and its specific challenges.
While Restoration is not particularly fast at clearing Delves in general,
it has the advantage of being able to do it while keeping itself healthy without
much effort through beefy self-healing with ![]() Healing Wave and multiple cooldowns
that work surprisingly well when healing only yourself, and perhaps also a handful
of allies such as your Delve companion.
Healing Wave and multiple cooldowns
that work surprisingly well when healing only yourself, and perhaps also a handful
of allies such as your Delve companion.
For advanced players, swapping to ![]() Reactive Warding is actually very strong
because in a very small group setting
Reactive Warding is actually very strong
because in a very small group setting ![]() Earth Shield is a major source of
healing and thus this talent accrues a lot of value from low count shield refreshes.
It is also much easier to refresh with the new
Earth Shield is a major source of
healing and thus this talent accrues a lot of value from low count shield refreshes.
It is also much easier to refresh with the new ![]() Instinctive Imbuements, which
refreshes all of your shields and buffs whenever you refresh
Instinctive Imbuements, which
refreshes all of your shields and buffs whenever you refresh ![]() Water Shield.
Water Shield.
The builds listed above are popular recommendations, covering various different loadouts suited to each style of endgame content. Each Talent Build will have it's own rotation, and can also be manipulated further for specific types of content and to better benefit your group.
Restoration Shaman Apex Talent - Stormstream Totem
The Apex talents of Restoration Shamans are ![]() Stormstream Totem, the
two-pointer
Stormstream Totem, the
two-pointer ![]() Stormstream Totem, and final talent
Stormstream Totem, and final talent ![]() Stormstream Totem.
As a whole, these apex talents grants
Stormstream Totem.
As a whole, these apex talents grants ![]() Riptide a small chance to proc a
very powerful version of
Riptide a small chance to proc a
very powerful version of ![]() Healing Stream Totem which can be cast without using
regular HST charges once you fully unlock the talent.
Healing Stream Totem which can be cast without using
regular HST charges once you fully unlock the talent. ![]() Nature's Swiftness
(or
Nature's Swiftness
(or ![]() Ancestral Swiftness) also grant a proc when used.
Ancestral Swiftness) also grant a proc when used.
The proc stays active for up to 60 seconds and stacks twice, allowing you ample
time to wait for the best time to use it, although you will generally want to
do so before both charges of regular ![]() Healing Stream Totem are ready to avoid
wasting potential uses.
Healing Stream Totem are ready to avoid
wasting potential uses.
Restoration Shaman Hero Talents
Upon reaching Level 71 on any specialization, players will gain access to one
of two unique talent trees called Hero Talents. Restoration Shaman has the choice
between Farseer and Totemic.
Farseer
Farseer is all about spawning Ancestors, mostly through ![]() Call of the Ancestors
and
Call of the Ancestors
and ![]() Ancestral Swiftness. These are friendly NPCs that heal or deal damage
based on what spells you use while they are active, making this tree a solid all-rounder
that amplifies your burst healing potential. Hero Talents such as
Ancestral Swiftness. These are friendly NPCs that heal or deal damage
based on what spells you use while they are active, making this tree a solid all-rounder
that amplifies your burst healing potential. Hero Talents such as ![]() Maelstrom Supremacy
and
Maelstrom Supremacy
and ![]() Windspeaker also make Farseer's base spells stronger than those of Totemic.
Windspeaker also make Farseer's base spells stronger than those of Totemic.
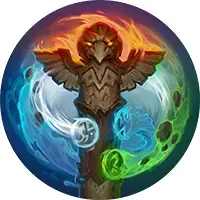
Totemic
Totemic is all about using Totems, and enables ![]() Surging Totem,
which replaces
Surging Totem,
which replaces ![]() Healing Rain with a longer duration instant cast which can
be moved with
Healing Rain with a longer duration instant cast which can
be moved with ![]() Totemic Projection. This frees up a lot of casting time, especially
when combined with
Totemic Projection. This frees up a lot of casting time, especially
when combined with ![]() Lively Totems, and its free
Lively Totems, and its free ![]() Chain Heals when using
throughput totems. These talents simplify gameplay greatly, at the cost of tying
your throughput potential even more to the small radius of
Chain Heals when using
throughput totems. These talents simplify gameplay greatly, at the cost of tying
your throughput potential even more to the small radius of ![]() Healing Rain.
Healing Rain.
PvP Talents (War Mode)
Enabling War Mode provides the following benefits:
- PvP talents that can be used in the outdoor world.
- 10% to 30% increase in World Quest rewards at max level.
- 10% to 30% more experience gained while leveling.
- Ability to earn Conquest Points in the outdoor world, which can reward powerful gear every week.
With the benefits of enabling War Mode for leveling and PvE content, it is recommended to enable the feature to maximize your leveling and rewards at maximum level. However, you will make yourself available for open-world PvP, and the possibility to be "ganked" while leveling or doing World Quests exists.
In this section, we will explain the PvP talents and rank them on their leveling and solo / small group PvE content usefulness.
 Counterstrike Totem replicates and reflects damage you take for a
decent duration on a short cooldown. This can be really strong when in a high
damage area to deal some chip damage to targets around you and convert your
health pool into additional damage
Counterstrike Totem replicates and reflects damage you take for a
decent duration on a short cooldown. This can be really strong when in a high
damage area to deal some chip damage to targets around you and convert your
health pool into additional damage Rain Dance makes Healing Rain instant, cheaper, and more
effective. This has great synergy with
Rain Dance makes Healing Rain instant, cheaper, and more
effective. This has great synergy with  Acid Rain and also with Counterstrike Totem,
as it will provide a lot of healing for you to tank mobs with while they kill themselves
Acid Rain and also with Counterstrike Totem,
as it will provide a lot of healing for you to tank mobs with while they kill themselves Totem of Wrath significantly increases the critical effect of spells
of nearby allies for a short duration whenever you use
Totem of Wrath significantly increases the critical effect of spells
of nearby allies for a short duration whenever you use  Nature's Swiftness.
It is good for solo play and excellent if you are doing outdoor content with others.
Nature's Swiftness.
It is good for solo play and excellent if you are doing outdoor content with others.
The remaining talents have their own niches, but are not as generally useful in PvE situations with War Mode active.
Changelog
- 19 May 2026: Updated Mythic+ talent recommendations to Totemic and explanation text.
- 20 Apr. 2026: Updated for Patch 12.0.5.
- 30 Mar. 2026: Updated with current meta talents.
- 16 Mar. 2026: Updated for Midnight Season 1 launch.
- 26 Feb. 2026: Updated for Midnight release.
- 10 Feb. 2026: Patch 12.0.1 updates and recommendation adjustments.
- 27 Jan. 2026: Updated Farseer raid talent build with the best practices from pre-patch raiding.
- 24 Jan. 2026: Typo fix with Totemic raid talents.
- 19 Jan. 2026: Updated for the Midnight Pre-Patch.
- 30 Nov. 2025: Reviewed for Patch 11.2.7.
- 05 Oct. 2025: Reviewed for Patch 11.2.5.
- 15 Aug. 2025: Added new recommended tags with and without new tier set bonuses.
- 10 Aug. 2025: Now recommend the Whispering Waves talents for raiding.
- 04 Aug. 2025: Updated for Patch 11.2.
- 15 Jun. 2025: Reviewed for Patch 11.1.7.
- 13 May 2025: Revamped Farseer M+ talents based on top key pusher.
- 21 Apr. 2025: Reviewed for Patch 11.1.5.
- 23 Mar. 2025: Updated talents for the current Season 2 meta.
- 24 Feb. 2025: Updated with the changes of Patch 11.1.
- 15 Dec. 2024: Added recommended builds and minor talent recommendation adjustments for ease of play.
- 24 Oct. 2024: Adjustments to the recommended Mythic+ talent builds.
- 21 Oct. 2024: Updated for Patch 11.0.5 and new talent tree.
- 06 Oct. 2024: Raid talent adjustments and typo fixes in talent details section.
- 15 Sep. 2024: Added Farseer Chain Heal raid build and revamped Delve build.
- 09 Sep. 2024: Reviewed for The War Within Season 1.
- 24 Aug. 2024: Added a recommended Delves build.
- 21 Aug. 2024: Updated for The War Within launch.
- 23 Jul. 2024: Updated for The War Within pre-patch and new Tier Set bonuses.
- 11 May 2024: Updated recommended talents.
- 07 May 2024: Reviewed for 10.2.7.
- 22 Apr. 2024: Updated for Season 4.
- 18 Mar. 2024: Reviewed for Patch 10.2.6.
- 15 Jan. 2024: Reviewed for Patch 10.2.5.
- 06 Nov. 2023: Updated with new talent builds for Patch 10.2 and Ascendance nerfs on talent descriptions.
- 04 Sep. 2023: Updated with tab-based formatting.
- 31 Jul. 2023: Reworked how multiple talent trees are shown in the guide.
- 10 Jul. 2023: Updated for Patch 10.1.5.
- 13 Jun. 2023: Changed recommended raiding talents to use Deeply Rooted Elements and various text updates.
- 01 May 2023: Talent updates for Season 2 and the new Tier Set gameplay changes.
- 20 Mar. 2023: Updated talents for Patch 10.0.7.
- 10 Mar. 2023: Further updates before patch 10.0.7.
- 24 Jan. 2023: Reviewed for Patch 10.0.5.
- 13 Dec. 2022: Adjusted talents further for both Mythic+ and Raid.
- 11 Dec. 2022: Reviewed for Dragonflight Season 1.
- 28 Nov. 2022: Updated for Dragonflight launch.
- 25 Oct. 2022: Updated for Dragonflight pre-patch.