Lost City of the Tol'vir Dungeon Guide
The Lost City of the Tol'vir is an ancient city buried deep in the Uldum sands. Players will navigate through winding corridors and face off against the corrupted inhabitants threatening to devastate the lands.
Lost City of the Tol'vir Entrance Location
Lost City of the Tol'vir is found on the Southern end of Uldum at the end of the river.

Overview of Bosses in Lost City of the Tol'vir
Here we will give you a full rundown of what you can expect from each of the bosses found here on both Normal and Heroic difficulties as well as the items they drop.
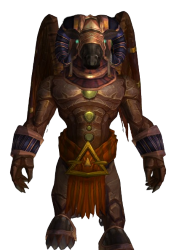
General Husam
-
 Shockwave
 Bad Intentions
 Hammer Fist
 Mystic Trap
 Detonate Traps

General Husam will cover the ground with ![]() Mystic Traps,
giving you very little room to stand safely. These traps will arm themselves
after 3 seconds, detonating if any player comes in contact with them.
General Husam will also craft the ground with
Mystic Traps,
giving you very little room to stand safely. These traps will arm themselves
after 3 seconds, detonating if any player comes in contact with them.
General Husam will also craft the ground with ![]() Shockwave,
displaying an "X" pattern where he will damage any enemies in the
area; simply avoid this while being sure not to run into any of the armed
Shockwave,
displaying an "X" pattern where he will damage any enemies in the
area; simply avoid this while being sure not to run into any of the armed
![]() Mystic Trap. Lastly he will charge a random player with
Mystic Trap. Lastly he will charge a random player with
![]() Bad Intentions, dealing moderate damage to them and stunning them
for a few seconds.
Bad Intentions, dealing moderate damage to them and stunning them
for a few seconds.
Loot from Normal
| Item | Required Level | Item Type |
|---|---|---|
| 83 | Plate Feet | |
| 83 | Mail Hands | |
| 83 | Back | |
| 83 | Polearm | |
| 83 | Finger |
Loot from Heroic
| Item | Required Level | Item Type |
|---|---|---|
| 85 | Plate Feet | |
| 85 | Mail Hands | |
| 85 | Back | |
| 85 | Polearm | |
| 85 | Finger |
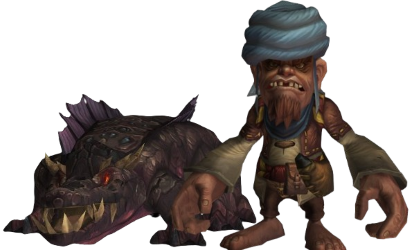
Lockmaw and Augh
-
 Lockmaw
  Viscous Poison
 Dust Flail
 Venomous Rage
 Scent of Blood
- Frenzied Crocolisk
 Vicious Bite
- Augh
 Paralytic Blow Dart
 Whirlwind
 Smoke Bomb

This fight starts off with you facing only Lockmaw, with
Augh appearing in random using ![]() Whirlwind; simply attack
Augh a few times when he appears to make him vanish. Avoid attacking
Lockmaw from behind as he will often use
Whirlwind; simply attack
Augh a few times when he appears to make him vanish. Avoid attacking
Lockmaw from behind as he will often use ![]() Dust Flail, dealing
damage to all players behind him and reducing their chance to hit by 50%.
Spread out to avoid
Dust Flail, dealing
damage to all players behind him and reducing their chance to hit by 50%.
Spread out to avoid ![]() Viscous Poison from hitting multiple targets
and remove the poison debuff if possible. Lockmaw will frequently use
Viscous Poison from hitting multiple targets
and remove the poison debuff if possible. Lockmaw will frequently use
![]() Scent of Blood on a random target, spawning in multiple
Frenzied Crocolisks that will fixate on attacking the player
marked with
Scent of Blood on a random target, spawning in multiple
Frenzied Crocolisks that will fixate on attacking the player
marked with ![]() Scent of Blood. These adds should be slowed, stunned,
and AoEd down as quickly as possible to prevent them from attacking the marked
target.
Scent of Blood. These adds should be slowed, stunned,
and AoEd down as quickly as possible to prevent them from attacking the marked
target.
Once Lockmaw is defeated the fight is not over. After a brief break
Augh will appear and engage you in combat. He will debuff random
targets with ![]() Paralytic Blow Dart, a poison debuff that should be
removed if possible. Augh will periodically disorient the tank
temporarily, attacking his second threat target until they are free. Lastly he
will use
Paralytic Blow Dart, a poison debuff that should be
removed if possible. Augh will periodically disorient the tank
temporarily, attacking his second threat target until they are free. Lastly he
will use ![]() Whirlwind, dealing high damage to all nearby targets while
he moves towards a random enemy. The tank should be ready to taunt him
during the
Whirlwind, dealing high damage to all nearby targets while
he moves towards a random enemy. The tank should be ready to taunt him
during the ![]() Whirlwind to force him to stay in place, rather than
moving around the room damaging your ranged players.
Whirlwind to force him to stay in place, rather than
moving around the room damaging your ranged players.
Loot from Normal
| Item | Required Level | Item Type |
|---|---|---|
| 83 | One-Hand Dagger | |
| 83 | Trinket | |
| 83 | Plate Waist | |
| 83 | Cloth Wrist | |
| 83 | Finger |
Loot from Heroic
| Item | Required Level | Item Type |
|---|---|---|
| 85 | One-Hand Dagger | |
| 85 | Trinket | |
| 85 | Plate Waist | |
| 85 | Cloth Wrist | |
| 85 | Finger |
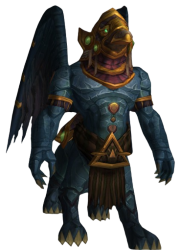
High Prophet Barim
-
 Phase One
 - Blaze of the Heavens
 Fifty Lashings
 Plague of Ages
 Heaven's Fury
 Repentance
- Phase Two
- Harbinger of Darkness
 Hallowed Ground
 Soul Sever

High Prophet Barim has two phases with different abilities in each. In
the first phase, players will need to quickly move out of
![]() Heaven's Fury, a beam of light spawned on a random target. He will
debuff players with
Heaven's Fury, a beam of light spawned on a random target. He will
debuff players with ![]() Plague of Ages, a disease that bounces between
enemies if not dispelled quickly. High Prophet Barim will also buff
his melee damage via Blaze of the Heavens, giving him moderately
high damage output.
Plague of Ages, a disease that bounces between
enemies if not dispelled quickly. High Prophet Barim will also buff
his melee damage via Blaze of the Heavens, giving him moderately
high damage output.
When High Prophet Barim reaches 50% health he will
![]() Repentance, going immune to damage, stunning all enemies and
pulling them on top of himself. He will then spawn in a
Harbinger of Darkness, dark phoenix that will debuff players with
Repentance, going immune to damage, stunning all enemies and
pulling them on top of himself. He will then spawn in a
Harbinger of Darkness, dark phoenix that will debuff players with
![]() Soul Sever, causing them to spawn Soul Fragments.
These Soul Fragments will slowly move towards the
Harbinger of Darkness, increasing its damage dealt if they reach
the bird. Stun, slow, and quickly kill the Soul Fragments before
they can reach the Harbinger of Darkness; once the
Harbinger of Darkness dies, High Prophet Barim will stop
casting
Soul Sever, causing them to spawn Soul Fragments.
These Soul Fragments will slowly move towards the
Harbinger of Darkness, increasing its damage dealt if they reach
the bird. Stun, slow, and quickly kill the Soul Fragments before
they can reach the Harbinger of Darkness; once the
Harbinger of Darkness dies, High Prophet Barim will stop
casting ![]() Repentance and phase one will start again.
Repentance and phase one will start again.
Loot from Normal
| Item | Required Level | Item Type |
|---|---|---|
| 83 | Mail Legs | |
| 83 | Plate Feet | |
| 83 | One-Hand Sword | |
| 83 | Finger | |
| 83 | Neck |
Loot from Heroic
| Item | Required Level | Item Type |
|---|---|---|
| 85 | Mail Legs | |
| 85 | Plate Feet | |
| 85 | One-Hand Sword | |
| 85 | Finger | |
| 85 | Neck |
Siamat
-
 Phase One
  Storm Bolt
 Cloud Burst
- Servant of Siamat
 Lightning Nova
- Thunder Crash
- Minion of Siamat
 Chain Lightning
 Tempest Storm
 Depletion
- Phase Two
 Wailing Winds
- Storm Bolt
- Gathered Storms

Siamat starts the fight off with ![]() Deflecting Winds,
reducing his damage taken by 90%. He will attack random targets with
Deflecting Winds,
reducing his damage taken by 90%. He will attack random targets with
![]() Storm Bolt during this phase. Siamat will often use
Storm Bolt during this phase. Siamat will often use
![]() Cloud Burst to cover the area with clouds that deal damage and
knockback players near them; be ready to move away from any of these as they
spawn in.
Cloud Burst to cover the area with clouds that deal damage and
knockback players near them; be ready to move away from any of these as they
spawn in.
In this phase Siamat will also frequently spawn in 2 different adds;
Servant of Siamat and Minion of Siamat.
Minion of Siamats can mostly be ignored, interrupting them whenever
possible; when they die they will release a ![]() Tempest Storm,
dealing Nature damage to any players caught under the cloud. The
Servant of Siamats are the main focus of this phase, as you need to
kill 3 of them to activate Siamat himself. Keep these away from the
group as they will frequently cast
Tempest Storm,
dealing Nature damage to any players caught under the cloud. The
Servant of Siamats are the main focus of this phase, as you need to
kill 3 of them to activate Siamat himself. Keep these away from the
group as they will frequently cast ![]() Thunder Crash, dealing
Nature damage to all nearby targets. After the third
Servant of Siamat dies, Siamat will drop his
Thunder Crash, dealing
Nature damage to all nearby targets. After the third
Servant of Siamat dies, Siamat will drop his
![]() Deflecting Winds buff and take full damage for the rest of the fight.
Deflecting Winds buff and take full damage for the rest of the fight.
As soon as Siamat drops his ![]() Deflecting Winds buff he will
use
Deflecting Winds buff he will
use ![]() Wailing Winds on the group, throwing you around the room while
dealing damage to you. Minion of Siamat will continue to spawn in
during this phase, simply kill them, interrupt them, or ignore them entirely
while you primarily focus on dealing with Siamat himself.
Wailing Winds on the group, throwing you around the room while
dealing damage to you. Minion of Siamat will continue to spawn in
during this phase, simply kill them, interrupt them, or ignore them entirely
while you primarily focus on dealing with Siamat himself.
Loot from Normal
| Item | Required Level | Item Type |
|---|---|---|
| 83 | Leather Feet | |
| 83 | Cloth Waist | |
| 83 | Back | |
| 83 | One-Hand Mace | |
| 83 | Leather Legs | |
| 83 | Cloth Shoulder | |
| 83 | Finger | |
| 83 | Trinket | |
| 83 | Trinket | |
| 83 | Shield |
Loot from Heroic
| Item | Required Level | Item Type |
|---|---|---|
| 85 | Leather Feet | |
| 85 | Cloth Waist | |
| 85 | Back | |
| 85 | One-Hand Mace | |
| 85 | Leather Legs | |
| 85 | Cloth Shoulder | |
| 85 | Finger | |
| 85 | Trinket | |
| 85 | Trinket | |
| 85 | Shield |
Lost City of the Tol'vir Quests
Starting in Cataclysm, dungeon quests are found directly inside the dungeon and have no quest chains required. This means you can simply queue up for the dungeon and grab all of the available quests inside without needing to complete long-winded, complicated quest chains! The following quests are found inside the dungeon:
- Targets of Opportunity
- The Source of Their Power
This is simply a breadcrumb quest you can grab from General Ammantep in Uldum.
Lost City of the Tol'vir Achievements in Cataclysm
| Achievement | Description |
|---|---|
| Defeat 20 Frenzied Crocolisks within 10 seconds during the Lockmaw encounter in the Lost City of the Tol'vir on Heroic Difficulty. | |
| Defeat Siamat, Lord of the South Wind, with 3 stacks of Lightning Charge in Lost City of the Tol'vir on Heroic Difficulty. | |
| Defeat 3 Burning Souls during the High Prophet Barim encounter in Lost City of the Tol'vir on Heroic Difficulty. | |
| Defeat Siamat, Lord of the South Wind in the Lost City of the Tol'vir. | |
| Defeat Siamat, Lord of the South Wind in the Lost City of the Tol'vir on Heroic Difficulty. | |
| Defeat Siamat, Lord of the South Wind in the Lost City of the Tol'vir in Heroic difficulty while in a guild group. |
Changelog
- 30 Jul. 2024: Page reviewed for phase two.
- 20 May 2024: Added page.
This guide has been written by Abide, TBC veteran for nearly a decade. Abide is a Warrior tank and multi-class expert currently playing on Faerlina as Horde. You can find him in the the Icy Veins Discord. You can also see him live on Twitch.
- Could WoW Be Added to Xbox Game Pass Ultimate?
- MoP Classic Escalation PTR Update Details New Content
- TBC Classic Players Are Earning Arena Points Differently Now
- Population Density Adjustments Coming to Burning Crusade Classic Zones
- Blizzard Are Fixing the Incorrect Armor Values in BCC!
- WoW Players Were Already Arguing About This on Launch Day
- Burning Crusade Classic Hotfixes, February 4th
- Free Riding Skill Fix: Burning Crusade Classic Hotfixes, February 3rd