The Deadmines Dungeon Guide
In Cataclysm, the Deadmines dungeon received a complete revamp, offering players a re-imagined experience within one of World of Wacraft's most iconic dungeons.
The Deadmines Entrance Location
The Deadmines is found in Westfall on the Southern edge of the zone. Horde players will need to fly to STV first, or simply queue up for the dungeon through group finder.

Overview of Bosses in The Deadmines
Here we will give you a full rundown of what you can expect from each of the bosses found here on both Normal and Heroic difficulties as well as the items they drop.
Glubtok
-
 Arcane Power
  Fire Wall
- Phase One
 Fists of Flame
 Fists of Frost
 Blink
Blink- Phase Two
- Fire Blossom
- Frost Blossom

In phase one you only need to avoid near your tank to prevent ![]() Fists of Flame
and
Fists of Flame
and ![]() Fists of Frost. Each time Glubtok swaps between these
2 spells, he will
Fists of Frost. Each time Glubtok swaps between these
2 spells, he will ![]() Blink in a random direction and reset threat.
At 50% health, Glubtok will return to the center of the room
and bombard random areas of the room with both
Blink in a random direction and reset threat.
At 50% health, Glubtok will return to the center of the room
and bombard random areas of the room with both ![]() Fire Blossom and
Fire Blossom and
![]() Frost Blossom, watch the floor for these indicators and avoid
standing where they are landing.
Frost Blossom, watch the floor for these indicators and avoid
standing where they are landing.
On Heroic, a Frost Blossom and Fire Blossom will
spawn at the landing location of each ![]() Frost Blossom and
Frost Blossom and
![]() Fire Blossom; simply ignore these and burn the boss, or let a few
of them gather up and AoE them down. Glubtok will also cover the area
in a massive fire wall, dealing high damage to anyone that touches the wall.
Move around the boss in a circle, avoiding touching the wall at all times.
Fire Blossom; simply ignore these and burn the boss, or let a few
of them gather up and AoE them down. Glubtok will also cover the area
in a massive fire wall, dealing high damage to anyone that touches the wall.
Move around the boss in a circle, avoiding touching the wall at all times.
Loot from Normal
| Item | Required Level | Item Type |
|---|---|---|
| 15 | One-Hand Dagger | |
| 15 | Cloth Hands | |
| 15 | Back |
Loot from Heroic
| Item | Required Level | Item Type |
|---|---|---|
| 85 | One-Hand Dagger | |
| 85 | Leather Chest | |
| 85 | Plate Shoulder | |
| 85 | Back | |
| 85 | Leather Chest |
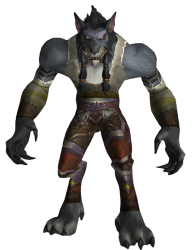
Helix Gearbreaker
-
 Sticky Bomb
  Oaf Smash
 Chest Bomb
 Leap
Leap

Helix Gearbreaker beings the fight on the back of a
Lumbering Oaf. While he on the Oaf, Helix Gearbreaker will
constantly cover the room with Sticky Bombs, which deal high damage
to any nearby players after a short timer. Helix Gearbreaker will also
place a ![]() Chest Bomb on a random player, dealing high damage to them
and any nearby allies, knocking them into the air. Whoever gets this debuff
needs to run away from everyone else to avoid knocking up the entire group. The
Lumbering Oaf will occasionally pick up a random player and slam
them into a wall, dealing moderate damage. Keep dodging the
Sticky Bombs while finishing off the Oaf to force
Helix Gearbreaker to dismount and being the second phase.
Chest Bomb on a random player, dealing high damage to them
and any nearby allies, knocking them into the air. Whoever gets this debuff
needs to run away from everyone else to avoid knocking up the entire group. The
Lumbering Oaf will occasionally pick up a random player and slam
them into a wall, dealing moderate damage. Keep dodging the
Sticky Bombs while finishing off the Oaf to force
Helix Gearbreaker to dismount and being the second phase.
Helix Gearbreaker will continue to throw down Sticky Bombs
all over the room. He will also ![]() Leap onto a different ally every
10 seconds, auto attacking them and placing a
Leap onto a different ally every
10 seconds, auto attacking them and placing a ![]() Chest Bomb on them
when he chooses a new target. Avoiding the bombs and keeping his
Chest Bomb on them
when he chooses a new target. Avoiding the bombs and keeping his
![]() Leap target alive are the main concerns in this fight.
Leap target alive are the main concerns in this fight.
In this phase
Loot from Normal
| Item | Required Level | Item Type |
|---|---|---|
| 15 | One-Hand Sword | |
| 15 | Shield | |
| 15 | Polearm | |
| 15 | Leather Legs |
Loot from Heroic
| Item | Required Level | Item Type |
|---|---|---|
| 85 | Back | |
| 85 | One-Hand Sword | |
| 85 | Plate Hands | |
| 85 | Plate Wrist | |
| 85 | Mail Hands |
Foe Reaper 5000
-
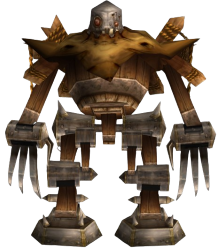
 Reaper Strike
  Overdrive
 Harvest
 Safety Restrictions Off-line
- Molten Slag

Start off the fight by having your DPS and healers spread out, and one of
your DPS players jump into the nearby Prototype Reaper. This
Prototype Reaper can be used to help DPS the boss, but should
primarily be used to DPS down the Molten Slags that will be
constantly spawning in. ![]() Overdrive will cause
Foe Reaper 5000 to run around the room rapidly, dealing AoE damage to
all nearby enemies; when he casts this run away.
Overdrive will cause
Foe Reaper 5000 to run around the room rapidly, dealing AoE damage to
all nearby enemies; when he casts this run away.
Foe Reaper 5000 will also target a random player with
![]() Harvest, moving to that location shortly after. While moving any
nearby players will take massive AoE damage every second, and again when he
reaches the original
Harvest, moving to that location shortly after. While moving any
nearby players will take massive AoE damage every second, and again when he
reaches the original ![]() Harvest location. Be quick to move away from
the boss during this, as well as away from the targeted location. Do not be in
front of the boss to avoid taking damage from
Harvest location. Be quick to move away from
the boss during this, as well as away from the targeted location. Do not be in
front of the boss to avoid taking damage from ![]() Reaper Strike; and
use any cooldowns available when Foe Reaper 5000 reaches 30%, as
he will double his damage done with
Reaper Strike; and
use any cooldowns available when Foe Reaper 5000 reaches 30%, as
he will double his damage done with ![]() Safety Restrictions Off-line.
Safety Restrictions Off-line.
Loot from Normal
| Item | Required Level | Item Type |
|---|---|---|
| 15 | Two-Hand Mace | |
| 15 | One-Hand Sword | |
| 15 | Staff |
Loot from Heroic
| Item | Required Level | Item Type |
|---|---|---|
| 85 | Two-Hand Mace | |
| 85 | One-Hand Sword | |
| 85 | Staff |
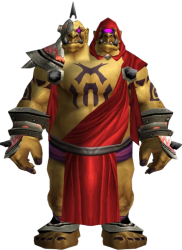
Admiral Ripsnarl
-
 Thirst for Blood
  Swipe
Swipe- Vapor Phase
 Summon Vapor
 Go For the Throat

Only the tank should be in front of the boss to avoid taking extra damage
from ![]() Swipe. Admiral Ripsnarl will gain a stack of
Swipe. Admiral Ripsnarl will gain a stack of
![]() Thirst for Blood each time he attacks, making his very deadly if
your DPS is low. Every 25% health, Admiral Ripsnarl will vanish
into the fog, becoming unattackable for a short time. While
Admiral Ripsnarl is hidden in this fog, the group will be attacked by
multiple Vapors; quickly kill these while waiting for him to reappear.
Lastly, when Admiral Ripsnarl emerges from the fog, he will use
Thirst for Blood each time he attacks, making his very deadly if
your DPS is low. Every 25% health, Admiral Ripsnarl will vanish
into the fog, becoming unattackable for a short time. While
Admiral Ripsnarl is hidden in this fog, the group will be attacked by
multiple Vapors; quickly kill these while waiting for him to reappear.
Lastly, when Admiral Ripsnarl emerges from the fog, he will use
![]() Go For the Throat, attacking a random enemy and stunning them for
2 seconds.
Go For the Throat, attacking a random enemy and stunning them for
2 seconds.
Loot from Normal
| Item | Required Level | Item Type |
|---|---|---|
| 15 | Finger | |
| 15 | Two-Hand Axe | |
| 15 | One-Hand Axe |
Loot from Heroic
| Item | Required Level | Item Type |
|---|---|---|
| 85 | Finger | |
| 85 | Two-Hand Axe | |
| 85 | One-Hand Axe |
"Captain" Cookie
-
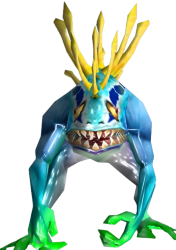
 Throw Food
  Rotten Aura
 Nauseated
 Satiated

Captain Cookie will stay in his cooking pot the entire fight, not
requiring a tank. He will constantly ![]() Throw Food at the group,
covering the entire area in both good and bad food. When you
"eat" food by walking over it, you will gain a buff or debuff depending
on the type of food; a stack of the
Throw Food at the group,
covering the entire area in both good and bad food. When you
"eat" food by walking over it, you will gain a buff or debuff depending
on the type of food; a stack of the ![]() Nauseated debuff will be applied
by any of the bad food, while good food will apply a stack of
Nauseated debuff will be applied
by any of the bad food, while good food will apply a stack of
![]() Satiated. Eating 1 type of food, either good or bad, will cancel
out a stack of the other food. Try to avoid the bad food as much as possible
while eating good food to maintain the buff. You can have your tank run around
and eat a lot of bad food early on to help clear up the area, giving you more
space to move around in.
Satiated. Eating 1 type of food, either good or bad, will cancel
out a stack of the other food. Try to avoid the bad food as much as possible
while eating good food to maintain the buff. You can have your tank run around
and eat a lot of bad food early on to help clear up the area, giving you more
space to move around in.
Loot from Normal
| Item | Required Level | Item Type |
|---|---|---|
| 15 | Back | |
| 15 | Cloth Chest | |
| 15 | One-Hand Sword | |
| 15 | One-Hand Mace | |
| 15 | Wand |
Loot from Heroic
| Item | Required Level | Item Type |
|---|---|---|
| 85 | Back | |
| 85 | Cloth Chest | |
| 85 | One-Hand Sword | |
| 85 | One-Hand Mace | |
| 85 | Wand |
Vanessa VanCleef (Heroic Only)
-
 Deflection
  Deadly Blades
 Backslash
 Fiery Blaze
 Vengeance of VanCleef
 Powder Explosion
- Defias Enforcer
- Defias Shadowguard
- Defias Blood Wizard

The fight will start with Vanessa VanCleef using
![]() Nightmare Elixir on your group, entering you into a twisted reality.
Right away your group will be getting lowered into a forge, requiring you to
click the vent levers around the forge to escape. After escaping, make your way
over to Glubtok while avoiding the fire on the ground, as well as the
large rocks being thrown at you. This version of Glubtok is much
weaker and will be defeated quickly.
Nightmare Elixir on your group, entering you into a twisted reality.
Right away your group will be getting lowered into a forge, requiring you to
click the vent levers around the forge to escape. After escaping, make your way
over to Glubtok while avoiding the fire on the ground, as well as the
large rocks being thrown at you. This version of Glubtok is much
weaker and will be defeated quickly.
When Glubtok dies, Helix Gearbreaker will appear in his place, along side an army of spiders. Quickly AoE any aggrod spiders down and deal with Helix Gearbreaker afterwards. When defeated, the tunnels behind him will open up, allowing you to continue forward. Here you will need to keep moving while avoiding the fatal Lightning Rods while making your way through the tunnels into the final area.
In this last part you will be helping Admiral Ripsnarl save his family from attacking Worgens. Have your tank taunt the 3 Worgens attacking Emme Harrington and quickly defeat them, then make your way up towards the ship and do this one more time to save Erik Harrington from the Worgens attacking him. Lastly on the ship, you will need to save Calissa Harrington from Admiral Ripsnarl himself. After defeating him, make your way to the top of the ship to finally face off against Vanessa VanCleef.
She will frequently all in Defias Enforcers,
Defias Shadowguards, and Defias Blood Wizards to
aid her in the fight; these adds must be quickly picked up by the tank and AoE'd
down. She will also periodically use ![]() Deflection, preventing all
damage taken for 10 seconds; simply deal with any remaining adds during this
time. At 50% and 25% health, Vanessa VanCleef will jump
on top of the ship and use
Deflection, preventing all
damage taken for 10 seconds; simply deal with any remaining adds during this
time. At 50% and 25% health, Vanessa VanCleef will jump
on top of the ship and use ![]() Fiery Blaze, detonating all explosives
on the ship deck. To avoid dying to this, players will need to click on the
nearby ropes on the side of the ship, which will swing you away from the
explosives before returning you to the deck. After the first
Fiery Blaze, detonating all explosives
on the ship deck. To avoid dying to this, players will need to click on the
nearby ropes on the side of the ship, which will swing you away from the
explosives before returning you to the deck. After the first
![]() Fiery Blaze, Vanessa VanCleef will buff herself every
second with
Fiery Blaze, Vanessa VanCleef will buff herself every
second with ![]() Vengeance of VanCleef until she is re-engaged, increasing
her damage done. At 25% she will continue to use this every second until
the end of the fight. Finally, at 1% health she will use
Vengeance of VanCleef until she is re-engaged, increasing
her damage done. At 25% she will continue to use this every second until
the end of the fight. Finally, at 1% health she will use
![]() Powder Explosion, dealing fatal damage to any nearby enemies within 10
yards.
Powder Explosion, dealing fatal damage to any nearby enemies within 10
yards.
Loot from Heroic
| Item | Required Level | Item Type |
|---|---|---|
| 85 | Cloth Wrist | |
| 85 | Relic | |
| 85 | Mail Wrist | |
| 85 | Leather Head | |
| 85 | Cloth Hands | |
| 85 | Plate Feet | |
| 85 | Relic | |
| 85 | Mail Wrist | |
| 85 | Plate Head | |
| 85 | Leather Feet |
The Deadmines Quests
Starting in Cataclysm, dungeon quests are found directly inside the dungeon and have no quest chains required. This means you can simply queue up for the dungeon and grab all of the available quests inside without needing to complete long-winded, complicated quest chains! The following quests are found inside the dungeon:
 The Foreman /
 Only the Beginning
- The Carpenter /
Traitors!!!
- The Machination /
Not Quite There
- The Admiral /
Good Intentions...Poor Execution
- The Defias Kingpin /
The Defias Kingpin
The Deadmines Achievements in Cataclysm
| Achievement | Description |
|---|---|
| Do not gain more than one stack of Nauseated during the Cookie encounter in Deadmines on Heroic Difficulty. | |
| Allow three Freezing Vapors to cast Coalesce during the Admiral Ripsnarl encounter in Deadmines on Heroic Difficulty. | |
| Keep the Prototype Reaper from falling below 90% health at any time before the Foe Reaper 5000 is defeated in Deadmines on Heroic Difficulty. | |
| Kill 20 Mine Rats during the Helix Gearbreaker encounter in Deadmines on Heroic Difficulty. | |
| Do not get hit by Fire Wall in the Glubtok encounter in Deadmines on Heroic Difficulty. | |
| Engage Vanessa VanCleef within 5 minutes of being inflicted with the Nightmare Elixir in Deadmines on Heroic Difficulty. | |
| Defeat "Captain" Cookie. | |
| Defeat Vanessa VanCleef in Deadmines on Heroic Difficulty. | |
| Defeat Vanessa VanCleef in Deadmines on Heroic difficulty while in a guild group. |
Changelog
- 30 Jul. 2024: Page reviewed for phase two.
- 19 May 2024: Added page.
This guide has been written by Abide, TBC veteran for nearly a decade. Abide is a Warrior tank and multi-class expert currently playing on Faerlina as Horde. You can find him in the the Icy Veins Discord. You can also see him live on Twitch.
- Chalice Quest NPC Rewards Temporarily Disabled Disabled in Season of Discovery
- Two Mounts Drop in the Scarlet Enclave Raid — Here’s Where to Get Them
- This Level 42 Gnome Reached Exalted with Darnassus by Turning In 1,800 Eggs One at a Time—Over 800 Hours Played
- Season of Discovery Hotfixes, April 15th
- Fan-Made WoW Armory Lets You Track Characters, Talents, PvP, and More in Cataclysm Classic
- Gold Swapping/Trading in Classic and Between Classic and Retail Now Prohibited by Blizzard
- Beatrix Encounter in Scarlet Enclave Raid Has Special Features, as Blizzard Explain in Detail
- Season of Discovery Phase 8 Raid Adjustments Now Live