Zul'Gurub Dungeon Guide
Zul'Gurub was originally introduced in original World of Warcraft as a 20-man catch-up raid. With phase two of Cataclysm, it has been re-vamped from a raid, down into a 5-man heroic only dungeon. While much of the instance maintains the original Zul'Gurub theme, this dungeon comes with a handful of fun new challenges for players to overcome!
Zul'Gurub Entrance Location
During Cataclysm, Zul'Gurub is now located in the Northern Stranglethorn half of the newly divided Stranglethorn Jungle. On the far Eastern outskirts of the zone, players will find heavy troll opposition here as they make their way towards the dungeon instance portal.

High Priest Venoxis
-

 Venomous Effusion
  Word of Hethiss
 Whispers of Hethiss
 Toxic Link
 Toxic Explosion
 Blessing of the Snake God
- Pool of Acrid Tears
 Breath of Hethiss
- Venom Withdrawal
- Bloodvenom
- Poison Cloud

Have the group stack together behind High Priest Venoxis to save
as much space in the area as possible. Be sure to interrupt
![]() Whispers of Hethiss every time it is cast, and whenever two players
are targeted with
Whispers of Hethiss every time it is cast, and whenever two players
are targeted with ![]() Toxic Link quickly spread apart to break the
link. Shortly after entering combat, High Priest Venoxis will
gain
Toxic Link quickly spread apart to break the
link. Shortly after entering combat, High Priest Venoxis will
gain ![]() Blessing of the Snake God, transforming into a powerful serpent
and gaining new abilities.
Blessing of the Snake God, transforming into a powerful serpent
and gaining new abilities.
Continue to avoid the ![]() Venomous Effusion maze, the
Venomous Effusion maze, the
![]() Pool of Acrid Tears, and quickly move behind
High Priest Venoxis whenever he begins casting
Pool of Acrid Tears, and quickly move behind
High Priest Venoxis whenever he begins casting
![]() Breath of Hethiss to avoid the damage. When the
Breath of Hethiss to avoid the damage. When the
![]() Blessing of the Snake God buff wears off,
High Priest Venoxis will return to his altar and cover the area
with
Blessing of the Snake God buff wears off,
High Priest Venoxis will return to his altar and cover the area
with ![]() Poison Clouds, preventing players from following him. He will
then cast
Poison Clouds, preventing players from following him. He will
then cast ![]() Bloodvenom, spawning tendrils that chase players around
the room. Kite these around while avoiding as much poison as possible. After a
short duration, High Priest Venoxis will suffer from
Bloodvenom, spawning tendrils that chase players around
the room. Kite these around while avoiding as much poison as possible. After a
short duration, High Priest Venoxis will suffer from
![]() Venom Withdrawal, stunning him for 10 seconds and increasing all damage
taken by 100%; use this time to quickly finish him off.
Venom Withdrawal, stunning him for 10 seconds and increasing all damage
taken by 100%; use this time to quickly finish him off.
High Priest Venoxis Loot
| Item |
|---|
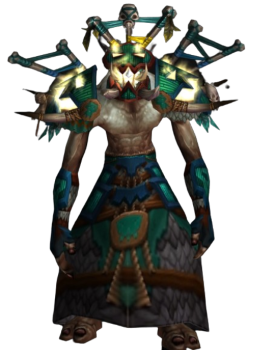
Bloodlord Mandokir
-

 Decapitate
  Level Up
 Devastating Slam
 Bloodletting
 Frenzy
- Ohgan
 Ohgan's Orders
- Reanimate Ohgan
- Chained Spirit
 Revive
 Spirit's Vengeance

Bloodlord Mandokir is a unique encounter, in which players will
need to die multiple times to win! Bloodlord Mandokir will
periodically ![]() Decapitate a random target, instantly killing them
and gaining a stack of
Decapitate a random target, instantly killing them
and gaining a stack of ![]() Level Up, increasing his damage dealt by
20% per stack. After the first
Level Up, increasing his damage dealt by
20% per stack. After the first ![]() Decapitate
Bloodlord Mandokir will dismount Ohgan, who joins
in the fight. Quickly move out of the
Decapitate
Bloodlord Mandokir will dismount Ohgan, who joins
in the fight. Quickly move out of the ![]() Devastating Slam indicated
shockwave and heal the
Devastating Slam indicated
shockwave and heal the ![]() Bloodletting victims up after the debuff
falls off,
Bloodletting victims up after the debuff
falls off, ![]() Bloodletting deals a percentage of the targets current
health, making it pointless to heal them while they still have the debuff.
Bloodletting deals a percentage of the targets current
health, making it pointless to heal them while they still have the debuff.
Players killed by ![]() Decapitate will be revived shortly after by
a one of the 8 nearby Chained Spirits; with only 8
Chained Spirits in the room, this puts a time limit on how long
you have to kill the boss before there are no more spirits available to
Decapitate will be revived shortly after by
a one of the 8 nearby Chained Spirits; with only 8
Chained Spirits in the room, this puts a time limit on how long
you have to kill the boss before there are no more spirits available to
![]() Revive players. When Ohgan joins the fight, he
will begin attacking the Chained Spirits, attempting to kill them
all and prevent them from ressing your party. For this reason, the party must
always focus and kill Ohgan as quickly as possible to save the
Chained Spirits; Bloodlord Mandokir will also
occasionally use
Revive players. When Ohgan joins the fight, he
will begin attacking the Chained Spirits, attempting to kill them
all and prevent them from ressing your party. For this reason, the party must
always focus and kill Ohgan as quickly as possible to save the
Chained Spirits; Bloodlord Mandokir will also
occasionally use ![]() Reanimate Ohgan to bring Ohgan back to
life, simply focus him down again.
Reanimate Ohgan to bring Ohgan back to
life, simply focus him down again.
Bloodlord Mandokir Loot
| Item |
|---|
| Armored Razzashi Raptor |
Cache of Madness
-
 Hazza'rah
  Earth Shock
 Wrath
Wrath Sleep
Sleep- Nightmare Illusion
 Consume Soul
- Renataki
 Deadly Poison
 Vanish
 Ambush
 Thousand Blades
 Frenzy
- Wushoolay
 Lightning Cloud
 Forked Lightning
 Lightning Rush
- Lightning Rod
- Gri'lek
 Rupture Line
 Avatar
 Pursuit
 Entangling Roots

The Cache of Madness encounter in Zul'Gurub can only be started by someone with a level 225 or higher Archaeology profession. Once the nearby artifacts have been examined, one of four random bosses will appear: Hazza'rah, Renataki, Wushoolay, or Gri'lek.
Hazza'rah will frequently summon in
Nightmare Illusions, which target a random player, stun them and
walks towards them. If the Nightmare Illusion reaches the targeted
player, it will instantly kill them; the Nightmare Illusions have
very low health however and should always be quickly killed. When
Hazza'rah reaches either 66% or 33% health, he will
![]() Sleep the entire party except for 1 random player and summon 4
Nightmare Illusions; the player who was not affected by
Sleep the entire party except for 1 random player and summon 4
Nightmare Illusions; the player who was not affected by
![]() Sleep must quickly kill all 4 Nightmare Illusions to
save the party. Interrupt
Sleep must quickly kill all 4 Nightmare Illusions to
save the party. Interrupt ![]() Wrath whenever he casts it and casters
should stay at max ranged to avoid the
Wrath whenever he casts it and casters
should stay at max ranged to avoid the ![]() Earth Shock.
Earth Shock.
Renataki is a Rogue-type enemy, stacking up
![]() Deadly Poison on the tank and periodically slipping away from combat
with
Deadly Poison on the tank and periodically slipping away from combat
with ![]() Vanish. After using
Vanish. After using ![]() Vanish Renataki
will use
Vanish Renataki
will use ![]() Thousand Blades, charging a random player and spinning
around, dealing deadly Physical damage to all nearby players. Run away from him
while he is in
Thousand Blades, charging a random player and spinning
around, dealing deadly Physical damage to all nearby players. Run away from him
while he is in ![]() Vanish until he
Vanish until he ![]() Ambushs a random
player and re-appears. At 30% health Renataki will
Ambushs a random
player and re-appears. At 30% health Renataki will
![]() Frenzy, greatly increasing his attack speed.
Frenzy, greatly increasing his attack speed.
Wushoolay is the easiest of the four bosses, spread around the
room to avoid ![]() Forked Lightning from hitting everyone and move out
of any
Forked Lightning from hitting everyone and move out
of any ![]() Lightning Clouds that appear. Periodically
Wushoolay will
Lightning Clouds that appear. Periodically
Wushoolay will ![]() Lightning Rush to a random player
and start casting
Lightning Rush to a random player
and start casting ![]() Lightning Rod, killing anyone still in the area
at the end of the cast; quickly move away from his charge location until
Lightning Rod, killing anyone still in the area
at the end of the cast; quickly move away from his charge location until
![]() Lightning Rod ends.
Lightning Rod ends.
Gri'lek frequently smash the ground, creating
![]() Rupture Lines that move towards players and knocks up anyone
caught in the area; avoid these if they are heading towards you. Throughout the
fight Gri'lek will gain
Rupture Lines that move towards players and knocks up anyone
caught in the area; avoid these if they are heading towards you. Throughout the
fight Gri'lek will gain ![]() Avatar, greatly buffing his
damage output, but slowing his movement speed down; take advantage of the reduced
movement speed and kite him while he has this buff. Gri'lek will
then fixate a random player and
Avatar, greatly buffing his
damage output, but slowing his movement speed down; take advantage of the reduced
movement speed and kite him while he has this buff. Gri'lek will
then fixate a random player and ![]() Pursuit them, using
Pursuit them, using
![]() Entangling Roots on his target to root them in place; these must
be quickly dispelled or Gri'lek will reach his target and easily
kill them.
Entangling Roots on his target to root them in place; these must
be quickly dispelled or Gri'lek will reach his target and easily
kill them.
Edge of Madness Shared Loot
| Item |
|---|
Hazza'rah Loot
| Item |
|---|
Renataki Loot
| Item |
|---|
Wushoolay Loot
| Item |
|---|
Gri'lek Loot
| Item |
|---|
High Priestess Kilnara
-
 Phase One
  Lash of Anguish
 Shadow Bolt
 Tears of Blood
 Wave of Agony
 Wail of Sorrow
- Phase Two
 Camouflage
 Ravage
 Rage of the Ancients
- Vengeful Smash
- Pride of Bethekk
 Gaping Wound

High Priestess Kilnara starts out the fight in her troll form,
mostly focusing on casting Shadow magic spells. Interrupt
![]() Tears of Blood whenever she casts it, if you have additional
interrupts try to stop some her
Tears of Blood whenever she casts it, if you have additional
interrupts try to stop some her ![]() Shadow Bolts, but
Shadow Bolts, but
![]() Tears of Blood should be your interrupt priority.
Tears of Blood should be your interrupt priority.
![]() Wave of Agony by quickly running behind
High Priestess Kilnara before the cast finishes, so make sure you
are standing near her. Dispel the
Wave of Agony by quickly running behind
High Priestess Kilnara before the cast finishes, so make sure you
are standing near her. Dispel the ![]() Lash of Anguish debuff or simply heal
through it whenever it goes out.
Lash of Anguish debuff or simply heal
through it whenever it goes out.
The area surrounding High Priestess Kilnara is full of panthers which must be killed before reaching phase two as they will all come to the bosses aid then. Either have your tank grab a few at a time, or use cooldowns to AoE large packs of them at a time.
At 50% health High Priestess Kilnara will enter her
panther form, gaining new abilities. Use all major DPS cooldowns here to quickly
burn down the boss and end the fight before ![]() Rage of the Ancients buffs
her damage greatly and overwhelms the party. Avoid the
Rage of the Ancients buffs
her damage greatly and overwhelms the party. Avoid the ![]() Vengeful Smash
areas and be ready to quickly heal a
Vengeful Smash
areas and be ready to quickly heal a ![]() Ravage target whenever
High Priestess Kilnara uses
Ravage target whenever
High Priestess Kilnara uses ![]() Camouflage.
Camouflage.
High Priestess Kilnara Loot
| Item |
|---|
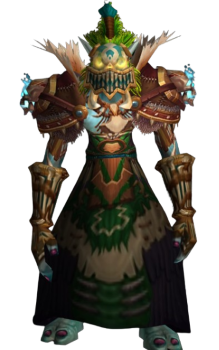
Zanzil
-
 Zanzili Fire
  Terrible Tonic
 Voodoo Bolt
- Zanzili Zombie
- Zanzili Berserker
- Zanzil's Graveyard Gas

Throughout Zanzils room are 3 cauldrons, which grant players a unique buff depending on which is consumed. The Frostburn cauldron causes the players next attack to stun the target for 15 seconds and inflict 65% of their maximum health. The Burning Blood cauldron deals fire damage to all nearby enemies, as well as the player. The Toxic Torment cauldron causes the player to take 90% reduced Nature damage for the duration. Utilizing the proper cauldrons at the correct times is key to defeating this encounter.
Zanzil will constantly be shooting a line of
![]() Zanzili Fire in front of him, requiring the tank to frequently
reposition to avoid the flames. Interrupt
Zanzili Fire in front of him, requiring the tank to frequently
reposition to avoid the flames. Interrupt ![]() Voodoo Bolt as often as
possible and spread out for
Voodoo Bolt as often as
possible and spread out for ![]() Terrible Tonic.
Terrible Tonic.
Zanzil will periodically consume one of three elixirs, each
causing a different effect. The Red Resurrection Elixir will teleport a player
to the nearby graveyard and resurrect a huge wave of Zanzili Zombies to
attack them. The Blue Resurrection Elixir will resurrect a
Zanzili Berserker which will fixate on a random target, knocking them
and chasing them down, killing the targeted player if they reach them. Lastly,
if Zanzil uses ![]() Zanzil's Graveyard Gas rather than an
elixir, he will fill the entire area with deadly poison, dealing 20% of
players health every second for the duration.
Zanzil's Graveyard Gas rather than an
elixir, he will fill the entire area with deadly poison, dealing 20% of
players health every second for the duration.
To counter the elixirs players must use the proper cauldron. If
Zanzil uses the Red Elixir, players should grab the Burning Blood
cauldron to help AoE the Zanzili Zombies down as soon as possible. If
Zanzil uses the Blue Elixir, one or two players should grab the
Frostburn cauldron to stun the Zanzili Berserker and deal massive
damage. Finally, to survive ![]() Zanzil's Graveyard Gas, the entire party
must take the Toxic Torment cauldron for the Nature damage reduction buff.
Zanzil's Graveyard Gas, the entire party
must take the Toxic Torment cauldron for the Nature damage reduction buff.
Zanzil Loot
| Item |
|---|
Jin'do the Godbreaker
-
 Phase One
  Deadzone
 Shadows of Hakkar
- Phase Two
 Shadow Spike
- Gurubashi Spirit
- Body Slam
 Frenzy
 Sunder Rift
- Twisted Spirit
 Hakkar's Chains
 Brittle Barrier

Jin'do the Godbreaker will create a ![]() Deadzone that
reduce magic damage taken and casting speed by 90% while inside. Simply
move the boss out of the bubble, but stay nearby as you will need to enter the
Deadzone that
reduce magic damage taken and casting speed by 90% while inside. Simply
move the boss out of the bubble, but stay nearby as you will need to enter the
![]() Deadzone whenever he casts
Deadzone whenever he casts ![]() Shadows of Hakkar.
Shadows of Hakkar.
At 70% health Jin'do the Godbreaker enters phase two,
transporting the entire party into the Spirit Realm. He will continuously attack
the party with ![]() Shadow Spikes for the rest of the fight, shooting a
project at the location of a random player; be quick to move away from the
indicated areas. In the Spirit Realm Jindo is harnessing his powers from the
Spirit of Hakkar, who is chained in place by three
Shadow Spikes for the rest of the fight, shooting a
project at the location of a random player; be quick to move away from the
indicated areas. In the Spirit Realm Jindo is harnessing his powers from the
Spirit of Hakkar, who is chained in place by three
![]() Hakkar's Chains. Freeing the Spirit of Hakkar is not so
easy however as the
Hakkar's Chains. Freeing the Spirit of Hakkar is not so
easy however as the ![]() Hakkar's Chains are protected by
Hakkar's Chains are protected by
![]() Brittle Barrier.
Brittle Barrier.
To break the ![]() Brittle Barriers and expose the chains, your tank
must engage a nearby Gurubashi Spirit and bring it near one of the
chains. The rest of the party must then stand on top of one of the chains and
wait for the Gurubashi Spirit to use
Brittle Barriers and expose the chains, your tank
must engage a nearby Gurubashi Spirit and bring it near one of the
chains. The rest of the party must then stand on top of one of the chains and
wait for the Gurubashi Spirit to use ![]() Body Slam on a random
player, who should be standing on top of the nearby chain. Wherever
Body Slam on a random
player, who should be standing on top of the nearby chain. Wherever
![]() Body Slam lands, it leaves a
Body Slam lands, it leaves a ![]() Sunder Rift at that
location; if this is done properly, the
Sunder Rift at that
location; if this is done properly, the ![]() Sunder Rift will temporarily
remove the
Sunder Rift will temporarily
remove the ![]() Brittle Barrier, exposing the
Brittle Barrier, exposing the ![]() Hakkar's Chains
and allowing you to destroy them. Destroy all 3 chains to finally return to the
normal realm and finish off Jin'do the Godbreaker himself.
Hakkar's Chains
and allowing you to destroy them. Destroy all 3 chains to finally return to the
normal realm and finish off Jin'do the Godbreaker himself.
Jin'do the Godbreaker Loot
| Item |
|---|
Zul'Gurub Quests
- Secondary Targets
- Break Their Spirits
- Putting a Price on Priceless
- The Beasts Within
- Break the Godbreaker
- Booty Bay's Interests
Zul'Gurub Achievements in Cataclysm
| Achievement | Description |
|---|---|
| Defeat Jin'do the Godbreaker in Zul'Gurub on Heroic Difficulty. | |
| Defeat Jin'do the Godbreaker in Zul'Gurub on Heroic difficulty while in a guild group. | |
| Gurubashi Headhunter | Defeat Gub, Mortaxx, Kaulema, Mor'Lek, the Florawing Hive Queen, a Lost Offspring of Gahz'ranka, Tor-Tun, and the Gurubashi Master Chef in Zul'Gurub on Heroic Difficulty. |
| Do not get hit by Bloodvenom, Pool of Acrid Tears, or Venomous Effusion in the High Priest Venoxis encounter in Zul'Gurub on Heroic Difficulty. | |
| Defeat Bloodlord Mandokir in Zul'Gurub on Heroic Difficulty without killing Ohgan. | |
| Defeat 20 Twisted Spirits within 15 seconds during the Jin'do encounter in Zul'Gurub on Heroic Difficulty. |
Changelog
- 30 Jul. 2024: Page added.

This guide has been written by Abide, TBC veteran for nearly a decade. Abide is a Warrior tank and multi-class expert currently playing on Faerlina as Horde. You can find him in the the Icy Veins Discord. You can also see him live on Twitch.
- Limited-Time Mount Alert: Get the Voidfeather Dragonhawk for TBC Classic Servers Now!
- Could WoW Be Added to Xbox Game Pass Ultimate?
- MoP Classic Escalation PTR Update Details New Content
- TBC Classic Players Are Earning Arena Points Differently Now
- Population Density Adjustments Coming to Burning Crusade Classic Zones
- Blizzard Are Fixing the Incorrect Armor Values in BCC!
- WoW Players Were Already Arguing About This on Launch Day
- Burning Crusade Classic Hotfixes, February 4th