Crusader Roland's Set Dungeon Guide
Welcome to our guide to complete the Roland's set dungeon for Crusaders, a required step to complete the Masters of the Universe Conquest.
Overview of the Roland Set Dungeon
The Roland Set Dungeon is located in Act II, the Road to Alcarnus waypoint. From there, simply head left and down the hill to reach a dead end. The entrance will appear if you have the Rolands 6-piece bonus equipped.
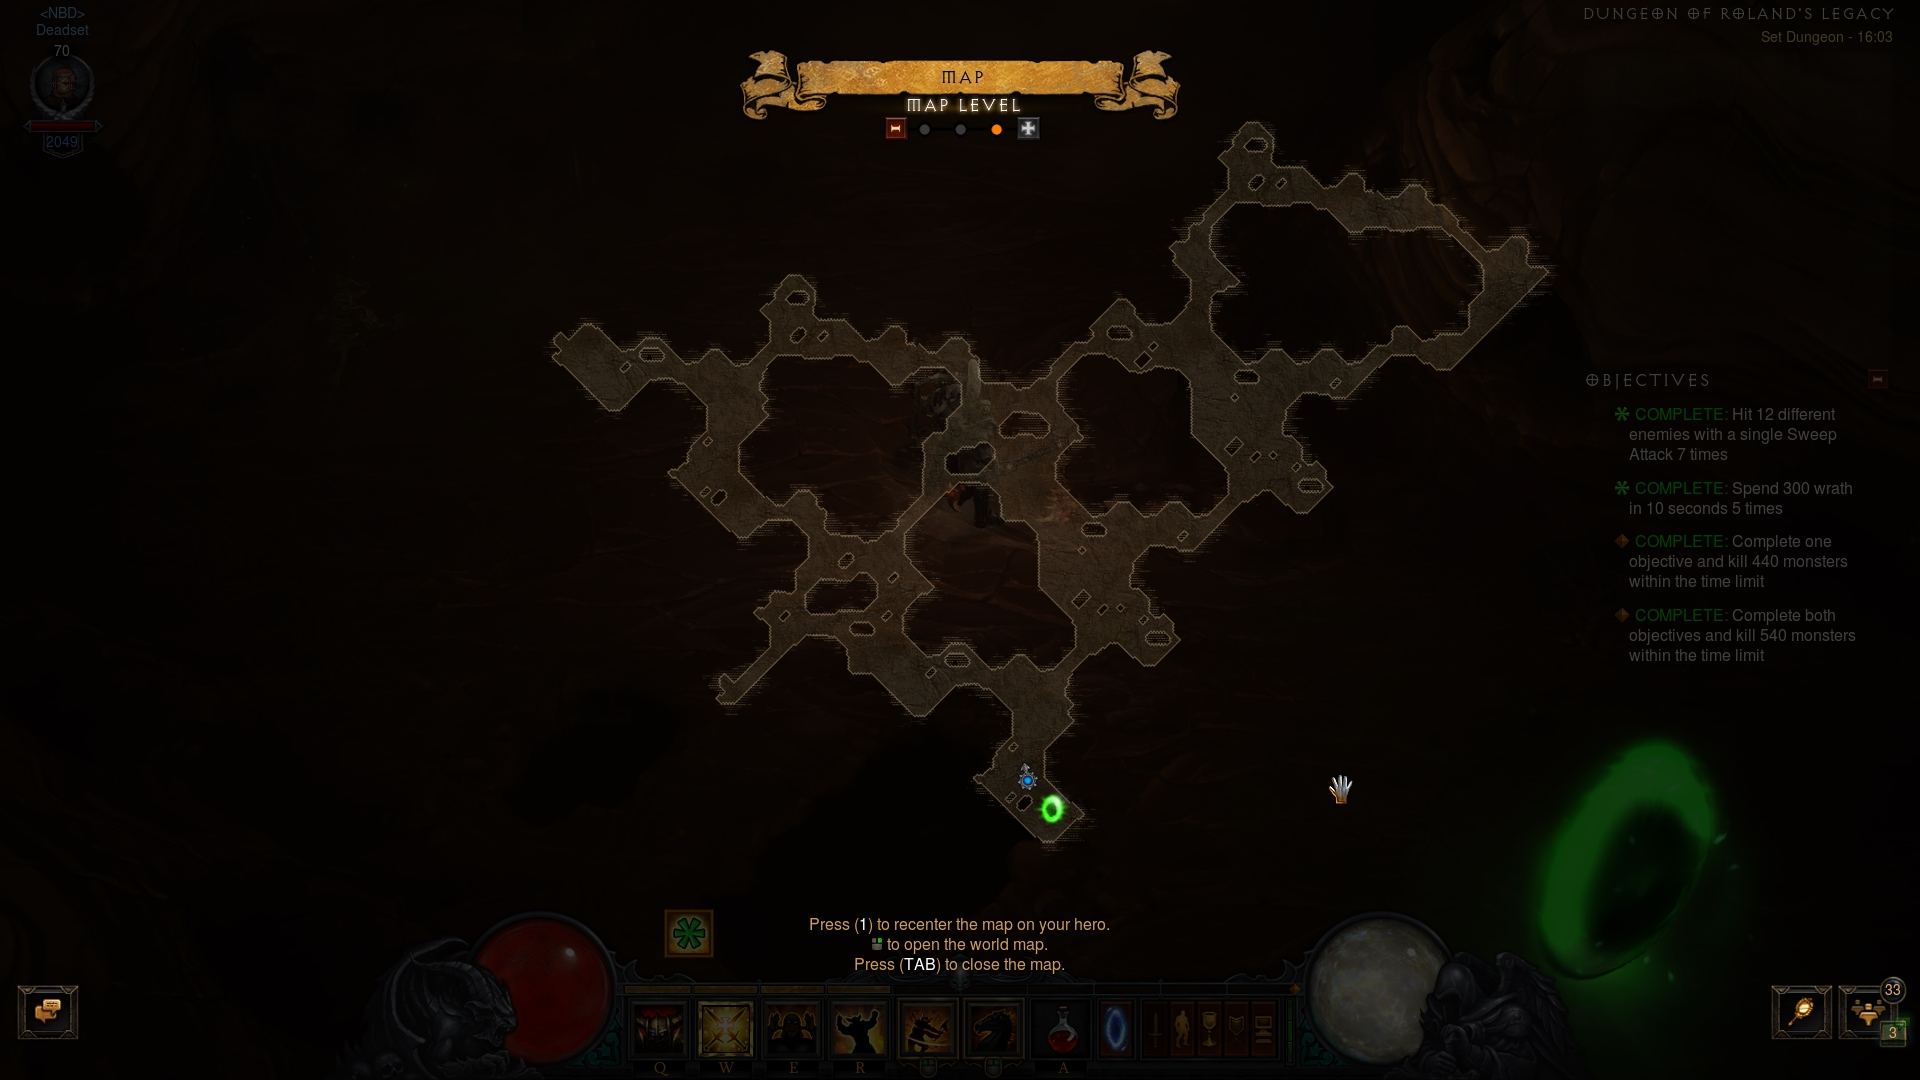
The Roland's Set Dungeon's two unique Primary Objectives are to: 1) Hit 12
different enemies with a single ![]() Sweep Attack 7 times; and 2) Spend 300
Wrath in 10 seconds 5 times.
Sweep Attack 7 times; and 2) Spend 300
Wrath in 10 seconds 5 times.
The Rolands Set Dungeon is a tight, interconnected string of caves divided into four roughly circular patterns. A proven attempt path is to go left at the first intersection, following the outer rim of the maze and revealing the minor remaining areas as you pass by each circle.
The Rolands Set Dungeon is populated by four kinds of enemies:
- Shrivel — these small, low health enemies will serve to fuel both
Primary Objectives. They populate the majority of the cave map and swarm you in
big numbers, allowing you to hit many at once and maintain Wrath reserves through
the equipped
 Golden Flense unique bonus.
 - Blood Clan Maulers — fewer and further between, these melee critters can be lured into massive Shrivel pulls for extra numbers on the first Objective.
- Blood Clan Spearmen — these hard-hitting ranged minions can be surprisingly threatening to your health as you try to set up big pulls. Kill them on sight, and do not worry about preserving them for a bigger hit.
- Defender of Legacy — the unique enemies on the map. They resemble Act
3's Blood Clan Mauler trash, but also have a Waller elite affix. They mostly
serve as an obstacle for quality pulls with the walls they place, prompting our
suggestion for cubing
 Illusory Boots.
Tips for the Rolands Set Dungeon
As with most Set Dungeons, a follower is not necessary and might get in the way more than help the situation. Do not be afraid to dismiss your companion.
Huge packs of Shrivel trash is piled in various places of the cave's
corridors. Either using ![]() Condemn
Condemn ![]() Vacuum as per our suggestion, or simply
by walking up to them and taking aggro, gather up massive pulls of them. The
requirement for 12 sounds deceptively low, so do not be afraid to go for a bigger
pull than you think is necessary — there's enough packs in the dungeon to get
all 7 massive hits.
Vacuum as per our suggestion, or simply
by walking up to them and taking aggro, gather up massive pulls of them. The
requirement for 12 sounds deceptively low, so do not be afraid to go for a bigger
pull than you think is necessary — there's enough packs in the dungeon to get
all 7 massive hits.
It is also recommended that, as soon as you get the 12-enemy hit, you continue
swinging and killing nearby stragglers — even if they do not form a big
enough pack for another 12 hit. With some luck and a combination of an active
![]() Laws of Valor
Laws of Valor ![]() Unstoppable Force and/or
Unstoppable Force and/or ![]() Akarat's Champion, you will be
able to fulfill the "spend 300 Wrath in 10 seconds" once, thus working on the
second Objective simultaneously.
Akarat's Champion, you will be
able to fulfill the "spend 300 Wrath in 10 seconds" once, thus working on the
second Objective simultaneously.
The Rolands set dungeon benefits from toning down your damage — dropping
Strength, Crit and Attack Speed from Paragon points, taking out all legendary
gems, replacing Rubies in Armor with Diamonds, and even dropping the Emerald from
the weapon socket. Toning down your damage prevents your ![]() Condemn
Condemn ![]() Vacuum
pulls from oneshotting the enemies, making the first objective considerably
easier.
Vacuum
pulls from oneshotting the enemies, making the first objective considerably
easier.
![]() Illusory Boots in your armor Cube slot will help considerably with
positioning when trying to affect as many enemies as you can with a
Illusory Boots in your armor Cube slot will help considerably with
positioning when trying to affect as many enemies as you can with a
![]() Sweep Attack, and additionally allow you to ignore the Waller affix of
unique enemies in the area.
Sweep Attack, and additionally allow you to ignore the Waller affix of
unique enemies in the area.
Build for the Rolands Set Dungeon
| Active Skills |
|---|


|
| Passive Skills |
| Slot | Pieces | Stat Priority |
|---|---|---|
| Head |
|
|
| Shoulders |
|
|
| Torso |
|
|
| Wrists |
|
|
| Hands |
|
|
| Waist |
|
|
| Legs |
|
|
| Feet |
|
|
| Amulet |
|
|
| Ring #1 |
|
|
| Ring #2 |
|
|
| Weapon |
|
|
| Off-hand |
|
To help you with farming the gear you need for your builds, we have two very useful guides that you can access by clicking the links below: a Salvage Guide to help you quickly check whether or not you can safely salvage a piece of gear and a Legendary Farming Guide to help you efficiently farm legendaries and set items.
| Slot | Gems |
|---|---|
| Helm | |
| Torso and Pants |
|
Kanai's Cube
- Weapon Slot:
 In-geom
 - Armor Slot: Illusory Boots
- Jewelry Slot:
 Obsidian Ring of the Zodiac
Changelog
- 18 Feb. 2018: Added guide.
This build is presented to you by Deadset, one of the very few professional Diablo 3 players. Deadset regularly publishes video guides on Youtube and streams on Twitch, where you can see how this and other builds play out in practice.
- Diablo 3 Season 37 (Official Preview)
- What's Coming in Diablo 3 Season 36?
- Diablo 3 Season 35: Official Preview
- All Diablo 3 Season 34 Class Guides and Compendium
- Diablo 3 Season 34 Delayed a Week
- Season 34 Official Preview
- Diablo 3 Season 33 Unintentionally Prematurely Ended
- The Darkening of Tristram Returns January 3rd