Build Introduction
This Shock Sorceress build is highly effective for leveling up a new, alt, or seasonal character. It excels in dealing significant frontal area-of-effect (AoE) damage through the use of  Arc Lash, while also providing solid single-target damage with
  Charged Bolts to take down bosses in melee range, and has improved mobility thanks to
  Flickering Arc Lash. The new
 ![]() Familiar conjuration skill will also support the build providing additional range damage.
Familiar conjuration skill will also support the build providing additional range damage.
Check our Leveling Tier List to see how this build compares to others.
Quick Navigation
Want to skip ahead? Use the table below to jump to the sections you are looking for.
Allocation of Skill Points
Below is the optimal order for spending your points as you level up. If you are missing skill points, complete Renown Tier 1-3 in every zone.
Skill Bar and Skill Tree Points
If you are unsure how to use these skills, read the Build Mechanics section after setting up your skill bar.
Wondering what comes after Level 60 or which Paragon boards to pick? Head to the Sorcerer Builds page and choose an endgame build to continue progressing your character even further.
Sorceress Class Mechanic — Enchantment Slots
The Specialization of the Sorceress Class becomes available at Level 15. It is recommended to complete the Legacy of The Magi questline, within the Fractured Peaks, as soon as possible to unlock the first Enhancement Slot. The second slot will become available upon reaching Level 30. In the Eternal Realm, you only need to do this questline once per class.
Each Non-Ultimate Skill is associated with an Enchantment effect, and any Non-Ultimate Skill can be equipped in an Enchantment Slot. However, a skill must have at least one skill point allocated to it in order to be used in the Enchantment Slot. Skill points that have been granted through gear work as well.
 Fireball is slotted in the first Enchantment Slot once you unlock it at Level 15. It helps clear groups of enemies early on.
 Arc Lash is slotted in the second Enchantment Slot once you unlock it at Level 30. It simply provides more Crowd Control for surrounding enemies.
Gear, Stats, Gems, and Runes
When picking your gear, higher Item Power generally indicates stronger gear, but you should also consider the affixes and effects that are relevant to your class and build. When making gear decisions, keep an eye on both Item Power and the specific attributes that complement the build.
Legendary Aspects
For general information on how to unlock the Codex of Power, head to our dedicated Aspects and Codex of Power guide. You can imprint Apsects onto items by visiting the Occultist.
Listed below are all the Aspects that are important for the ![]() Arc Lash leveling build. Equip any aspect from this list in the slot it drops for, as they are all useful while leveling.
Arc Lash leveling build. Equip any aspect from this list in the slot it drops for, as they are all useful while leveling.
If you need a specific pointer as to which aspect to get first, the  Rapid Aspect would be the most beneficial as you level with Arc Lash. You can unlock this aspect by completing the Burried Halls dungeon within the Dry Steppes. For best results, combine these Aspects with the right stat/affix priorities.
| Aspect Name | Legendary Aspect Power | Source |
|---|---|---|
 Aspect of the Moonrise (Offensive) Aspect of the Moonrise (Offensive) | Damaging an enemy with a Basic Skill grants you 4% Attack Speed for 10 seconds, stacking up to 5 times. Upon reaching maximum stacks, you enter a Vampiric Bloodrage, gaining {#}% Basic Skill damage and 15% Movement Speed for 10 seconds. | Random Drop / Obols Gambling |
 Aspect of Piercing Static (Offensive) Aspect of Piercing Static (Offensive) |  Charged Bolts pierce, but deal {#}% less damage to targets hit after the first. Charged Bolts pierce, but deal {#}% less damage to targets hit after the first. | Wretched Delve, Scosglen |
 Jolting Aspect (Offensive) Jolting Aspect (Offensive) | Every {#} seconds, a single arc of lightning zaps a nearby enemy for {#} damage. This damage counts as a Shock Skill. | Random Drop |
 Aspect of Control (Offensive) Aspect of Control (Offensive) | You deal % more damage to Immobilized, Stunned, or Frozen enemies. | Sunken Library, Kehjistan |
 Rapid Aspect (Offensive) Rapid Aspect (Offensive) | Basic Skills gain {#}% Attack Speed. | Buried Halls, Dry Steppes |
 Aspect of Might (Defensive) Aspect of Might (Defensive) | Basic Skills grant % Damage Reduction for 4.0 seconds. | Dark Ravine, Dry Steppes |
 Aspect of Charged Flash (Offensive) Aspect of Charged Flash (Offensive) | After | |
 Aspect of the Orange Herald (Utility) Aspect of the Orange Herald (Utility) | Lucky Hit: Up to a [5 – 10%] Chance when you damage an enemy with a Skill to reduce the Cooldown of your Ultimate Skill by 2 seconds. Can only happen once per Skill cast. | Random Drop |
 Aspect of Disobedience (Defensive) Aspect of Disobedience (Defensive) | You gain {#}% increased Armor for 4 seconds when you deal any form of damage, stacking up to {#}%. | Halls of the Damned, Kehjistan |
 Stable Aspect (Offensive) Stable Aspect (Offensive) | While | Random Drop |
 Aspect of the Bounding Conduit (Mobility) Aspect of the Bounding Conduit (Mobility) | Gain % Movement Speed for 3 seconds after using  Teleport. Teleport. | Komdor Temple, Dry Stepps |
Stat Priority and Tempering Affixes
During your leveling journey, you may stumble across items with very good affixes. Tempering these items can provide you with a significant boost in character power, so make sure you understand how it works.
Tempering is only possible if you have already found a few Tempering Manuals while leveling!
Keep an eye out for the following stats and modifiers that are particularly beneficial for this build (listed in order of importance):
| Gear Slot | Important Affixes (ranked by priority) | Tempering Recipes and Affixes |
|---|---|---|
| Weapons | 1. Intelligence 2. Basic Skill Damage 3. Critical Strike Damage | |
| Focus | 1. Basic Skill Attack Speed, Attack Speed 2. Cooldown Reduction 3. Resource Generation | |
| Helm | 1. Cooldown Reduction 2. Maximum Life 3. Resistances | |
| Chest | 1. Intelligence, Ranks to All Defensive Skills 2. Resistances 3. Barrier Generation | |
| Gloves | 1. Attack Speed 2. Critical Strike Chance 3. Maximum Life | |
| Pants | 1. Ranks of Arc Lash 2. Intelligence 3. Resistances | |
| Boots | 1. Movement Speed 2. Intelligence 3. Maximum Life | |
| Amulet | 1. Ranks to Glass Canon 2. Movement Speed 3. Resistances | |
| Rings | 1. Attack Speed 2. Intelligence 3. Crowd Control Damage |
Want to jump back up to the gear table?
Gems and Runewords
Listed below are the best Gems to socket into gear for each item type.
Gems
Runewords
If you find one of the Runes listed below, you can equip them as a Runeword on your Chest or Pants.
Runewords are unlocked during the Vessel of Hatred campaign and replace gems in gear. Improve your build by combining a trigger Rune of Ritual and an effect Rune of Invocation. You can equip up to two Runeword pairs (four Runes) at a time. For a detailed guide on Runewords, check out our Runewords Guide!
| Runeword Combination | Runeword Effects |
|---|---|
| Tam Ohm | |
| Lith Wat |
Paragon starts at Level 60. So, once you reach this level, switch to one of our Endgame Builds here.
Boss Powers (Season 8)
During Season 8, you can unlock and rank up Boss Powers using Spectral Ash earned from Apparition Incursions, which provide powerful bonuses to support your build as you level.
| Slot | Boss Power & Drop Location | Effect |
|---|---|---|
| Main Power | Any World Boss power | Please refer to the listed powers here. |
| Modifier | Beastmaster’s Training (Incursion) | Your Summons deal 5%[x] more damage, increased by 0.25%[x] for each 1% Bonus Critical Strike Damage you have from items and Paragon, up to a maximum of 17%[x]. |
| Modifier | Torusk’s Rage (Incursion) | Gain 5%[+] Attack Speed, increased by 0.25%[+] for each 1% Damage to Crowd Controlled Enemies you have, up to a maximum of 10.5%[+]. |
| Modifier | Avarice’s Explosive Ore (World Boss) | Activating your Main Boss Power spends all your Primary Resource to increase its damage by 0.01%[x] per Resource point spent. |
Mercenaries
During the Vessel of Hatred campaign, you will unlock Mercenaries to assist you. While you can choose freely early on, we recommend Raheir as your main companion, for the added survivability he provides, and Varyana as Reinforcement.
Raheir Skill Tree choices:
- Core Skill:
 Ground Slam
 - Core Passive:
 Raheir’s Aegis
 - Iconic Skill:
 Bastion
 - Iconic Passive:
 Inspiration
Varyana Reinforcement choices:
- Opportunity Skill:
 Ice Armor
 - Reinforcement Skill:
 Shockwave, then switch
  Bloodthirst as soon as you unlock it, for increased Attack Speed.
Build Mechanics
Rotation and Playstyle
The core damage-dealing abilities in this build are  Arc Lash and
  Charged Bolts. Arc Lash delivers impressive frontal area-of-effect damage and can Stun enemies it touches. The Charged Bolts Skill, on the other hand, excels in single target damage and is particularly effective against elites and bosses when used at melee range.
Additionally, the  Unstable Currents ultimate skill enhances damage output by randomly casting an additional shock spell whenever a shock skill is used. This synergizes well with
  Arc Lash, as you can spam the skill during Unstable Currents, and use
  Charged Bolts when sufficient Mana has been accumulated.
The Shock Sorceress excels at controlling crowds. With increased movement speed through  Flickering Arc Lash, as well as
  Teleport, you can easily move around or even through enemies, while Stunning or Freezing them through
  Frost Nova. This provides control and mobility during the fight.
When combined with a fully upgraded ![]() Familiar, enemies will remain Stunned indefinitely, allowing your Arc Lash to deal much more damage. The Familiar also assists with Crowd Control and does a significant amount of damage. Even if you are Stunned or Frozen, the Familiar will be able to help you by defeating the enemies around you.
Familiar, enemies will remain Stunned indefinitely, allowing your Arc Lash to deal much more damage. The Familiar also assists with Crowd Control and does a significant amount of damage. Even if you are Stunned or Frozen, the Familiar will be able to help you by defeating the enemies around you.
Please note that this build will be especially fun for players who prefer melee combat, featuring a rotation that emphasizes melee-focused Skills:
- (Optional) Activate
 Unstable Currents against tough elites and bosses.
 - Cast
 Familiar to stun the surrounding enemies.
 - Cast
 Charged Bolts up close against tougher enemies to shotgun them with multiple bolt projectiles.
 - Use
 Ice Armor to protect against incoming damage and regenerate Mana.
 - Spam
 Arc Lash to finish off weaker groups of enemies.
Repeat the above steps until all enemies are defeated.
Which Elixirs Should You Use?
Head to the Alchemist in any main town and craft Elixirs to boost your stats and experience gain for 30 minutes! Remember to gather the necessary crafting materials by foraging plants (to get ![]() Bundled Herbs)
Bundled Herbs)
Listed below are Elixirs that will be useful for you while leveling as an Arc Lash Sorcerer:
 Elixir of Advantage to boost Attack Speed.
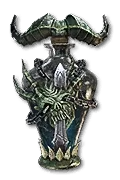 Elixir of Momentum for increased Movement Speed.
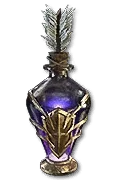 Elixir of Iron Barbs or
  Elixir of Fortitude to increase your defense a little bit until other options become available.
Return to the Alchemist again when you reach Level 5, 10, 15, 22, 30, 35, 40, and 50, to upgrade your potion. The extra healing is essential to survival! You can upgrade your potion at Level 60 multiple times, depending on whether you have the required materials or not.
Season 8 Updates
For a complete overview of Season 8, its mechanics and theme, new leveling activity, and other changes coming with this season, please take a look at our comprehensive season hub here.
Here is a quick overview of seasonal changes relevant to this build:
 Convulsions:
 - Previous: Shock Skills have up to a 7% chance to Stun enemies for 3 seconds.
- Now: You deal 5/10/15%[x] increased damage while you have Crackling Energy. You periodically pick up nearby Crackling Energy.
 Familiar: The casting of Familiar has been refined, resulting in snappier gameplay.
Difficulty and Endgame
Once you hit Level 60 with this build, you will be ready to tackle harder difficulties as you transition into more challenging endgame content. Make sure to pick one of our recommended endgame builds to continue your journey! Additionally, keep your Obols until you reach maximum Level (60), then spend them on a weapon to kickstart your preferred endgame build.
Changelog
- April 24, 2025: Guide update for Season 8. Removed Convulsions from Skill Tree, added Boss Powers.
- January 17th, 2025: Guide updated for Vessel of Hatred Season 7.
- Added Unstable Currents ranks 4 and 5.
- Renamed Conjuration Mastery passive as Primordial Binding.
- Removed Inner Flames and Devouring Blaze passives.
- Added Witchcraft Powers recommendations.
- Updated Season 7 change list.
- October 3rd, 2024: Guide updated for Vessel of Hatred and Season 6.
- Switched out Frost Nova for Familiar.
- Updated Passives.
- Updated Legendary Aspects.
- Updated Tempering Affixes.
- Updated Season 6 change list.
- August 2nd, 2024: Guide updated for Season 5.
- May 10th, 2024: Guide updated for Season 4.
- March 5th, 2024: Updated for Patch 1.3.3.
- January 22nd, 2024: Guide updated for Season 3.
- October 17th, 2023: Guide updated for Season 2.
- August 7th, 2023: Moved this build to its own separate page.
- August 4th, 2023: Updated for Patch 1.1.1.
- July 18th, 2023: Updated for Season 1.
