
Build Introduction
Before we get into details about the build, please keep in mind that this is purely speculative for the time being and everything is still subject to change. Furthermore, this build is purely theoretical, as it was NOT yet tested in-game and might completely change or not work as intended! It is currently meant as a showcase of what should be possible but is not representative of anything that was tested.
This theorycrafted endgame barrier-build focuses on using a low-life barrier, and accumulating as many ![]() Razor Wings charges as possible! Once again, this build is solely theoretical and has not been tested in the game. It would heavily rely on gear and very specific tempering stats, making it a build only achievable in the endgame. You can try to go for this interesting yet experimental build once you have gathered all the necessary gear for it.
Razor Wings charges as possible! Once again, this build is solely theoretical and has not been tested in the game. It would heavily rely on gear and very specific tempering stats, making it a build only achievable in the endgame. You can try to go for this interesting yet experimental build once you have gathered all the necessary gear for it.
Of course, this endgame guide assumes your Spiritborn is Level 60 and meets all the build requirements. If you are just starting out with a new Spiritborn character, we recommend heading over to the Quill Volley Leveling Build and then switching to this endgame build when ready.
For information on the current season, you can check out our Season Hub.
Have questions or feedback about this guide? Join Ghazzy’s livestream and ask him!
Strengths and Weaknesses
- Heavy Damage
- Low Cooldowns
- Barrier-Build
- Very heavy Gear and Tempering requirements
- Low-Life focused Build can be hard to play
To see how this build compares to the other builds on our site, you can check out our build tier lists.
Build Requirements
 Aspect of Forest Power
 Duelist’s Aspect
 Aspect of Unyielding Hits
 Bruiser’s Aspect
 Starlight Aspect
 Aspect of Redirected Force
In addition to the gear, this build also requires the ![]() Eagle Efficiency (Resource) Tempering Manual, for the additional Razor Wings Charges.
Eagle Efficiency (Resource) Tempering Manual, for the additional Razor Wings Charges.
Skill Bar and Skill Tree Points
Follow the points allocated in the Skill Tree above for the completed build. If you are missing skill points, complete Renown Tier 1-4 in every zone to get the missing additional points.
Spirit Hall Choice
The Spirit Hall allows you to combine two different Spirit Guardians or stick with just one.
- Primary Spirit Guardian: Gorilla
- Casting a Gorilla Skill deals 100% Thorns to enemies you hit and grants a Barrier for 10% of maximum life, up to 40%, for 3 seconds. All Skills are now also Gorilla Skills.
- Secondary Spirit Guardian: Jaguar
- Maximum Ferocity is increased by 1. Gain 1 stack of Ferocity whenever you kill an enemy or damage a Boss.
For this endgame build, we pick the Gorilla as the primary Spirit Guardian for additional thorns and barrier generation. The Jaguar is selected as secondary Spirit Guardian, simply to increase Ferocity stacks.
Paragon Board
Paragon unlocks after reaching Level 60, and is considered an endgame progression system. Leveling up your paragon greatly increases your character’s power! We recommend using the following Legendary nodes and Rare Glyphs to improve the build even further as you grind through the endgame. Note that each Rare Glyph’s information and radius listed below is for the Level 46 version.
Because this build is just theoretical, we do not have any paragon recommendations for the time being. Paragon boards will be added after relevant testing has been done in-game.
Gear, Stats, Gems, Runes, and Elixirs
The following sections cover all systems that are important if you want to improve the power of your character in the endgame of Diablo 4.
Legendary Aspects
Each Aspect is listed with its matching gear slot. Do your best to keep each Aspect in the assigned slot. Remember to salvage Legendary Items with higher Aspect values to unlock them in the Codex of Power, and then imprint them onto gear pieces with the preferred affixes.
Additionally, if you are trying to farm a specific item, we recommend using your Obols to target farm them!
| Gear Slot | Gems/Runes | Aspect / Unique | Legendary Aspect / Unique Power |
|---|---|---|---|
| Helm | Your skills are all additionally Jaguar, Eagle, Gorilla or Centipede skills based on your secondary spirit hall choice. Each Spirit type on a skill increases its damage by x%. | ||
| Chest | Spending Vigor Heals you for x% of your Maximum Life. Every second, your active cooldowns now drain 10% of your maximum Life to reduce their durations by 3 seconds. | ||
| Gloves | When you would take direct damage, it is instead distributed as Poisoning over the next 10 seconds but increased by x%. Lucky Hit: Direct damage has up to a 25% chance based on your Poisoned Life percentage to infect an enemy with Touch of Death. | ||
| Pants |  Aspect of Forest Power Aspect of Forest Power | Lucky hit: Up to a 25% chance to create a mystic circle for 10 seconds. Casting a gorilla skill in Mystic circles empowers them to periodically grant you a barrier for 25% of your maximum life which increases your armor and maximum resistances by x% while active. | |
| Boots |  Duelist’s Aspect Duelist’s Aspect | Maximum Ferocity increased by 1-5. | |
| Amulets(50% bonus) |  Bruiser’s Aspect Bruiser’s Aspect | Gain x% increased Armor and x thorns per 1% missing maximum health | |
| Ring |  Starlight Aspect Starlight Aspect | Gain {x} primary resource for every 20% life that you Heal or every 200% life that you overheal when at maximum life. | |
| Ring |  Aspect of Redirected Force Aspect of Redirected Force | Gain increased critical strike damage equal x% of your block chance. Blocking doubles this bonus for 10 seconds. | |
| Weapon (200% bonus) |  Aspect of Unyielding Hits Aspect of Unyielding Hits | Casting a Gorilla Skill adds x% of your Armor to all attacks for 3 seconds. |
Stat Priority and Tempering Affixes
Affixes on the same line are considered to be equally important. Bolded affixes are the most important targets for Masterworking upgrades. To masterwork, you will need rare materials that only drop from Nightmare Dungeons. Be sure to check our Tempering and Masterworking guides, for more details about these topics.
| Slot | Targeted Gear Affix | Tempering Affixes |
|---|---|---|
| Helm | All Stats Movement Speed Damage Reduction Ranks to Velocity | N/A |
| Chest | Damage Reduction while Injured Life On Hit Maximum Life Ranks to Endurance | N/A |
| Gloves | Critical Strike Chance Ranks to Antivenom Ranks to Nourishment Ranks to Touch of Death | N/A |
| Pants | 1. Dexterity 2. Armor 3. Resistances | |
| Boots | 1. Movement Speed 2. Armor 3. Resistances | |
| Amulet | 1. Attack Speed 2. Movement Speed 3. Critical Strike Chance | |
| Rings | 1. Attack Speed 2. Critical strike Chance/Damage 3. Needed Resistance | |
| Weapon | 1. Dexterity 2. Critical Strike Damage 3. Vulnerable Damage |
The priority order of Resistances is Lightning > Poison > Fire > Cold > Shadow.
Make sure to reach the Armor Cap of 1,000. Certain builds that scale with armor may benefit from having more of it. For instance, those that make use of the  Aspect of Unyielding Hits. Furthermore, in higher difficulties, there will be a penalty to armor and resistance, so you will need a higher amount to compensate for the loss.
Gems and Runewords
Listed below are the recommended Gems and Runewords to socket into your gear.
Gems
| Weapon Gems | Armor Gems | Jewelry Gems |
|---|---|---|
For more Dexterity |
For Jewelry Gems, simply use any gem that provides armor (capped at 1,000) or the resistance you lack the most.
Runewords
Runewords are unlocked during the Vessel of Hatred campaign and can be used to strengthen or fill a build’s weaknesses. Two Runewords have to be combined to create a new effect:
- A trigger Runeword of Ritual that provides Offerings when the condition is met
- An effect Runeword of Invocation that costs Offerings and triggers an action.
Once the Runeword of Ritual has generated enough Offerings, the Runeword of Invocation will trigger its effect. Some Runewords of Invocation will have overflow effects, meaning that extra Offerings that have been created will be used to empower the triggered effect. For more information on how Runewords work, take a look at our comprehensive Runeword Guide.
- Runewords replace Gems in gear.
- Only two Runeword pairs (4 Runes in total) can be equipped at a time.
The following are recommended Runeword combination options for the Crazed God Barrier endgame build of the Spiritborn:
| Runeword Combination | Runeword Effects |
|---|---|
| Yul Vex | |
| Feo Yom | |
| Bac Eom |
In theory, these Runes should be very good for this build, but will need testing to be certain. We will update this part as soon as possible.
Which Elixirs Should You Use?
Visit the Alchemist and craft an Elixir providing any Resistance you need most, or the Assault Elixir to increase Attack Speed. Some Elixirs cannot be crafted and only drop from activities like Helltides or Nightmare Dungeons. Additionally, make sure to keep your health potion upgraded!
The following Elixirs are useful for this Spiritborn build:
 Elixir of Precision provides the highest damage output increase.
 Elixir of Advantage increases your attack speed
 Elixir of Fortitude for additional survivability
Mercenaries
During the Vessel of Hatred campaign, you will unlock different NPC Mercenaries who join you on your travels. In the early endgame, you can generally pick any mercenary you like, as they will not play an essential role until you optimize your build. However, if you would prefer to get a recommendation, we would advise selecting Raheir as your main companion, for the added survivability he provides, and Varyana as Reinforcement.
Raheir Skill Tree choices:
- Core Skill:
 Shield Charge
 - Core Passive:
 Raheir’s Guard
 - Iconic Skill:
 Crater
 - Iconic Passive:
 Iron Wolf’s Call
Varyana Reinforcement choices:
- Opportunity Skill:
 Armored Hide
 - Reinforcement Skill:
 Shockwave, then switch
  Bloodthirst as soon as you unlock it, for increased Attack Speed.
Rotation and Playstyle
The Crazed God Barrier build relies, as the name implies, on barrier generation in combination with life recovery. The main skill is ![]() Razor Wings, which will greatly benefit and be scaled by other Jaguar and Gorilla skills used in this build. Let’s jump right into the recommended gameplay rotation, also known as priority list:
Razor Wings, which will greatly benefit and be scaled by other Jaguar and Gorilla skills used in this build. Let’s jump right into the recommended gameplay rotation, also known as priority list:
 The Protector Ultimate activates the Barrier, increases Damage to Elites, and sets down the protector area, making you unstoppable and slowing enemy missiles.
 Armored Hide for extra survivability.
- Use
 Counterattack to increase Critical Strike Damage.
  Rake to reduce cooldowns.
- Spam
 Razor Wings!
 - Make use of
 Rock Splitter whenever you need Vigor.
Uniques and Mythic Uniques
Below you will find information on Uniques and Mythic Uniques that are useful and recommended for this build. Moreover, if you are interested in target farming Mythic Uniques, check out our How to Farm Mythic Uniques guide.
If a Unique or Mythic Unique is not listed here, it is NOT recommended and won’t benefit this specific build in any way.
Uniques
Listed below are the recommended and optional Unique Items for this build.
 Harmony of Ebewaka (Required): Your skills are all additionally Jaguar, Eagle, Gorilla or Centipede skills based on your secondary spirit hall choice. Each Spirit type on a skill increases its damage by x%.
 Jacinth Shell (Required): Spending Vigor Heals you for x% of your Maximum Life. Every second, your active cooldowns now drain 10% of your maximum Life to reduce their durations by 3 seconds.
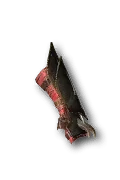 Craze of the Dead God (Required): When you would take direct damage, it is instead distributed as Poisoning over the next 10 seconds but increased by 30 – 0%. Lucky Hit: Direct damage has up to a 25% chance based on your Poisoned Life percentage to infect an enemy with Touch of Death.
Mythic Uniques
This Barrier-focused Spiritborn build does currently not require any Mythic Uniques!
If you want to have a look at builds that focus on other items or spirit guardians, you can find all our Spiritborn builds listed on this page.
Obol Gambling
Obol gambling is a great way to potentially find item upgrades or items missing from your build. Similar to Kadala in Diablo 3, you can use Obol vendors in town to try and get any specific item that you are missing. When a Level 60 Character spends Obols, all gear from that vendor will be 750 item power, the highest non-Ancestral item power in the game, allowing you to fill out gear with the affixes or Legendary Aspects you need. There is also a small chance to receive an Ancestral piece with item power 800.
You can check out our Obol Gambling Tool Guide here!
Changelog
- October 3rd, 2024: Guide theorycrafted and created for Vessel of Hatred, Season 6.


