Build Introduction
The ![]() Death Trap Rogue is a specialized build focusing on Ultimate Skill damage. Death Trap is rapidly cast through synergies with the Preparation specialization,
Death Trap Rogue is a specialized build focusing on Ultimate Skill damage. Death Trap is rapidly cast through synergies with the Preparation specialization, ![]() Beastfall Boots, and Cooldown Reduction.
Beastfall Boots, and Cooldown Reduction.
This late-endgame guide assumes your character is Level 60 and fulfills the Build Requirements. If you are not ready for this build, follow the Rogue Leveling Guide to find a starter build.
Check the build tier lists to see how this build compares to others on Icy Veins.
Strengths and Weaknesses
- High sustained damage in an Area-of-Effect
- Good survivability with Barriers and Damage Reduction
- Multiple crowd controls to render entire groups of enemies helpless
- Extremely strict build requirements
- Complex mechanics and playstyle
Build Requirements
The Death Trap Rogue is an advanced endgame build with extremely strict requirements to function. Obtain the following list of items before attempting the build.
- A Maximum Energy of 150 is required.
 Beastfall Boots provides a Maximum Resource affix.
- The remaining Energy is obtained from an
 Elixir of Resourcefulness II.
- 150 Energy needs to be restored after each cast of
 Death Trap.
 - Two Legendary Rings with the Casting Ultimate Skills Restores Primary Resource temper from
 Ultimate Efficiency — Rogue is required. One Ring restores 41 Energy with a Greater Affix temper and Capstone Masterworking bonus, while the other Ring restores 32 Energy with just a Greater Affix temper.
  Beastfall Boots restores 25 Energy when using a Cooldown, which is activated by casting
  Death Trap.
 Aftermath refunds 35 Energy after casting
  Death Trap.
- At least 425 Strength to increase Resource Generation by 12.8%.
- Final Calculation: (41 +32 + 25 + 35) × 1.128 = 150
- Two Legendary Rings with the Casting Ultimate Skills Restores Primary Resource temper from
 Death Trap cooldown needs to be reduced to 10 seconds or less by any necessary combination of the following sources:
  Beastfall Boots with a Greater Affix and Capstone Masterworking bonus on Ultimate Cooldown Reduction.
- Death Trap Cooldown Reduction temper with Greater Affix and Capstone Masterworking bonus on a Legendary Amulet.
- Regular Cooldown Reduction affixes on Rings and Gloves.
- Additional Ranks to
 Death Trap reduces its base Cooldown. Ranks to Core Skills applies to Death Trap when
 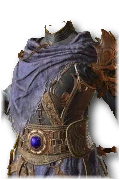 Scoundrel’s Leathers is equipped, along with Ranks to Ultimate Skills. The additional ranks are available on Legendary Gloves,
  Harlequin Crest,
  Heir of Perdition,
  Vehement Brawler’s Aspect, and
  Vex .
Vex .
Quick Navigation
Want to skip ahead? Use the table below to jump to sections.
Skill Bar and Skill Tree Points
The Skill Tree above shows the full allocation of 71 Skill Points for the Death Trap Rogue build. Leveling up grants 59 points. The remaining 12 points are gained from completing Renown for Eternal Players and Seasonal Rank/Journey for Seasonal Players.
![]() Frigid Finesse is always active against Staggered Bosses since they count as being affected by all crowd controls.
Frigid Finesse is always active against Staggered Bosses since they count as being affected by all crowd controls.
Wondering what comes after Level 60? Head to the Paragon Board section to power up the build even further. If you want to see how everything plays out in combat, check out the Rotation and Playstyle section for a quick breakdown.
Rogue Class Mechanic – Specialization
Preparation is the required Specialization for the Death Trap Rogue. Consuming the 150 Maximum Energy in this build activates Preparation 2 times, reducing the Cooldown of ![]() Death Trap by 10 seconds.
Death Trap by 10 seconds.
Gear, Stats, Gems, and Runes
The following sections cover the important systems that are essential to improving the power of your character in the endgame of Diablo 4.
Legendary Aspects
Listed below are all the best-in-slot Aspects for the Death Trap Rogue build. Salvage Legendary Items with higher Aspect values to unlock them in the Codex of Power, and then imprint them onto Legendary Items with the preferred affixes. For the best results, combine these Aspects with the ideal Stat Priorities.
 Trickster’s Aspect applies the Stun Grenade Tag to
 ![]() Death Trap, allowing it to receive Stun Grenade damage bonuses.
Death Trap, allowing it to receive Stun Grenade damage bonuses.
| Gear Slot | Name | Effect |
|---|---|---|
| Ranged Weapon (+100% bonus effect) |  Aspect of Apogeic Furor Aspect of Apogeic Furor | Casting an Ultimate Skill increases your Ultimate damage by x [6 – 10%] , up to x [60 – 100%]. At 10 stacks, your Cooldowns and this bonus are reset. |
| Amulet (+50% bonus effect) |  Trickster’s Aspect Trickster’s Aspect | Caltrops, Smoke Grenade, and Death Trap receive your Stun Grenade benefits and throw Stun Grenades that deal [X] Physical damage and Stun enemies for 1 second. Your Stun Grenades deal x [25 – 45%] increased damage. |
| Ring Slot #1 |  Vehement Brawler’s Aspect Vehement Brawler’s Aspect | Casting an Ultimate Skill increases your damage by [10 – 30%] for 8 seconds. Gain 2 additional Ultimate Skill Ranks. |
| Ring Slot #2 |  Frostbitten Aspect Frostbitten Aspect | Enemies hit by your Grenade Skills have a chance equal to your Critical Strike Chance to be Frozen for 2 seconds. You deal x [10 – 30%] increased Critical Strike Damage against Frozen or Stunned enemies. |
| Dual-Wielded Weapons or Gloves |  Aspect of Artful Initiative Aspect of Artful Initiative | When you spend 75 Energy you release a cluster of exploding Stun Grenades that deal [X] total Physical damage and Stun enemies for 1 second. Your Stun Grenades deal x [25 – 45%] increased damage. |
| Dual-Wielded Weapons or Gloves |  Opportunist’s Aspect Opportunist’s Aspect | When you enter or break Stealth, you drop a cluster of exploding Stun Grenades around you that deal [X] Physical damage and Stun enemies for 1 second. Your Stun Grenades deal x [25 – 45%] more damage. |
| Dual-Wielded Weapons or Gloves |  Aspect of Surprise Aspect of Surprise | When you Evade or Shadow Step, you leave behind a cluster of exploding Stun Grenades that deal [X] total Physical damage and Stun enemies for 1 second. Your Stun Grenades deal x [25 – 45%] more damage. |
| Helm (replaced by |  Juggernaut’s Aspect Juggernaut’s Aspect | Gain [X] Armor, but your Evade has 100% increased Cooldown. |
| Chest | Your Trap Skills can be thrown and will spawn a Death Trap every 10 seconds when Cast, granting you x [10 – 30%] increased damage for 5 seconds. | |
| Pants | Death Trap deals x [40 – 60%] increased damage and will rearm itself after activating, once every 10 seconds. | |
| Boots | When you cast an Ultimate Skill, your next Core Skill consumes all of your energy and deals [0.25 – 0.75%] increased damage per Energy consumed. Using a Cooldown restores 25 Energy. |
Stat Priority and Tempering Affixes
Listed below are the affixes to prioritize on gear for Death Trap Rogues, ranked by importance. Affixes on the same line have equal value, so attempt to obtain all affixes in each line before moving on to the next.
Ensure you apply a Tempering affix to your endgame items. If you have a surplus of crafting materials, reroll Tempering affixes on your best items until they upgrade to a Greater Affix.
Bolded affixes are the most important targets for the Capstone Bonus from Masterworking. Capstone Bonuses are granted after Masterworking 25% Quality and can be re-rolled for a cost. For more details, check the Tempering and Masterworking guides.
Swords are preferred over Daggers for higher damage per hit and a better implicit stat. The choice of a Ranged Weapon between Bow and Crossbows does not matter.
↑ Back to Legendary Gear Table
| Slot | Gear Affixes | Tempering Affixes |
|---|---|---|
| Weapons | 1. Maximum Life, Dexterity, Vulnerable Damage or Critical Strike Damage 2. Life on Hit, Damage | |
| Helm | 1. Cooldown Reduction 2. Maximum Resource 3. Maximum Life, Dexterity | |
| Chest | Masterworking Priority: Dexterity | |
| Gloves | 1. Ranks to Core Skills, Cooldown Reduction 2. Resistances or Armor 3. Attack Speed, Maximum Life, Dexterity | |
| Pants | Masterworking Priority: Maximum Life or Dexterity | |
| Boots | Masterworking Priority: ⁕Ultimate Cooldown Reduction | |
| Amulet | 1. Ranks to Frigid Finesse 2. Ranks to Unstable Elixirs 3. Ranks to Exploit or Malice | |
| Rings | 1. Cooldown Reduction 2. Resistances 3. Attack Speed, Maximum Life, Dexterity |
Uniques and Mythic Uniques
Listed below are the required and recommended Unique and Mythic Unique Items for the Death Trap Rogue build. Each item description includes the most important affix to target for Masterworking upgrades. Check the Mythic Unique Items Guide for information on target-farming them.
 Scoundrel’s Leathers (required) applies the Core Skills tag to
  Death Trap for the
  Beastfall Boots interaction.
 - Masterworking Priority: Dexterity
 Beastfall Boots (required) consume all of your Energy for multiple activations of the Preparation and a damage increase for
  Death Trap.
 - Masterworking Priority: Maximum Resource or Ultimate Cooldown Reduction
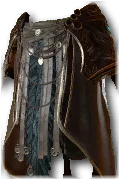 Eyes in the Dark (required) provides a massive damage multiplier in its unique effect.
 - Masterworking Priority: Maximum Life or Dexterity
 Heir of Perdition (highly recommended) is the best helm for damage output.
 - Masterworking Priority: Ranks to Core Skills
 Cowl of the Nameless (recommended) is an alternative offensive option if you do not yet have
  Heir of Perdition.
 - Masterworking Priority: Trick Attacks or Unstable Elixirs
 Harlequin Crest (optional) can be equipped if additional Cooldown Reduction is needed for
  Death Trap, but it is not the most optimal setup.
 - Masterworking Priority: Cooldown Reduction
Gems and Runewords
Listed below are the recommended Gems and Runewords to socket into your gear.
Gems
Equip the corresponding Gems into your Weapon, Armor, and Jewelry slots.
| Weapon Gems | Armor Gems | Jewelry Gems |
|---|---|---|
| Any Gem with your lowest Resistance. |
Runewords
Equip the following 2 Runewords, each consisting of a Rune of Ritual and a Rune of Invocation. Insert the first Runeword into your Ranged Weapon, and then the second Runeword into any equipped Helm, Chest, or Pants item. Add sockets to your equipment at the Jeweler if necessary. Check the Runewords Guide for more details.
| Runewords | Effects |
|---|---|
(Ranged Weapon) | Gain: 150 Offering — Cast an Ultimate Skill. Requires: 300 Offering, Cooldown: 1 Second — Your next attack will cause your hits to be a guaranteed Critical Strike and Overpower for 0.35 seconds. |
(Armor) | Gain: 5 Offering — Spend 5% of your Maximum Resource. Requires: 250 Offering, Cooldown: 2 Seconds —Replace your next Evade with the Sorcerer’s Teleport, blinking further, dealing damage, and becoming Unstoppable. |
![]() Cir
Cir ![]() Vex can replace
Vex can replace ![]() Poc
Poc ![]() Jah for a maximum damage setup.
Jah for a maximum damage setup.
Paragon Board
Use the following Paragon Boards, Legendary Nodes, and Glyphs for the Death Trap Rogue.
![]() Death Trap receives the Stun Grenade tag from
Death Trap receives the Stun Grenade tag from  Trickster’s Aspect to benefit from the damage multipliers from
 ![]() Explosive. The additive increased damage [+] for Stun Grenades is bugged to not work. Only invest enough Dexterity to enable the Additional Bonus and Legendary Bonus.
Explosive. The additive increased damage [+] for Stun Grenades is bugged to not work. Only invest enough Dexterity to enable the Additional Bonus and Legendary Bonus.
Season 12 Mechanics
The Season of Slaughter (S12) offers a seasonal theme that introduces Killstreaks, Bloodsoaked Sigils, and Bloodied Items to enhance this build.
Killstreaks
Slay enemies to advance your Killstreak, gaining experience and seasonal reputation after completing the Killstreak. A higher Killstreak count grants more rewards.
Bloodsoaked Sigils
Bloodsoaked Sigils empower content and increase Bloodied drop rewards for your Nightmare Dungeons, Infernal Hordes, and Lair Bosses. Beware, as the Relentless Butcher bloodied affix increases the difficulty of content by around a full Torment tier!
Bloodied Items
Bloodied Gear will drop throughout Sanctuary, granting additional Bloodied Affixes that interact with Killstreaks. There are three categories of Bloodied Affixes:
- Rampage Affixes (Armor) increase in power based on Killstreak tier.
- Feast Affixes (Weapons) provide a periodic bonus after a certain amount of kills.
- Hunger Affixes (Jewelry) increase drop rewards based on Killstreak tier.
Chase the following beneficial affixes for this build:
- Rampage (Armor): Critical Strike Chance if not capped > Attack Speed > Cooldown Reduction
- Feast (Weapons): Gain Berserking (increases damage and movement speed)
- Hunger (Jewelry): Tailor these affixes to your preferred activity rewards, as they do not increase character power.
Mercenaries
Once the Den is unlocked during the main questline in the Vessel of Hatred expansion, complete the key quests to acquire each Mercenary. Hire a Mercenary and enlist a Reinforcement in the following setup.
- Hired Mercenary: Raheir
- Skills:
 Ground Slam,
  Raheir’s Aegis,
  Bastion,
  Inspiration
- Skills:
- Reinforcement: Varyana
- Skill:
 Bloodthirst
 - Opportunity: Cast when the player casts any skill in combat.
- Skill:
Build Mechanics
The Death Trap Rogue is a specialized build that requires a high amount of Cooldown Reduction applied to ![]() Death Trap and Maximum Energy to function. The cooldown of Death Trap must be reduced to 10 seconds or less through Cooldown Reduction affixes and Trap Cooldown Reduction tempers on gear.
Death Trap and Maximum Energy to function. The cooldown of Death Trap must be reduced to 10 seconds or less through Cooldown Reduction affixes and Trap Cooldown Reduction tempers on gear.
The Preparation specialization is activated 2 times after consuming 150 Maximum Energy with ![]() Beastfall Boots to reduce the remaining Cooldown of
Beastfall Boots to reduce the remaining Cooldown of ![]() Death Trap by 10 seconds. Refer to the Build Requirements for more information.
Death Trap by 10 seconds. Refer to the Build Requirements for more information.
A total of 150 Energy needs to be restored for each cast of ![]() Death Trap to activate Preparation twice. Ensure you have the following requirements to generate Energy. Refer to the Build Requirements for more information.
Death Trap to activate Preparation twice. Ensure you have the following requirements to generate Energy. Refer to the Build Requirements for more information.
![]() Concealment is cast every 4 seconds in the Damage Rotation to apply
Concealment is cast every 4 seconds in the Damage Rotation to apply ![]() Subverting Concealment for guaranteed Critical Strike and Vulnerable. The Subterfuge Skill also activates
Subverting Concealment for guaranteed Critical Strike and Vulnerable. The Subterfuge Skill also activates ![]() Danse Macabre to increase Death Trap damage.
Danse Macabre to increase Death Trap damage.
Fight from a Distant range to gain the damage increase from ![]() Deadeye.
Deadeye.
Defenses
Armor and Resistances are not as high in this build due to the require Unique Items. Do not worry, the build becomes tanky with high Maximum Life, multiple sources of damage reduction, and a rapidly refreshing barrier from ![]() Second Wind.
Second Wind.
Rotation and Playstyle
Use the following rotation to optimize damage output. Steps 1-5 can be executed before a boss spawns.
- Keep
 Dark Shroud refreshed to maintain stacks for Damage Reduction and Damage per Dark Shroud Stacks.
 - Cast
 Caltrops and
  Smoke Grenade when more damage is desired against Bosses and tough Elites.
  Dash to traverse or maintain a Distant range from enemies for the damage increase from
  Deadeye.
- Drink a Potion to activate
 Unstable Elixirs.
 - Cast
 Concealment every 4 seconds to activate
  Subverting Concealment and
  Danse Macabre.
 - Cast
 Death Trap repeatedly to kill enemies.
Elixirs and Incenses
Visit the Alchemist in any main town to craft helpful Elixirs and Incense. Listed below are the best consumables for the Death Trap Rogue, ranked by importance.
 Elixir of Resourcefulness II is required to reach the 150 Maximum Energy requirement in this build, along with the Maximum Resource affix on
  Beastfall Boots.
Incense can also be crafted at the Alchemist. ![]() Queen’s Supreme (Core Stat),
Queen’s Supreme (Core Stat), ![]() Song of the Mountain (Defensive), and
Song of the Mountain (Defensive), and ![]() Soothing Spices (Resistance) are recommended. These Incenses are categorized into three separate groups and can be active simultaneously. The added Armor and Resistances are especially helpful to reduce incoming damage.
Soothing Spices (Resistance) are recommended. These Incenses are categorized into three separate groups and can be active simultaneously. The added Armor and Resistances are especially helpful to reduce incoming damage.
Season Updates
A brief summary of the changes in Patch 2.6.0 that may pertain to this specific build is provided below. For a complete overview of Season 12, take a look at the comprehensive season guide.
 Tricks of the Trade: Damage bonus increased from 50%[x] to 60%[x].
 Deadly Ambush: Damage bonus increased from 50%[x] to 60%[x].
 Cheap Shot: Damage bonus increased from 30%[x] to 40%[x].
Changelog
- March 7th, 2026: Guide updated for Season 12 (Patch 2.6.0).
- December 7th, 2025: Guide updated for Season 11 (Patch 2.5.0).
- September 21st, 2025: Guide updated for Season 10 (Patch 2.4.0).
- June 27th, 2025: Guide updated for Season 9 (Patch 2.3.0).
- April 26th, 2025: Guide updated for Season 8 (Patch 2.2.0).
- January 21st, 2025: Guide updated for Season 7 (Patch 2.1.0).
- October 4th, 2024: Guide updated for Season 6 (Patch 2.0.2).
- September 21st, 2024: Guide created.
