Build Introduction
The Heartseeker Rogue is the easiest-to-play build within the class, mainly focused on repeatedly casting a Basic Skill to deal damage. ![]() Heartseeker deals devasting single-target damage, and
Heartseeker deals devasting single-target damage, and ![]() Paingorger’s Gauntlets echos the damage to clear activities with high monster density, such as Inferno Hordes and The Pit.
Paingorger’s Gauntlets echos the damage to clear activities with high monster density, such as Inferno Hordes and The Pit.
The final version of the Heartseeker Rogue utilizes ![]() Shard of Verathiel for maximum damage output.
Shard of Verathiel for maximum damage output. ![]() Heartseeker is transformed to consume Energy, so the setup has strict requirements to function properly. Check the Shard of Verathiel section for the full details.
Heartseeker is transformed to consume Energy, so the setup has strict requirements to function properly. Check the Shard of Verathiel section for the full details.
The only starting requirement for this endgame build guide is a Level 60 character. Check the Rogue Leveling Guide if you need help getting there.
Check the build tier lists to see how this build compares to others on Icy Veins.
Strengths and Weaknesses
- Easy to play ranged build
- Heartseeker seeks enemies so aiming is not an issue
- Deals high single-target damage and echos it to additional enemies.
- Playstyle can be boring for some players
- Requires a lot of well-rolled gear to see results
Quick Navigation
Want to skip ahead? Use the table below to jump to sections.
Skill Bar and Skill Tree Points
The Skill Tree above shows the full allocation of 71 Skill Points for the Heartseeker Rogue build. Leveling up grants 59 points. The remaining 12 points are gained from completing Renown for Eternal Players and Seasonal Rank/Journey for Seasonal Players.
![]() Cold Imbuement is not equipped on the Skill Bar.
Cold Imbuement is not equipped on the Skill Bar.  Coldclip Aspect automatically applies the effects of
 ![]() Enhanced Cold Imbuement and
Enhanced Cold Imbuement and ![]() Mixed Cold Imbuement to
Mixed Cold Imbuement to ![]() Heartseeker.
Heartseeker.
Wondering what comes after Level 60? Head to the Paragon Board section to power up the build even further. If you want to see how everything plays out in combat, check out the Rotation and Playstyle section for a quick breakdown.
Rogue Class Mechanic – Specialization
Preparation is the preferred specialization for the Heartseeker Rogue for 15% Damage Reduction and to reset Cooldowns. The bonuses are activated by casting ![]() Shadow Clone. When
Shadow Clone. When ![]() Shard of Verathiel is equipped to consume Energy, Preparation quickly recovers the Cooldown of Shadow Clone for permanent uptime.
Shard of Verathiel is equipped to consume Energy, Preparation quickly recovers the Cooldown of Shadow Clone for permanent uptime.
Gear, Stats, Gems, and Runes
The following sections cover the important systems that are essential to improving the power of your character in the endgame of Diablo 4.
Legendary Aspects
Listed below are all the best-in-slot Aspects for the Heartseeker Rogue build. Salvage Legendary Items with higher Aspect values to unlock them in the Codex of Power, and then imprint them onto Legendary Items with the preferred affixes. For the best results, combine these Aspects with the ideal Stat Priorities.
| Gear Slot | Aspect Name | Aspect Power |
|---|---|---|
| Ranged Weapon |  Aspect of the Moonrise Aspect of the Moonrise | Damaging an enemy with a Basic Skill grants you 4% Attack Speed for 10 seconds, stacking up to 5 times. Upon reaching maximum stacks, you enter a Vampiric Bloodrage, gaining x [40 – 60%] Basic Skill damage and 15% Movement Speed for 10 seconds. |
| Amulet |  Aspect of Adaptability Aspect of Adaptability | Basic Skills generate 5 additional Primary Resource, once per Skill. Basic Skills deal x [0.4 – 0.6%] increased damage for each point of Primary Resource you have. |
| Dual-Wielded Weapon Slot #1 ( |  Aspect of Retribution Aspect of Retribution | Distant enemies have a 10% chance to be Stunned for 2 seconds when they hit you. You deal x [15 – 35%] increased damage to Stunned and Knocked Down enemies. |
| Dual-Wielded Weapon Slot #2 |  Coldclip Aspect Coldclip Aspect | You deal x [20 – 40%] increased damage to enemies that are Chilled or Frozen. Your Basic Skills are always Cold Imbued at 50% potency and gain this damage bonus against Bosses. |
| Ring Slot #1 (replaced by |  Frostbitten Aspect Frostbitten Aspect | Enemies hit by your Grenade Skills have a chance equal to your Critical Strike Chance to be Frozen for 2 seconds. You deal x [10 – 30%] increased Critical Strike Damage against Frozen or Stunned enemies. Note: Only used for the damage multiplier, not the Grenade Skills effect. |
| Ring Slot #2 |  Vehement Brawler’s Aspect Vehement Brawler’s Aspect | Casting an Ultimate Skill increases your damage by [10 – 30%] for 8 seconds. Gain 2 additional Ultimate Skill Ranks. |
| Gloves (replaced by |  Rapid Aspect Rapid Aspect | Basic Skills gain [15 – 35%] Attack Speed. |
| Helm (replaced by |  Aspect of Might Aspect of Might | Basic Skills grant 20% Damage Reduction for [2 – 10] seconds. |
| Chest (replaced by |  Cheat’s Aspect Cheat’s Aspect | You gain [5 – 15%] increased Damage Reduction and +10% increased Movement Speed. These bonuses are doubled while below 50% Maximum Life. |
| Pants (replaced by |  Umbrous Aspect Umbrous Aspect | Lucky Hit: Critical Strikes have up to a [45 – 65%] chance to grant a free Dark Shroud shadow. |
| Boots |  Aspect of Quickening Fog Aspect of Quickening Fog | You automatically drop a Smoke Grenade at the end of Dash. Smoke Grenades reduce Dash’s cooldown by [0.5 – 0.65] seconds for each enemy hit, up to [1.50 – 1.95] seconds. |
Stat Priority and Tempering Affixes
Listed below are the affixes to prioritize on gear for Heartseeker Rogues, ranked by importance. Affixes on the same line have equal value, so attempt to obtain all affixes in each line before moving on to the next.
Ensure you apply a Tempering affix to your endgame items. If you have a surplus of crafting materials, reroll Tempering affixes on your best items until they upgrade to a Greater Affix.
Bolded affixes are the most important targets for the Capstone Bonus from Masterworking. Capstone Bonuses are granted after Masterworking 25% Quality and can be re-rolled for a cost. For more details, check the Tempering and Masterworking guides.
The Ranged Weapon type selected depends on your preference. Bows have a faster weapon speed, while Crossbows have a higher damage per hit. Equip Daggers for a faster weapon speed on ![]() Dash.
Dash.
↑ Back to Legendary Gear Table
| Slot | Gear Affixes | Tempering Affixes |
|---|---|---|
| Ranged Weapon | 1. Resource Cost Reduction 2. Dexterity, Maximum Life, Vulnerable Damage or Critical Strike Damage | |
| Dual-Wielded Weapons | 1. Lucky Hit Chance to Restore Primary Resource 2. Dexterity, Maximum Life, Vulnerable Damage or Critical Strike Damage | |
| Helm | 1. Cooldown Reduction, Lucky Hit Chance 2. Any uncapped Resistances or Armor 3. Dexterity, Maximum Life | |
| Chest | 1. Ranks to Dark Shroud 2. Any uncapped Resistances or Armor 3. Dexterity, Maximum Life | |
| Gloves | 1. Critical Strike Chance, Attack Speed 2. Any uncapped Resistances or Armor 3. Dexterity, Maximum Life, Lucky Hit chance | |
| Pants | 1. Ranks to Heartseeker 2. Any uncapped Resistances or Armor 2. Dexterity, Maximum Life | |
| Boots | 1. Movement Speed 2. Any uncapped Resistances or Armor 3. Ranks to Dash, Dexterity, Maximum Life | |
| Amulet | 1. Ranks to Frigid Finesse, Unstable Elixirs, Malice and Exploit 2. Maximum Resource, Critical Strike Chance, Attack Speed, Lucky Hit Chance | |
| Rings | 1. Critical Strike Chance, Attack Speed, All Resistances 2. Lucky Hit Chance, Vulnerable Damage or Critical Strike Damage |
Uniques and Mythic Uniques
Listed below are the recommended and optional Unique and Mythic Unique Items for the Heartseeker Rogue build. Each item description includes the most important affix to target for Masterworking upgrades. Check the Mythic Unique Items Guide for information on target-farming them.
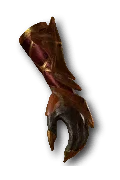 Paingorger’s Gauntlets (highly recommended) echos damage to multiple enemies to supplement the limited targeting of
  Heartseeker.
 - Masterworking Priority: Ranks to Basic Skills
 Shroud of False Death (recommended) provides the highest damage increase in the slot due to the +1 Ranks to All Passives inherent affix.
 - Masterworking Priority: All Stats or Maximum Life
 Tibault’s Will (recommended) provides a damage multiplier and Maximum Resource to scale the damage bonus of
  Aspect of Adaptability.
 - Masterworking Priority: Maximum Resource
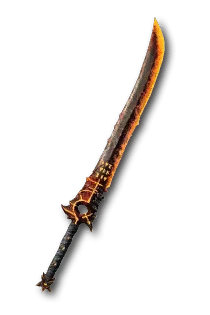 Shard of Verathiel (recommended build variant) provides a massive damage multiplier for
  Heartseeker, at the cost of 25 Primary Resource per cast. Solving for the heavy Energy drain requires strict gearing, so check the Shard of Verathiel section for the full setup.
 - Masterworking Priority: Ranks to Basic Skills or Basic Attack Speed
 Crown of Lucion (recommended build variant) provides another damage multiplier for
  Heartseeker once
  Shard of Verathiel is equipped.
 - Masterworking Priority: Cooldown Reduction or Maximum Life
 Ring of Starless Skies (recommended build variant) synergizes with
  Shard of Verathiel to reduce the Mana cost of
  Heartseeker, while also providing a damage multiplier.
 - Masterworking Priority: Critical Strike Chance, Attack Speed, or Lucky Hit Chance
Gems and Runewords
Listed below are the recommended Gems and Runewords to socket into your gear.
Gems
Equip the corresponding Gems into your Weapon, Armor, and Jewelry slots.
| Weapon Gems | Armor Gems | Jewelry Gems |
|---|---|---|
| Any Gem with your lowest Resistance. |
Runewords
Insert the following 2 Runewords, each consisting of a Rune of Offering and a Rune of Invocation, into any equipped Helm, Chest, or Pants item. Add sockets to your equipment at the Jeweler if necessary. Check the Runewords Guide for more details.
| Runewords | Effects |
|---|---|
| Gain: 300 Offering — Cast 5 Skills then become exhausted for 3 seconds. Requires: 100 Offering, Cooldown: 1 Second — Summon a Spirit Wolf to attack enemies for 8 seconds. | |
| Gain: 5 Offering — Spend 5% of your Maximum Resource. Requires: 300 Offering, Cooldown: 1 Seconds — Invoke the Sorcerer’s Mystical Frost Nova, inflicting Freeze and Vulnerable onto enemies. |
Paragon Board
Use the following Paragon Boards, Legendary Nodes, and Glyphs for the Heartseeker Rogue.
Season 12 Mechanics
The Season of Slaughter (S12) offers a seasonal theme that introduces Killstreaks, Bloodsoaked Sigils, and Bloodied Items to enhance this build.
Killstreaks
Slay enemies to advance your Killstreak, gaining experience and seasonal reputation after completing the Killstreak. A higher Killstreak count grants more rewards.
Bloodsoaked Sigils
Bloodsoaked Sigils empower content and increase Bloodied drop rewards for your Nightmare Dungeons, Infernal Hordes, and Lair Bosses. Beware, as the Relentless Butcher bloodied affix increases the difficulty of content by around a full Torment tier!
Bloodied Items
Bloodied Gear will drop throughout Sanctuary, granting additional Bloodied Affixes that interact with Killstreaks. There are three categories of Bloodied Affixes:
- Rampage Affixes (Armor) increase in power based on Killstreak tier.
- Feast Affixes (Weapons) provide a periodic bonus after a certain amount of kills.
- Hunger Affixes (Jewelry) increase drop rewards based on Killstreak tier.
Chase the following beneficial affixes for this build:
- Rampage (Armor): Critical Strike Chance if not capped > Attack Speed > Cooldown Reduction
- Feast (Weapons): Gain Berserking (increases damage and movement speed)
- Hunger (Jewelry): Tailor these affixes to your preferred activity rewards, as they do not increase character power.
Mercenaries
Once the Den is unlocked during the main questline in the Vessel of Hatred expansion, complete the key quests to acquire each Mercenary. Hire a Mercenary and enlist a Reinforcement in the following setup.
- Hired Mercenary: Raheir
- Skills:
 Ground Slam,
  Raheir’s Aegis,
  Bastion,
  Inspiration
- Skills:
- Reinforcement: Varyana
- Skill:
 Bloodthirst
 - Opportunity: Cast when the player casts any skill in combat.
- Skill:
Build Mechanics
The ![]() Heartseeker Rogue focuses on increasing Basic Skill damage with massive multipliers from
Heartseeker Rogue focuses on increasing Basic Skill damage with massive multipliers from  Aspect of the Moonrise and
  Aspect of Adaptability.
 ![]() Primary Heartseeker allows for 2 hits per cast, even against an individual target due to the seeking property of the skill.
Primary Heartseeker allows for 2 hits per cast, even against an individual target due to the seeking property of the skill.
![]() Paingorger’s Gauntlets mark enemies hit by
Paingorger’s Gauntlets mark enemies hit by ![]() Smoke Grenade,
Smoke Grenade, ![]() Caltrops, and wolves from
Caltrops, and wolves from ![]() Ceh to echo damage done by
Ceh to echo damage done by ![]() Heartseeker to groups of enemies.
Heartseeker to groups of enemies.
Vulnerable from ![]() Enhanced Cold Imbuement is automatically applied through
Enhanced Cold Imbuement is automatically applied through  Coldclip Aspect.
![]() Shadow Clone activates No Witnesses and Preparation, while mimicking
Shadow Clone activates No Witnesses and Preparation, while mimicking ![]() Heartseeker to supplement damage output.
Heartseeker to supplement damage output.
Rotation and Playstyle
Use the following rotation to optimize damage output.
- Refresh
 Dark Shroud when buff stacks are needed.
 - Cast
 Shadow Clone to activate No Witnesses.
 - Cast
 Smoke Grenade to Daze enemies from a distance.
 - Against bosses or tough elites, cast
 Caltrops on top of them to apply
  Enhanced Caltrops.
 - Use a Potion to activate the damage buff from
 Unstable Elixirs.
 - Spam
 Heartseeker to deal damage. Remain at a distance to benefit from
  Deadeye for maximum damage output.
Elixirs and Incenses
Visit the Alchemist in any main town to craft helpful Elixirs, or find Elixirs by killing enemies or opening chests during various activities in Diablo 4. Listed below are the best Elixirs to consume for the Heartseeker Rogue, ranked by importance.
 Elixir of Resourcefulness II is the best option due to its Resource Cost Reduction and Maximum Resource to scale the damage bonus of
  Aspect of Adaptability.
 Elixir of Precision II provides a damage output increase, if not already capped at 100% Critical Strike Chance.
 Elixir of Advantage II increases damage output, if not already capped at 100% Attack Speed bonus from gear and Paragon.
 Elixir of Fortitude II is the best general purpose option for survivability.
Incense can also be crafted at the Alchemist. ![]() Queen’s Supreme (Core Stat),
Queen’s Supreme (Core Stat), ![]() Song of the Mountain (Defensive), and
Song of the Mountain (Defensive), and ![]() Soothing Spices (Resistance) are recommended. These Incenses are categorized into three separate groups and can be active simultaneously. The added Armor and Resistances are especially helpful to reduce incoming damage.
Soothing Spices (Resistance) are recommended. These Incenses are categorized into three separate groups and can be active simultaneously. The added Armor and Resistances are especially helpful to reduce incoming damage.
Shard of Verathiel Heartseeker Rogue
The final version of the Heartseeker Rogue utilizes ![]() Shard of Verathiel for a massive damage multiplier, at the cost of 25 Primary Resource per cast. Energy is drained quickly from rapidly casting
Shard of Verathiel for a massive damage multiplier, at the cost of 25 Primary Resource per cast. Energy is drained quickly from rapidly casting ![]() Heartseeker with a high Attack Speed, so the setup has strict requirements to function.
Heartseeker with a high Attack Speed, so the setup has strict requirements to function.
Make the following changes to the original version of the Heartseeker Rogue to solve Energy issues:
- Remove
 Frostbitten Aspect,
  Aspect of Retribution, and
  Aspect of Might from the build.
 - Equip a
 Shard of Verathiel, prioritizing a high-value damage bonus in the unique effect.
 - Equip
 Ring of Starless Skies to reduce the Resource cost of your Skills.
 - Equip
 Crown of Lucion for more damage.
 - Remove Skill Points from
 Stutter Step (3) and
  Sturdy (2).
 - Add Skill Points to
 Innervation (3) and
  Second Wind (2).
 - Obtain Resource Cost Reduction on your Legendary Ranged Weapon and Lucky Hit Chance to Restore Primary Resource on your Legendary Dual-Wielded Weapon.
Season Updates
A brief summary of the changes in Patch 2.6.0 that may pertain to this specific build is provided below. For a complete overview of Season 12, take a look at the comprehensive season guide.
 Tricks of the Trade: Damage bonus increased from 50%[x] to 60%[x].
 Deadly Ambush: Damage bonus increased from 50%[x] to 60%[x].
 Cheap Shot: Damage bonus increased from 30%[x] to 40%[x].
Changelog
- March 7th, 2026: Guide updated for Season 12 (Patch 2.6.0).
- December 28th, 2025: Guide updated for Season 11 (Patch 2.5.0).
- June 27, 2025: Guide updated for Season 9 (Patch 2.3.0).
- April 26, 2025: Guide updated for Season 8 (Patch 2.2.0).
