


In Diablo 4, mercenaries are companions that help you in exploration and combat. They are NPCs that can be recruited, and each of them comes with a powerful set of skills to aid you on the battlefield. On top of that, each mercenary has an interesting backstory that will unfold as you journey together.
How to Unlock Mercenaries
Mercenaries are introduced through the Vessel of Hatred expansion. You will meet your first companion, Raheir, the Shieldbearer, during the main campaign questline. As you progress, you will unlock additional mercenaries by completing specific quests given by each one.
Types of Mercenaries
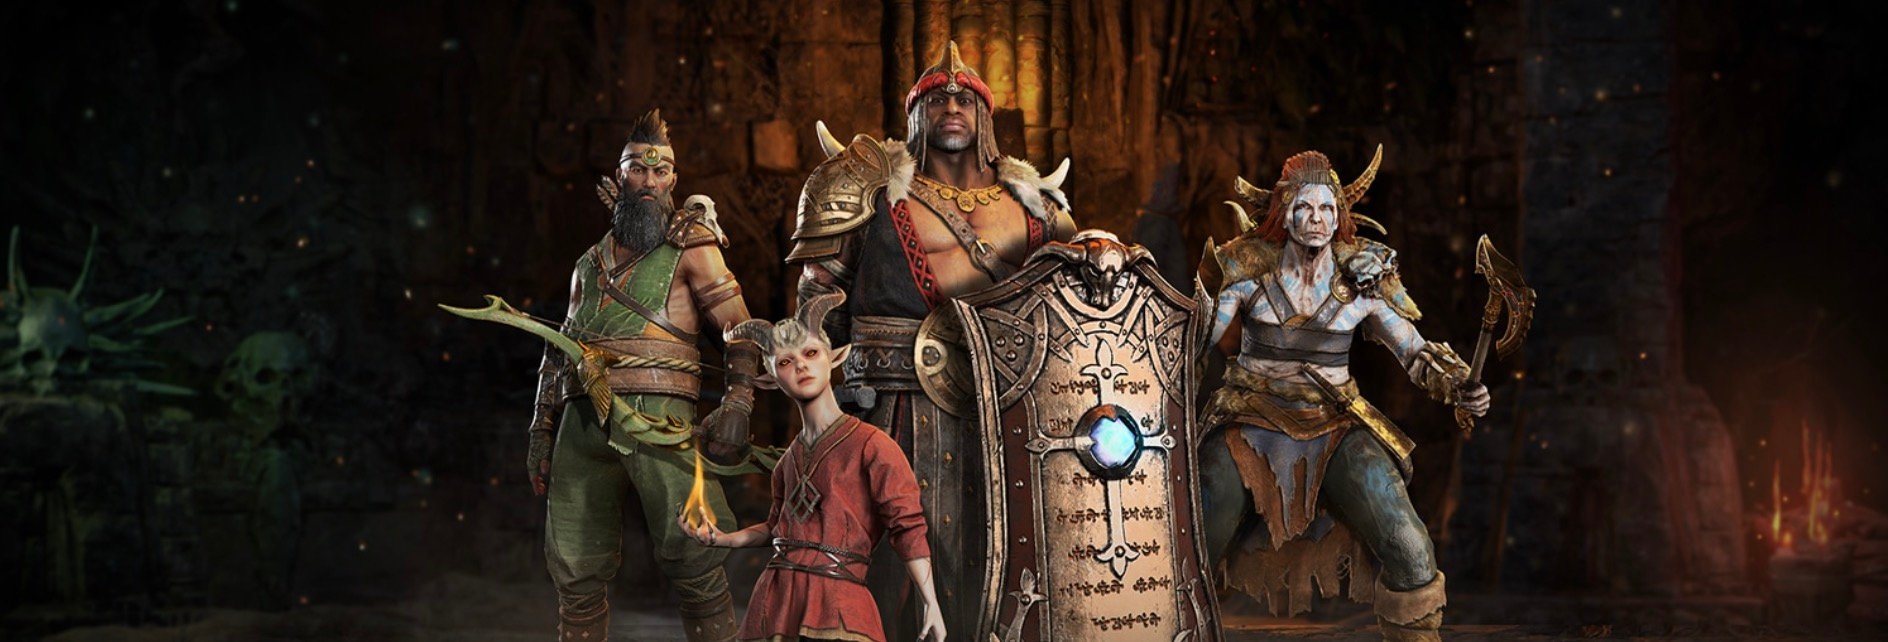
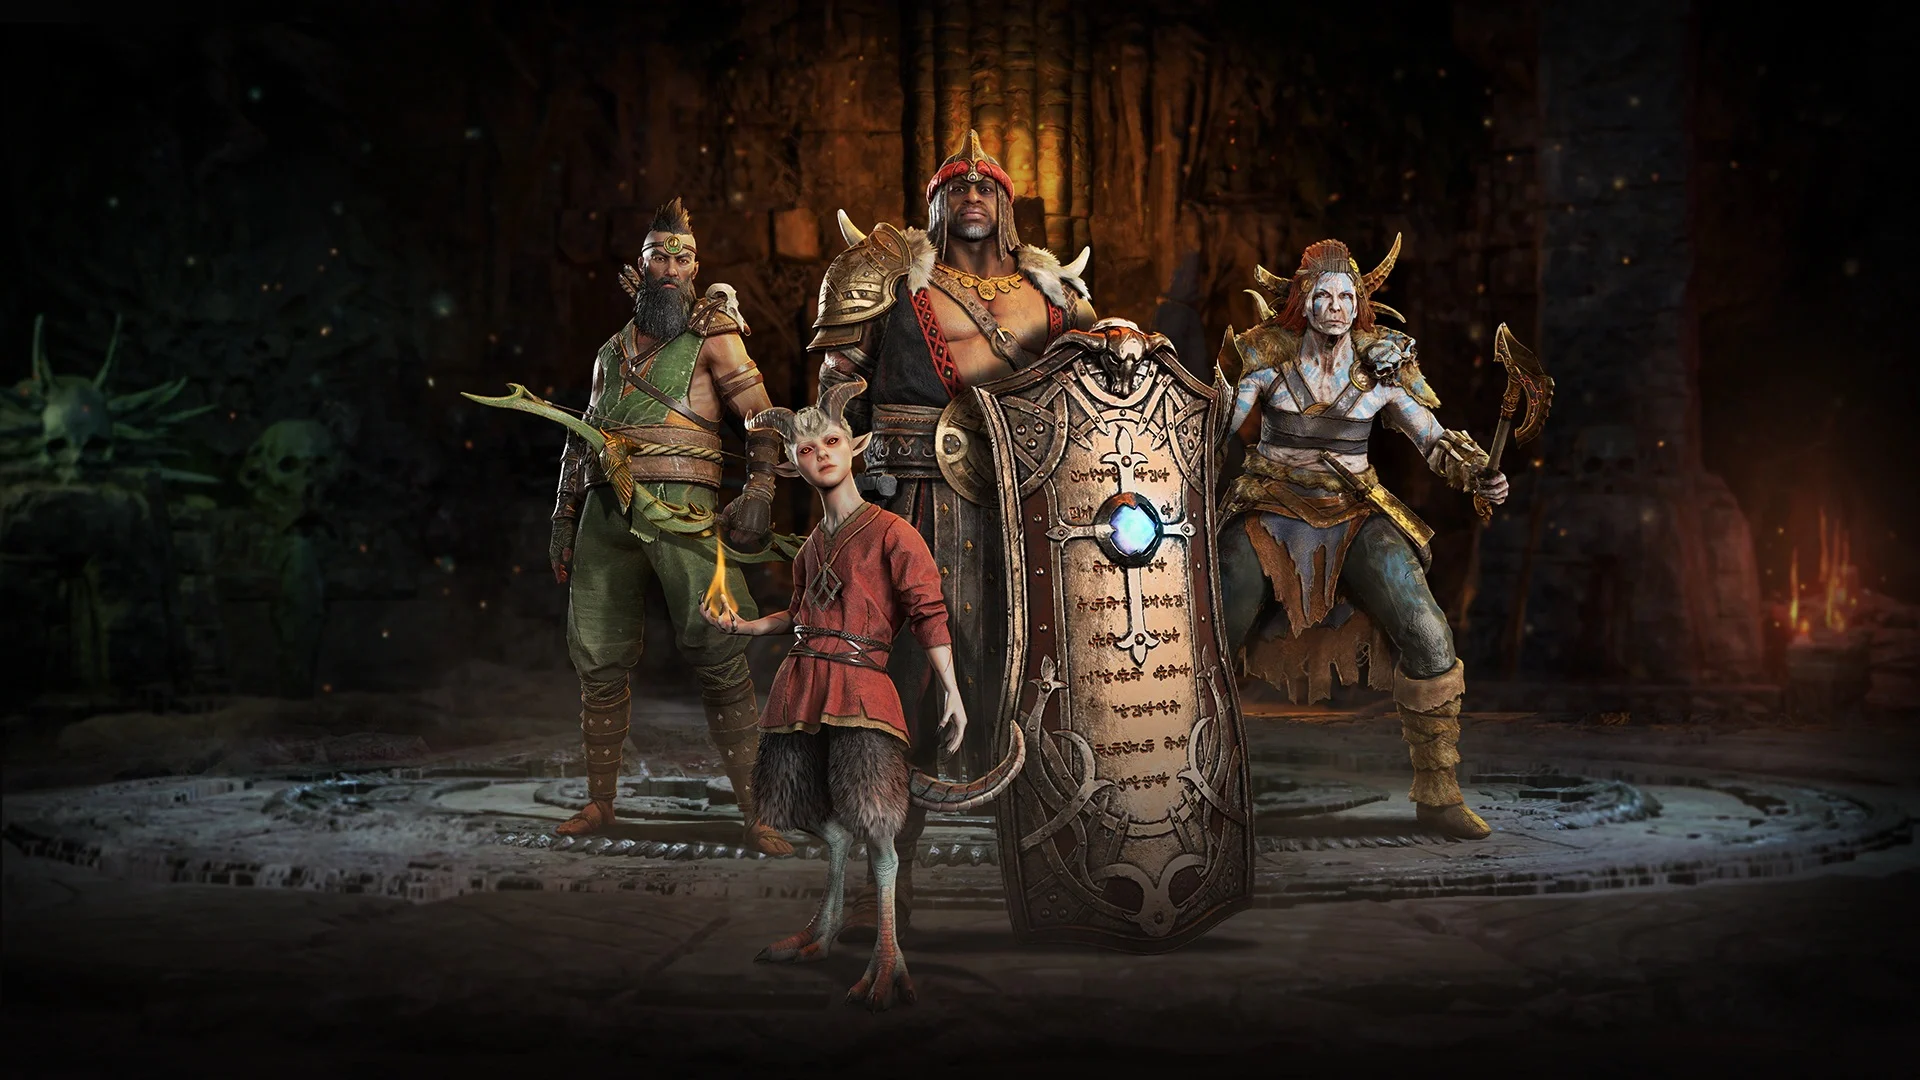
There are 4 mercenaries you can recruit, each with different abilities and playstyles:
- Raheir, the Shieldbearer: A defensive tank born on the streets of Gea Kul and trained by the Iron Wolves. Raheir is good at absorbing damage and protecting you from harm with his shield.
- Varyana, the Berserker Crone: Once a cannibal from a dark tribe, Varyana grows stronger with every enemy you kill, feeding off the massacre to boost her power. Her skills are brutal and melee-focused.
- Subo, the Drunken Archer: A fallen hero turned bounty hunter, Subo specializes in ranged combat and traps. He marks enemies during the fight, rewarding you with reduced ability cooldowns for eliminating his targets.
- Aldkin, the Cursed Child: Half-demon, half-human, Aldkin is a powerful caster who shapeshifts into a demon during combat. His magical abilities make him a great support companion.
Each mercenary complements different playstyles, offering a mix of utility, crowd control, and damage.
How to Hire and Equip Mercenaries
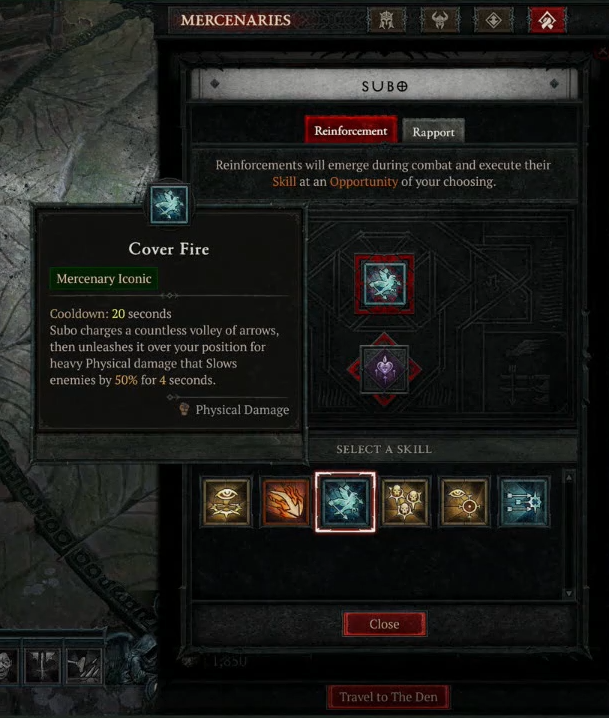
You can hire two mercenaries at once – one as your primary mercenary, and another as a reinforcement.
- Primary Mercenary: This mercenary will always fight by your side, offering a full set of abilities and their own skill tree for you to develop.
- Reinforcement: A secondary mercenary that joins combat briefly, triggered by specific actions in battle. Reinforcements activate a unique skill that can be linked to one of your own, for example, when you are affected by crowd control or when you use a specific skill. You can set up this specific trigger in the Mercenaries window as an “Opportunity“.
Keep in mind that you must choose a different mercenary for each role. After you unlock more mercenaries beyond Raheir, you will be able to equip one in both slots.
How to Build Rapport
Fighting alongside your mercenaries builds Rapport, a measure of trust between you and your companion. The more Rapport you earn, the more skill points you can invest in their skill trees to unlock new abilities and perks.
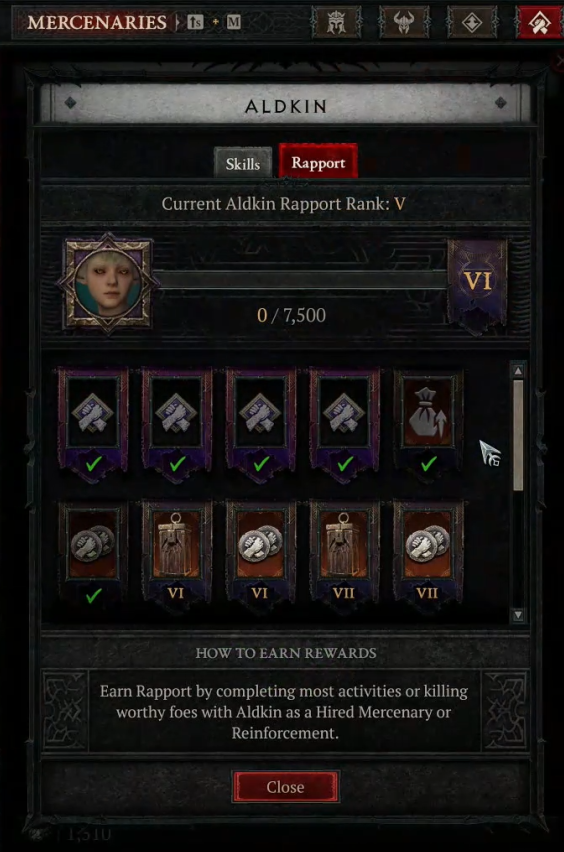
You can build Rapport through:
- Recruiting a mercenary
- Hiring them as a primary or reinforcement
- Completing mercenary-related events across Sanctuary
There are 10 levels of Rapport to earn with each mercenary, and the progression is realm-wide (eternal, seasonal, and hardcore). It will reset for every season. After maxing out their level, you can continue gaining Rapport to earn additional Pale Marks, a currency used for bartering in the Den, the mercenary hideout.
Below you can find the rewards for each Rapport level as they differentiate from one mercenary to the other:
| Rapport Level | Raheir | Varyana | Subo | Aldkin |
|---|---|---|---|---|
| 1 to 4 | +1 Skill Point | +1 Skill Point | +1 Skill Point | +1 Skill Point |
| 5 | Defensive Aspects 100 | Mobility Aspects 100 | Utility Aspects 100 | Resource Aspects 100 |
| 6 | Raheir Cache (Contains Legendary Armor and Gold) 100 | Varyana Cache (Contains Legendary Weapons and Gold) 100 | Subo Cache (Contains Legendary Amulets and Gold) 100 | Aldkin Cache (Contains Legendary Rings and Gold) 100 |
| 7 | Raheir Masterworking Cache (Contains Masterworking Materials and Legendary Armor) 150 | Varyana Masterworking Cache (Contains Masterworking Materials and Legendary Weapons) 150 | Subo Masterworking Cache (Contains Masterworking Materials and Legendary Amulets) 150 | Aldkin Masterworking Cache (Contains Masterworking Materials and Legendary Rings) 150 |
| 8 | Crafting (An additional Legendary item will be offered when Bartering, with a chance of it being a cache of valuable crafting materials.) 150 | Masterworking (An additional Legendary item will be offered when Bartering, with a chance of it being a cache of masterworking materials and obols.) 150 | Boss Summoning (An additional Legendary item will be offered when Bartering, with a chance of it being a cache of boss summoning materials.) 150 | Augmentations (An additional Legendary item will be offered when Bartering, with a chance of it being a cache of Scattered Prisms, Gem Fragments and Runes.) 150 |
| 9 | Living Steel Cache (incl. Legendary Armor) 200 | Malignant Heart Cache (incl. Legendary Weapons) 200 | Exquisit Blood Cache (incl. Legendary Amulets) 200 | Distilled Fear Cache (incl. Legendary Rings) 200 |
| 10 | Grand Raheir Cache (Contains Gold, Gem Fragments, Scattered Prisms, and Legendary Armor) 200 | Grand Varyana Cache (Contains Gold, Gem Fragments, Scattered Prisms, and Legendary Weapons) 200 | Grand Subo Cache (Contains Gold, Gem Fragments, Scattered Prisms, and Legendary Amulets) 200 | Grand Aldkin Cache (Contains Gold, Gem Fragments, Scattered Prisms, and Legendary Rings) 200 |
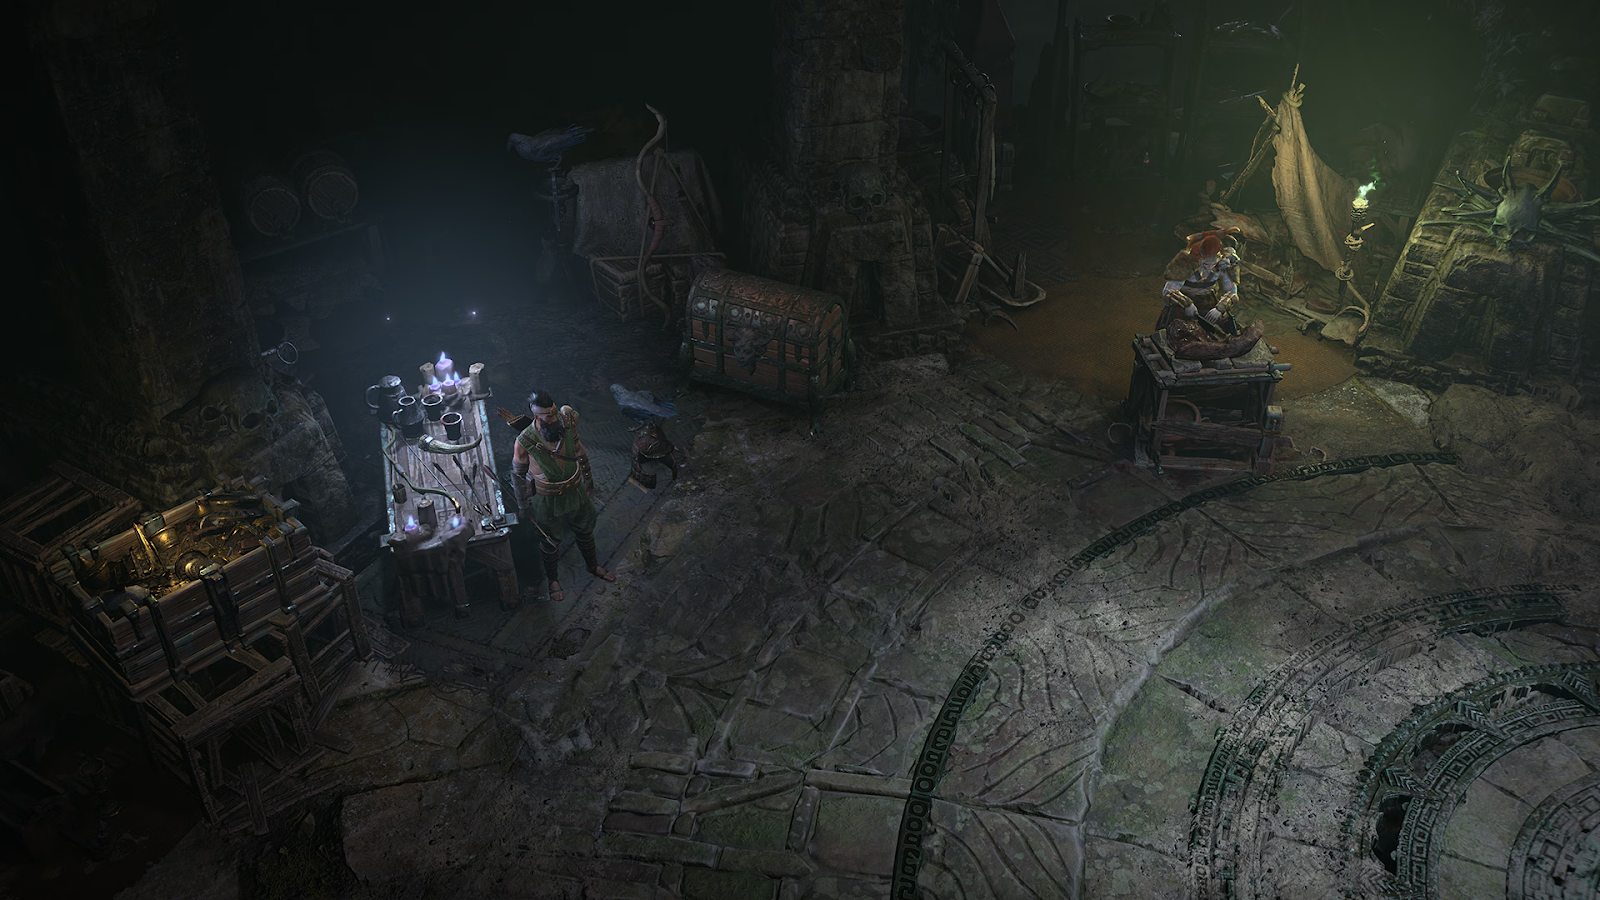
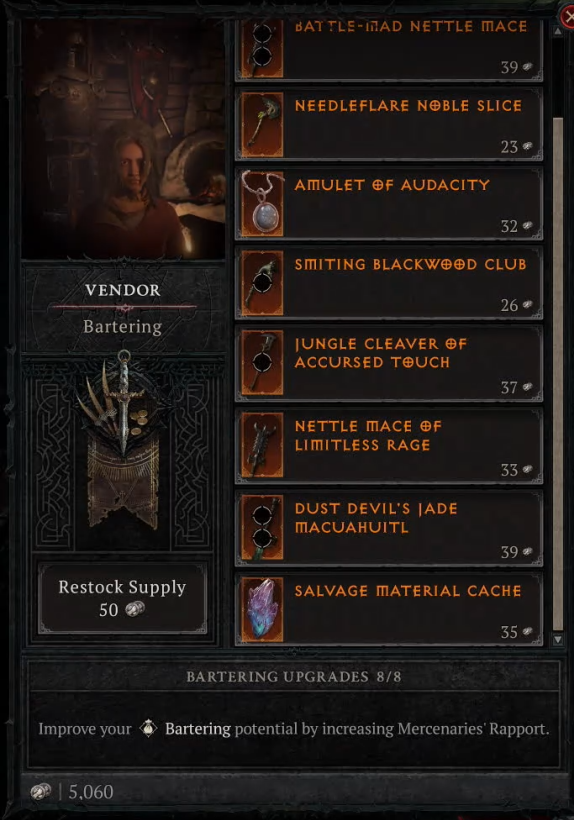
Pale Marks and Bartering
As you build Rapport, you accumulate Pale Marks, a currency used to purchase Trade Agreements and barter for items within the Den. Reaching higher Rapport levels unlocks better items for trade. Bartering becomes available once you reach Rank 5 Rapport with any mercenary.
The vendor has a variety of Legendaries available for purchase with Pale Marks. You can also use the Restock Supply button to refresh the items. However, be mindful that refreshing costs Pale Marks, so keep an eye on your currency. The list of items will also improve as you gain more Rapport with your mercenaries.
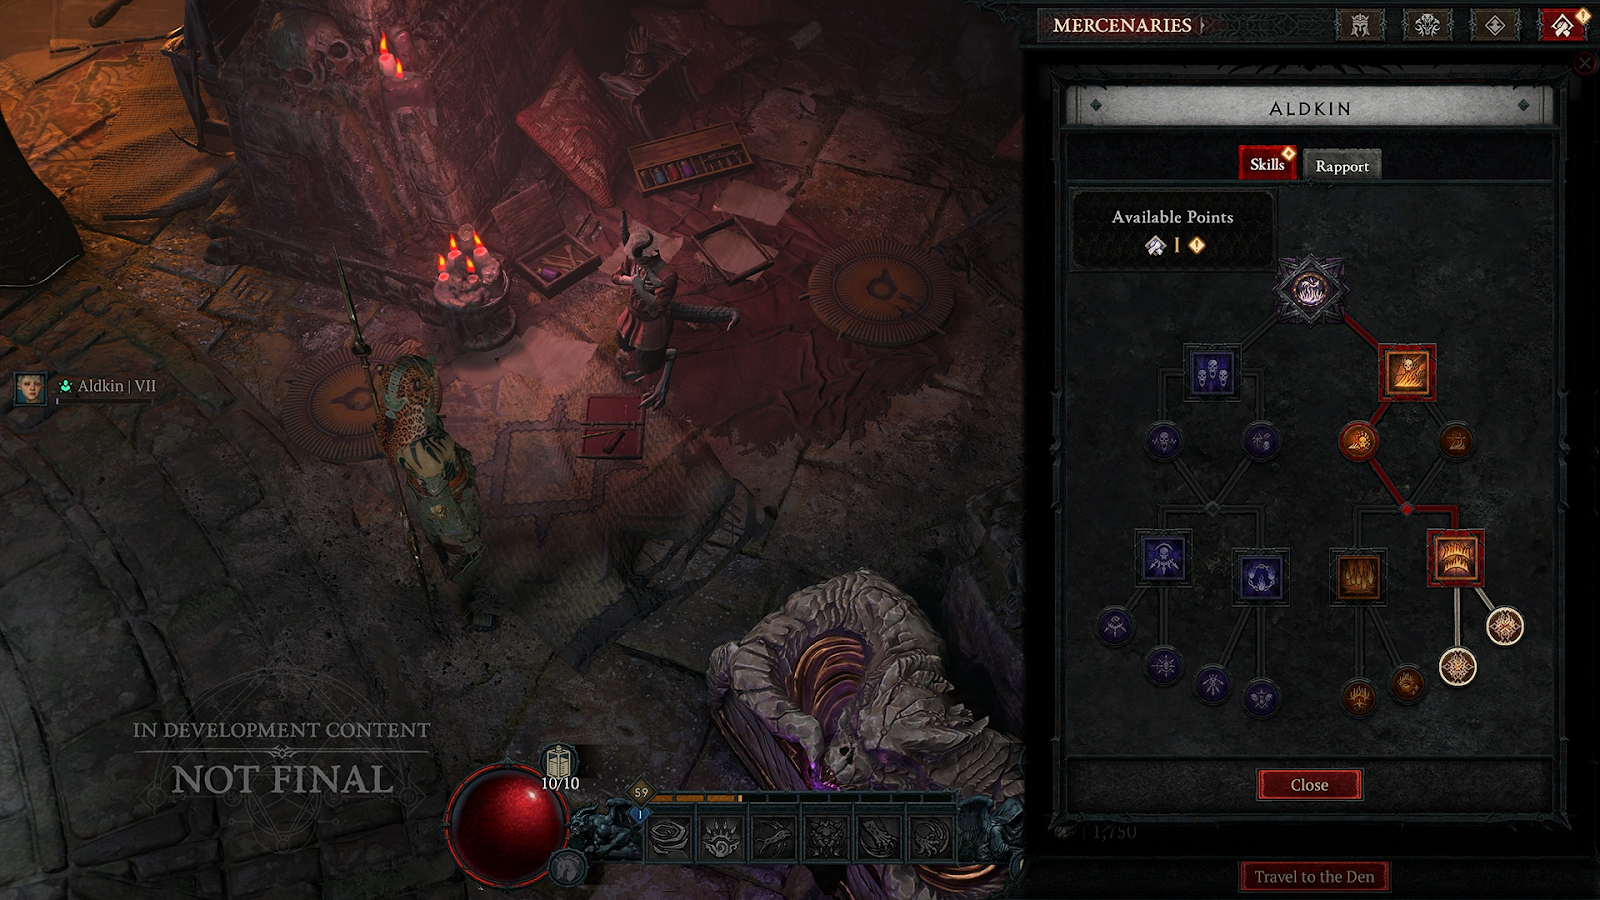
Skill Trees and Abilities
Each mercenary has a unique skill tree you can develop over time and allows you to further customize your playstyle by complementing your skills with theirs.
Each skill tree has two branches that represent distinct playstyles. Each branch can activate two abilities and two passives.
Raheir Skill Tree
Raheir uses his shield to absorb damage and protect you, with the ability to draw aggro and perform powerful Shield Throws.
Mercenary Perk: ![]() Valiance
Valiance
He has two different playstyles:
Tower Shield skills, which are meant for close combat.
Core Skill: ![]() Shield Charge
Shield Charge
Core Passives: ![]() Raheir’s Guard or
Raheir’s Guard or ![]() Vanguard
Vanguard
Iconic Skills: ![]() Provoke or
Provoke or ![]() Crater
Crater
Iconic Passives: ![]() Mocking Lure or
Mocking Lure or ![]() Iron Wolf’s Ward,
Iron Wolf’s Ward, ![]() Iron Wolf’s Call or
Iron Wolf’s Call or ![]() Sundering Shield
Sundering Shield
Round Shield abilities, making him more of a Holy Protector.
Core Skill: ![]() Ground Slam
Ground Slam
Core Passives: ![]() Raheir’s Aegis or
Raheir’s Aegis or ![]() Draw Fire
Draw Fire
Iconic Skills: Bastion or ![]() Shield Throw
Shield Throw
Iconic Passives: ![]() Inspiration or
Inspiration or ![]() Iron Wolf’s Virtue,
Iron Wolf’s Virtue, ![]() Iron Wolf’s Arrival or
Iron Wolf’s Arrival or ![]() Consecrated Shield
Consecrated Shield
Varyana Skill Tree
Varyana grows stronger with each kill, and her Massacre meter rewards you for maintaining kill streaks.
Mercenary Perk: ![]() Massacre
Massacre
Her skill tree is split in two branches:
Dual Wield Axes abilities with stronger cleaves.
Core Skill: ![]() Cleave
Cleave
Core Passives: ![]() Hysteria or
Hysteria or ![]() Recklessness
Recklessness
Iconic Skills: ![]() Bloodthirst or Whirlwind
Bloodthirst or Whirlwind
Iconic Passives: ![]() Intimidated or
Intimidated or ![]() Bloodlust,
Bloodlust, ![]() No Escape or
No Escape or ![]() Taste of Flesh
Taste of Flesh
Large Mace skills with heavy slams.
Core Skill: ![]() Shockwave
Shockwave
Core Passives: ![]() Crushing Force or
Crushing Force or ![]() Reprisal
Reprisal
Iconic Skills: ![]() Earth Breaker or
Earth Breaker or ![]() Ancient Harpoons
Ancient Harpoons
Iconic Passives: ![]() Rampage or
Rampage or ![]() Dismembering,
Dismembering, ![]() Annihilator or
Annihilator or ![]() Iron Grip
Iron Grip
Subo Skill Tree
Subo specializes in ranged attacks and traps, marking targets for quick kills and offering combat buffs in return.
Mercenary Perk: ![]() Seeker
Seeker
He has two different playstyles:
Long Bow skills, as he centers around precision kills and traps.
Core Skill: ![]() Wire Trap
Wire Trap
Core Passives: ![]() Piercing Arrows or
Piercing Arrows or ![]() Ready At Hand
Ready At Hand
Iconic Skills: ![]() Cover Fire or
Cover Fire or ![]() Trip Mines
Trip Mines
Iconic Passives: ![]() Pin Cushion or
Pin Cushion or ![]() Opening Fire,
Opening Fire, ![]() Loaded Munitions or
Loaded Munitions or ![]() Mastermind
Mastermind
Crossbow abilities with heavy bolts and explosives.
Core Skill: ![]() Molotov
Molotov
Core Passives: ![]() Scorched Earth or
Scorched Earth or ![]() Share a Drink
Share a Drink
Iconic Skills: ![]() Snipe or
Snipe or ![]() Explosive Charge
Explosive Charge
Iconic Passives: ![]() Incendiary Bolt or
Incendiary Bolt or ![]() Ambusher,
Ambusher, ![]() Thrillseeker or
Thrillseeker or ![]() Bargaining Chips
Bargaining Chips
Aldkin Skill Tree
Aldkin shapeshifts into a demon, providing powerful magical support.
Mercenary Perk: ![]() Blasphemous Fate
Blasphemous Fate
He can shift into two demons using different magic:
Shadow Magic, allowing him to haunt the souls of his enemies.
Core Skill: ![]() Haunt
Haunt
Core Passives: ![]() Terrify or
Terrify or ![]() Exhaustion
Exhaustion
Iconic Skills: ![]() Field of Languish or
Field of Languish or ![]() Chain of Souls
Chain of Souls
Iconic Passives: ![]() Paranoia or
Paranoia or ![]() Condemned,
Condemned, ![]() Amplified Suffering or
Amplified Suffering or ![]() Shared Pain
Shared Pain
Fire Magic, enabling him to make his enemies burn and suffer.
Core Skill: ![]() Flame Surge
Flame Surge
Core Passives: ![]() Covered in Ash or
Covered in Ash or ![]() Raging Violence
Raging Violence
Iconic Skills: ![]() Storm of Fire or
Storm of Fire or ![]() Wave of Flame
Wave of Flame
Iconic Passives: ![]() Eradication or
Eradication or ![]() Ember’s Gift,
Ember’s Gift, ![]() Burning Chaos or
Burning Chaos or ![]() Raging Havoc
Raging Havoc
Mercenary Death and Revival
Mercenaries can die in battle, temporarily disabling their skills and abilities. If this happens, you can revive them manually, similar to how you would revive another player, or wait for them to recover on their own. Reviving them quickly can be important in tough battles where their powers provide essential support.
Mercenaries bring utility, crowd control, and complement your builds. Pair a defensive mercenary like Raheir with a high-damage ally like Varyana for balanced combat, or use Aldkin’s magic to improve your own abilities. The options are wide, offering different strategies to overcome any challenge.
