This is a legacy build that is not competitive for the current version of Diablo 4 and which we do not recommend using. It only exists for documentation purposes and will not receive further updates.
Last Updated for Season 7
Strengths and Weaknesses
- Great Mobility
- Fast Attacks
- Easy to Play
- Gear Reliant
- Does not work without Sepazontec Unique Weapon
Build Introduction
This ![]() Thunderspike Spiritborn build is a fast, high-impact Basic Skill setup that is great for Spiritborn players looking for a reliable endgame option without needing Mythic Uniques. Great for beginners or anyone farming until their best drops arrive.
Thunderspike Spiritborn build is a fast, high-impact Basic Skill setup that is great for Spiritborn players looking for a reliable endgame option without needing Mythic Uniques. Great for beginners or anyone farming until their best drops arrive.
Starting new? Begin with our Quill Volley Leveling Build and switch to this one at Level 60.
Have questions or feedback about this guide? Join Ghazzy’s livestream and ask him!
Build Requirements
 Aspect of Unyielding Hits
Want to know more about the Uniques supporting this setup? Jump to the Uniques section.
Quick Navigation
Want to skip ahead? Use the table below to jump to the sections you are looking for.
Skill Bar and Skill Tree Points
Wondering what comes after Level 60? Head to the Paragon Board section to power up the build even further.
And if you want to see how everything plays out in combat, check out the Rotation and Playstyle section for a quick breakdown. If you are missing skill points, complete Renown Tier 1-3 in every zone.
Spiritborn Class Mechanic – Spirit Hall Choice
The Spirit Hall lets you combine two different Spirit Guardians or stick with one. For this build, we go with a mix of guardians that balance survivability and damage.
- Primary Spirit Guardian: Gorilla
- Casting a Gorilla Skill deals 100% Thorns to enemies you hit and grants a Barrier for 10% of Maximum Life, up to 40%, for 3 seconds. All Skills are now also Gorilla Skills.
- Secondary Spirit Guardian: Jaguar
- Maximum Ferocity is increased by 1. Gain 1 stack of Ferocity whenever you kill an enemy or damage a Boss.
Gear, Stats, Gems, and Runes
The following sections cover all systems that are important if you want to improve the power of your character in the endgame of Diablo 4.
Legendary Aspects
Each Aspect is listed with its matching gear slot. Do your best to keep each Aspect in the assigned slot. Remember to salvage Legendary Items with higher Aspect values to unlock them in the Codex of Power, and then imprint them onto gear pieces with the preferred affixes. For best results, combine these Aspects with the right stat priorities.
| Gear Slot | Gems/Runes | Aspect / Unique | Legendary Aspect / Unique Power |
|---|---|---|---|
| Helm | According to your secondary Spirit Hall choice, your Skills are all additionally Jaguar, Eagle, Gorilla, or Centipede Skills. Your skills deal {x}% increased damage per Spirit type they have. | ||
| Chest |  Aspect of Disobedience Replace with Aspect of Disobedience Replace with | You gain x%[+] increased Armor for 4 seconds when you deal any form of damage, stacking up to x%[+]. | |
| Gloves | N/A |  Aspect of Plains Power Aspect of Plains Power | Lucky Hit: Up to a 25% chance to create a Mystic Circle for 10 seconds. Casting a Jaguar Skill in Mystic Circles empowers them to keep your Ferocity at Maximum and increase your damage by {x}% per stack while you remain within. |
| Pants |  Aspect of Might Aspect of Might | Basic Skills grant 20.0% Damage Reduction for {x} seconds. | |
| Boots |  Duelist’s Aspect Duelist’s Aspect | Maximum Ferocity increased by 1-5. | |
| Amulets(50% bonus) |  Aspect of Unyielding Hits Aspect of Unyielding Hits | Casting a gorilla skill adds x% of your armor to all attacks for 3 seconds. | |
| Ring |  Aspect of Adaptability Aspect of Adaptability | When cast below 50% Maximum resource, Basic Skills generate 3 of your Primary Resource, once per cast. When cast at or above 50% Maximum Resource, Basic Skills deal x% increased damage. | |
| Ring |  Aspect of the Moonrise Aspect of the Moonrise | Damaging an enemy with a Basic Skill grants you 4% Attack Speed for 10 seconds, stacking up to 5 times. Upon reaching maximum stacks, you enter a Vampiric Bloodrage, gaining {x}% Basic Skill damage and 15% Movement Speed for 10 seconds. | |
| Weapon (200% bonus) | Your Basic Skills deal x% increased damage and always use their 3rd attack. Every 3rd cast of a Basic Skill strikes three times. |
The Unique Weapon, ![]() Sepazontec, is very important because it greatly increases basic skill damage. On top of that, the
Sepazontec, is very important because it greatly increases basic skill damage. On top of that, the ![]() Harmony of Ebewaka helmet provides an incredibly powerful passive by making all attacks also count as Gorilla attacks.
Harmony of Ebewaka helmet provides an incredibly powerful passive by making all attacks also count as Gorilla attacks.
Curious how this build compares to other endgame options? Take a look at our Endgame Build Tier List.
Stat Priority and Tempering Affixes
Affixes on the same line are considered to be equally important. Bolded affixes are the most important targets for Masterworking upgrades. Be sure to check our Tempering and Masterworking guides for more details about these topics. Want to jump back up to the gear table?
| Slot | Targeted Gear Affix | Tempering Affixes |
|---|---|---|
| Helm | All Stats Movement Speed Damage Reduction Ranks to Velocity | N/A |
| Chest | 1. Ranks to Armored Hide 2. Resistances 3. Armor | |
| Gloves | 1. Attack Speed 2. Critical Strike Chance 3. Critical Strike Damage | |
| Pants | 1. Ranks to Basic Skills 2. Ranks to Thunderspike 3. Resistances | |
| Boots | 1. Movement Speed 2. Armor 3. Dexterity | |
| Amulet | 1. Attack Speed 2. Ranks to Follow Through 3. Needed Resistance | |
| Rings | 1. Attack Speed 2. Critical Strike Damage / Lucky Hit: Up to a % Chance to Make Enemies Vulnerable 3. Critical Strike Chance | |
| Weapon | Chance for Basic Skills to Deal Double Damage Ranks to Follow Through Dexterity Basic Lucky Hit Chance | N/A |
The priority order of Resistances is Lightning > Poison > Fire > Cold > Shadow.
Make sure to reach the Armor Cap of 1,000. Certain builds that scale with armor may benefit from having more of it. For instance, those that make use of the  Aspect of Unyielding Hits. Furthermore, in higher difficulties, there will be a penalty to armor and resistance, so you will need a higher amount to compensate for the loss.
Looking for progression beyond gear? See our Paragon recommendations or Runewords Synergy next.
Uniques and Mythic Uniques
Below, you will find information on Uniques and Mythic Uniques that are useful and recommended for this build. If a Unique or Mythic Unique is not listed here, it is NOT recommended and won’t benefit this specific build in any way.
Uniques
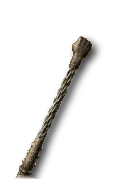 Sepazontec (Required): Basic Skills deal [100 – 200]% increased damage, always use their 3rd attack, and every 3rd cast unleashes triple strikes.
 Harmony of Ebewaka (Required): According to your secondary Spirit Hall choice, your Skills are all additionally Jaguar, Eagle, Gorilla, or Centipede Skills. Your skills deal {x}% increased damage per Spirit type they have.
Mythic Uniques
The Thunderspike Jaguar Spiritborn build does not require any Mythic Uniques to work! However, if you do find ![]() Tyrael’s Might, you can replace the
Tyrael’s Might, you can replace the  Aspect of Disobedience with it.
If you are interested in target farming Mythic Uniques, check out our How to Farm Mythic Uniques guide. Or you can return to the Build Requirements.
Gems and Runewords
Listed below are the recommended Gems and Runewords to socket into your gear.
Gems
| Weapon Gems | Armor Gems | Jewelry Gems |
|---|---|---|
For increased Critical Strike Damage | For more Dexterity | For more Armor |
Occult Gems
For your Jewelry sockets, you can also equip Occult Gems in Season 7. Here are some recommended Occult Gems for this build:
 Cornucopia: While you have three or more Growth and Decay Witch Powers slotted, you generate 30% more Barrier, gain 30% more Fortify and have 30% more Thorns.
 Dust Stone: For each of your Auras and Hexes an enemy is afflicted by, they take 2.5% increased damage from you.
 Hungering Void: While you have an Aura active, pull Nearby enemies toward you every 8 seconds.
Runewords
Runewords are unlocked during the Vessel of Hatred campaign and replace gems in gear. Improve your build by combining a trigger Rune of Ritual and an effect Rune of Invocation. You can equip up to two Runeword pairs (four Runes) at a time. For a detailed guide on Runewords, check out our Runewords Guide!
Here are the recommended Runeword combinations for the Thunderspike Spiritborn endgame build:
| Runeword Combination | Runeword Effects |
|---|---|
| Lith Ohm | |
| Xol Kry |
Paragon Board
Paragon unlocks at Level 60 and plays a big role in endgame progression. The following Legendary Nodes and Glyphs are recommended for this build. Keep in mind that each Glyph’s information and radius listed below is for the Level 46 version.
Need a refresher on how the skills are set up? Click here to return to the Skill Tree section.
Witchcraft Powers
During Season 7, you can unlock and rank up Witchcraft Powers using Restless Rot earned from Headhunts, which provide powerful bonuses to support your build as you level.
| Witchcraft Power & Type | Effect |
|---|---|
| When an enemy is afflicted by both Hex and an Aura Effect, a Piranhado is summoned, pulling enemies towards it and dealing x physical damage over 12 seconds. May occur once every 20 seconds. At Rank 5 and above: Piranhado moves itself towards nearby enemies. | |
| Feed upon the life force of nearby enemies whenever you use a skill with a cooldown, increasing your primary stat by 3% per monster for x seconds. At Rank 9 and above: Soul Harvest does not lose duration so long as enemies are nearby. | |
| Enemies near you have a x% chance for their attacks to be interrupted. Does not work on bosses. At Rank 5 and above: Auro of Misfortune increases your Movement Speed by 5% and Slows enemies by 30%. | |
| Damage done by your Witchcraft Effects afflicts enemies with Hex of Shattering causing them to deal x% reduced damage for 5 seconds. At Rank 8 and above: When a Hex effect is applied to Headrotten, all damage will be guaranteed critical strikes for 5 seconds. | |
| Release a Wave of Woe when damaging an enemy with your skills. Wave of Woe deals an additional x Shadow damage and echoes this damage to all other nearby enemies of the same type. At Rank 5 and above: Damage is increased by 15% each time damage is echoed and is guaranteed to echo at least 5 times. May strike the same target multiple times. | |
| Lucky Hit: You have up to a x% chance to apply Hex of Flames. Hex of Flames deals 40% additional Fire damage each time you deal damage to the target. At Rank 7 and above: Hex of Flames explodes dealing damage to all nearby enemies when you land a critical strike. |
Mercenaries
During the Vessel of Hatred campaign, you will unlock Mercenaries to assist you. While you can choose freely early on, we recommend Subo for survivability and Raheir as a Reinforcement once you reach endgame.
Subo Skill Tree choices:
- Core Skill:
 Wire Trap
 - Core Passive:
 Ready At Hand
 - Iconic Skill:
 Trip Mines
 - Iconic Passive:
 Mastermind
Raheir Reinforcement choices:
- Opportunity Skill: Pick “Injured” as opportunity skill (it will automatically trigger when you become Injured).
- Reinforcement Skill:
 Provoke
Build Mechanics
Rotation and Playstyle
This ![]() Thunderspike Spiritborn build is simple and fast-paced, making it great for beginners or anyone who wants a reliable, low-maintenance playstyle. Thanks to Thunderspike’s consistent output and basic skill scaling, you rarely have to worry about resource generation.
Thunderspike Spiritborn build is simple and fast-paced, making it great for beginners or anyone who wants a reliable, low-maintenance playstyle. Thanks to Thunderspike’s consistent output and basic skill scaling, you rarely have to worry about resource generation.
Your general combat flow looks like this:
 Soar into enemies to engage quickly or reposition safely.
 Armored Hide grants Unstoppable and solid defense, especially with Gorilla Guardian. (
 Unrestrained Power).
 Ravager should be used before and after
  The Hunter to benefit from
  Intricacy.
 The Hunter boosts damage against Injured enemies.
 Ravager again.
- Spam
 Thunderspike for consistent, high DPS.
  Counterattack to dodge incoming attacks whenever necessary.
Runeword Synergy
Another interesting interaction worth mentioning within this section comes from the Runewords we use in this build to trigger powerful effects.
 Lith grants +25 Offering every time you stand still for 0.3s.
- At 600 Offering,
 Ohm triggers
  War Cry for bonus Movement Speed and damage.
 - That triggers
 Xol (activates when another class power is used), which grants 150 more Offering.
  Kry then casts the Spiritborn’s
  Vortex at 600 Offering, pulling in and damaging enemies.
This combination lets you repeatedly pull in enemies so you can continuously deal damage to them with minimal effort.
Which Elixirs Should You Use?
Visit the Alchemist to craft a Resistance Elixir based on what you need most, or pick from the recommended options below. Some Elixirs only drop from Helltides or Nightmare Dungeons. Also, do not forget to keep your health potion upgraded.
 Elixir of Precision provides the highest damage output increase.
 Elixir of Advantage increases your attack speed
 Elixir of Resourcefulness helps with resource issues, if you struggle with resource management
 Elixir of Fortitude for additional survivability
Season 7 Updates
For a full overview of what is new in Season 7, please take a look at our comprehensive season hub.
Here is a quick overview of seasonal changes relevant to this build:
 Enhanced Thunderspike: Vigor generated increased from 5 to 7.
 Endurance: Vigor generated increased from 5/10/15 to 10/20/30.
 Acceleration:
 - Previous – Gain 1/2/3 additional Evade Charges. After you Evade your next Eagle Skill deals 10/20/30%[x] increased damage.
- Now – Gain 1 additional Evade Charge. After you Evade, your Eagle Skills deal 8/16/24%[x] increased damage for 2 seconds.
 The Hunter: Rank 5: The Hunter’s initial damage will Execute Injured Non-Boss enemies.
 Kry: Overflow: Increased size.
 Xol: Updated tooltips on runes that invoke players’ skills to be more clear with the Xol rune effect.
Obol Gambling
Similar to Kadala in Diablo 3, the Purveyor of Curiosities lets you gamble your Obols for 750 item power gear at Level 60, making them a great way to fill in missing affixes, Aspects, or upgrades. There is also a small chance to receive an Ancestral piece with item power 800.
Changelog
- January 18th, 2025: Added Witchcraft Powers and Occult Gems for Season 7.
- November 10th, 2024: Added Lucky Hit: Up to a % Chance to Make Enemies Vulnerable – Ring Affix recommendation.
- October 5th, 2024: Updated Skills, Mercenary Skills, Tempers, Runes, and Gear.
- October 3rd, 2024: Guide theorycrafted and created for Vessel of Hatred, Season 6.


