

Build Introduction
This  Touch of Death endgame build focuses on turning the ability into a Core skill with Swarm of Swarms , and using the
  Rod of Kepeleke to make it also count as a Basic Skill. This combination makes the build deal excellent damage over time when Touch of Death is used at maximum Vigor. It also has additional durability to survive being in melee combat with dangerous enemies.
Starting new? Begin with our Quill Volley or Payback leveling builds, and then switch to this one at Level 70. Have questions or feedback about this guide? Join Cashlarond’s livestream!
Strengths and Weaknesses
- Massive AoE and Single Target Damage
- Poison Over Time Damage
- Needs to be close to enemies to deal damage
Build Requirements
 Harmony of Ebewaka
 Ring of the Midnight SunRod of Kepeleke
Want to know more about the Uniques supporting this setup? Jump to the Uniques section.
Quick Navigation
Use the table below to jump to the sections you are looking for.
Skill Bar and Skill Tree Points
 Ravager
 Counterattack
 Toxic Skin
 ScourgeTouch of Death
 The Devourer
Wondering what comes after Level 70? Head to the Paragon Board section to power up the build even further.
And if you want to see how everything plays out in combat, check out the Rotation and Playstyle section for a quick breakdown. If you are missing skill points, complete Renown Tier 1-3 in every zone.
Spiritborn Class Mechanic — Spirit Hall
The Spirit Hall allows you to combine two different Spirit Guardians or stick with just one.
- Primary Spirit Guardian: Gorilla
- Casting a Gorilla Skill deals 150% Thorns to enemies you hit and grants a Barrier for 2.5% of Maximum Life, for 3 seconds.
- All Skills are now also Gorilla Skills
- Secondary Spirit Guardian: Eagle
- Gain 20%[x] Vulnerable Damage and 5%[+] Critical Strike Chance
Gear, Stats, Gems, and Runes
The following sections cover all systems that are important if you want to improve the power of your character in the endgame of Diablo 4.
Legendary Aspects
Each Aspect is listed with its matching gear slot. Do your best to keep each Aspect in the assigned slot. Remember to salvage Legendary Items with higher Aspect values to unlock them in the Codex of Power, and then imprint them onto gear pieces with the preferred affixes. For best results, combine these Aspects with the right stat priorities.
With the addition of the Horadric Cube Crafting, and the Kullean Tuning Prism it is possible to add a second Aspect to your Amulet, even adding an Aspect to Uniques. While this can be attempted infinitely much like Masterworking or Tempering, it can take a lot of resource to reroll a very specific Aspect. Keep an eye out for any Aspect that has a large number for Offensive or Defensive scaling, as Aspects in the Amulet slot gain a 50% bonus to their potency.
| Gear Slot | Gems/Runes | Aspect / Unique | Legendary Aspect / Unique Power |
|---|---|---|---|
| Helm |  Grand Emerald Grand Emerald |  Harmony of Ebewaka Harmony of Ebewaka | According to your secondary Spirit hall choice, your skills are all additionally Jaguar, Eagle, Gorilla, or Centipede skills. Your skills deal x{x}% increased damage per Spirit type they have. |
| Chest |  Bac Bac Ohm Ohm |  Jacinth Shell Jacinth Shell | Spending Vigor Heals you for [7 – 10%] of your Maximum Life. Every second, your active Cooldowns each drain 10% of your Maximum Life from you to reduce their durations by 2 seconds. |
| Gloves |  Writhing Aspect Writhing Aspect | Enemies take [7.5 – 12.5%] increased Damage Over Time for every second they’ve been affected by a Damage Over Time, up to 10 seconds. | |
| Pants |  Tam Tam Que Que |  Aspect of Debilitating Toxins Aspect of Debilitating Toxins | You gain [20 – 30%] Damage Reduction, and Poisoned enemies deal 15% less damage to you. |
| Boots |  Aspect of Apprehension Aspect of Apprehension | Once an enemy is Slowed by at least 80%, they also become Feared for 3 seconds. You deal x [30 – 40%] increased damage to Feared enemies. | |
| Amulets(50% bonus) |  Grand Topaz Grand Topaz | Insatiable Aspect | Centipede Skills deal x [30 – 45%] increased damage, further increased to x [60 – 90%] against Crowd Controlled enemies. |
| Ring |  Grand Ruby Grand Ruby | Ring of the Midnight Sun | When you Critically Strike, you regain + [40 – 50%] of the Vigor you’ve spent in the last 2 seconds. Gain Counterattack’s Passive Effect. |
| Ring | Grand Emerald | Aspect of Supremacy | Enemies you kill while an Ultimate Skill is active grants a stack of Supremacy, each increasing your damage by x [6 – 9%] , up to x [60 – 90%]. When an Ultimate Skill ends, you gain 5 stacks of Supremacy, but you begin to lose one stack every second. |
| Weapon (200% bonus) | Grand Emerald | Rod of Kepeleke | Your Core Skills are now additionally Basic Skills and free to cast. When cast at Maximum Vigor, your Core Skills Consume all Vigor to cast at their largest Size, and become guaranteed Critical Strikes, with x [0.85 – 1.05%] increased Critical Strike Damage for each point of Vigor spent this way. |
Curious how this build compares to other endgame options? Take a look at our Endgame Build Tier List.
Stat Priority and Tempering Affixes
Affixes on the same line are considered to be equally important. Bolded affixes are the most important targets for Masterworking upgrades. Be sure to check our Tempering and Masterworking guides for more details about these topics. Want to jump back up to the gear table?
| Slot | Targeted Gear Affixes | Tempering Affixes |
|---|---|---|
| Helm | 1. Dexterity 2. Resistance to All Elements 3. Maximum Life 4. Maximum Resource |  Worldly Endurance – Maximum Resolve Stacks Worldly Endurance – Maximum Resolve Stacks |
| Chest | 1. Dexterity 2. Maximum Life 3. Armor 4. Maximum Resource | Worldly Endurance – Maximum Resolve Stacks |
| Gloves | 1. Dexterity 2. Damage over time Multiplier 3. Vulnerability Damage Multiplier 4. Poison Damage Multiplier | Elemental Finesse — Night – Poison Damage |
| Pants | 1. Dexterity 2. Armor 3. Maximum Life 4. Resistance to All Elements | Worldly Endurance – Maximum Resolve Stacks |
| Boots | 1. Dexterity 2.Maximum Life 3. Move Speed 4. Armor | Natural Motion – Movement Speed |
| Amulet | 1. Dexterity 2. Damage over Time Multiplier 3. Vulnerability Damage Multiplier 4. Maximum resource | Worldly Endurance – Maximum Resolve Stacks |
| Ring 1 | 1. Dexterity 2. Damage over Time Multiplier 3. Attack Speed 4. Vulnerability Damage Multiplier | Elemental Finesse — Night – Poison Damage |
| Ring 2 | 1. Dexterity 2. Damage over Time Multiplier 3. Poison Damage Multiplier 4. Attack Speed | Elemental Finesse — Night – Poison Damage |
| Weapon | 1. Damage over Time Multiplier 2. Dexterity 3. Maximum Life 4. Weapon Damage | Worldly Destruction – Attack Speed |
Looking for progression beyond gear? See our Paragon recommendations or Runewords Synergy next.
Uniques and Mythic Uniques
Below you will find information on Uniques and Mythic Uniques that are useful and recommended for this build. If a Unique or Mythic Unique is not listed here, it is NOT recommended and won’t benefit this specific build in any way.
Uniques
- Harmony of Ebewaka (Required): Your Skills are all additionally Jaguar, Eagle, Gorilla, or Centipede Skills based on your secondary Spirit Hall choice. Each Spirit type on a skill increases its damage by 50%.
- Ring of the Midnight Sun (Required): Refunds Vigor that you have spent in the last 2 seconds every time you Critically Strike, increasing the trigger rate of your Rod of Kepeleke resource spending Unique Effect
- Rod of Kepeleke (Required): Makes Touch of Death count as a Basic skill, as well as making it free to cast when you are not on full Vigor. When cast on full Vigor dramatically improves the damage, giving you massive poisons whenever you fill your Vigor bar.
Mythic Uniques
As of Season 14, all Uniques can drop as Mythics, and can be crafted in the Horadric Cube. For obvious reasons, you will want to try and find Mythic versions of all your Uniques. You can also choose to upgrade a single Unique to a Mythic and wear it. For this build you will want to focus on getting your Rod of Kepeleke upgraded to Mythic as a priority to scale your damage further.
If you are interested in target farming Mythic Uniques, check out our How to Farm Mythic Uniques guide. Or you can return to the Build Requirements.
Gems and Runewords
Listed below are the recommended Gems and Runewords to socket into your gear.
Gems
| Weapon Gems | Armor Gems | Jewelry Gems |
|---|---|---|
| Grand Emerald For More Damage | Grand Emerald For More Dexterity | Grand Gems For additional Resistances |
Runewords
Runewords are unlocked during the Vessel of Hatred campaign and replace gems in gear. Improve your build by combining a trigger Rune of Ritual and an effect Rune of Invocation. You can equip up to two Runeword pairs (four Runes) at a time. For a detailed guide on Runewords, check out our Runewords Guide!
Here are the recommended Runeword combination options for this endgame build of the Spiritborn:
| Runeword Combination | Runeword Effects |
|---|---|
| CirTzic |  Cir – Gain: 300 Offering, Cast 5 Skills then become exhausted for 3 seconds. Cir – Gain: 300 Offering, Cast 5 Skills then become exhausted for 3 seconds. Tzic – Requires: 200 Offering, Invoke the Spiritborn’s Concussive Stomp, dealing damage and Knocking Down enemies. Tzic – Requires: 200 Offering, Invoke the Spiritborn’s Concussive Stomp, dealing damage and Knocking Down enemies. |
| YulKry |  Yul – Gain: 50 Offering, Cast a Skill with a Cooldown. Yul – Gain: 50 Offering, Cast a Skill with a Cooldown. Kry – Requires: 300 Offering, Invoke the Spiritborn’s Vortex, dealing damage and Pulling In enemies. Kry – Requires: 300 Offering, Invoke the Spiritborn’s Vortex, dealing damage and Pulling In enemies. |
Paragon Board
Paragon unlocks at Level 70 and plays a big role in endgame progression. The following Legendary Nodes and Glyphs are recommended for this build. Keep in mind that each Glyph’s information and radius listed below is for the Level 100 version.
Need a refresher on how the skills are set up? Click here to return to the Skill Tree section.
Talismans – Seals and Charms
One new addition with the Lord of Hatred Expansion is the Talisman system. This allows you to add a Seal and up to 6 Charms that provide powerful bonuses to your character. This includes adding additional Unique effects without having to wear a specific unique, or even to collect new Set Charms that grant more powerful bonuses as you socket more of the set. For a more detailed breakdown check out our General Talisman Guide here!
This build uses the powerful effects of the Balazan’s Bite Charm Set to scale the effect of all of your poisons, and the  Sunstained War-Crozier Unique Charm to empower all of your Focus Skills with every upgrade, and to increase the damage of your Potency Skills, notably Touch of Death.
| Seal | 6 Charm Slots, Balazan’s Bite Unique Effect |
| Charm Slot 1 | Sunstained War-Crozier |
| Charm Slot 2 |  Fer of Balazan’s Bite Fer of Balazan’s Bite |
| Charm Slot 3 |  Mlor of Balazan’s Bite Mlor of Balazan’s Bite |
| Charm Slot 4 | 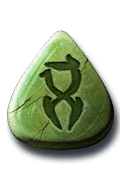 Phoba of Balazan’s Bite Phoba of Balazan’s Bite |
| Charm Slot 5 | 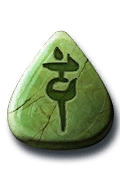 Linta of Balazan’s Bite Linta of Balazan’s Bite |
| Charm Slot 6 | 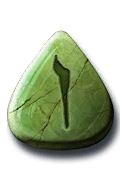 Berú of Balazan’s Bite Berú of Balazan’s Bite |
Seals and Charms also roll with random statistics, and while they are secondary to making sure you have the Set and Unique Charms, here is a list of powerful statistics you should keep an eye out for:
- Level of Gorilla/Centipede/Eagle Skills
- Maximum Resource
- Maximum Life, Armor, Resistances
Mercenaries
During the Vessel of Hatred campaign, you will unlock Mercenaries to assist you. While you can choose freely early on, we recommend Subo as your main companion, and Varyana as Reinforcement.
Subo Skill Tree choices:
- Core Skill:
 Molotov
 - Core Passive:
 Scorched Earth
 - Iconic Skill:
 Snipe
Snipe - Iconic Passive:
 Incendiary Bolt
Varyana Reinforcement choices:
- Opportunity Skill: Touch of Death
- Reinforcement Skill:
 Bloodthirst
Build Mechanics
Rotation and Playstyle
This build, like most Spiritborn Builds, doesn’t have a set specific rotation, instead focusing on using most of your skills on cooldown to maintain high uptime on powerful buffs while spamming Touch of Death to deal most of its damage. The Devourer can be used for a powerful, on demand burst of damage against tough enemies, and to provide additional healing over time through the The Devourer‘s Healing passive node.
Let’s see how this build will look in action:
- Use Ravager on cooldown to deal additional damage and gain additional Cooldown Reduction.
- Use Scourge on cooldown to fear nearby enemies and gain additional Damage Reduction.
- Use Counterattack on cooldown to increase your Dodge Chance and reduce Damage over Time taken.
- Use Toxic Skin on cooldown to gain healing and Vigor generation over time, and to grant you Unhindered.
- Use The Devourer to apply damaging debuffs to enemies, and increase your healing over time.
- Spam Touch of Death as your primary damage source.
In very difficult Endgame content you may encounter very dangerous enemies. In these situations it may be best to use a hit and run strategy, applying your Touch of Death and The Devourer damage over time effects and then moving away to avoid incoming damage, before re-engaging.
Runeword Synergy
- YulKry – Casting a few skills with a Cooldown will trigger the Spiritborn
 Vortex skill without needing to add it to the Skill Bar, allowing you to passively group enemies up through your regular skill use.
 - CirTzic – Casting 5 Skills will trigger the
 Concussive Stomp ability, knocking down nearby enemies, which will help keep you safe against more dangerous enemies.
Season 15 Updates
The Season of Hell’s Legacy brings with it a few new encounters and options for adding power to your character. For a breakdown of how the Season works, check out the full guide to the Season of Hell’s Legacy.
When choosing which Primeval to align with, consider the activities you most enjoy. If you spend your time farming Helltides or Infernal Hordes, you can empower them by choosing Diablo; if you run a lot of the Pit or Nightmare Dungeons, then you might want to choose Mephisto.
Soul Splinters drop at different rarities and provide the normal benefits of a gem, but with added passive bonuses. These can be amalgamated in the Horadric Cube to upgrade their rarity as you collect more of the same type. The additional bonuses come with a benefit and a drawback, so experiment with them to decide what works best for you.
Below are the recommended Soul Splinters for this build:
- Splinter of Pain
- Grants a huge boost to Damage Reduction, but lowers your Movement Speed
- Splinter of the Black Soulstone
- Grants a stacking Damage Buff for every monster you have killed in the last 15 seconds, but increases your damage taken for every stack
- Splinter of Hellfire
- Grants massively increased damage, but causes you to lose 100% Critical Strike Chance. You ignore this downside by using the Rod of Kepeleke, which guarantees a Crit when you attack at full Vigor.
- Grants massively increased damage, but causes you to lose 100% Critical Strike Chance. You ignore this downside by using the
Obol Gambling
Similar to Kadala in Diablo 3, the Purveyor of Curiosities lets you gamble your Obols for 850 item power gear at Level 70, making them a great way to fill in missing affixes, Aspects, or upgrades. There is also a small chance to receive an Ancestral piece with item power 900.
Changelog
- September 15th, 2026: Updated for Season 15, Hell’s Legacy
- June 26th, 2026: Updated for Season 14, Death Awakening
- April 28th, 2026: Added support for New Skill Tree
- April 25th, 2026: Preliminary Guide Update for Lord of Hatred Season 13
- September 20th, 2025: Merged the build back to one page. Added Chaos Perks and Chaos Armor for Season 10.
- July 31, 2025: Removed mention of alternative Duelist’s Aspect on Chest.
- June 28th, 2025: Added Horadric Spell and Jewels for Season 9.
- April 20th, 2025: Added Boss Powers for Season 8. Adjusted Skill Tree and Spirit Hall choices.
- January 15th, 2025: Adjusted the build for Season 7:
- Added Occult Gems and Witchcraft Powers recommendations.
- Removed Tyrael’s Might for Shroud of False Death on the chest.
- Switched Soar for Vortex.
- Changed gems and runewords.
- October 13th, 2024: Added Video Guide.
- October 11, 2024: Updated Paragon Board and changed Runewords from Weapon to Armor.
- October 9th, 2024: Updated Skills, Paragon, Gear, and exchanged Xol for Tam Rune.
- October 5th, 2024: Guide theorycrafted and created for Vessel of Hatred, Season 6.