Gate of the Setting Sun Heroic Dungeon Guide (WoD 6.1.2)
Table of Contents
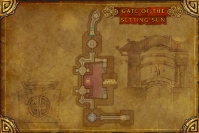
The Gate of the Setting Sun is a 5-man dungeon located between the Vale of Eternal Blossoms and the Dread Wastes on Pandaria. The dungeon is only open to level 90 players. It houses 4 encounters: Saboteur Kip'tilak, Striker Ga'dok, Commander Ri'mok, and Raigonn.
Introduction
The Gate of the Setting Sun is the only passage between the Vale of Eternal Blossoms and the Dread Wastes. It is currently closed, in an effort to contain the Mantid army and prevent it from invading the vale. Throughout the dungeon, you will combat the Mantid assault, which climaxes in their breaking through the main gate and entering the courtyard in front of it.
The dungeon has a linear layout during which you will progress through the ramparts before descending to the ground level to close the gate. The dungeon features both Normal (level 89+) and Heroic (level 90) modes. There are no differences in mechanics between Normal and Heroic modes. The only differences are increased health and damage done for all bosses and enemies.
| Gate of the Setting Sun | Gate Watch Tower |
|---|---|
|
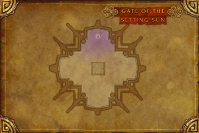
|
This guide will cover all of the four boss encounters, as well as the quests and achievements that are available in the dungeon.
Loot
The level of the items you can obtain from the Gate of the Setting
Sun is 463, with one exception, ![]() Klatith, Fangs of the Swarm,
which has an item level of 476.
Klatith, Fangs of the Swarm,
which has an item level of 476.
Armor
| Item Name | Armor | Slot | Main Stats | Source |
|---|---|---|---|---|
| Cloth | Head | Intellect/Spirit | Saboteur Kip'tilak | |
| Cloth | Shoulders | Intellect | Raigonn | |
| Cloth | Wrists | Intellect/Spirit | Raigonn | |
| Cloth | Hands | Intellect | Striker Ga'dok | |
| Cloth | Legs | Intellect | Commander Ri'mok | |
| Leather | Wrists | Agility | Saboteur Kip'tilak | |
| Leather | Legs | Agility | Raigonn | |
| Leather | Feet | Intellect | Striker Ga'dok | |
| Head | Agility | Commander Ri'mok | ||
| Waist | Agility | Striker Ga'dok | ||
| Feet | Agility | Raigonn | ||
| Plate | Chest | Intellect | Raigonn | |
| Plate | Shoulders | Strength | Striker Ga'dok | |
| Plate | Wrists | Strength/Dodge | Commander Ri'mok | |
| Plate | Hands | Strength/Mastery | Raigonn | |
| Plate | Waist | Strength | Saboteur Kip'tilak |
Weapons
| Item Name | Type | Main Stats | Source |
|---|---|---|---|
| Mace | Intellect | Raigonn | |
| Shield | Intellect | Raigonn | |
| One-Hand Dagger | Agility | Commander Ri'mok | |
| Bow | Agility | Raigonn | |
| Shield | Strength/Parry | Raigonn |
Amulets, Cloaks, Rings, and Trinkets
| Item Name | Type | Main Stats | Source |
|---|---|---|---|
| Amulet | Intellect/Hit | Saboteur Kip'tilak | |
| Cloak | Intellect/Spirit | That's a Big Bug! | |
| Cloak | Intellect/Hit | That's a Big Bug! | |
| Ring | Intellect/Spirit | Commander Ri'mok | |
| Trinket | Intellect/Damage | Striker Ga'dok | |
| Cloak | Agility | That's a Big Bug! | |
| Ring | Agility | Saboteur Kip'tilak | |
| Cloak | Strength | Raigonn | |
| Cloak | Strength/Mastery | That's a Big Bug! | |
| Cloak | Strength/Parry | That's a Big Bug! |
Quests
There are 2 quests that can be completed within the instance. They are both given by Bowmistress Li at the entrance of the dungeon.
The first quest is Lighting the Way. It requires you to light the flame signal, which is located on the northernmost part of the rampart. You will be able to access it right before fighting Commander Ri'mok, the third boss of the dungeon.
The second quest is That's a Big Bug!. It requires you to kill Raigonn, the final boss of the dungeon.
Only Lighting the Way has rewards. They have an item level of 440 (see loot section above).
Trash Mobs Before Kip'tilak
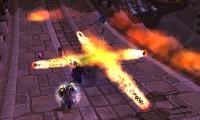 On your way to Saboteur Kip'tilak, the first boss of the instance,
you will fight several groups of trash mobs. While the mobs themselves do
not pose any threat, you will have to be aware of the bombs that other Mantid
units, who are flying above the ramparts, will regularly drop on you. These
bomb explode and create four damaging trails of fire that travel away
from the explosion. As you will see, this can become problematic when several
bombs go off at the same time.
Saboteur Kip'tilak
The fight with Saboteur Kip'tilak is relatively easy, especially since the preceding trash mobs have prepared you to deal with the Mantid bombs, which make up the only difficulty of the encounter.
In addition to dealing melee damage to the tank, Kip'tilak will often throw explosives (Stable Munitions) at random locations in his room.
When one of these explodes, trails of fire run through the room in each
of the cardinal directions (north, east, south, west). Similar trails of
fire are created by ![]() Sabotage, which the boss
will often cast on a random player, causing them to explode after a few seconds.
Sabotage, which the boss
will often cast on a random player, causing them to explode after a few seconds.
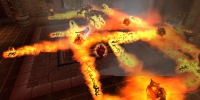 Stable Munitions are, as their name indicates, stable. They will detonate
only if hit by a trail of fire, which, as we explained above, can be the result
of another pack of Stable Munitions exploding or the result
of a player afflicted by
 ![]() Sabotage
exploding.
Sabotage
exploding.
Additionally, when Kip'tilak reaches 70% and 30% health, he will detonate all the Stable Munitions currently in the room with World in Flames.
The strategy for this boss is all about positioning. Each party member must
always position themselves in such a way that there are no bombs directly
north, east, south, or west of them. This way, they will not get hit by
trails of fire, and their ![]() Sabotage explosions
will not detonate additional bombs.
Sabotage explosions
will not detonate additional bombs.
Achievement: Bomberman
Completing the ![]() Bomberman achievement is very straightforward.
You need to get Saboteur Kip'tilak to 72 or 73% health and then hold off DPS
until he has thrown 15 Stable Munitions around the room. During this
time, party members need to avoid detonating them with
Bomberman achievement is very straightforward.
You need to get Saboteur Kip'tilak to 72 or 73% health and then hold off DPS
until he has thrown 15 Stable Munitions around the room. During this
time, party members need to avoid detonating them with
![]() Sabotage. When you reach 15 Stable Munitions, push the
boss below 70% and he will detonate all the bombs with World in Flames.
Sabotage. When you reach 15 Stable Munitions, push the
boss below 70% and he will detonate all the bombs with World in Flames.
Striker Ga'dok
Striker Ga'dok is located in the Gate Tower Watch, so just above the north pillar of the gate. Friendly NPCs will activate an elevator for you to get there.
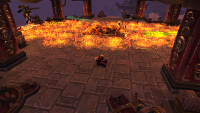 As most heroic dungeon fights, the encounter with Striker Ga'dok is not
difficult, provided that you properly pay attention to what matters. The most
important aspect of the fight is
 ![]() Strafing Run, which happens twice, when
Ga'dok reaches 70% and 30% health. When this happens, the boss engulfs half the
platform in flames twice (first from west to east, and then from north to south).
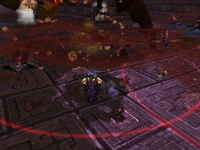
As you can see in the image on the left, the flames
separate the platform in two and it is important that you stick with the rest
of your group. This will enable you to properly take care of the
Krik'thik Strikers that will attack your group during the Strafing Run.
Strafing Run, which happens twice, when
Ga'dok reaches 70% and 30% health. When this happens, the boss engulfs half the
platform in flames twice (first from west to east, and then from north to south).
As you can see in the image on the left, the flames
separate the platform in two and it is important that you stick with the rest
of your group. This will enable you to properly take care of the
Krik'thik Strikers that will attack your group during the Strafing Run.
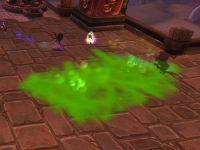 In addition to that, you need to be aware of
 ![]() Acid Bombs, which are regularly
dropped by Krik'thik Disruptors. These bombs create pools of poison on the
platform's surface.
Acid Bombs, which are regularly
dropped by Krik'thik Disruptors. These bombs create pools of poison on the
platform's surface.
Finally, healers should pay attention to ![]() Impaling Strike and
Impaling Strike and
![]() Prey Time.
Prey Time.
 Impaling Strike deals Physical damage to the tank equal to 50% of their
health, so they need to be topped off.
 Prey Time is a damaging DoT that the boss will regularly apply on
party members.
Commander Ri'mok
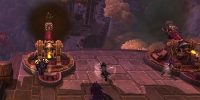 After defeating Ga'dok, you have to use the cannons at the Gate Watch Tower to
secure the northern ramparts where you will be able to light the flame signal
for Lighting the Way. Then, you will face a few adds before being able
to fight Commander Ri'mok.
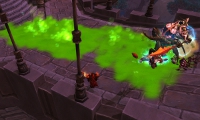 During the fight, Ri'mok has to be continuously moved up the ramp in order
to prevent him from standing in the poison pools that he creates with
![]() Viscous Fluid. Indeed, standing in them causes him to stack a buff on
himself that increases his damage dealt and reduces his damage taken. It
stacks up to 5 times.
Viscous Fluid. Indeed, standing in them causes him to stack a buff on
himself that increases his damage dealt and reduces his damage taken. It
stacks up to 5 times.
Other than that, you need to avoid standing in front of him as he has
a damaging frontal attack called ![]() Frenzied Assault.
Frenzied Assault.
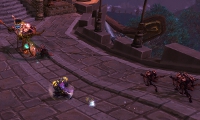 Finally, Krik'thik Swarmers and Krik'thik Saboteurs will regularly
join the fight and need to be killed.
Healers need to watch out for ![]() Bombard, which the Saboteurs will
regularly cast. This ability deals damage to all players.
Bombard, which the Saboteurs will
regularly cast. This ability deals damage to all players.
Achievement: Conscriptinator
Once Commander Ri'mok is defeated, three Krik'thik Conscripts will appear
on the rampart, close to the entrance, enabling you to complete
![]() Conscriptinator. Upon dying, they leave behind pool of
poison that gives you a stack of
Conscriptinator. Upon dying, they leave behind pool of
poison that gives you a stack of ![]() Resin Residue when you step in it.
You need to stack this debuff three times, by stepping in the pool of
poison left behind by each of the three Krik'thik Conscripts.
Resin Residue when you step in it.
You need to stack this debuff three times, by stepping in the pool of
poison left behind by each of the three Krik'thik Conscripts.
Note that ![]() Resin Residue lasts 1 minute, so you will need to
kill the second Conscript at most 1 minute after the first, and the
third at most 1 minute after the second.
Resin Residue lasts 1 minute, so you will need to
kill the second Conscript at most 1 minute after the first, and the
third at most 1 minute after the second.
Also, ![]() Resin Residue increases the damage you take from
Resin Residue increases the damage you take from
![]() Resin Burst, one of the abilities the Conscripts cast. Healers
need to watch our for extra damage taken as the fight against
the Conscripts progresses.
Resin Burst, one of the abilities the Conscripts cast. Healers
need to watch our for extra damage taken as the fight against
the Conscripts progresses.
Raigonn
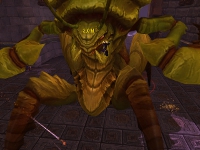 After defeating Commander Ri'mok, the Mantid will break open the Gate
of the Setting Sun, giving a chance to Raigonn, the giant Kuchong, to
enter the gate's courtyard. There, he will hammer the last rampart that still stands
between the Vale of Eternal Blossoms and the Mantid armies.
This final boss encounter is a two-stage fight. During Phase One, you will have to break Raigonn's carapace, all the while dealing with a number of adds. During Phase Two, Raigonn will fixate on random party members and you need to DPS him down.
Raigonn never needs to be tanked, but some of the adds do.
Phase One
During Phase One, you must prioritise the adds over Raigonn.
Below, you will find a list of the various types of adds you have to contend with.
-
 Krik'thik Swarm Bringers fixate on a random party member with
  Screeching Swarm,
inflicting Shadow damage every second to the targeted player, as well as to players
within 20 yards. Killing the Swarm Bringers should be the top priority during this
fight.
 -
 Krik'thik Protectorates come in waves of 8. They need to be tanked and
AoE-ed down. When they reach 20% health, they cast
  Hive Mind, increasing
the attack speed of remaining nearby Protectorates. Therefore the tank and healer
should expect a damage spike when this happens. DPS players should damage all the
Protectorates evenly until they all reach 20%, before killing them one by one.
 -
 Krik'thik Engulfers fly above and create tornados called
 Engulfing Winds on the ground. These tornadoes deal
proximity damage within 3 yards and should be avoided.
Raigonn should be taken care of whenever you are not busy with adds.
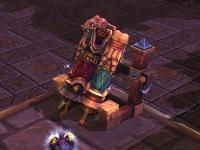 He keeps battering the rampart to the Vale of Eternal Blossoms by using
![]() Battering Headbutt. He cannot be directly damaged, so you need
to break his carapace by attacking his Weak Spot
To reach this weak spot, you need
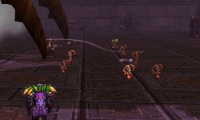
to use one of the launchers (as pictured on the left). Each time Raigonn uses
Battering Headbutt. He cannot be directly damaged, so you need
to break his carapace by attacking his Weak Spot
To reach this weak spot, you need
to use one of the launchers (as pictured on the left). Each time Raigonn uses
![]() Battering Headbutt, he throws all enemies attacking his weak spot on the ground, and
damages everyone within 10 yards of the impact. So, remember to jump off
him before the impact.
Battering Headbutt, he throws all enemies attacking his weak spot on the ground, and
damages everyone within 10 yards of the impact. So, remember to jump off
him before the impact.
Phase Two
After his carapace has been broken, Raigonn enters Phase Two. He takes
increased damage, because of his ![]() Broken Carapace, and keeps using
Broken Carapace, and keeps using
![]() Fixate on a random player. He does not need to be
tanked. Players fixated upon must drive him away from other party members because
he regularly casts
Fixate on a random player. He does not need to be
tanked. Players fixated upon must drive him away from other party members because
he regularly casts ![]() Stomp.
Stomp.
Adds will no longer be spawning, but you may have leftovers from Phase One. You may choose to finish them.
Achievement: Mantid Swarm
To complete ![]() Mantid Swarm achievement, you need to defeat Raigonn
without killing any of the adds. The idea, is to use all your available cooldowns
during Phase One to push Raigonn into Phase Two with as few adds as possible.
Mantid Swarm achievement, you need to defeat Raigonn
without killing any of the adds. The idea, is to use all your available cooldowns
during Phase One to push Raigonn into Phase Two with as few adds as possible.
There is a high amount of randomness associated with this achievement, as some waves of adds are a lot more difficult to deal with than others.
Final Considerations
This concludes our Gate of the Setting Sun dungeon guide. If you find any inconsistency or mistake, feel free to comment or send us an e-mail.
Changelog
- 21 May 2013: Patch 5.3 update. Added mention of normal-mode difficulty.
- Blizzard Breaks Silence on Puzzling Cartel Chips in Patch 11.1.5
- Chalice Quest NPC Rewards Temporarily Disabled Disabled in Season of Discovery
- Has The Catalyst Killed Raiding or Improved the Game? WoW Heroic Raid Progression Since Legion
- Undercoin Transfers Now Possible on 11.1.5 PTR — Bug or Feature?
- The Music of Azeroth: Community’s Favorite Soundscapes
- This Hunter Transmog Turned Heads on Reddit—and Here’s the Full Item List
- What’s Still in Your Bags? Players Reveal the Weirdest Items They Can’t Delete
- Two Mounts Drop in the Scarlet Enclave Raid — Here’s Where to Get Them
