
Windwheel Aster Farming Route Guide for Genshin Impact
This guide will show you efficient farming routes to farm all 73 available Windwheel Aster from Fontaine is under 5 minutes. Make sure to study these routes and learn them by heart to speed up your farming!
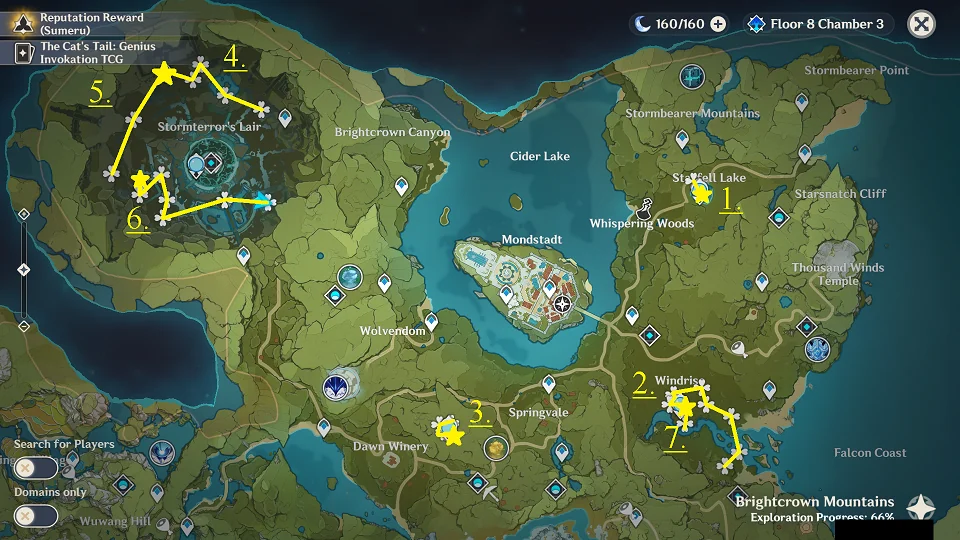
1.
Starfell Lake Windwheel Aster Farming Route
This route takes you through Starfell Lake and gets you 2 Windwheel Asters in roughly 5 seconds.
Screenshots of all Locations
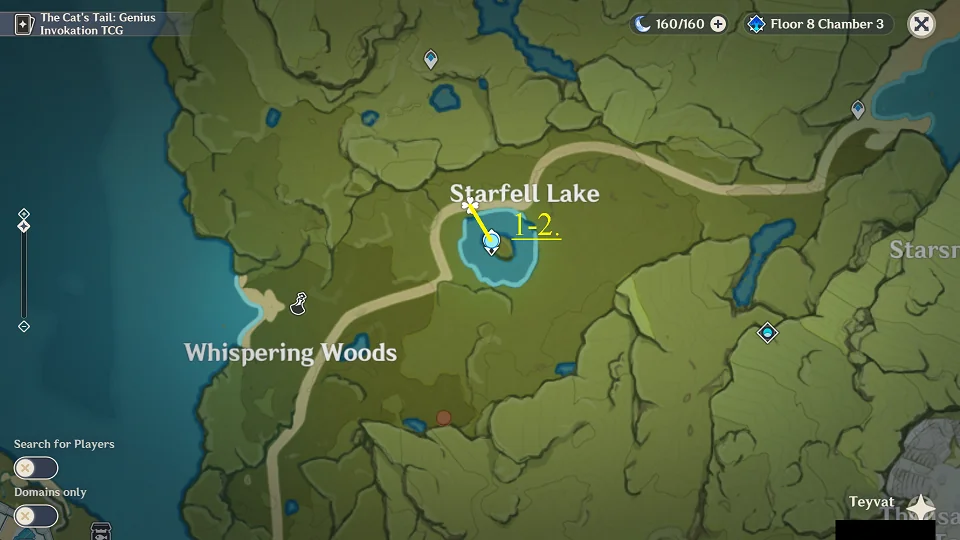
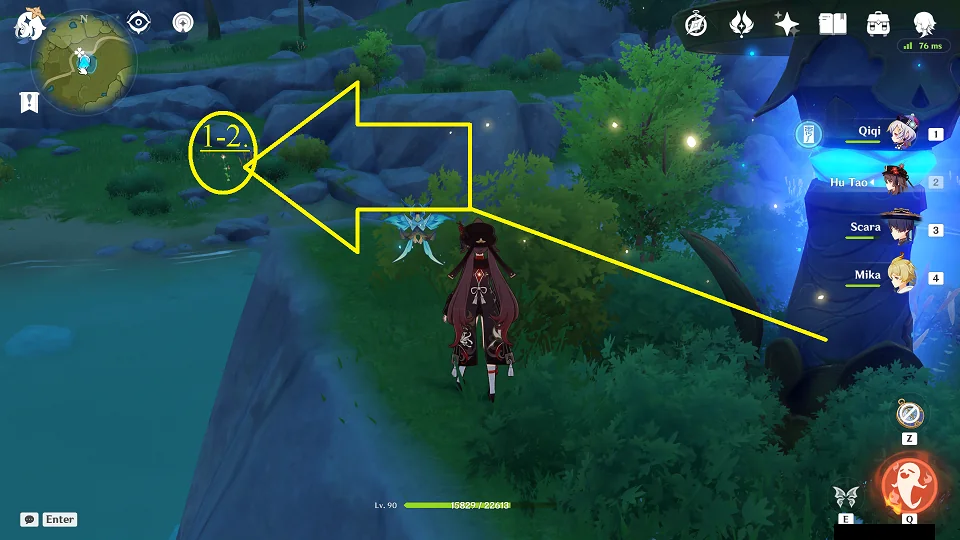 How to reach Nodes #1 and #2 from the Teleport
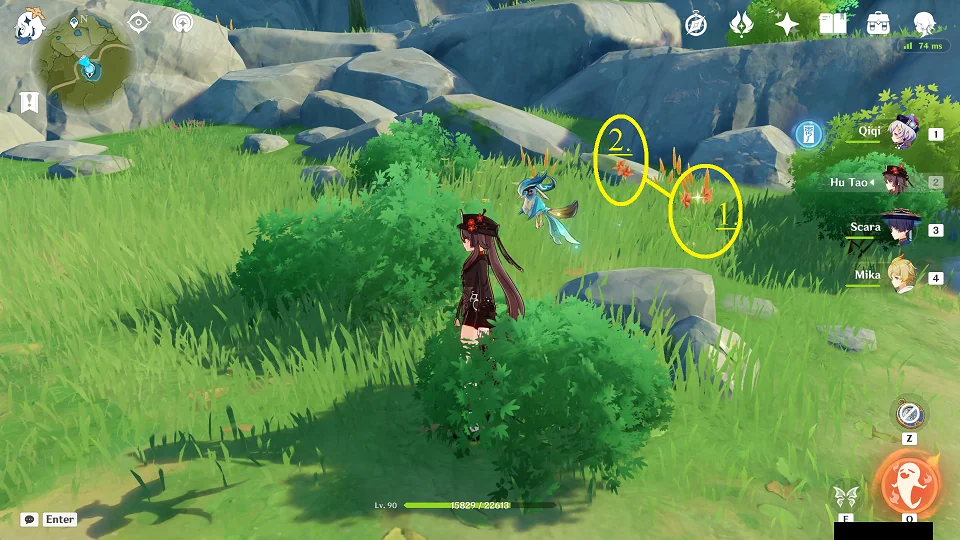 Nodes #1 and #2
2.
Windrise Windwheel Aster Farming Routes
These 2 routes start in Windrise and can get you 20 Windwheel Asters in roughly 1m20.
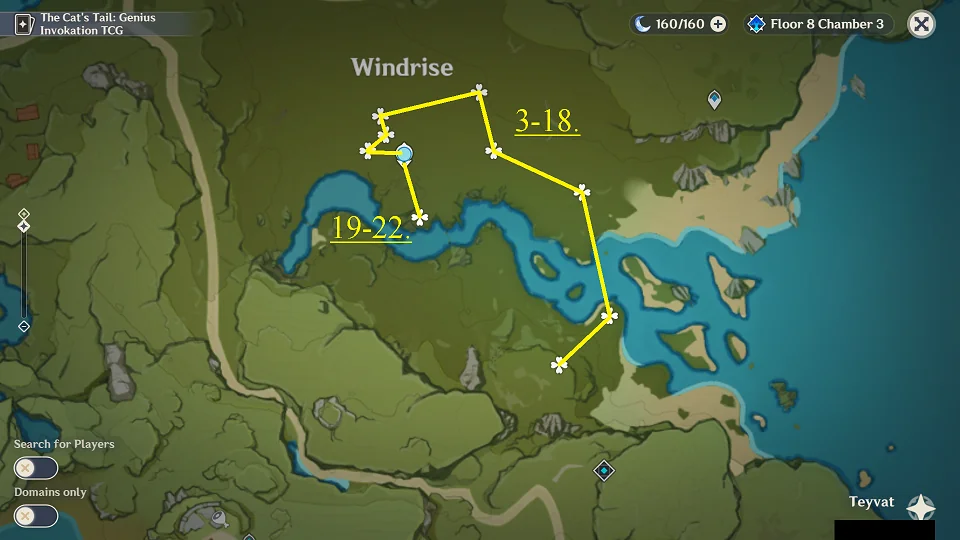
Screenshots of all Locations
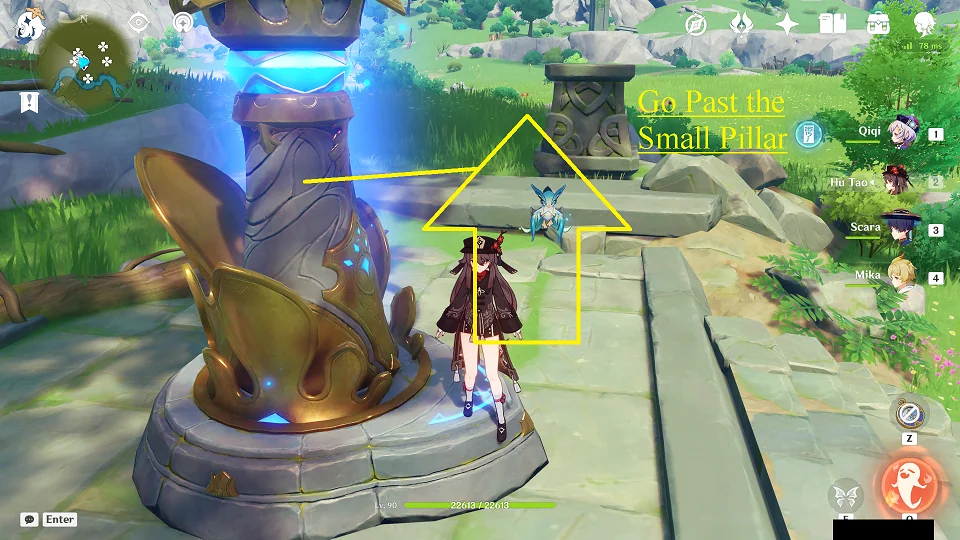 How to reach Node #3 from the Teleport
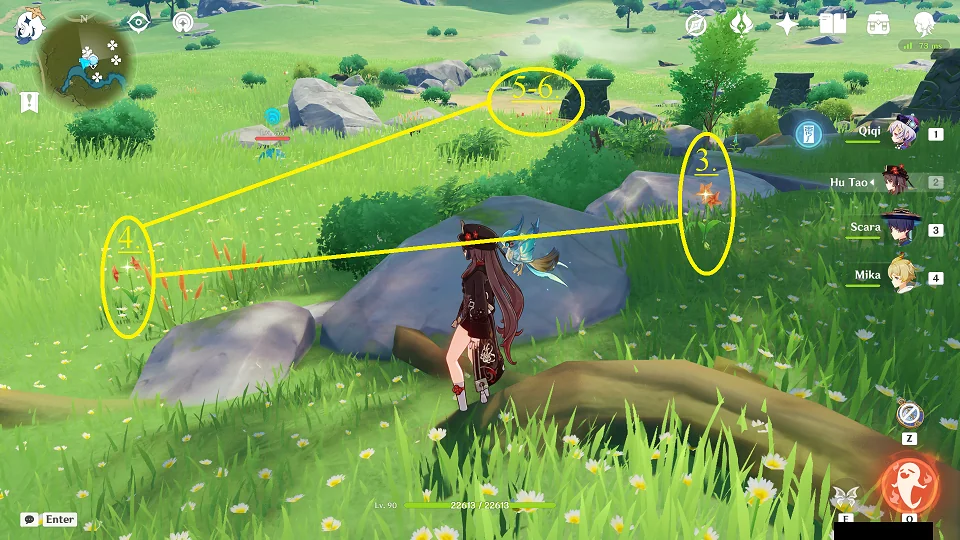 Nodes #3, #4, #5, and #6
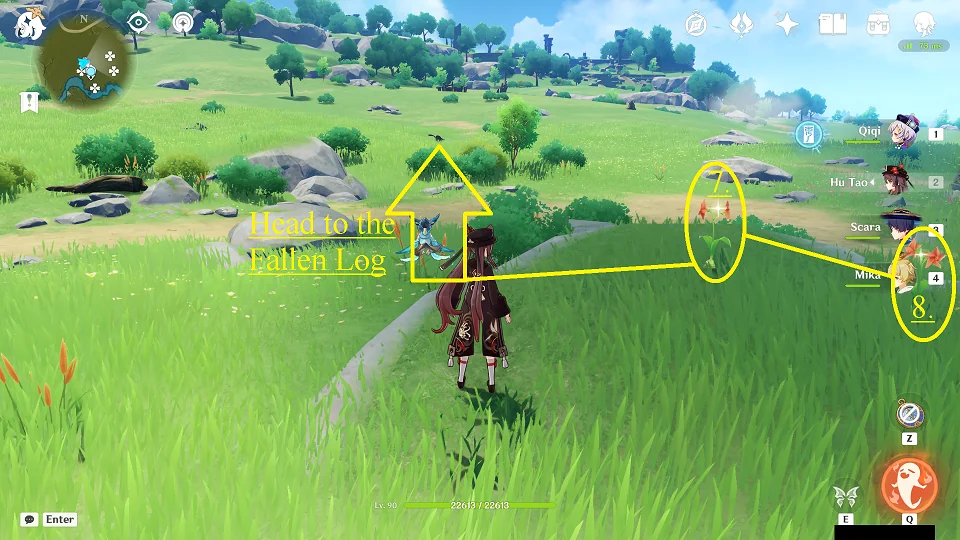
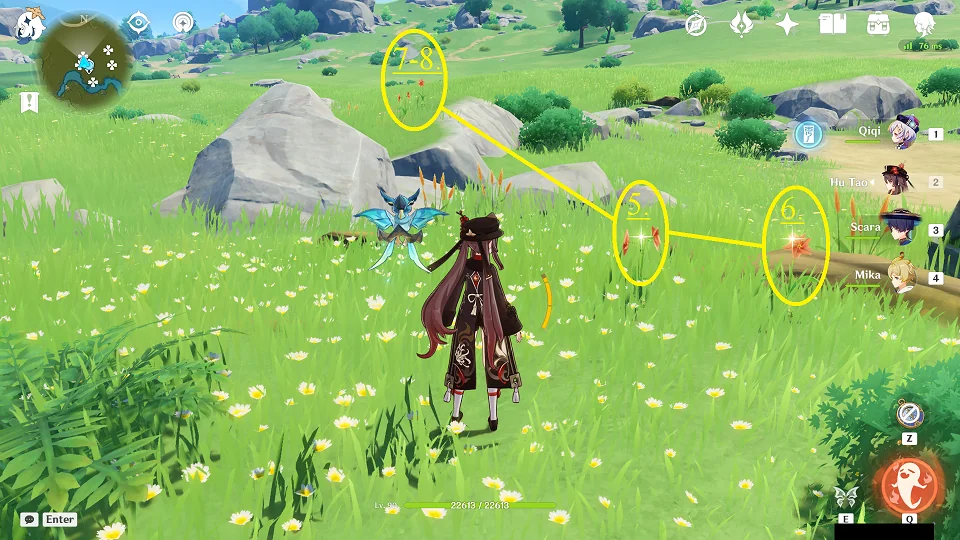 Nodes #5, #6, #7, and #8
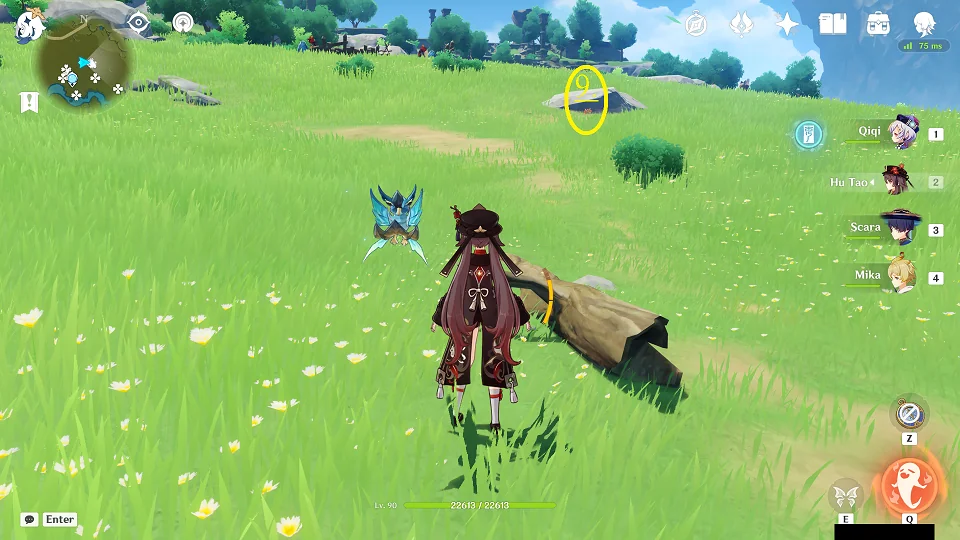
 Towards Node #9
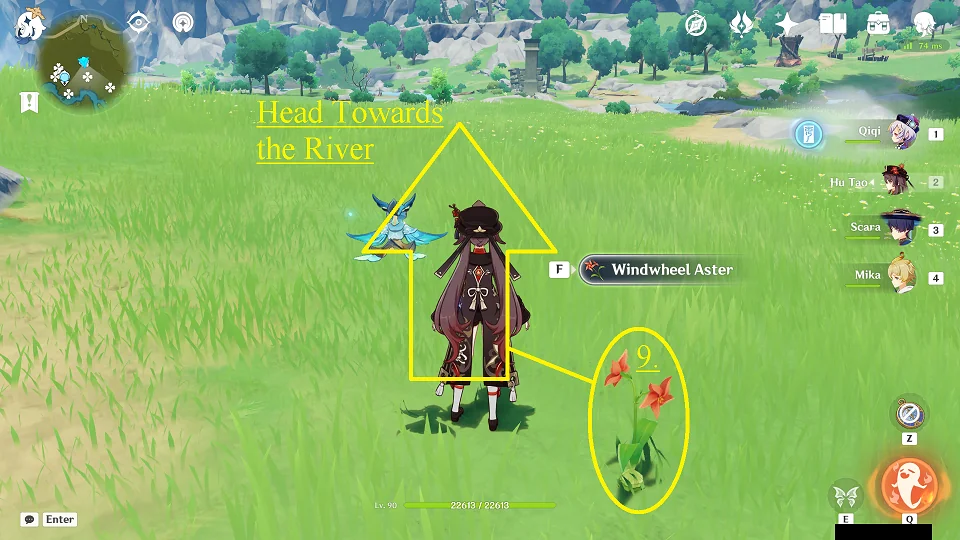
 Node #9
 Towards Node #10
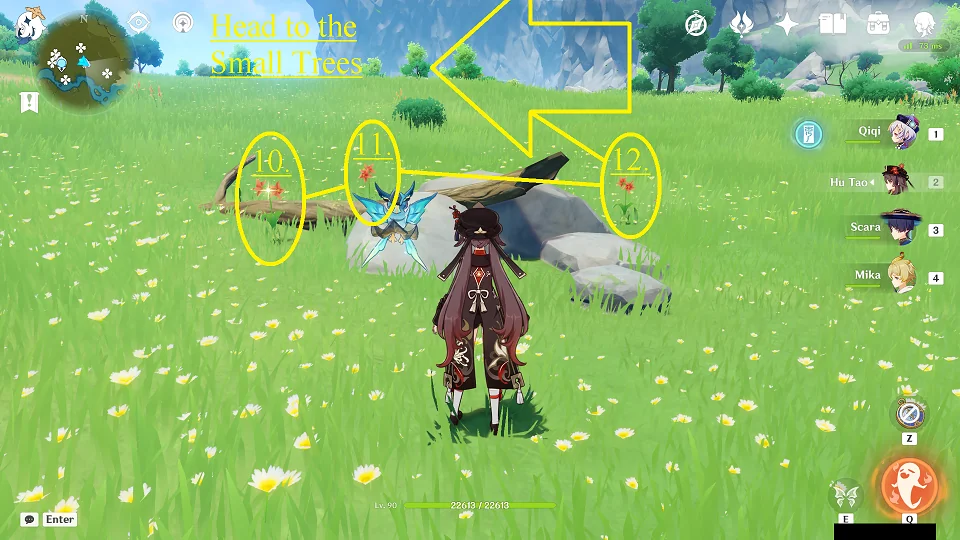 Nodes #10, #11, and #12
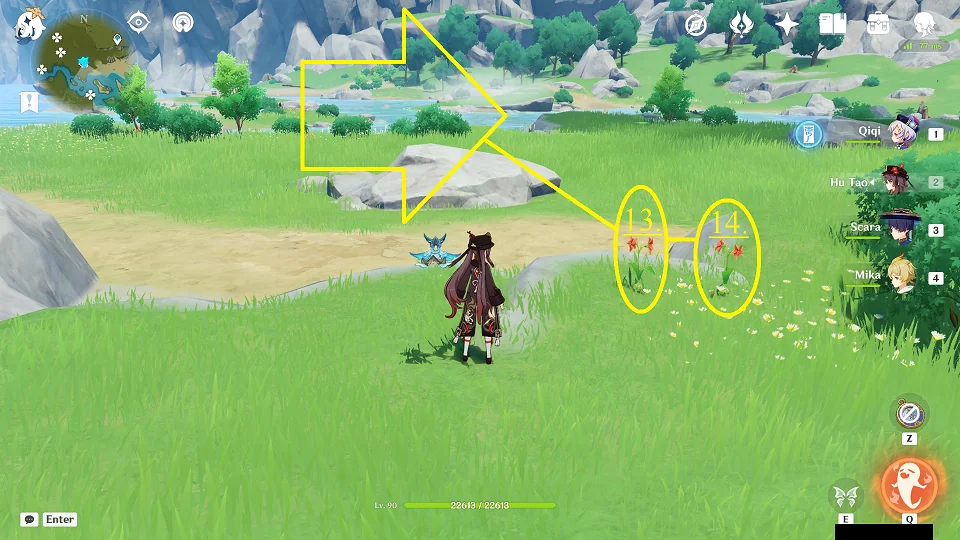
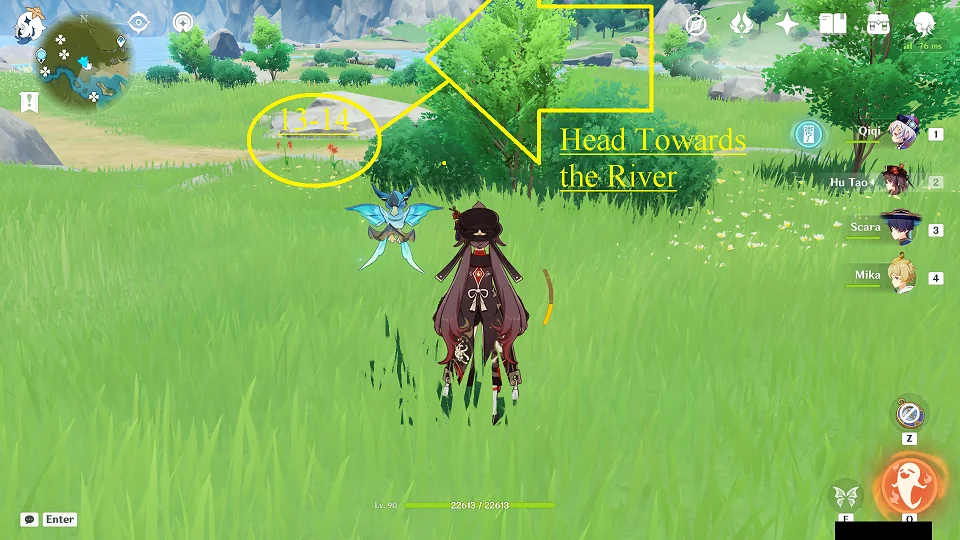 Nodes #13 and #14
 Towards Node #15
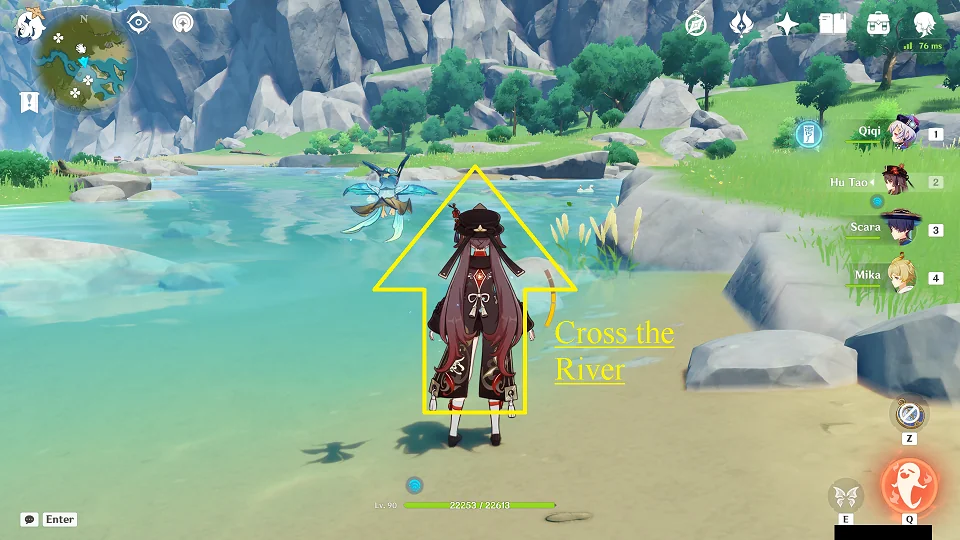 Towards Node #15 again
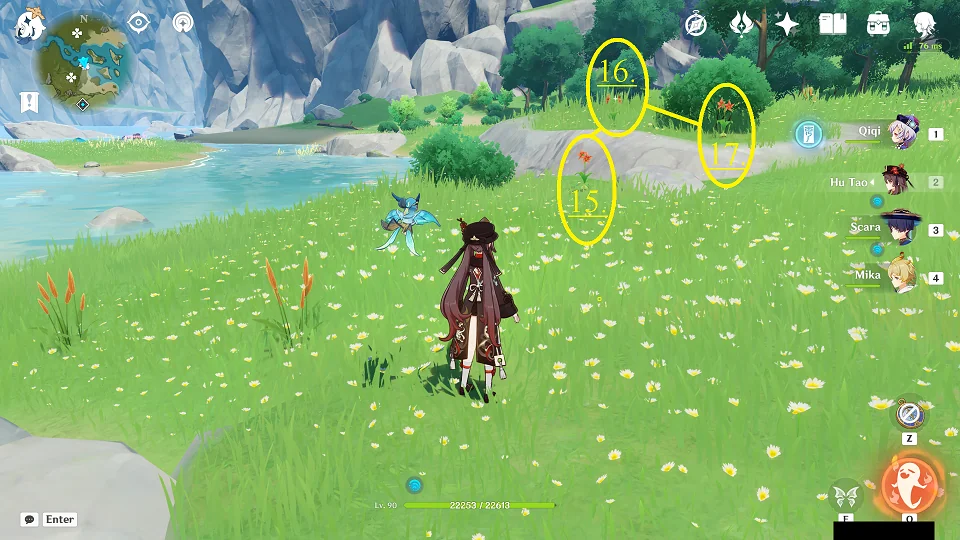 Nodes #15, #16, and #17
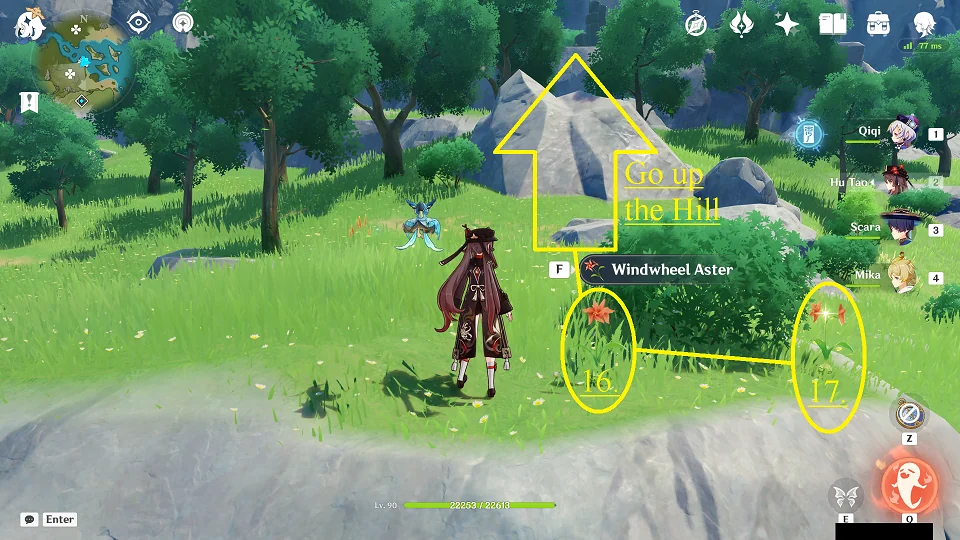 Towards Node #18
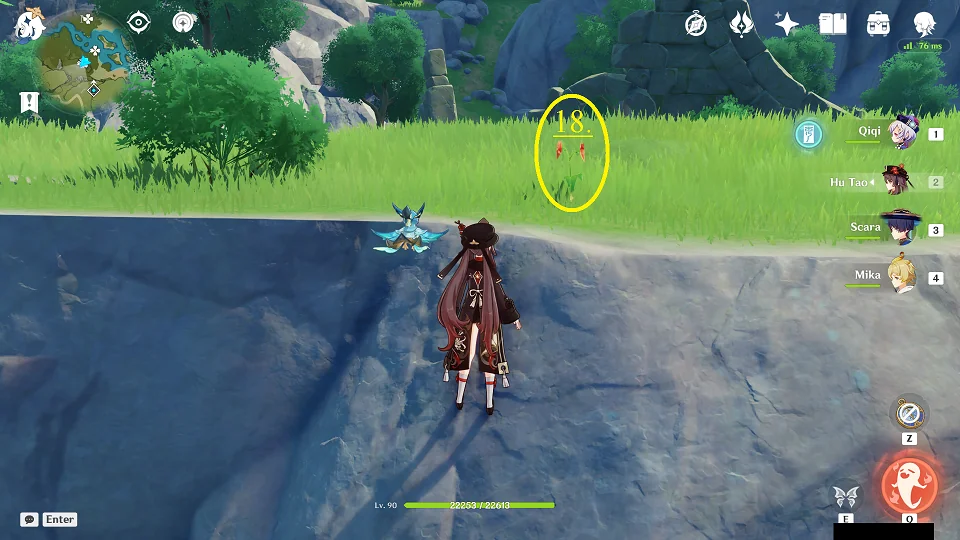 Node #18
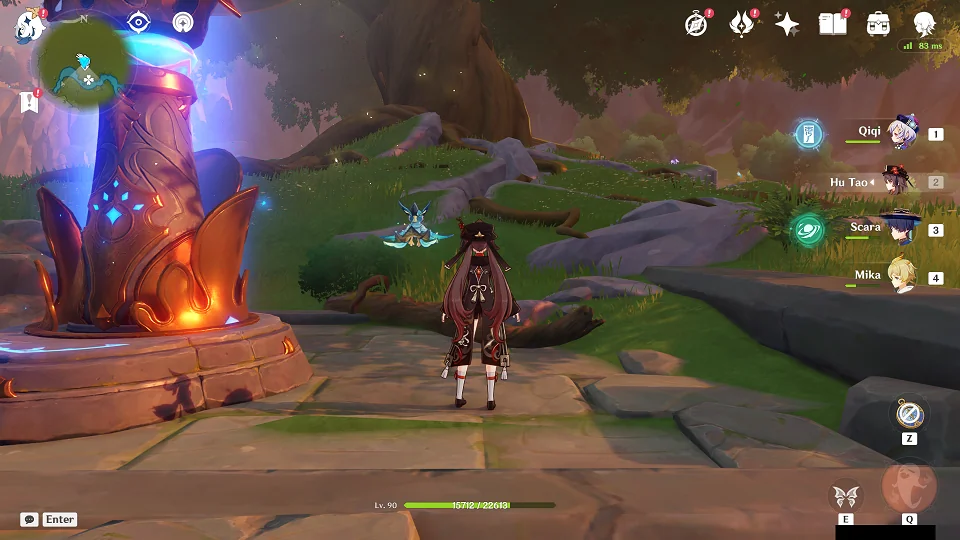 How to reach Node #19 from the Teleport
 Towards Node #19
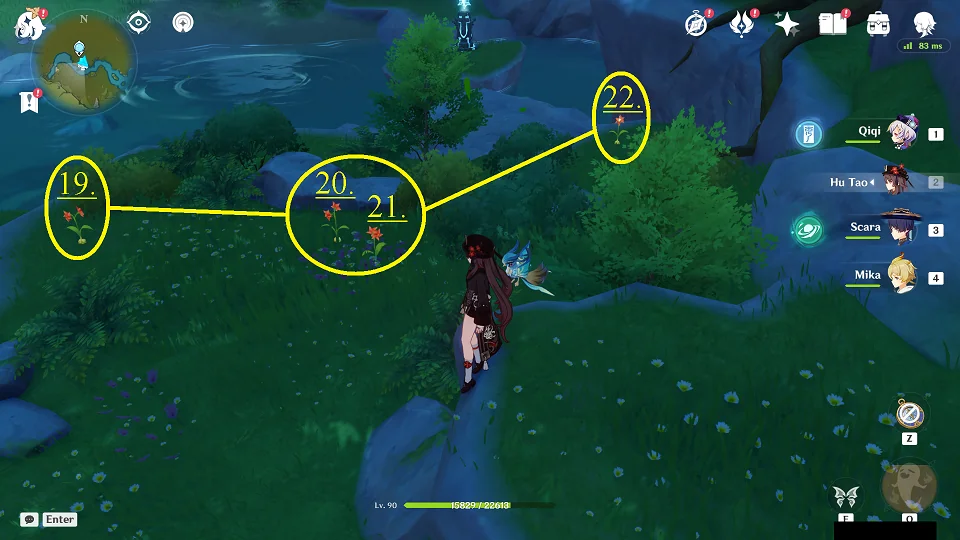 Nodes #19, #20, #21, and #22
3.
Windwail Highland Windwheel Aster Farming Routes
This route start in Windwail Highland and can get you 9 Windwheel Asters in slightly less than 20 seconds.
Screenshots of all Locations
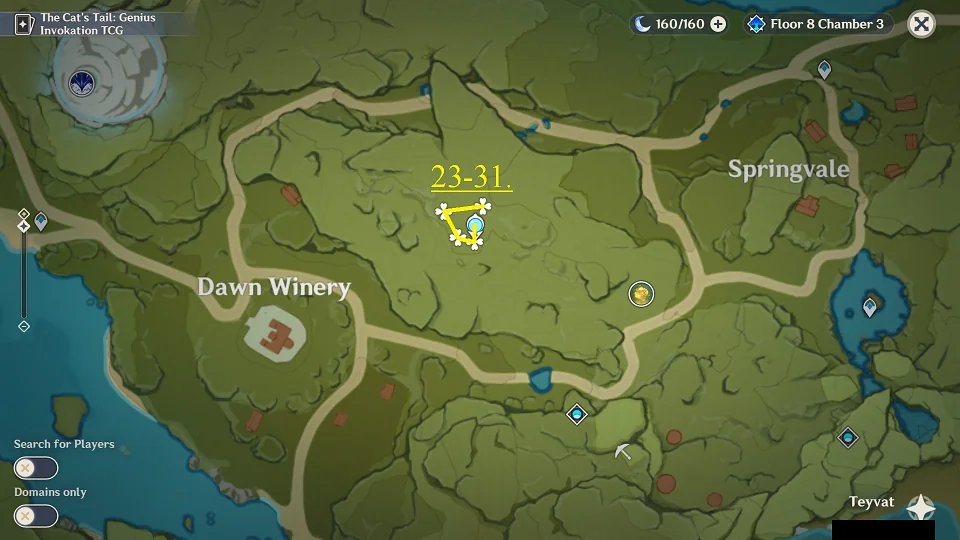
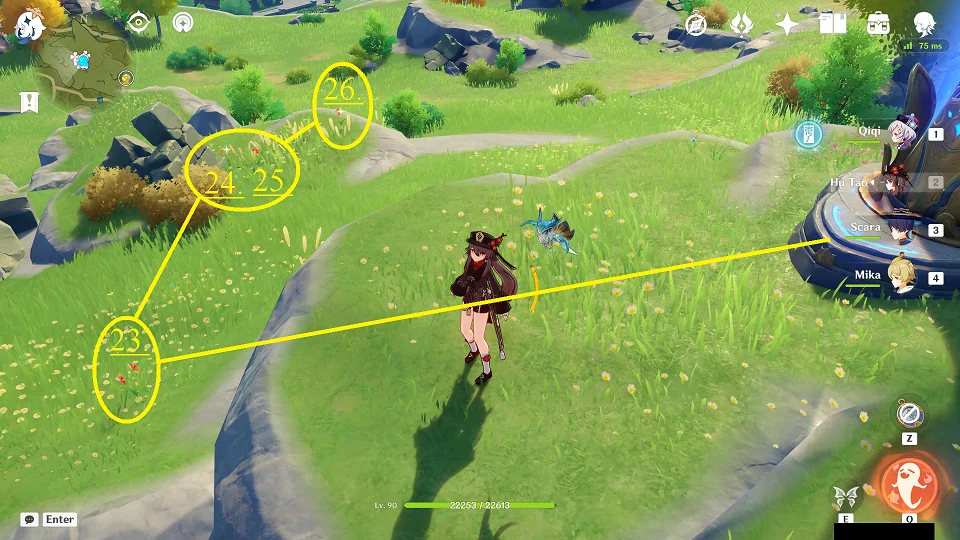 How to reach Nodes #23, #24, #25, and #26 from the Teleport
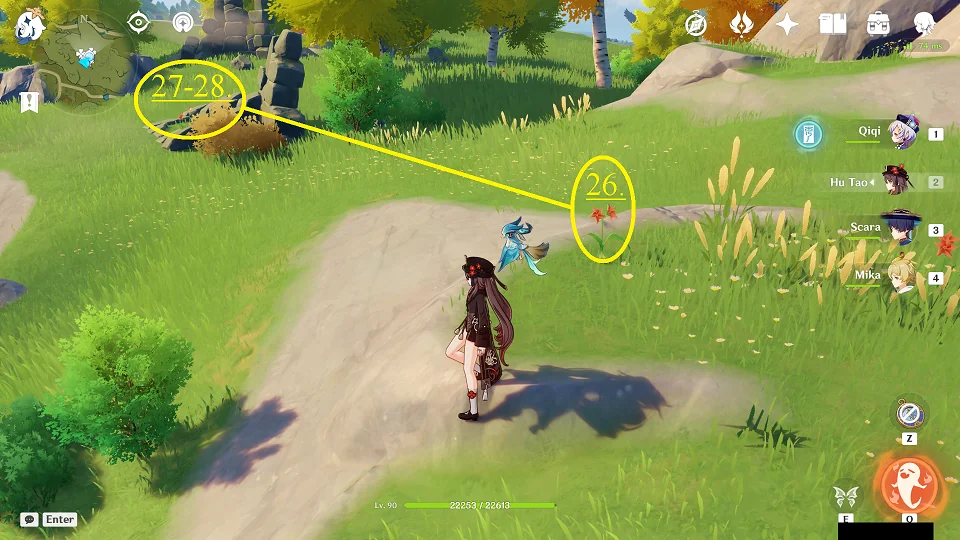 Towards Node #27
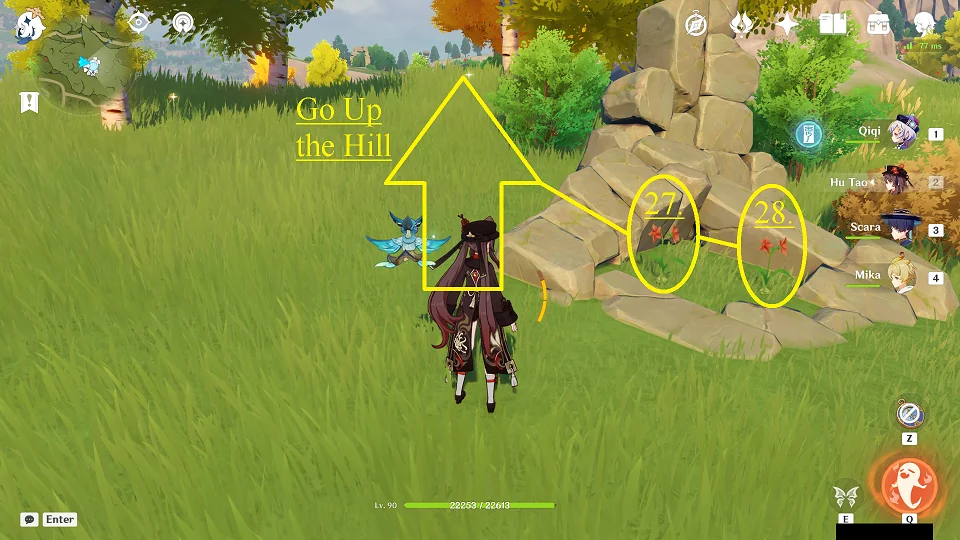 Nodes #27 and #28
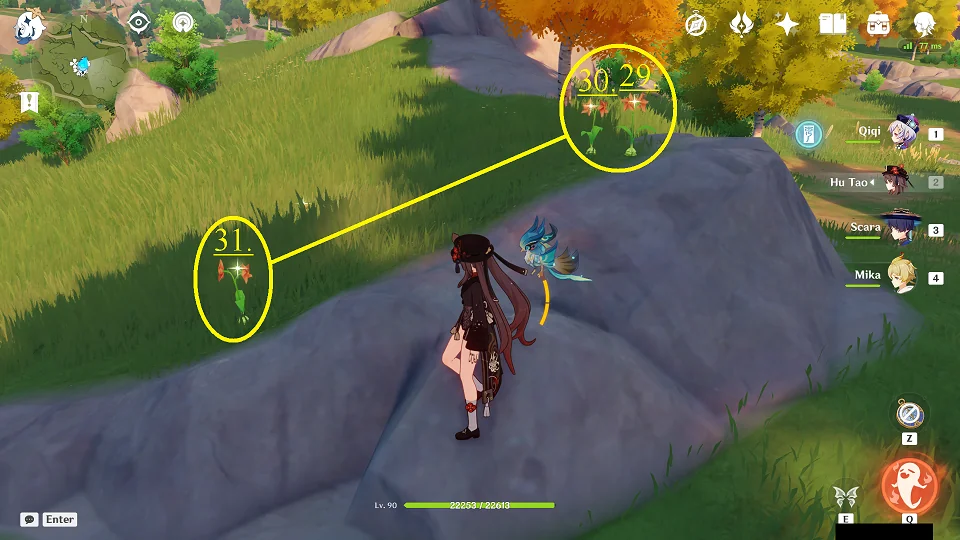 Nodes #29, #30, and #31
4.
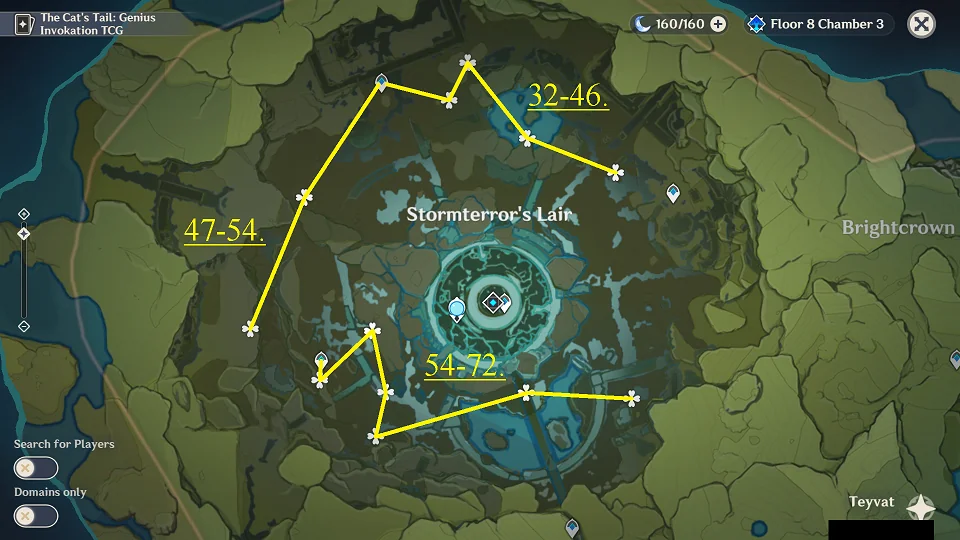
Stormterror's Lair Windwheel Aster Farming Routes
These 3 routes starts in the Stormterror's Lair and will net you 42 Windwheel Asters in slightly under 3m15.
Screenshots of all Locations
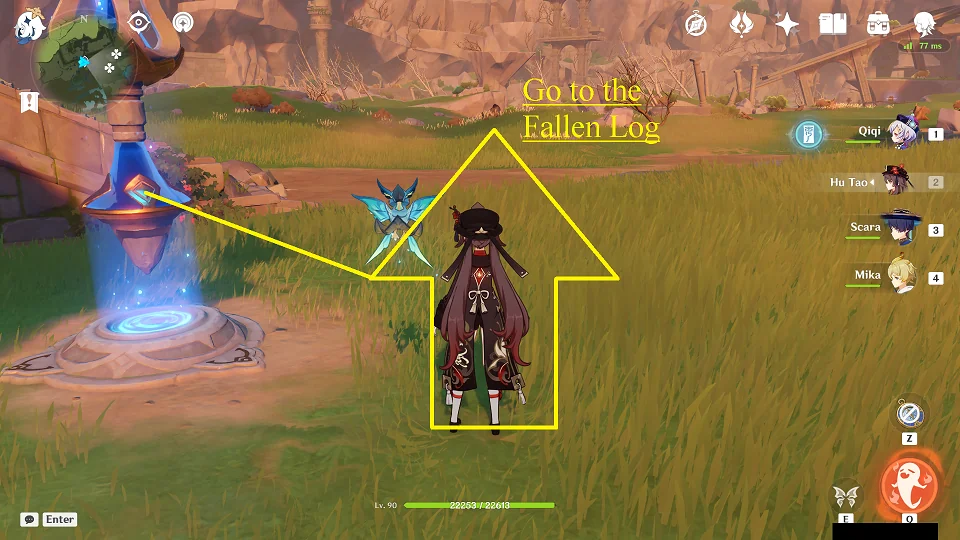 How to reach Node #32 from the Teleport
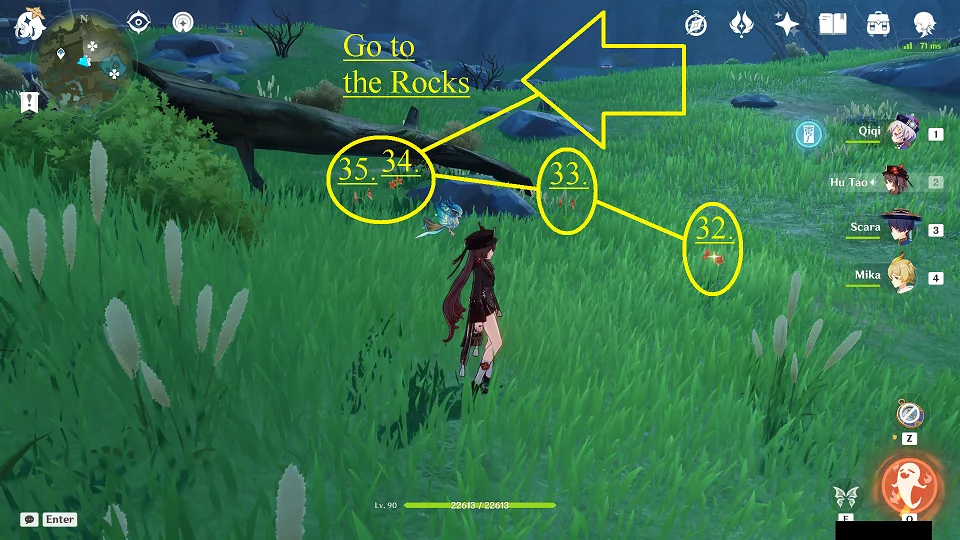 Nodes #32, #33, #34, and #35
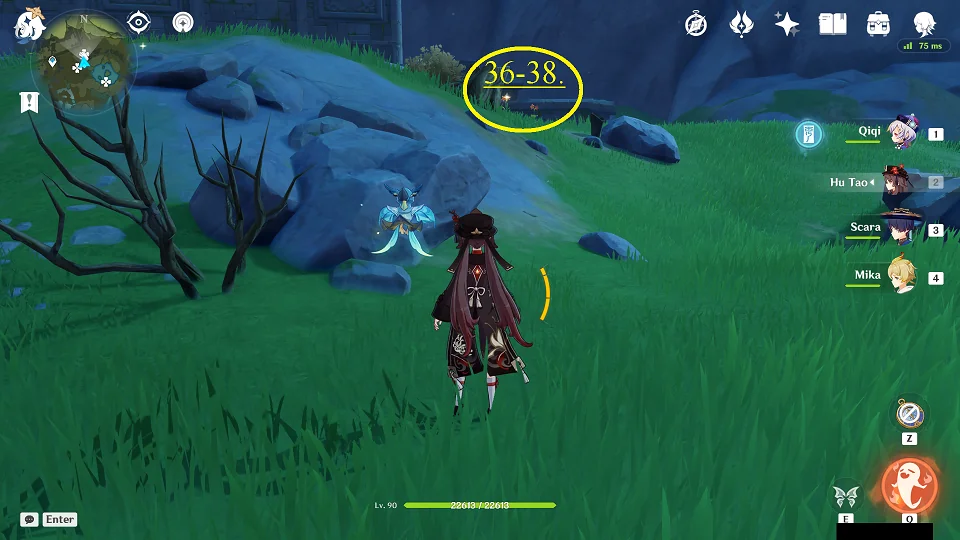 Nodes #36, #37, and #38
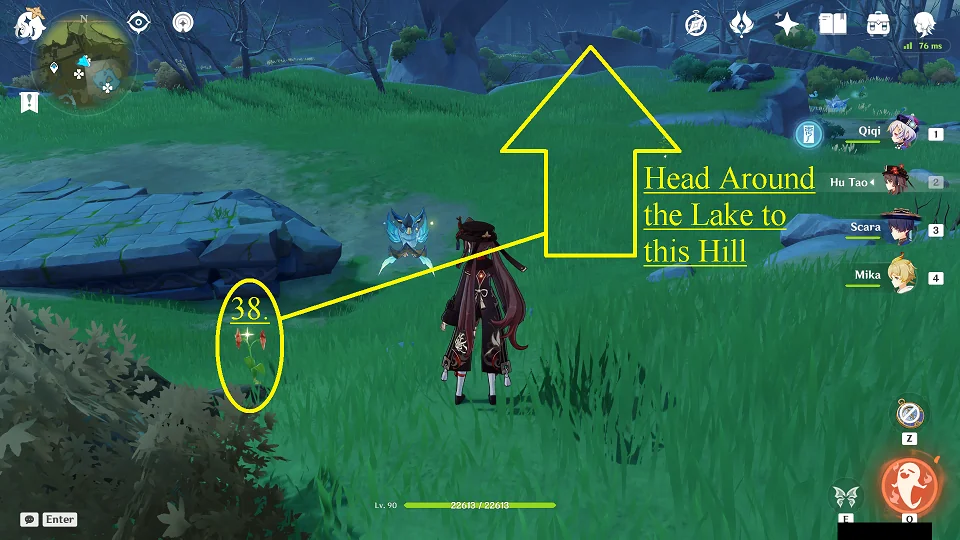 Towards Node #39
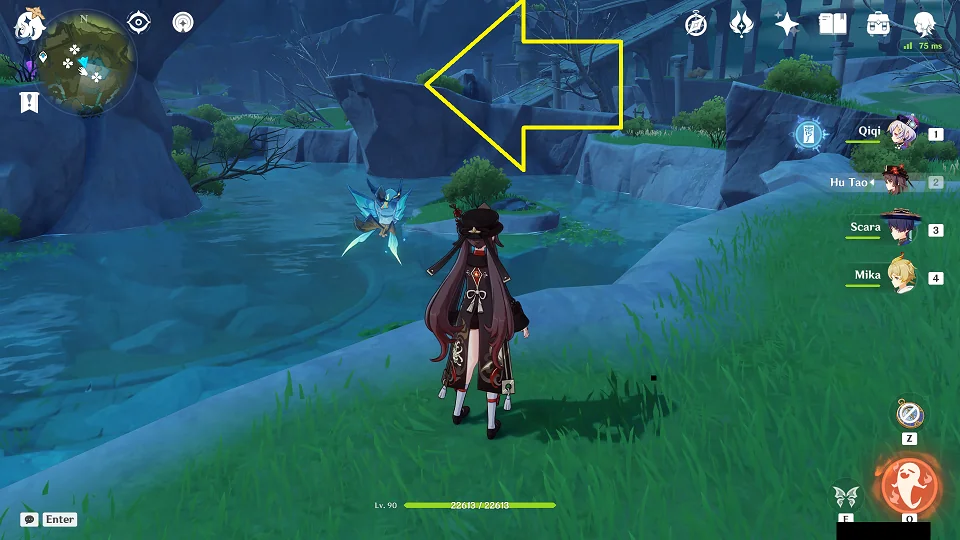 Towards Node #39 again
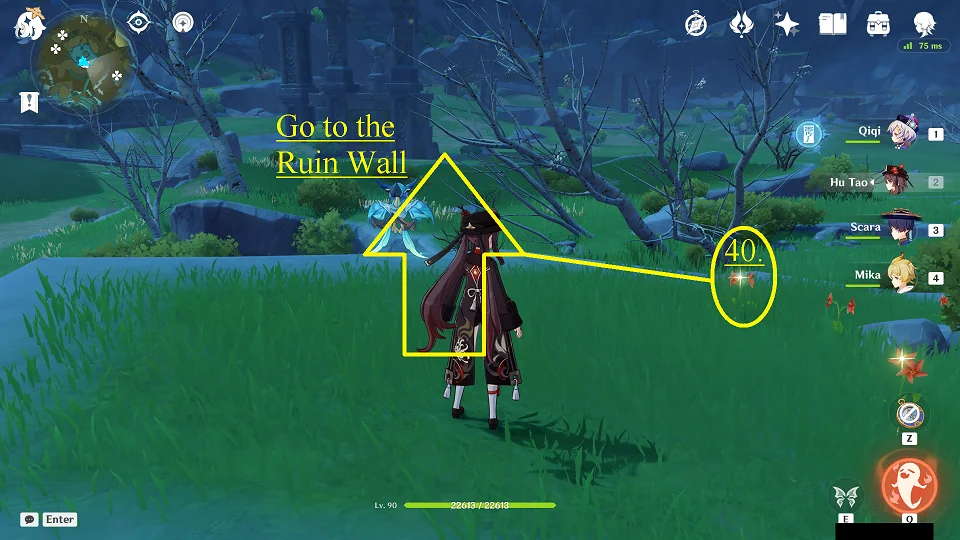
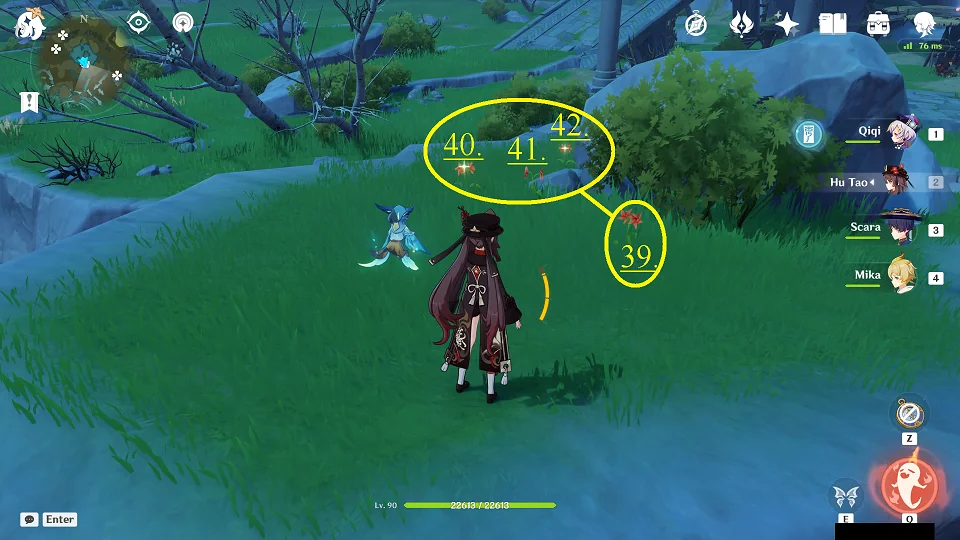 Nodes #39, #40, #41, and #42
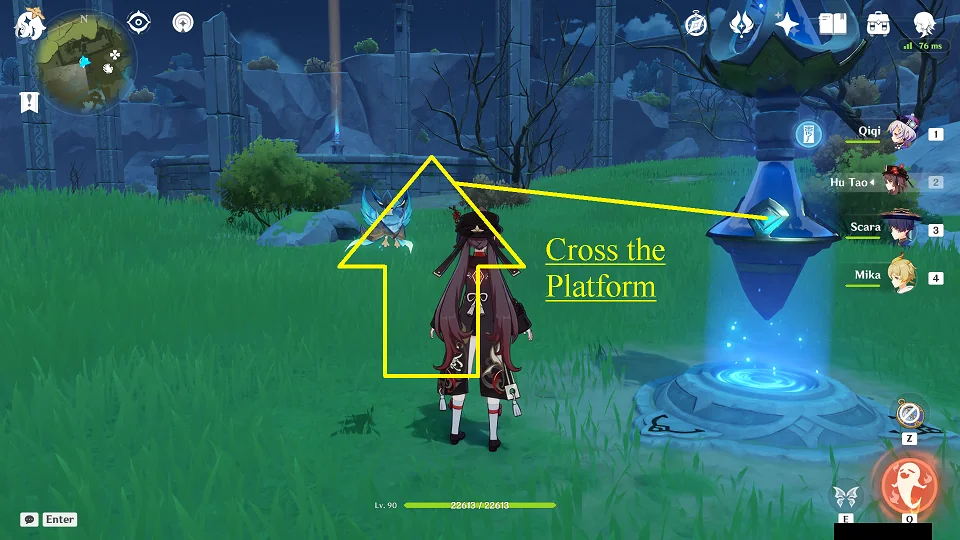
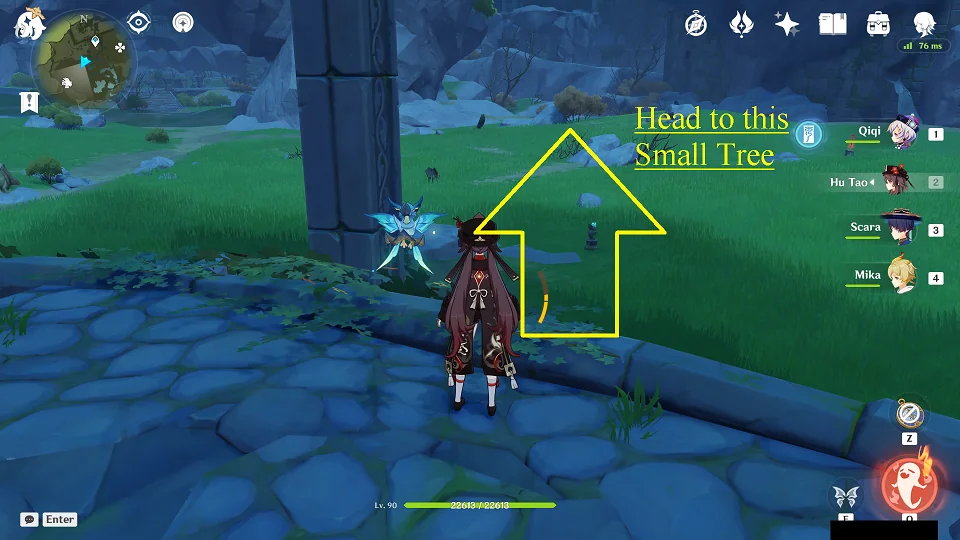
 Towards Node #43
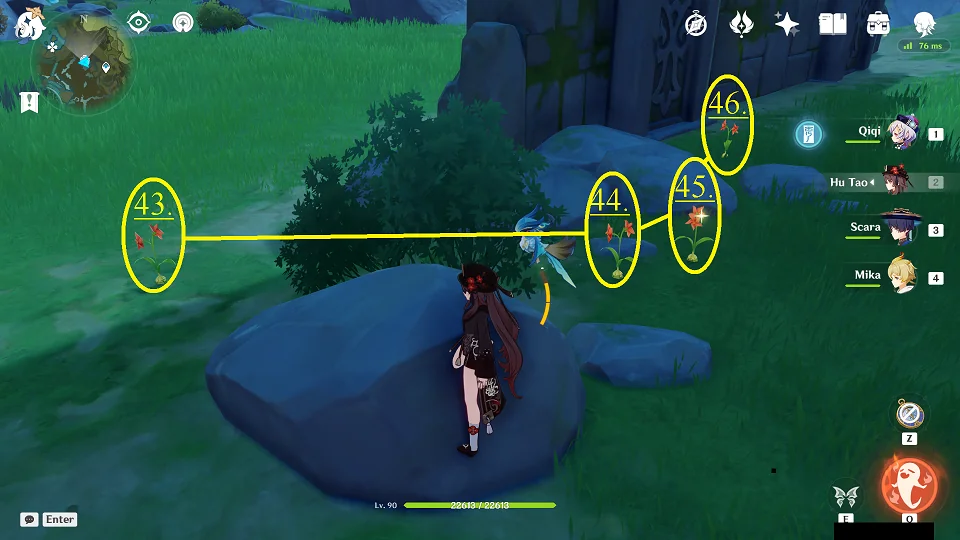 Nodes #43, #44, #45, and #46
 How to reach Node #47 from the Teleport
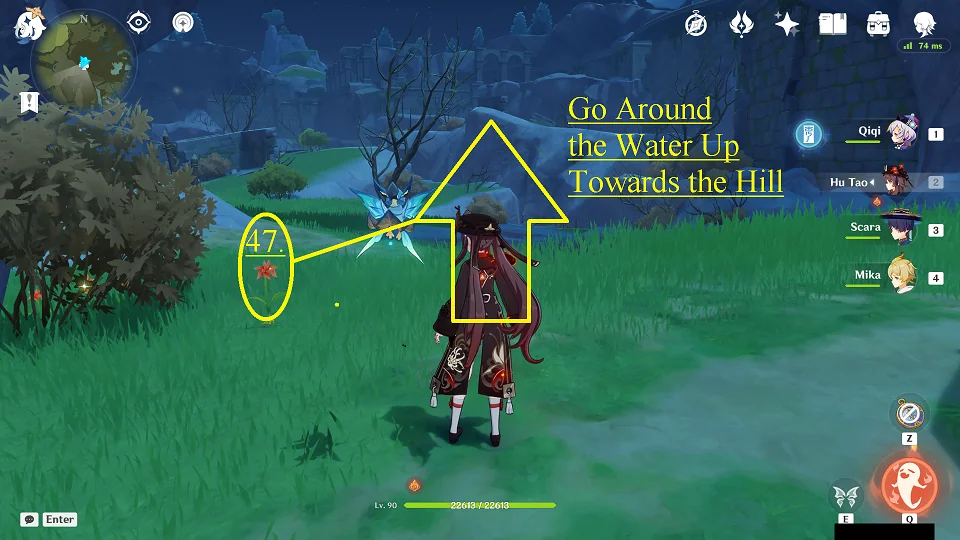
 Towards Node #47
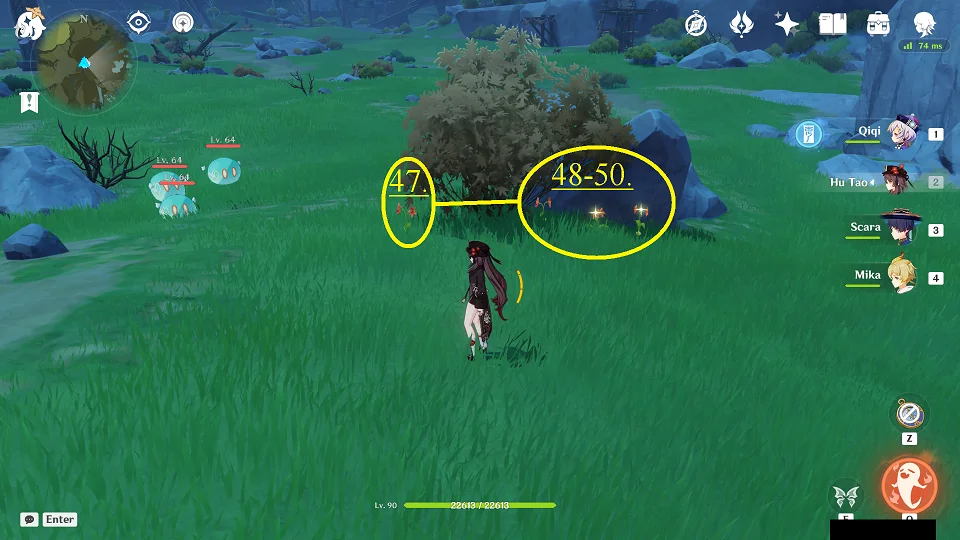 Nodes #47, #48, #49, and #50
 Towards Node #51
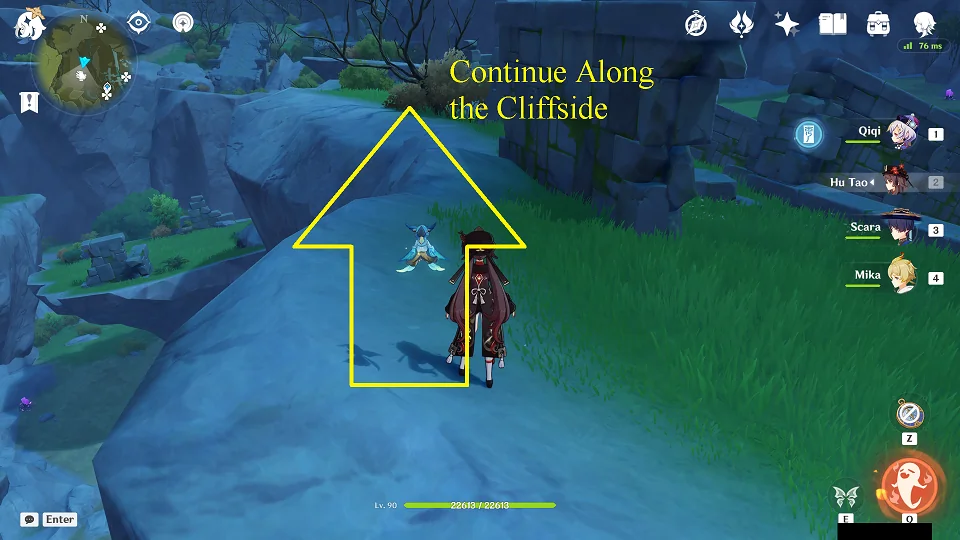 Towards Node #51 again
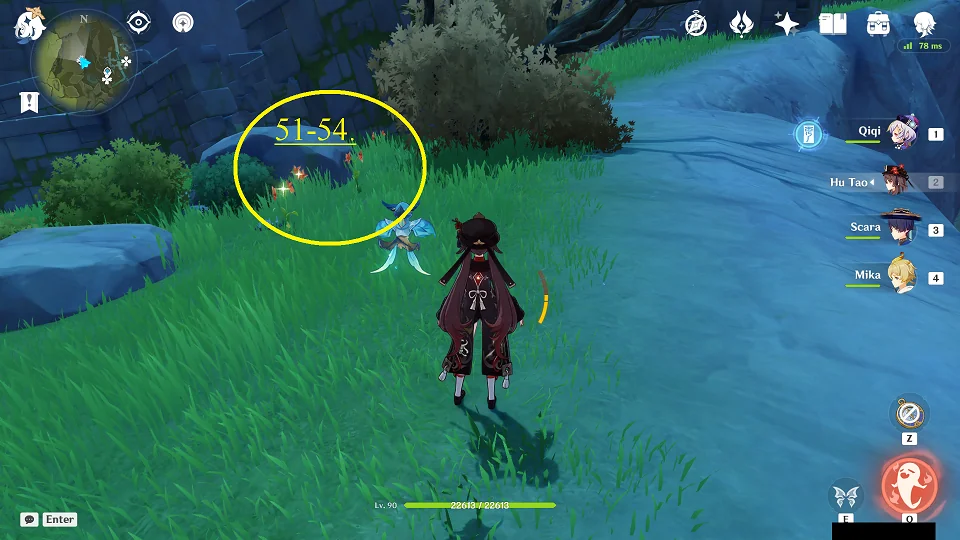 Nodes #51, #52, #53, and #54
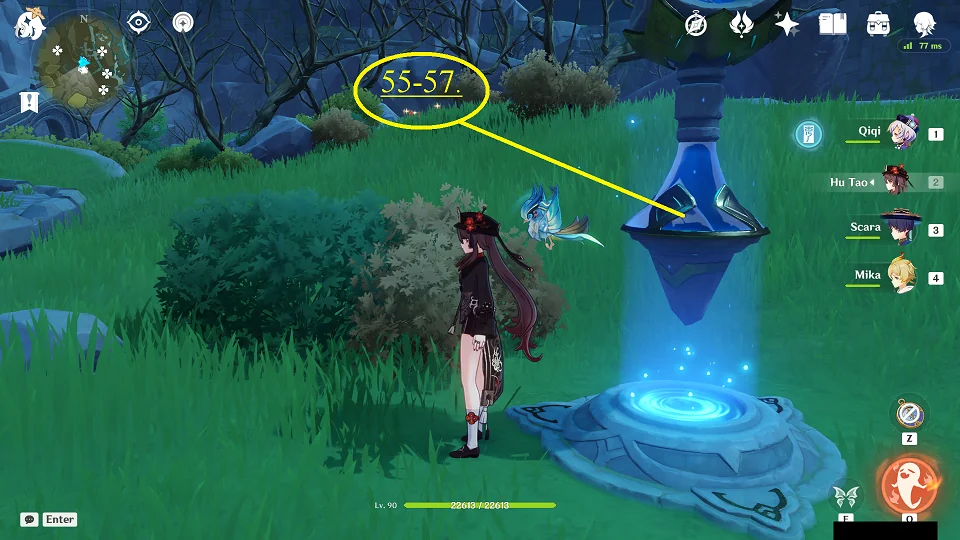 How to reach Node #55 from the Teleport
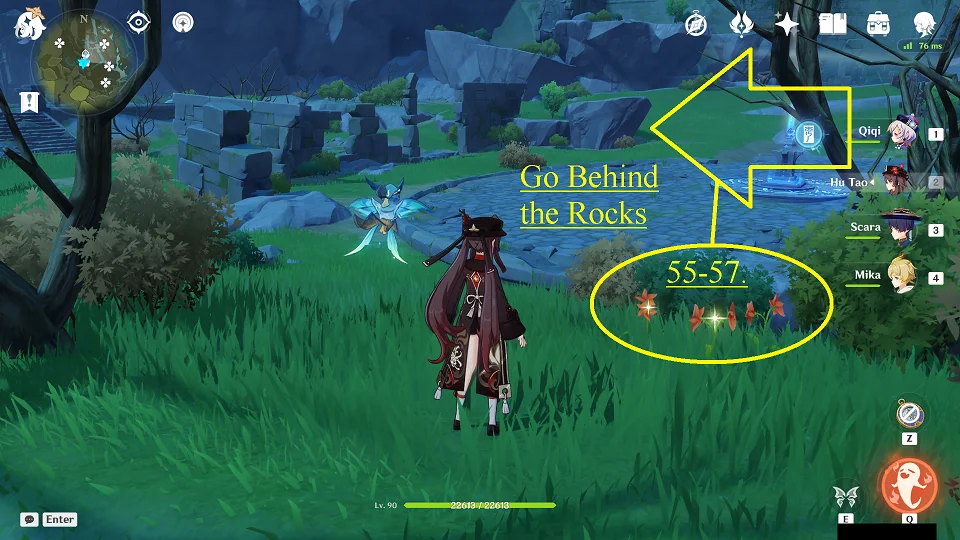 Nodes #55, #56, and #57
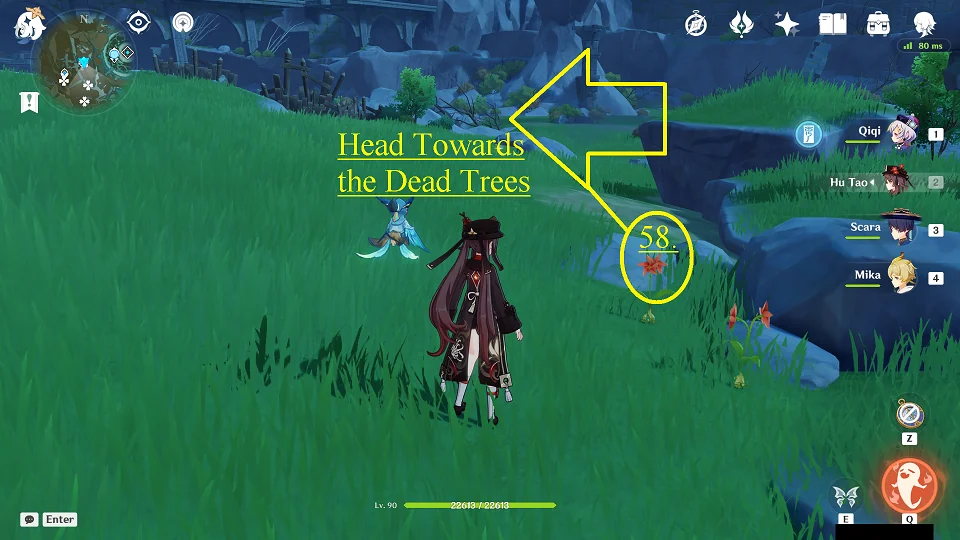
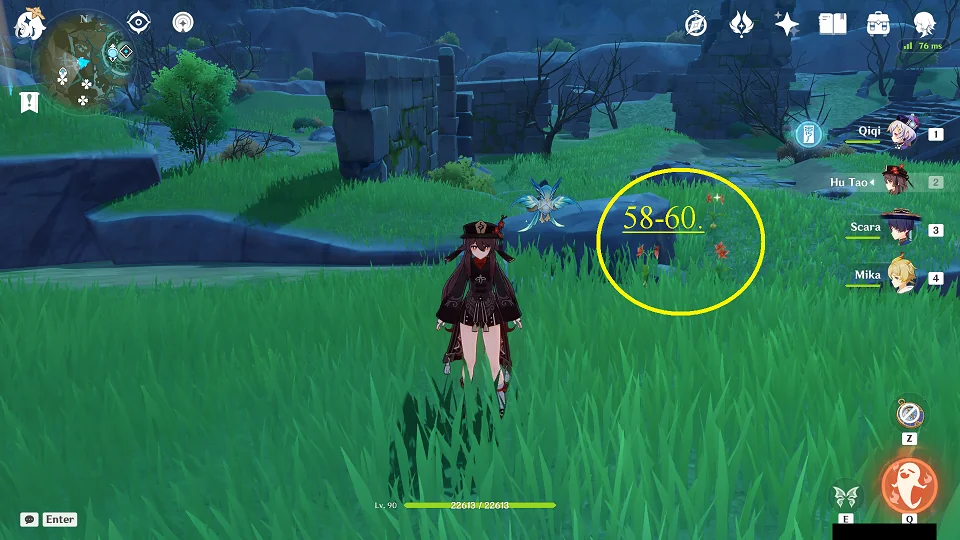 Nodes #58, #59, and #60
 Towards Node #61
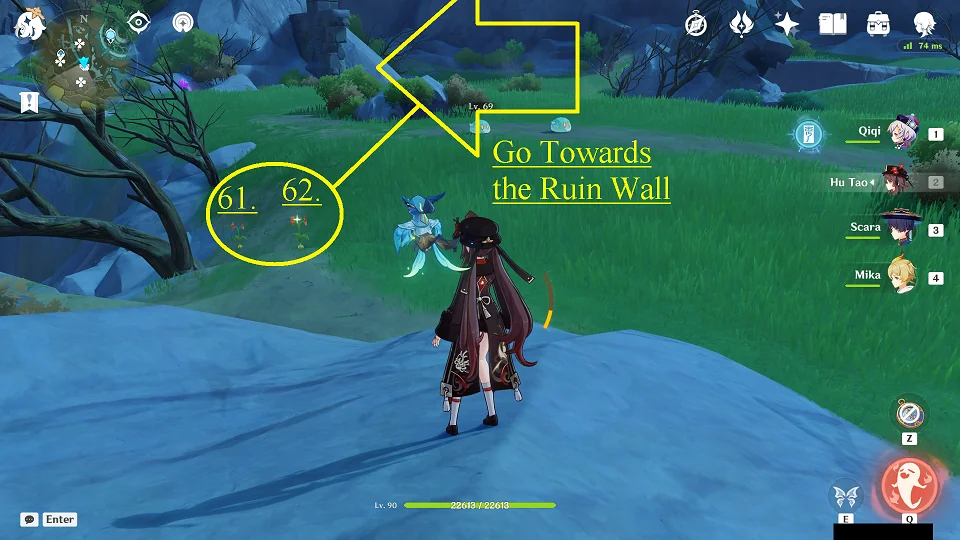 Nodes #61 and #62
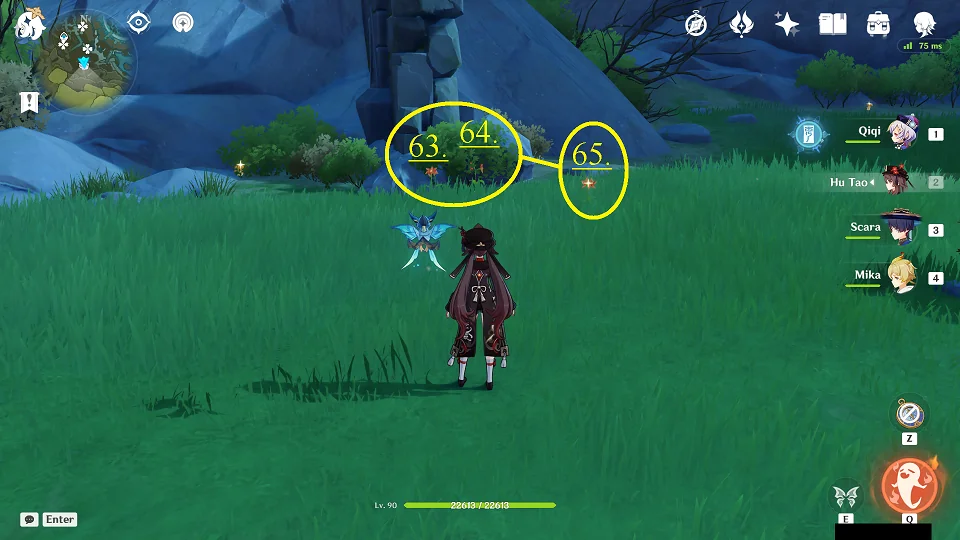 Nodes #63, #64, and #65
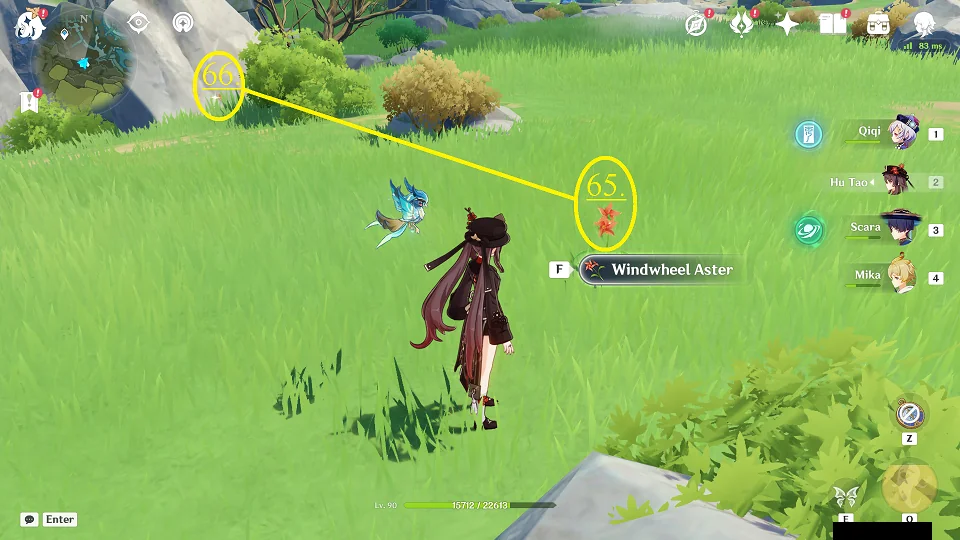 Node #66
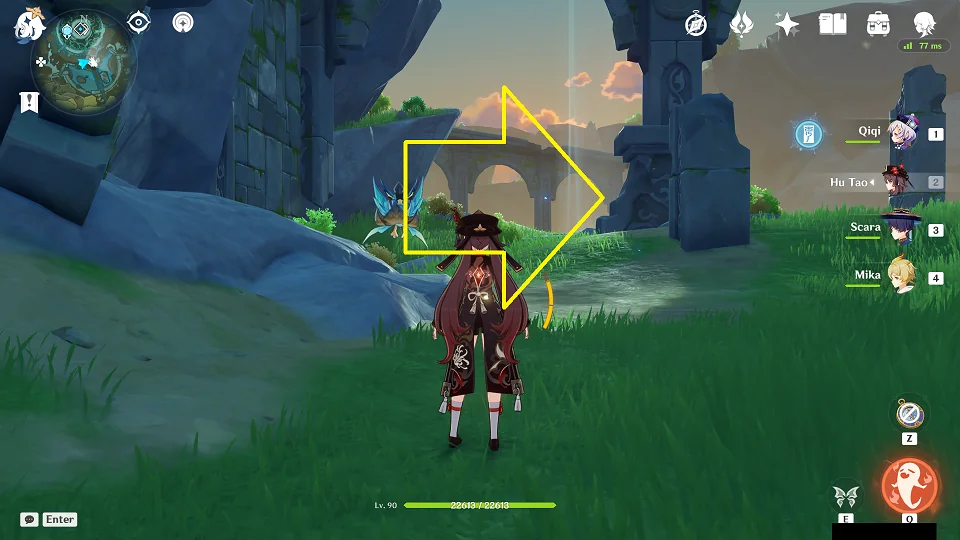
 Towards Node #67
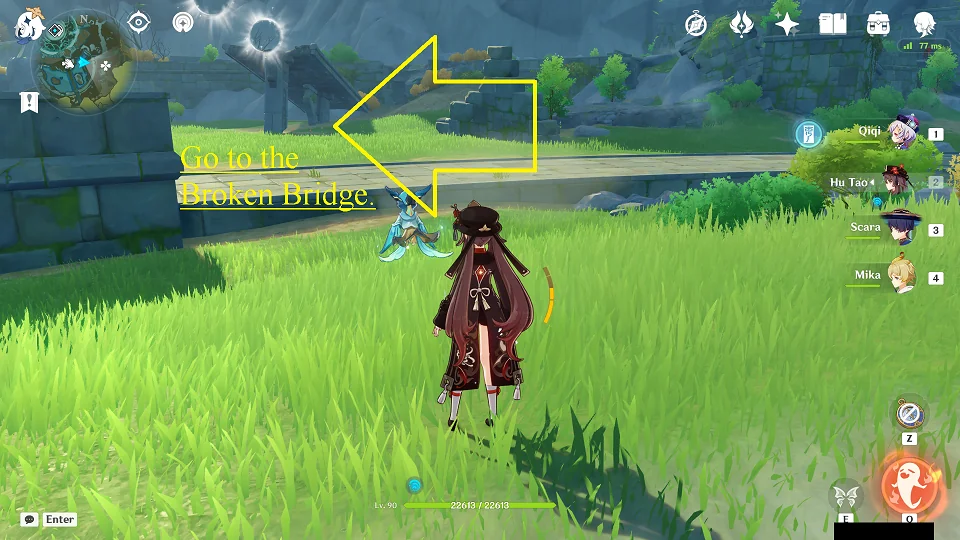
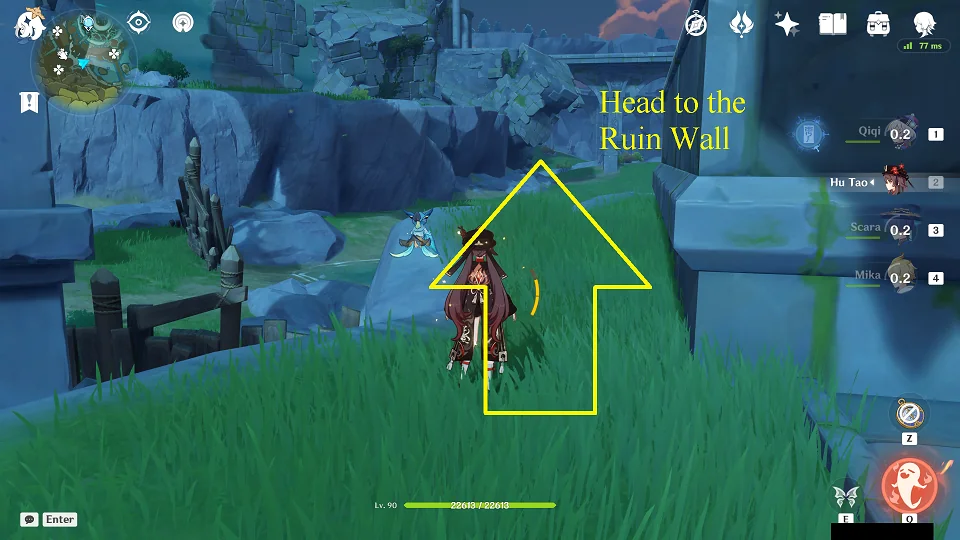 Towards Node #67 again
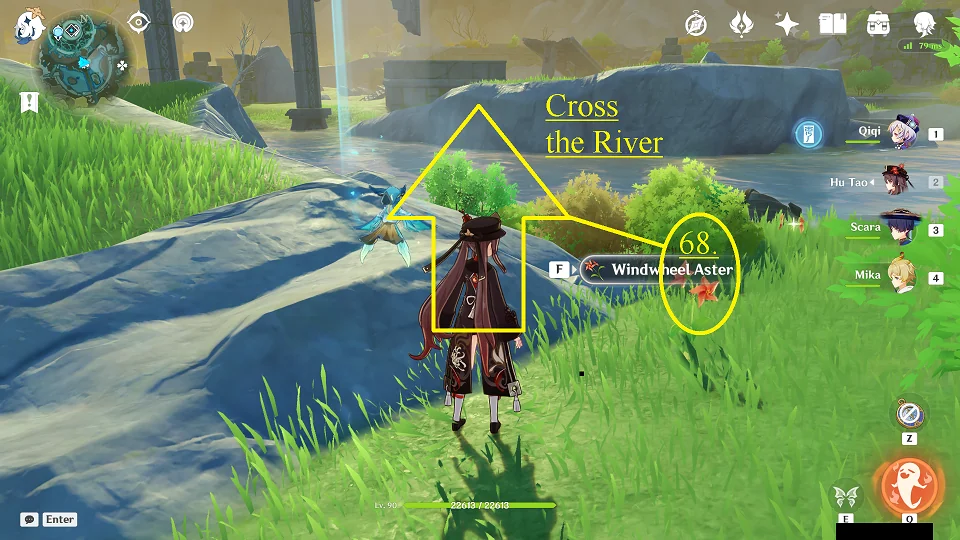
 Towards Node #67 continued
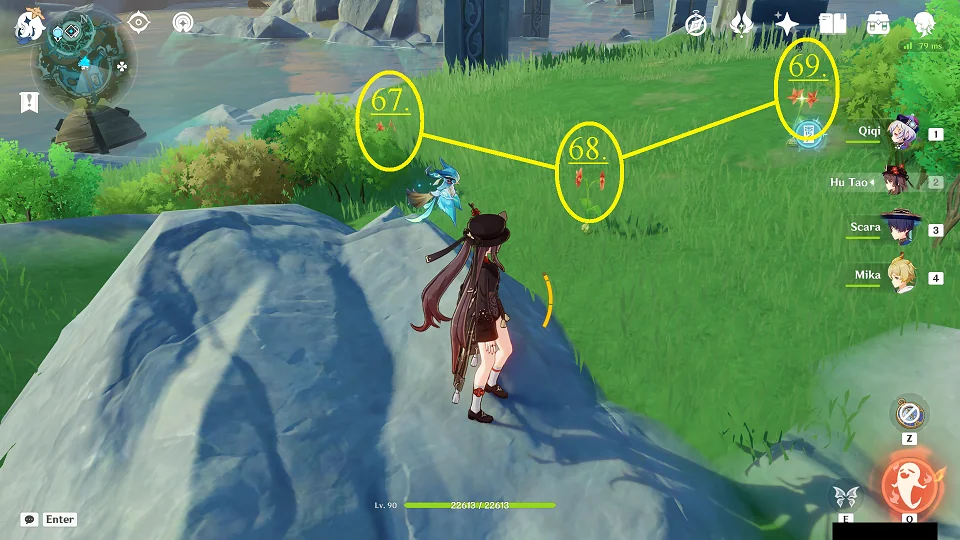 Nodes #67, #68, and #69
 Towards Node #70
 Towards Node #70 again
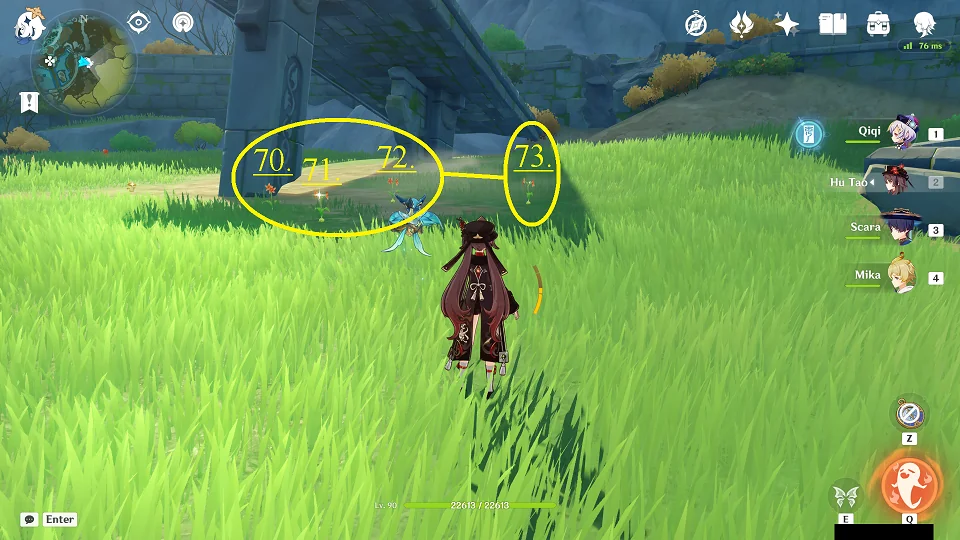 Nodes #70, #71, #72, and #73
5.
Changelog
- 06 Apr. 2024: Guide added.
Show more
Show less