Scarlet Monastery Heroic Dungeon Guide (WoD 6.1.2)
Table of Contents
The Scarlet Monastery is a 5-man dungeon located in Tirisfal Glades. In Mists of Pandaria, It has been revamped to include a level 90 Heroic mode. It houses 3 encounters: Thalnos the Soulrender, Brother Korloff, and High Inquisitor Whitemane.
The Scarlet Monastery is a 5-man dungeon that replaces, in Mists of Pandaria, the Graveyard and Cathedral wings of the old Scarlet Monastery instance. It now also features a level 90 Heroic mode. The Scarlet Monastery is one of the strongholds of the Scarlet Crusade, a group of maddened zealots so dedicated to the removal of all undead that they commonly attack the living.
The dungeon has a linear layout during which you will progress through 2 sub-zones, which are reminiscent of the old Graveyard and Cathedral wings, until you reach High Inquisitor Whitemane. For level 90 players, only the Heroic mode of the dungeon will be of interest.
| Forlorn Cloister | Crusader's Chapel |
|---|---|
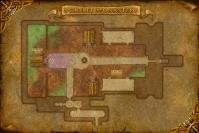
|
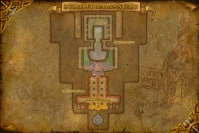
|
This guide will cover all of the three boss encounters, as well as the quests and achievements that are available in the dungeon.
Loot
The level of the items you can obtain from the Scarlet Monastery
is 463, with one exception, ![]() Helios, Durand's Soul of Purity,
which has an item level of 476.
Helios, Durand's Soul of Purity,
which has an item level of 476.
Armor
| Item Name | Armor | Slot | Main Stats | Source |
|---|---|---|---|---|
| Cloth | Head | Intellect | High Inquisitor Whitemane | |
| Cloth | Shoulders | Intellect | Thalnos the Soulrender | |
| Cloth | Hands | Intellect | Unto Dust Thou Shalt Return | |
| Cloth | Hands | Intellect/Spirit | Unto Dust Thou Shalt Return | |
| Cloth | Legs | Intellect/Spirit | High Inquisitor Whitemane | |
| Leather | Shoulders | Intellect | High Inquisitor Whitemane | |
| Leather | Hands | Intellect | Unto Dust Thou Shalt Return | |
| Leather | Chest | Agility | Brother Korloff | |
| Leather | Feet | Agility | High Inquisitor Whitemane | |
| Hands | Intellect | Unto Dust Thou Shalt Return | ||
| Hands | Agility | Unto Dust Thou Shalt Return | ||
| Hands | Agility | Unto Dust Thou Shalt Return | ||
| Legs | Agility | Thalnos the Soulrender | ||
| Plate | Head | Intellect | High Inquisitor Whitemane | |
| Plate | Hands | Intellect | Unto Dust Thou Shalt Return | |
| Plate | Head | Strength/Parry | Brother Korloff | |
| Plate | Wrists | Strength | Thalnos the Soulrender | |
| Plate | Hands | Strength/Mastery | Unto Dust Thou Shalt Return | |
| Plate | Hands | Strength/Dodge | Unto Dust Thou Shalt Return | |
| Plate | Waist | Strength/Dodge | High Inquisitor Whitemane |
Weapons
| Item Name | Type | Main Stats | Source |
|---|---|---|---|
| Staff | Intellect | High Inquisitor Whitemane | |
| Staff | Agility | Brother Korloff | |
| Two-Handed Sword | Strength/Mastery | High Inquisitor Whitemane |
Amulets, Cloaks, Rings, and Trinkets
| Item Name | Type | Main Stats | Source |
|---|---|---|---|
| Cloak | Intellect/Hit | Brother Korloff | |
| Ring | Intellect | High Inquisitor Whitemane | |
| Ring | Intellect/Hit | Thalnos the Soulrender | |
| Trinket | Agility | High Inquisitor Whitemane | |
| Amulet | Strength | High Inquisitor Whitemane | |
| Cloak | Strength/Dodge | Thalnos the Soulrender | |
| Ring | Strength/Mastery | Brother Korloff |
Quests
There are 2 quests that can be completed within the instance. The second quest is a follow-up of the first quest.
The first quest is Blades of the Anointed and is given to you by
the Hooded Crusader at the entrance of the instance. It requires you
to find the first ![]() Blade of the Anointed, which is located behind next
to Thalnos the Soulrender (the first boss of the instance). Once
you have found the first blade, you can turn in the quest at the second
Blade of the Anointed, which acts as a quest giver and will be marked
as a ? on your map.
Blade of the Anointed, which is located behind next
to Thalnos the Soulrender (the first boss of the instance). Once
you have found the first blade, you can turn in the quest at the second
Blade of the Anointed, which acts as a quest giver and will be marked
as a ? on your map.
The second quest is Unto Dust Thou Shalt Return. It is given to you by
the Blade of the Anointed and requires you to kill
High Inquisitor Whitemane, the final boss of the instance, before using
the ![]() Blades of the Anointed (provided to you for the quest) on Whitemane's
corpse.
Blades of the Anointed (provided to you for the quest) on Whitemane's
corpse.
Only Unto Dust Thou Shalt Return has rewards. They have an item level of 440 (see loot section above).
Thalnos the Soulrender
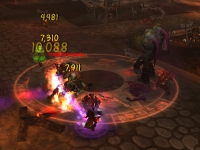 During your encounter with Thalnos the Soulrender, there is one important
thing to watch out for:
 ![]() Raise Fallen Crusader. This ability raises enemies
from the dead to fight against you. Disposing of these enemies is not an issue, but
right after you do, Thalnos will cast
Raise Fallen Crusader. This ability raises enemies
from the dead to fight against you. Disposing of these enemies is not an issue, but
right after you do, Thalnos will cast ![]() Summon Empowering Spirits. This ability
creates a spirit that tries to take possession of the body of the nearest dead
fallen crusader. If you do not kill the spirit before it does so, you will have
to contend with an Empowered Zombie for the remainder of the fight. These
enemies have too much health to be killed and they keep attacking
their target (so they need to be tanked).
Summon Empowering Spirits. This ability
creates a spirit that tries to take possession of the body of the nearest dead
fallen crusader. If you do not kill the spirit before it does so, you will have
to contend with an Empowered Zombie for the remainder of the fight. These
enemies have too much health to be killed and they keep attacking
their target (so they need to be tanked).
Other than that, try to interrupt ![]() Spirit Gale. This ability creates a
spirit that travels quickly to Thalnos' current target. When the spirit reaches its target, it
creates a Spirit Gale, which inflicts instant damage to players within
2 yards and then deals damage, every second, to players standing in it.
Spirit Gale. This ability creates a
spirit that travels quickly to Thalnos' current target. When the spirit reaches its target, it
creates a Spirit Gale, which inflicts instant damage to players within
2 yards and then deals damage, every second, to players standing in it.
Healers need to be aware of ![]() Evict Soul, a powerful DoT/debuff that can
be dispelled.
Evict Soul, a powerful DoT/debuff that can
be dispelled.
Achievement: Empowered Spiritualist
To complete ![]() Empowered Spiritualist, you need to defeat
Thalnos the Soulrender while three Empowered Zombies are alive.
At the moment, the achievement can be completed in the Normal version of
the dungeon, which makes it trivial.
Empowered Spiritualist, you need to defeat
Thalnos the Soulrender while three Empowered Zombies are alive.
At the moment, the achievement can be completed in the Normal version of
the dungeon, which makes it trivial.
If you want to attempt it in Heroic mode, then you should try to get Thalnos low on life (between 5 and 10%) and then stop DPSing until you have 3 Empowered Zombies.
Brother Korloff
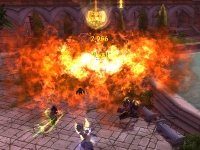
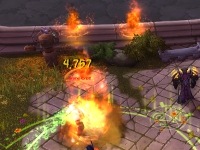
The fight against Brother Korloff is very straightforward. While Korloff will use a number of abilities, they can all be easily avoided.
- When he casts
 Blazing Fists, do not stand in front of him.
 - When he casts
 Firestorm Kick, move away from his landing zone.
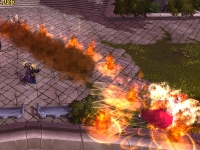
 - When he is below 50% health, he leaves a trail of flames behind him when
he moves, thanks to
 Scorched Earth. Do not stand in the flames.
|
|
|
Also, because of ![]() Rising Flame, he will deal increasing damage as the
fight goes on. This is something that the healer and tank need to be aware of.
Rising Flame, he will deal increasing damage as the
fight goes on. This is something that the healer and tank need to be aware of.
Achievement: Burning Man
To complete ![]() Burning Man, you need to make Brother Korloff set
six nearby training dummies on fire.
Burning Man, you need to make Brother Korloff set
six nearby training dummies on fire.
Only ![]() Blazing Fists and
Blazing Fists and ![]() Firestorm Kick will set a training
dummy on fire.
Firestorm Kick will set a training
dummy on fire.
 Blazing Fists causes Korloff to attack an area in front of him,
so have the tank always face the boss in such a way that he always has a
training dummy in front of him.
 Firestorm Kick causes Korloff to target the location of a random
party member, so have everyone position themselves on a non-lit training
dummy.
Note that there is no time limit involved. When a dummy is lit, it will stay that way until the end of the fight.
High Inquisitor Whitemane
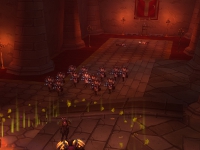
The fight against High Inquisitor Whitemane is a two-phase fight. Before starting the fight, you should first clear the entire room.
- In Phase One, you have to defeat Commander Durand in a typical tank and spank fight.
- In Phase Two, Whitemane appears, resurrects Duran, and you get to fight them both at once.
Phase One
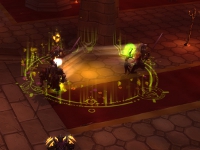
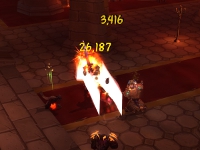
As said above, you first have to defeat Commander Durand in a typical tank
and spank fight. Durand has only two abilities: ![]() Flash of Steel and
Flash of Steel and
![]() Dashing Strike.
Dashing Strike.
 Flash of Steel causes Durand to perform a series of unavoidable attacks
on random players.
 Dashing Strike causes Durand to dash to a location, damaging
everyone in his path.
All you really need to do here is to avoid Dashing Strike.
|
|
Phase Two
After killing Durand, High Inquisitor Whitemane comes. You fight her for
a few seconds, then she puts everyone to sleep and resurrects Commander Durand,
who retains ![]() Flash of Steel and
Flash of Steel and ![]() Dashing Strike.
Dashing Strike.
The most important thing in this fight is to interrupt Whitemane when she casts
![]() Mass Resurrection. This spell resurrects all her fallen allies
within 100 yards. If you fail to interrupt this cast, you will most likely wipe.
Mass Resurrection. This spell resurrects all her fallen allies
within 100 yards. If you fail to interrupt this cast, you will most likely wipe.
With that in mind, you should kill Durand first and then finish off Whitemane who
also casts two other abilities: ![]() Heal and
Heal and
![]() Power Word: Shield.
Power Word: Shield.
 Heal heals her target (herself or Durand) for a large
amount. Interrupt it.
 Power Word: Shield places an absorption shield on herself or
Durand. This effect can be dispelled or spell-stolen.
Achievement: And Stay Dead!
 To complete
 ![]() And Stay Dead!, you need to let High Inquisitor Whitemane
complete a cast of
And Stay Dead!, you need to let High Inquisitor Whitemane
complete a cast of ![]() Mass Resurrection and resurrects all her
allies, before defeating her.
Mass Resurrection and resurrects all her
allies, before defeating her.
When her allies are resurrected, you should use all your cooldowns to stay alive and burn them as fast as you can.
One trick that may work is that when you clear the trash in the chapel, you
should kite them away from the chapel and kill them more than 100 yards (the
maximum range of ![]() Mass Resurrection) from the location
where you will fight Whitemane.
Mass Resurrection) from the location
where you will fight Whitemane.
Final Considerations
This concludes our Scarlet Monastery dungeon guide. If you find any inconsistency or mistake, feel free to comment or send us an e-mail.
- Get Mollie, the Alpaca Mount: Dunegorger Kraulok World Boss Is Up This Week on NA Servers
- Undermine’s Music Changes Depending on Your Weekly Cartel
- Comprehensive To-Do List for The War Within Season 2 Week 5
- Nightfall Skyreaver Mount Now Available with Timewarped Badges—Here’s How to Get It
- What Raider.IO Score & Item Level Do You Need for +2, +7, and +10 Keys in The War Within?
- World of Warcraft Official and Serious 11.4.1 Patch Notes
- Full April 2025 Trading Post Rotation in Action (Video): Snails, Spring, and Darkmoon!
- War Within Hotfixes, March 31st