Shado-Pan Monastery Heroic Dungeon Guide (WoD 6.1.2)
Table of Contents
The Shado-Pan Monastery is a 5-man dungeon located in Kun-Lai Summit on Pandaria. The Normal-difficulty version of the dungeon is open to players between level 87 and 90, while the Heroic-difficulty version of the dungeon is reserved to level 90 players. It houses 4 encounters: Gu Cloudstrike, Master Snowdrift, Sha of Violence, and Taran Zhu.
Introduction
The Shado-Pan Monastery becomes available to players after reaching level 87. The monastery is the most important Shado-Pan training center in Pandaria. It has been corrupted by the Sha of Violence, causing most of the Shado-Pan monks to turn against one another. You will have to fight your way through the monastery, in order to defeat the Sha of Violence and the various corrupted Shado-Pan leaders to make them come to their senses.
The dungeon has a linear layout during which you will progress through four different zones and encounter four bosses. The main zone is the Shado-Pan Monastery. It is composed of 3 buildings and a courtyard. In each of these locations, you will find a boss. Each building has its own sub-map. When traveling from one building to the other, you can use a ground mount to gain some time.
The dungeon features both Normal (level 87+) and Heroic (level 90) modes. There are no differences in mechanics between Normal and Heroic modes. The only differences are increased health and damage done for all bosses and enemies.
| Overview | Cloudstrike Dojo |
|---|---|
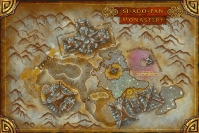
|
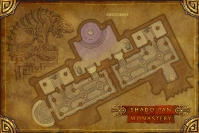
|
| Snowdrift Dojo | Sealed Chambers |
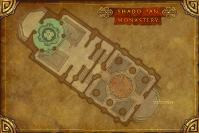
|
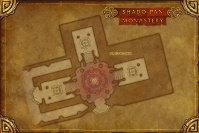
|
This guide will cover all of the four boss encounters, as well as the quests and achievements that are available in the dungeon.
Normal Difficulty Loot
In Normal Difficulty, the level of the items you can obtain from the Shado-Pan Monastery is 435.
Armor
| Item Name | Armor | Slot | Main Stats | Source |
|---|---|---|---|---|
| Cloth | Head | Intellect | Lord of the Shado-Pan | |
| Cloth | Head | Intellect | Lord of the Shado-Pan | |
| Cloth | Hands | Intellect | Sha of Violence | |
| Cloth | Waist | Intellect | The Path to Respect Lies in Violence | |
| Cloth | Waist | Intellect/Hit | The Path to Respect Lies in Violence | |
| Leather | Head | Intellect | Lord of the Shado-Pan | |
| Leather | Waist | Intellect | The Path to Respect Lies in Violence | |
| Leather | Legs | Intellect | Taran Zhu | |
| Leather | Head | Agility | Lord of the Shado-Pan | |
| Leather | Waist | Agility | The Path to Respect Lies in Violence | |
| Head | Intellect | Lord of the Shado-Pan | ||
| Waist | Intellect | The Path to Respect Lies in Violence | ||
| Legs | Intellect | Gu Cloudstrike | ||
| Feet | Intellect | Taran Zhu | ||
| Head | Agility | Lord of the Shado-Pan | ||
| Shoulders | Agility | Taran Zhu | ||
| Chest | Agility | Gu Cloudstrike | ||
| Waist | Agility | The Path to Respect Lies in Violence | ||
| Plate | Head | Intellect | Lord of the Shado-Pan | |
| Plate | Hands | Intellect | Taran Zhu | |
| Plate | Waist | Intellect | Master Snowdrift | |
| Plate | Waist | Intellect | The Path to Respect Lies in Violence | |
| Plate | Head | Strength/Mastery | Lord of the Shado-Pan | |
| Plate | Head | Strength/Dodge | Lord of the Shado-Pan | |
| Plate | Hands | Strength/Dodge | Master Snowdrift | |
| Plate | Waist | Strength | The Path to Respect Lies in Violence | |
| Plate | Waist | Strength/Dodge | The Path to Respect Lies in Violence | |
| Plate | Waist | Strength/Dodge | Gu Cloudstrike | |
| Plate | Feet | Strength/Mastery | Sha of Violence |
Weapons
| Item Name | Type | Main Stats | Source |
|---|---|---|---|
| One-Hand Axe | Agility | Sha of Violence | |
| Staff | Agility | Master Snowdrift | |
| Two-Handed Mace | Strength/Mastery | Taran Zhu | |
| Shield | Strength/Dodge | Taran Zhu |
Heroic Difficulty Loot
In Heroic Difficulty, the level of the items you can obtain from the
Shado-Pan Monastery is 463, with one exception,
![]() Ka'eng, Breath of the Shadow, which has an item level of 476.
Ka'eng, Breath of the Shadow, which has an item level of 476.
Armor
| Item Name | Armor | Slot | Main Stats | Source |
|---|---|---|---|---|
| Cloth | Chest | Intellect | Taran Zhu | |
| Cloth | Hands | Intellect | Sha of Violence | |
| Leather | Wrists | Intellect | Gu Cloudstrike | |
| Leather | Legs | Intellect | Taran Zhu | |
| Legs | Intellect | Gu Cloudstrike | ||
| Feet | Intellect | Taran Zhu | ||
| Shoulders | Agility | Taran Zhu | ||
| Chest | Agility | Gu Cloudstrike | ||
| Wrists | Agility | Sha of Violence | ||
| Plate | Hands | Intellect | Taran Zhu | |
| Plate | Waist | Intellect | Master Snowdrift | |
| Plate | Chest | Strength/Mastery | Taran Zhu | |
| Plate | Hands | Strength/Dodge | Master Snowdrift | |
| Plate | Waist | Strength/Dodge | Gu Cloudstrike | |
| Plate | Feet | Strength/Mastery | Sha of Violence |
Weapons
| Item Name | Type | Main Stats | Source |
|---|---|---|---|
| One-Hand Axe | Agility | Sha of Violence | |
| One-Hand Fist Weapon | Agility | Taran Zhu | |
| Staff | Agility | Master Snowdrift | |
| Shield | Strength/Dodge | Taran Zhu | |
| Two-Handed Mace | Strength/Mastery | Taran Zhu |
Amulets, Rings, and Trinkets
| Item Name | Type | Main Stats | Source |
|---|---|---|---|
| Amulet | Intellect/Spirit | Sha of Violence | |
| Ring | Intellect | Taran Zhu | |
| Ring | Intellect/Hit | Master Snowdrift | |
| Ring | Agility | Taran Zhu | |
| Amulet | Strength | Gu Cloudstrike | |
| Trinket | Mastery/Dodge | Master Snowdrift |
Quests
There are 2 quests that can be completed within the instance.
The first quest is Lord of the Shado-Pan, which is the follow-up quest of Into the Monastery. It is given by Ban Bearheart, inside the monastery at the entrance. To complete the quest, you need to defeat Taran Zhu, the final boss of the dungeon.
The second quest is The Path to Respect Lies in Violence. It is given to you by Master Snowdrift, after you pass his trial. It requires you to kill the Sha of Violence.
The quests reward you with item level 420 gear (see loot section above).
Gu Cloudstrike
The fight against Gu Cloudstrike is a 3-phase fight.
- During the first phase, you fight Gu and his Azure Serpent. The phase ends when Gu reaches 50% health.
- During the second phase, Gu becomes invulnerable and you have to kill his Azure Serpent.
- During the third phase, you have to finish Gu.
Phase One
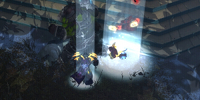
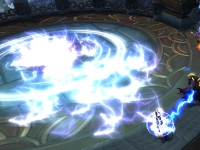 In Phase One, Gu keeps casting
 ![]() Invoke Lightning on a random target.
This ability has an AoE component, so you need to be spread out 5 yards,
to limit the damage it does.
Invoke Lightning on a random target.
This ability has an AoE component, so you need to be spread out 5 yards,
to limit the damage it does.
The Azure Serpent keeps putting down ![]() Static Field at the location of
a random party member. These fields have a very obvious visual effect and
need to be avoided.
Static Field at the location of
a random party member. These fields have a very obvious visual effect and
need to be avoided.
Phase Two
In Phase Two, Gu is protected by ![]() Charging Soul, which his Azure Serpent
casts on him.
Charging Soul, which his Azure Serpent
casts on him.
 The Azure Serpent does not need to be tanked. He has two abilities:
![]() Lightning Breath and
Lightning Breath and ![]() Magnetic Shroud.
Magnetic Shroud.
![]() Lightning Breath is a frontal attack that he
regularly uses to damage party members in front of him. Avoid it.
Lightning Breath is a frontal attack that he
regularly uses to damage party members in front of him. Avoid it.
![]() Magnetic Shroud is a somewhat complex ability that he sometimes
casts and that you can choose to completely ignore (at least, it was the case on
beta).
Magnetic Shroud is a somewhat complex ability that he sometimes
casts and that you can choose to completely ignore (at least, it was the case on
beta).
Magnetic Shroud creates a healing absorption shield on all party members. To break the effect, one of the party members needs to be healed until the shield is broken (50,000 in Normal mode, 75,000 in Heroic mode). Breaking the shield of one party member will cause all the other shields to break as well, and everyone in the proximity of that party member will share a bit of healing.
Phase Three
 In Phase Three, Gu Cloudstrike keeps casting
 ![]() Overcharged Soul,
which hits everyone in the party. The frequency at which he casts this ability
is proportional to his missing health. That is to say, he casts this
ability more and more often as his health lowers. This mechanism constitutes a
soft enrage timer.
Overcharged Soul,
which hits everyone in the party. The frequency at which he casts this ability
is proportional to his missing health. That is to say, he casts this
ability more and more often as his health lowers. This mechanism constitutes a
soft enrage timer.
Snowdrift's Students
After defeating a few groups of trash mob, you will reach Snowdrift Dojo where Master Snowdrift, the last non-corrupted Shado-Pan master, will test you.
Before engaging Snowdrift, you will have to prove your worth by defeating 24 Shado-Pan Novices (who will come to you in several waves) as well as Flying Snow and Fragrant Lotus, his top students. None of these fights should pose problems to your group. Flying Snow will fixate on a random party member and deal proximity damage, so avoid standing next to her.
Achievement: Respect
To complete ![]() Respect, you need to bow back to 20 of the
Shado-Pan Novices after they bow to you when you defeat them. In order to
do this easily, take the Novices down one by one and use a /bow
macro.
Respect, you need to bow back to 20 of the
Shado-Pan Novices after they bow to you when you defeat them. In order to
do this easily, take the Novices down one by one and use a /bow
macro.
Master Snowdrift
The fight against Snowdrift is divided in 3 phases.
- Phase One lasts until Snowdrift reaches 50% health.
- Phase Two lasts until you destroy the images that Snowdrift creates of himself.
- Phase Three lasts until you defeat Snowdrift.
Phase One
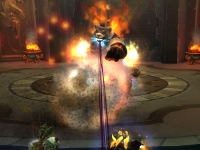 During Phase One, Snowdrift has two damaging attacks:
 ![]() Fists of Fury
and
Fists of Fury
and ![]() Tornado Kick. He also melees the tank.
Tornado Kick. He also melees the tank.
![]() Fists of Fury deals damage to everyone in front of him, which means that,
besides the tank, players should avoid standing in front of him.
Fists of Fury deals damage to everyone in front of him, which means that,
besides the tank, players should avoid standing in front of him.

![]() Tornado Kick kicks players around Snowdrift and knock them back. If
you are at melee range, then try moving away when he is using Tornado
Kick.
Tornado Kick kicks players around Snowdrift and knock them back. If
you are at melee range, then try moving away when he is using Tornado
Kick.
Phase Two
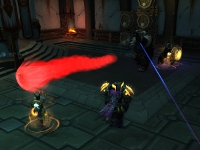 During Phase Two, Snowdrift creates images of himself in the corners of
the room. These images keeps appearing and disappearing. When they are
active, all they do is cast
 ![]() Ball of Fire, which creates a traveling ball of
fire that damages players in its path.
Ball of Fire, which creates a traveling ball of
fire that damages players in its path.
In this phase, you need to attack the images and destroy them, all the while avoiding the Balls of Fire.
Phase Three
 During Phase Three, there are two abilities to watch out for:
![]() Tornado Slam and
Tornado Slam and ![]() Parry Stance.
Parry Stance.
 Tornado Slam causes Snowdrift to fixate on a random raid member and
chase them. If he catches up with them, he casts
  Tornado Slam
at them, dealing 30% of their maximum health as Physical damage. When you
are fixated upon, you need to start running.
 Parry Stance causes him to sometimes assume a momentary defensive
stance in which he replies to:
Parry Stance causes him to sometimes assume a momentary defensive
stance in which he replies to:- melee attacks with
 Quivering Palm and
  Unleash Vibrations,
heavily damaging and stunning the attacker;
 - ranged attacks with
 Flying Kick, dealing low physical damage.
- melee attacks with
Sha Trash Mobs
On your way to the Sealed Chambers, where you will fight the Sha of Violence, you will encounter several groups of Sha mobs, which can be painful to deal with.
These groups are made up of the following types of creatures:
- Volatile Energy (not present in all groups), which casts
 Explosion, dealing a large amount of damage to nearby
party members;
 - Regenerating Sha, which heals nearby allies for large amounts with
 Regenerate (can be interrupted);
 - Consuming Sha, which deals heavy damage to its target with
 Consuming Bite and
  Consumption;
 - Destroying Sha, which deals AoE damage through
 Shadows of Destruction.
Sha of Violence
During the fight with the Sha of Violence, there are mainly two abilities
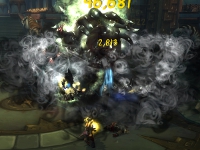
to watch out for: ![]() Smoke Blades and
Smoke Blades and ![]() Sha Spike.
Sha Spike.
-
 When
When  Smoke Blades is cast, you will notice a smoky cloud around the
Sha of Violence. Melee players should ignore this ability and ranged
players are normally too far away from the boss to be hit.
Smoke Blades is cast, you will notice a smoky cloud around the
Sha of Violence. Melee players should ignore this ability and ranged
players are normally too far away from the boss to be hit.- Every second, this cloud inflicts a small amount of damage to players
standing inside it. These players are also prevented from scoring critical
strikes for up to 30 seconds (this duration is reduced by 5 seconds each time
you use an ability). When this effect ends, these players receive the
 Parting Smoke buff, which causes the next attack or spell to be a
critical strike that hits for 100% more damage than usual.
- Every second, this cloud inflicts a small amount of damage to players
standing inside it. These players are also prevented from scoring critical
strikes for up to 30 seconds (this duration is reduced by 5 seconds each time
you use an ability). When this effect ends, these players receive the
-

 Sha Spike causes an erupting spike to appear at the location of a random
player, dealing damage to them and knocking them back. It also summons
a Lesser Volatile Energy enemy that attacks the group for 30 seconds
(it can be killed). Simply move away when the ground beneath you starts
vibrating.
In addition, the healer and the tank need to be aware of
![]() Disorienting Smash, which regularly deals heavy Shadow Damage to the
tank, and
Disorienting Smash, which regularly deals heavy Shadow Damage to the
tank, and ![]() Enrage, which causes the Sha to deal
increased damage at low health.
Enrage, which causes the Sha to deal
increased damage at low health.
Achievement: The Obvious Solution
To complete ![]() The Obvious Solution, you need to release all the Sha minions
imprisoned in the Sealed Chambers and kill them before defeating the Sha of
Violence. Releasing the minions causes the boss to engage your group, which
means that you have to kill the minions all the while fighting the boss.
The Obvious Solution, you need to release all the Sha minions
imprisoned in the Sealed Chambers and kill them before defeating the Sha of
Violence. Releasing the minions causes the boss to engage your group, which
means that you have to kill the minions all the while fighting the boss.
To release the minions, you need to go to the northern chamber. To do so, take left when you reach the boss (be careful not to aggro him). In this chamber, you will find an object that looks like the units where the Sha minions are contained, albeit much smaller. Clicking this object will release the minions.
Taran Zhu
Although not a difficult fight, the encounter with Taran Zhu has complex mechanics that you need to understand.
Hatred and Meditate
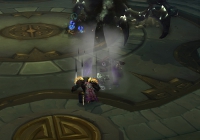
The fight presents you with an interesting mechanic, Hatred, which is represented by a progression bar that starts out empty and fills as you take damage from the boss.


When you reach maximum Hatred, your chance to hit is reduced by
90% and your healing done by 25%. To remove this effect and reset your
Hatred, you need to use ![]() Meditate. This fight-specific
ability can be used by clicking the button in the middle of your screen.
Meditate is a channeled ability, so you cannot do anything
for a few seconds while it resets your Hatred.
Meditate. This fight-specific
ability can be used by clicking the button in the middle of your screen.
Meditate is a channeled ability, so you cannot do anything
for a few seconds while it resets your Hatred.
Note that there are several sources of unavoidable damage in this
fight, so you will have to use ![]() Meditate.
Meditate.
Sources of Damage
![]() Rising Hate is an ability regularly cast by Taran Zhu at several
random targets. The cast of this ability can and should be interrupted.
Rising Hate is an ability regularly cast by Taran Zhu at several
random targets. The cast of this ability can and should be interrupted.
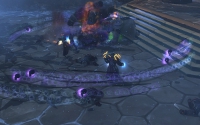
![]() Ring of Malice causes Taran Zhu to surround himself with a damaging
Shadow ring for 15 seconds, during which time his movement speed is reduced by 80%.
The ring only deals damage to players that touch its border. Make sure to be
either inside or outside the ring.
Ring of Malice causes Taran Zhu to surround himself with a damaging
Shadow ring for 15 seconds, during which time his movement speed is reduced by 80%.
The ring only deals damage to players that touch its border. Make sure to be
either inside or outside the ring.
The tank and the healer need to pay special attention to ![]() Sha Blast.
This ability is only cast when Ring of Malice is active. It deals a high
amount of damage and knocks the tank back.
Sha Blast.
This ability is only cast when Ring of Malice is active. It deals a high
amount of damage and knocks the tank back.
 Finally, Taran Zhu often summons a Gripping Hatred, which needs to
be killed as it creates a damaging Sha zone underneath itself and keeps pulling
party members into it.
Summing up the Strategy
Despite the lengthy ability explanations, the strategy can be easily summarised as follows:
- use
 Meditate when you reach full Hatred;
 - be either inside or outside of
 Ring of Malice, but not on the ring;
 - kill the Gripping Hatred and move away from its Sha zone when you are pulled into it.
Achievement: Hate Leads to Suffering
To complete ![]() Hate Leads to Suffering, you need to get Taran Zhu
low on health and then wait a bit for all the party members to reach
full hatred. Then you can finish him off.
Hate Leads to Suffering, you need to get Taran Zhu
low on health and then wait a bit for all the party members to reach
full hatred. Then you can finish him off.
Final Considerations
This concludes our Shado-Pan Monastery dungeon guide. If you find any inconsistency or mistake, feel free to comment or send us an e-mail.
- Get Mollie, the Alpaca Mount: Dunegorger Kraulok World Boss Is Up This Week on NA Servers
- Undermine’s Music Changes Depending on Your Weekly Cartel
- Comprehensive To-Do List for The War Within Season 2 Week 5
- Nightfall Skyreaver Mount Now Available with Timewarped Badges—Here’s How to Get It
- What Raider.IO Score & Item Level Do You Need for +2, +7, and +10 Keys in The War Within?
- World of Warcraft Official and Serious 11.4.1 Patch Notes
- Full April 2025 Trading Post Rotation in Action (Video): Snails, Spring, and Darkmoon!
- War Within Hotfixes, March 31st

