Magisters' Terrace Dungeon Guide
Magister's Terrace is the only new dungeon introduced throughout all of The Burning Crusade expansion. This dungeon requires Level 70 to enter, and heroic difficulty requires you to complete a quest chain on Normal to become attuned.
This dungeon will take approximately 20-30 minutes to complete with an average group. This dungeon is commonly abbreviated as "MgT". As this dungeon is added in the last phase of The Burning Crusade, it has a much higher base difficulty than previous dungeons, especially when faced on Heroic mode.
In this guide, we will cover ideal group compositions, loot that can drop from bosses, quests, an overview of trash mobs, and tactics for each boss.
Magister's Terrace Quests
Before heading into Magister's Terrace, we advise you to get the dungeon quests related to it. To make this process easier, we have written a separate guide for the quests and their chains.
Magister's Terrace Entrance Location
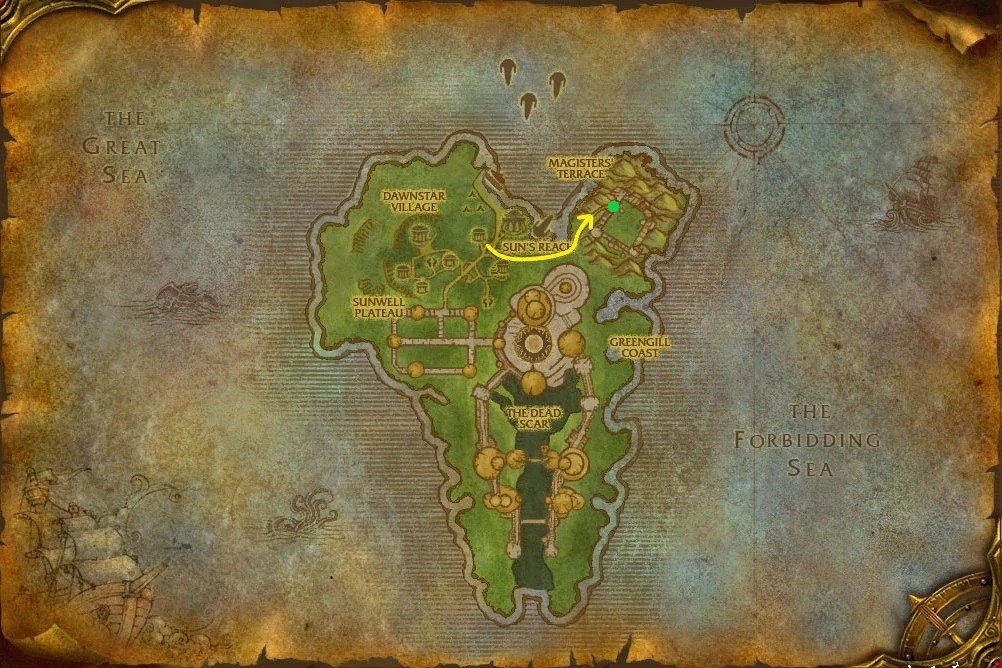
The fastest way to get to Magister's Terrace for both Alliance and Horde is to take the portal to the Isle of Quel'Danas in the middle of Shattrath. From there, follow the image shown above until you find the dungeon entrance, as shown in the picture above.
Layout of Magister's Terrace
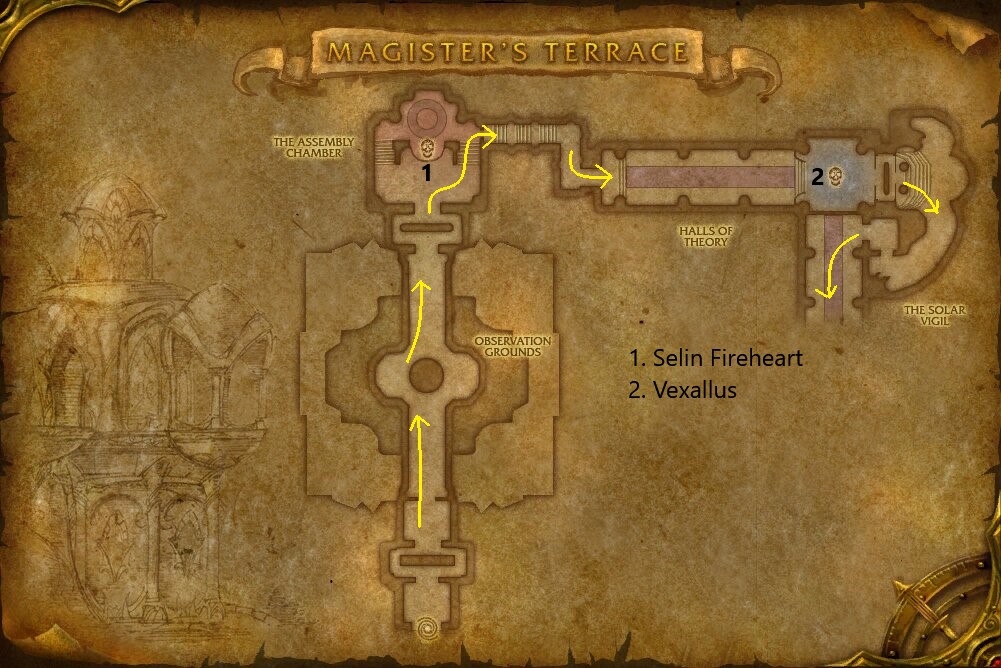
The first half of the dungeon has the first 2 bosses. The dungeon is very linear; simply follow the path forward, completing any quests you have along the way.
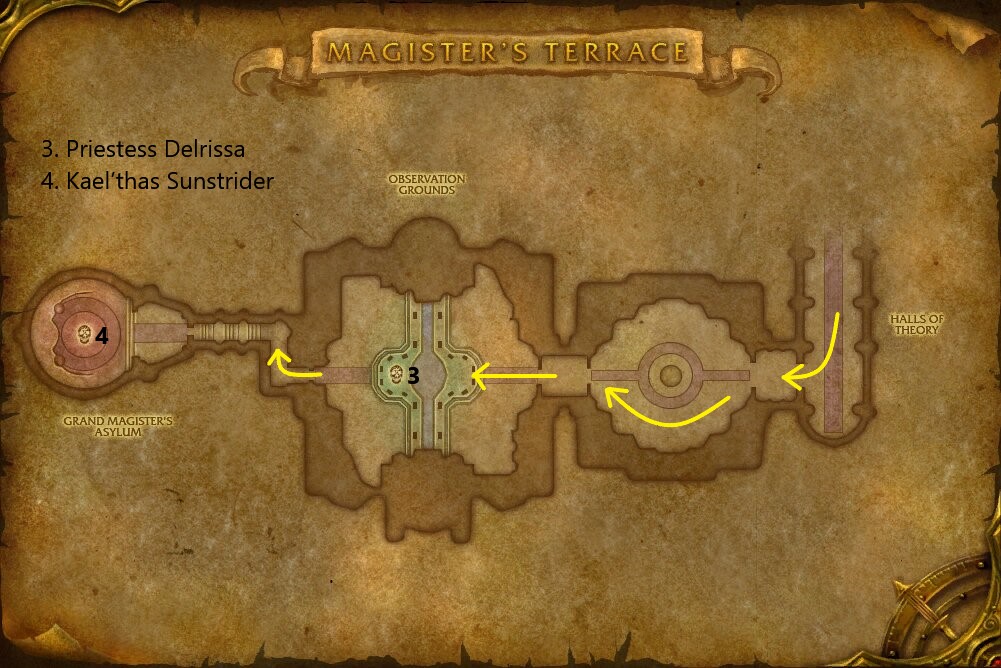
The second half of the dungeon contains the last 2 bosses. You will want to stay to one side of the dungeon, avoiding pulling skippable mobs.
Reputation from Magister's Terrace
Killing mobs in this instance grants Shattered Sun Offensive reputation.
Normal Difficulty
- Most mobs grant 12 reputation each.
- Each boss grants 120 reputation.
- A Normal Magister's Terrace run will give around 1,600 reputation.
- Reputation gains in Normal go all the way up until Exalted.
Heroic Difficulty
- Most mobs grant 15 reputation each.
- Each boss grants 250 reputation.
- A Heroic Magister's Terrace run will give around 2,400 reputation.
Overview of Magister's Terrace Bosses
Here we will give you a full rundown of what you can expect from each of the bosses found here on both Normal and Heroic difficulties as well as the items they drop.
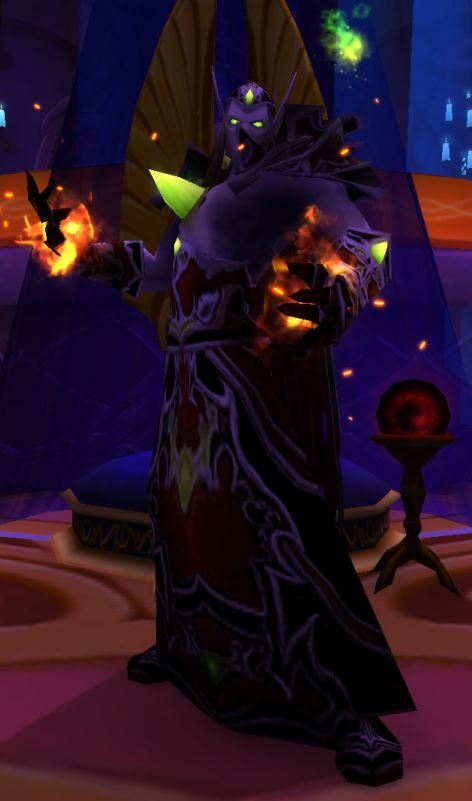
Selin Fireheart
 Drain Life — Channels on a random target,
dealing Shadow damage over time, healing himself for the damage dealt.
Drain Life — Channels on a random target,
dealing Shadow damage over time, healing himself for the damage dealt. Drain Mana — Channels on a random target,
stealing Mana over time.
Drain Mana — Channels on a random target,
stealing Mana over time. Mana Rage — Selin Fireheart drains a nearby
Fel Crystal, gaining 10% of his Mana every second he channels. He will continue to
drain the Fel Crystal until it is destroyed, or his Mana is full.
Mana Rage — Selin Fireheart drains a nearby
Fel Crystal, gaining 10% of his Mana every second he channels. He will continue to
drain the Fel Crystal until it is destroyed, or his Mana is full. Fel Explosion — Deals 1,000 damage to all nearby
enemies every second. Selin will continue to cast until he is out of Mana.
Fel Explosion — Deals 1,000 damage to all nearby
enemies every second. Selin will continue to cast until he is out of Mana.
Use any dispels or interrupts available to stop the ![]() Drain Life and
Drain Life and
![]() Drain Mana channels. Whenever Selin moves to a nearby
Fel Crystal to cast
Drain Mana channels. Whenever Selin moves to a nearby
Fel Crystal to cast ![]() Mana Rage, have your party target the Fel
Crystal and kill it to reduce the amount of Mana Selin gains. With high enough
damage and healing, you can ignore the Fel Crystals and simply damage Selin
himself instead.
Mana Rage, have your party target the Fel
Crystal and kill it to reduce the amount of Mana Selin gains. With high enough
damage and healing, you can ignore the Fel Crystals and simply damage Selin
himself instead.
Loot from Normal
| Item | Required Level | Item Type | Slot |
|---|---|---|---|
| 70 | Cloth | Wrist | |
| 70 | Wrist | ||
| 70 | Cloth | Back | |
| 70 | Plate | Hands | |
| 70 | Leather | Legs | |
| 70 | Weapon | One-Hand Axe |
Loot from Heroic
Unlike previous dungeons in The Burning Crusade, Magister's Terrace has completely different loot between Normal and Heroic difficulties.
| Item | Required Level | Item Type | Slot |
|---|---|---|---|
| 70 | Ranged | Thrown | |
| 70 | Leather | Wrists | |
| 70 | Weapon | Main-hand Dagger | |
| 70 | Plate | Shoulder | |
| 70 | Toy | Misc. |
Vexallus
 Summon Pure Energy — Vexallus spawns a Pure Energy at
every 15% health lost. Spawns 1 add on Normal difficulty, 2 adds on Heroic. These
Pure Energies cast
Summon Pure Energy — Vexallus spawns a Pure Energy at
every 15% health lost. Spawns 1 add on Normal difficulty, 2 adds on Heroic. These
Pure Energies cast  Energy Bolt at nearby enemies. The adds only have
1 health point and when killed, place
Energy Bolt at nearby enemies. The adds only have
1 health point and when killed, place  Energy Feedback on whoever
killed them; this debuff stacks up to 10 times.
Energy Feedback on whoever
killed them; this debuff stacks up to 10 times. Arcane Shock — Deals moderate Arcane damage to a
random target and places a DoT on the player, dealing Arcane damage over time.
Can be dispelled.
Arcane Shock — Deals moderate Arcane damage to a
random target and places a DoT on the player, dealing Arcane damage over time.
Can be dispelled.- Energy Bolt — Every 5 seconds, deals 1,885 Arcane
damage to a random target.
 Overload — At 20% health, Vexallus overloads, casting
an AoE attack that deals 1,000 Arcane damage to all nearby enemies. Also applies
a debuff that increases Arcane damage taken by 10% per stack, stacking up to 15
times total.
Overload — At 20% health, Vexallus overloads, casting
an AoE attack that deals 1,000 Arcane damage to all nearby enemies. Also applies
a debuff that increases Arcane damage taken by 10% per stack, stacking up to 15
times total.
This fight has very high healing requirements as there are multiple AoE
attacks going on. Focus on dispelling the ![]() Arcane Shock debuff
whenever possible. At 20% health, Vexallus will
Arcane Shock debuff
whenever possible. At 20% health, Vexallus will ![]() Overload. The
DPS players will need to quickly finish off the boss as it is very easy to
become overwhelmed during this phase.
Overload. The
DPS players will need to quickly finish off the boss as it is very easy to
become overwhelmed during this phase.
The main mechanic to deal with on this fight is the Pure Energy
add spawns. One will spawn on Normal mode and two on Heroic. The adds only have
1 health but can not be damaged by AoE abilities. Managing the debuff these adds
give when killed is the main challenge here. A Mage can kill these
and ![]() Ice Block the stacks off. Classes such as Hunter
and Warlock can use their pets to kill the Pure Energy
adds and despawn their pet when they get low health.
Ice Block the stacks off. Classes such as Hunter
and Warlock can use their pets to kill the Pure Energy
adds and despawn their pet when they get low health.
Loot from Normal
| Item | Required Level | Item Type | Slot |
|---|---|---|---|
| 70 | Jewelry | Finger | |
| 70 | Jewelry | Finger | |
| 70 | Leather | Feet | |
| 70 | Cloth | Wrist | |
| 70 | Cloth | Back | |
| 70 | Weapon | One-Hand Sword |
Loot from Heroic
Unlike previous dungeons in The Burning Crusade, Magister's Terrace has completely different loot between Normal and Heroic difficulties.
| Item | Required Level | Item Type | Slot |
|---|---|---|---|
| 70 | Plate | Chest | |
| 70 | Weapon | One-Hand Dagger | |
| 70 | Cloth | Shoulder | |
| 70 | Weapon | Staff | |
| 70 | Toy | Misc. |
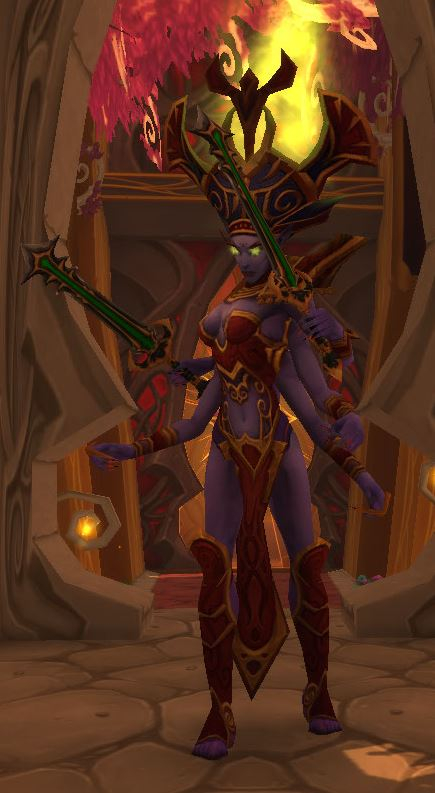
Priestess Delrissa
 Dispel Magic — Dispels 2 magical effects from
a friend or enemy.
Dispel Magic — Dispels 2 magical effects from
a friend or enemy. Flash Heal — Heals an ally for a moderate
amount of missing health.
Flash Heal — Heals an ally for a moderate
amount of missing health. Power Word: Shield — Shields an ally, absorbing
a moderate amount of damage.
Power Word: Shield — Shields an ally, absorbing
a moderate amount of damage. Psychic Scream — Fears nearby enemies for
up to 5 seconds.
Psychic Scream — Fears nearby enemies for
up to 5 seconds. Shadow Word: Pain — Puts a DoT on a random
enemy, dealing Shadow damage over time.
Shadow Word: Pain — Puts a DoT on a random
enemy, dealing Shadow damage over time.
In addition to Priestess Delrissa, there are 4 additional adds as part of this encounter. Out of the 8 listed NPCs below, 4 are randomly chosen. Knowing what each add does is crucial to knowing how to handle this fight properly, as certain combinations of adds can be quite deadly.
| NPC Name | Abilities |
|---|---|
| Apoko | Shaman mob type. Drops multiple different totems, Windfury and Fire Nova being the most deadly. Stuns nearby enemies, purges enemies buffs and heals nearby allies. Try to interrupt the heals and make sure to kill any totems dropped. |
| Eramas Brightblaze | Monk mob type. Interrupts nearby casters ( |
| Ellrys Duskhallow | Warlock mob type. Has a pet imp that has low health. Casts |
| Garaxxas | Hunter type mob. Has a ravager pet which can be tanked. Casts |
| Kagani Nightstrike | Rogue type mob. Has multiple different stuns, a |
| Warlord Salaris | Warrior type mob. Has a Mortal Strike, Fear and Charge. This mob deals very high damage, and when paired with the Mortal Strike, this mob can be extremely deadly. Kill this mob first or keep it crowd controlled. |
| Yazzai | Mage type mob. Casts |
| Zelfan | Engineering type mob. Deals high AoE Fire damage. Keep faced away and try to crowd control if possible. Can be banished. |
Depending on your group composition and damage output, you may need to focus
certain adds down first before killing Priestess Delrissa herself. Interrupt any
adds that heal if possible, and use any available crowd control wherever
possible. As the Priestess herself has ![]() Dispel Magic, many of the
crowd controls will be removed early. In addition to that, many of the mobs will
attempt to break free from crowd control often, making this fight very
difficult.
Dispel Magic, many of the
crowd controls will be removed early. In addition to that, many of the mobs will
attempt to break free from crowd control often, making this fight very
difficult.
This fight is similar to a PvP arena match, and most of the mobs cannot be tanked. Your tank should instead focus on debuffing, interrupting, and crowd controlling any dangerous mobs while protecting party members with lower health. AoE damage is not recommended here, as you need to quickly remove an enemy from the fight to greatly improve your odds of succeeding.
Lastly, it is recommended to "scout" the adds on this boss when doing Heroic difficulty to avoid getting a deadly combo. You can do this by looking under the bridge at the start, checking out Priestess Delrissa herself and seeing which 4 adds she has with her. Difficult combos such as Kagani Nightstrike, Eramas Brightblaze, and Warlord Salaris can make this fight seem nearly impossible, as they all deal high damage, have multiple stuns, and even apply healing reduction debuffs. If you get an undesirable combo such as this, simply have everyone head out of the dungeon and reset your dungeon by right clicking your character's portrait. This will reset the dungeon and give you a different combination of adds on this fight, possibly making the encounter much easier.
Loot from Normal
| Item | Required Level | Item Type | Slot |
|---|---|---|---|
| 70 | Weapon | Main-Hand Mace | |
| 70 | Plate | Wrist | |
| 70 | Cloth | Back | |
| 70 | Cloth | Shoulder | |
| 70 | Hands | ||
| 70 | Ranged | Thrown | |
| 375 | Enchanting | Pattern |
Loot from Heroic
Unlike previous dungeons in The Burning Crusade, Magister's Terrace has completely different loot between Normal and Heroic difficulties.
| Item | Required Level | Item Type | Slot |
|---|---|---|---|
| 70 | Jewelry | Trinket | |
| 70 | Jewelry | Trinket | |
| 70 | Jewelry | Trinket | |
| 70 | Jewelry | Trinket | |
| 70 | Toy | Misc. |
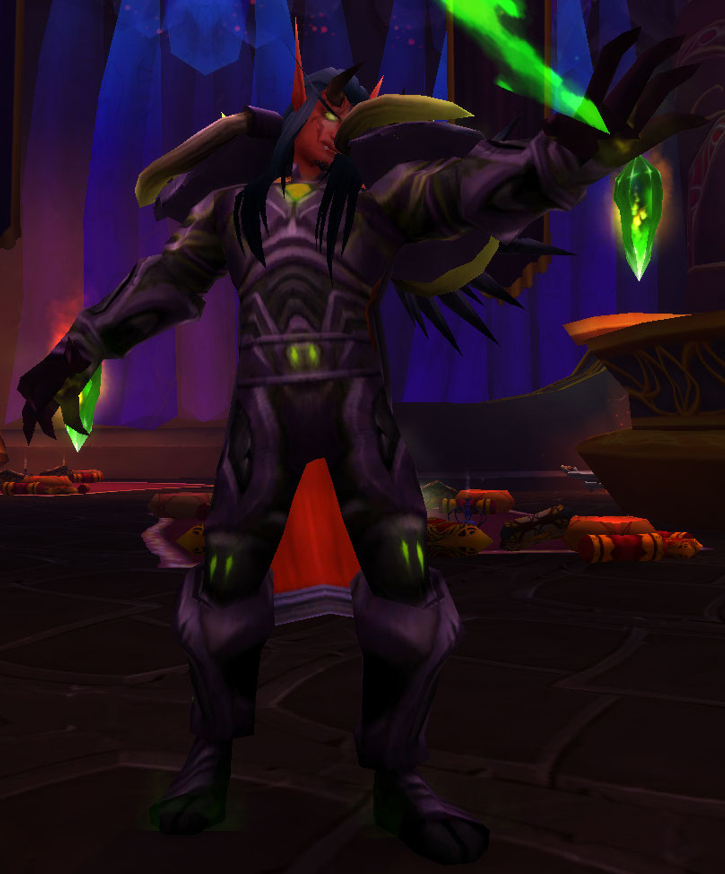
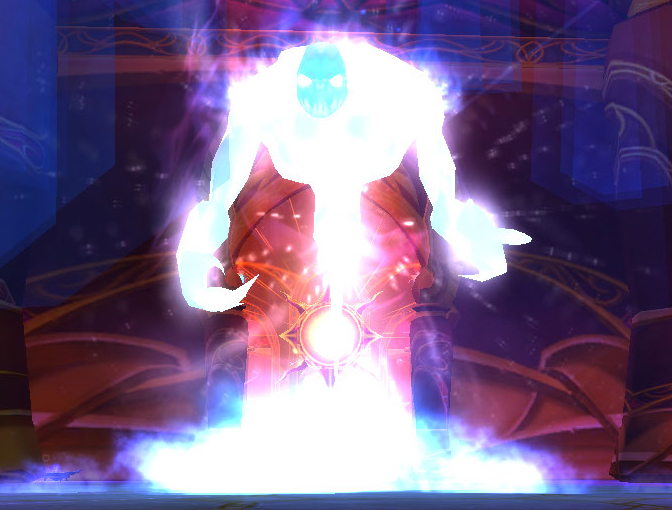
Kael'thas Sunstrider
 Fireball — Deals around 3,000 Fire damage
to current target. Increased to 6,000 Fire damage on heroic difficulty. Can be
interrupted.
Fireball — Deals around 3,000 Fire damage
to current target. Increased to 6,000 Fire damage on heroic difficulty. Can be
interrupted. Flame Strike — Covers an area in a large
inferno. 5 seconds later the area explodes, dealing 5,000 Fire damage (9,000 on
Heroic difficulty) to any enemies caught in the area.
Flame Strike — Covers an area in a large
inferno. 5 seconds later the area explodes, dealing 5,000 Fire damage (9,000 on
Heroic difficulty) to any enemies caught in the area. Phoenix — Summons a phoenix that
deals 2,000 Fire damage to itself and any nearby enemies every second. When they
die, they turn into a Phoenix Egg that causes them to respawn if the egg is not
killed.
Phoenix — Summons a phoenix that
deals 2,000 Fire damage to itself and any nearby enemies every second. When they
die, they turn into a Phoenix Egg that causes them to respawn if the egg is not
killed. Gravity Lapse — When reaching 50% health,
Kael'thas will cast this, throwing all players into the air and pulling them to
him. Players will then need to "swim" around the room, avoiding large purple
orbs while avoiding touching the floor. Players will also take a high amount of
damage over time from the Gravity Lapse debuff until the effect ends.
Gravity Lapse — When reaching 50% health,
Kael'thas will cast this, throwing all players into the air and pulling them to
him. Players will then need to "swim" around the room, avoiding large purple
orbs while avoiding touching the floor. Players will also take a high amount of
damage over time from the Gravity Lapse debuff until the effect ends. Shock Barrier — (Heroic only) Kael'thas
buffs himself with this shield, absorbing 10,000 damage and making him immune to
interrupts while the shield is up.
Shock Barrier — (Heroic only) Kael'thas
buffs himself with this shield, absorbing 10,000 damage and making him immune to
interrupts while the shield is up.- Pyroblast — (Heroic only) After casting
Shock Barrier, Kael'thas will start to cast Pyroblast;
dealing 55,000 Fire damage to current target. Can be interrupted.
This fight plays out very similarly to the Kael'thas Sunstrider
fight in Tempest Keep. Make sure to interrupt the
![]() Fireball casts as often as possible, as they are cast
very frequently. Have the group spread out as much as possible to avoid the
Fireball casts as often as possible, as they are cast
very frequently. Have the group spread out as much as possible to avoid the
![]() Flame Strike. If you see the visual effect of the
Flamestrike, you and your party members MUST move out
of it as soon as possible.
Flame Strike. If you see the visual effect of the
Flamestrike, you and your party members MUST move out
of it as soon as possible.
Avoid the ![]() Phoenixes whenever they spawn. They
will chase down their highest threat target, most likely the healer. Run away
from them and avoid standing near them at all times, as they will constantly
cast a Hellfire, dealing high damage to any nearby enemies.
Phoenixes whenever they spawn. They
will chase down their highest threat target, most likely the healer. Run away
from them and avoid standing near them at all times, as they will constantly
cast a Hellfire, dealing high damage to any nearby enemies.
At 50% health, Kael'thas will cast ![]() Gravity Lapse.
The party must avoid touching the floor while flying in the air, as you will
take damage and get shot back up into the air. There will also be 3 large,
Gravity Lapse.
The party must avoid touching the floor while flying in the air, as you will
take damage and get shot back up into the air. There will also be 3 large,
![]() Arcane Spheres that all players must avoid at all times. Fly around, avoiding the
floor and the orbs while trying to slowly DPS Kael'thas whenever you can
safely.
Arcane Spheres that all players must avoid at all times. Fly around, avoiding the
floor and the orbs while trying to slowly DPS Kael'thas whenever you can
safely.
On Heroic difficulty, Kael'thas will cast
![]() Shock Barrier 60 seconds into the fight. This absorbs
10,000 damage and makes him immune to interrupts. After casting
Shock Barrier, Kael'thas will begin casting
Shock Barrier 60 seconds into the fight. This absorbs
10,000 damage and makes him immune to interrupts. After casting
Shock Barrier, Kael'thas will begin casting
![]() Pyroblast. The group will need to burn through the
10,000 damage absorbing shield and interrupt the
Pyroblast before the casts finishes, as it deals
55,000 damage. With enough damage, you may be able to push Kael'thas below 50%
in less than 60 seconds, preventing him from even casting these abilities.
Pyroblast. The group will need to burn through the
10,000 damage absorbing shield and interrupt the
Pyroblast before the casts finishes, as it deals
55,000 damage. With enough damage, you may be able to push Kael'thas below 50%
in less than 60 seconds, preventing him from even casting these abilities.
Loot from Normal
| Item | Required Level | Item Type | Slot |
|---|---|---|---|
| 70 | Cloth | Waist | |
| 70 | Weapon | Two-Hand Axe | |
| 70 | Plate | Head | |
| 70 | Leather | Chest | |
| 70 | Weapon | Staff | |
| 70 | Jewelry | Finger | |
| 70 | Jewelry | Finger | |
| 70 | Chest | ||
| 70 | Plate | Feet | |
| 70 | Cloth | Hands | |
| 70 | Leather | Feet | |
| 70 | Cloth | Back | |
| Unique | Misc. | Pet |
Loot from Heroic
Unlike previous dungeons in The Burning Crusade, Magister's Terrace has completely different loot between Normal and Heroic difficulties.
| Item | Required Level | Item Type | Slot |
|---|---|---|---|
| 70 | Weapon | One-Hand Sword | |
| 70 | Cloth | Chest | |
| 70 | Weapon | Main-Hand Mace | |
| 70 | Plate | Feet | |
| 70 | Leather | Shoulder | |
| 70 | Chest | ||
| 70 | Plate | Chest | |
| 70 | Weapon | One-Hand Axe | |
| 70 | Mount | 100% Epic Ground Mount | |
| 70 | Toy | Misc. |
Recommended Magister's Terrace Group Composition
Magister's Terrace can be difficult, especially when facing Heroic difficulty. Make sure to prepare a proper group composition before heading into this dungeon, or you may find yourself struggling to clear.
The trash mobs in this dungeon are very difficult, as such, it is highly
recommended to bring a form of crowd control to the dungeon to help you
succeed. A Mage is a great asset to most groups as they bring
![]() Polymorph, which helps on many of the more difficult trash
pulls. In addition to that, a Shaman of any spec is always great
for this dungeon, as most of the bosses have soft enrage timers, making
Polymorph, which helps on many of the more difficult trash
pulls. In addition to that, a Shaman of any spec is always great
for this dungeon, as most of the bosses have soft enrage timers, making
![]() Bloodlust /
Bloodlust / ![]() Heroism great assets to help quickly
defeat the bosses.
Heroism great assets to help quickly
defeat the bosses.
Changelog
- 12 May 2022: Fixed some typos. Added additional information about the Priestess Delrissa encounter.
- 06 May 2022: Guide added.
This guide has been written by Abide, TBC veteran for nearly a decade. Abide is a Warrior tank and multi-class expert currently playing on Faerlina as Horde. You can find him in the the Icy Veins Discord. You can also see him live on Twitch.
- Chalice Quest NPC Rewards Temporarily Disabled Disabled in Season of Discovery
- Two Mounts Drop in the Scarlet Enclave Raid — Here’s Where to Get Them
- This Level 42 Gnome Reached Exalted with Darnassus by Turning In 1,800 Eggs One at a Time—Over 800 Hours Played
- Season of Discovery Hotfixes, April 15th
- Fan-Made WoW Armory Lets You Track Characters, Talents, PvP, and More in Cataclysm Classic
- Gold Swapping/Trading in Classic and Between Classic and Retail Now Prohibited by Blizzard
- Beatrix Encounter in Scarlet Enclave Raid Has Special Features, as Blizzard Explain in Detail
- Season of Discovery Phase 8 Raid Adjustments Now Live