The Slave Pens Dungeon Guide
The recommended level range to run this dungeon on Normal is 61-65. Heroic
mode will require Level 70 and the ![]() Reservoir Key to enter.
Reservoir Key to enter.
This dungeon will take approximately 20-30 minutes to complete with an average group. This dungeon is commonly abbreviated as "SP".
In this guide, we will cover dungeon quests, the layout of the dungeon, an overview of trash mobs, tactics for each boss, loot that can be obtained, and ideal group compositions.
The Slave Pens Quests
Before heading into The Slave Pens, we advise you to get all the dungeon quests related to it. To make this process easier, we have written a separate guide for the quests and their chains.
The Slave Pens Entrance Location
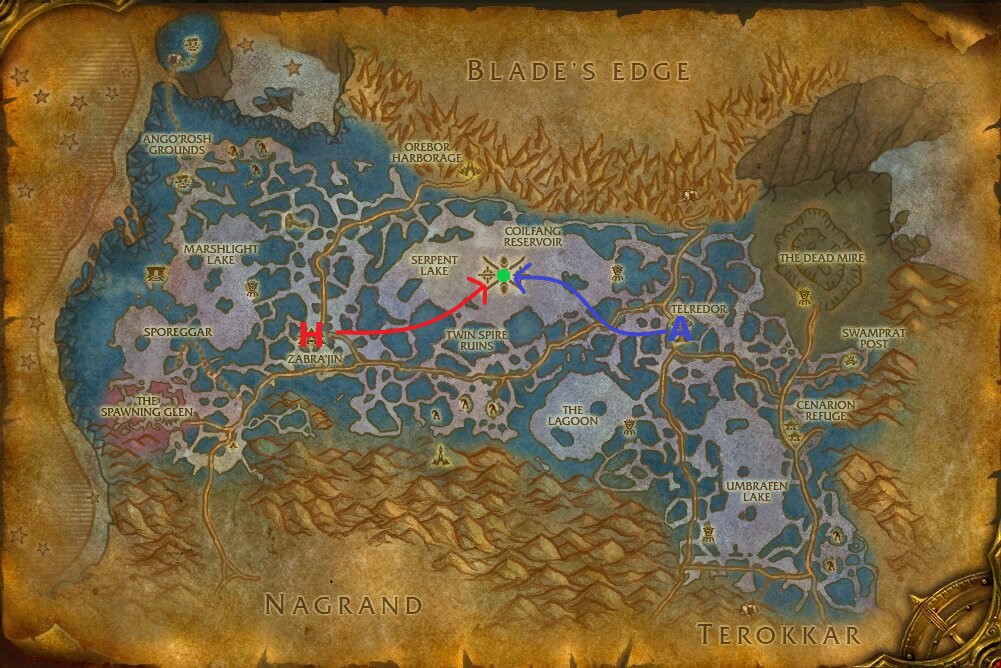
Conveniently, all dungeons in Zangarmarsh are located in one centralized location: Coilfang Reservoir. This area is in the middle of the map on the Northern side in the water.
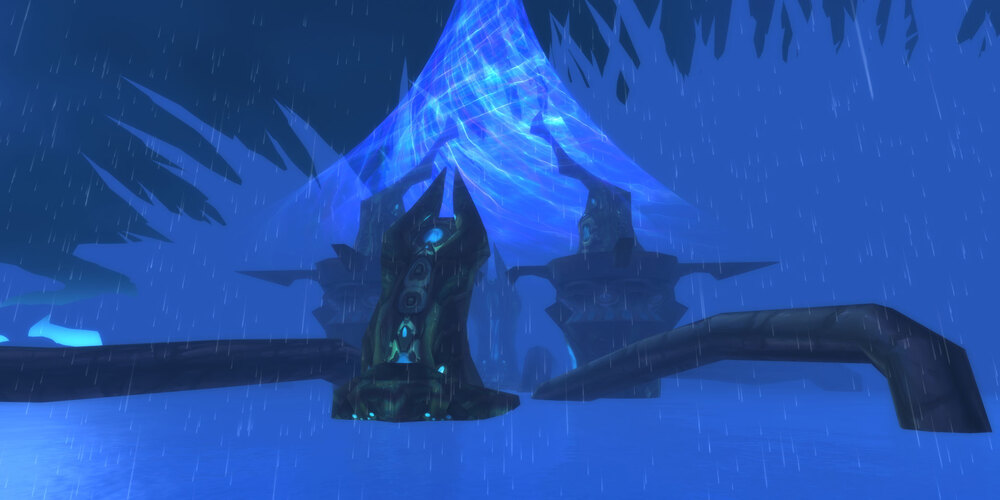
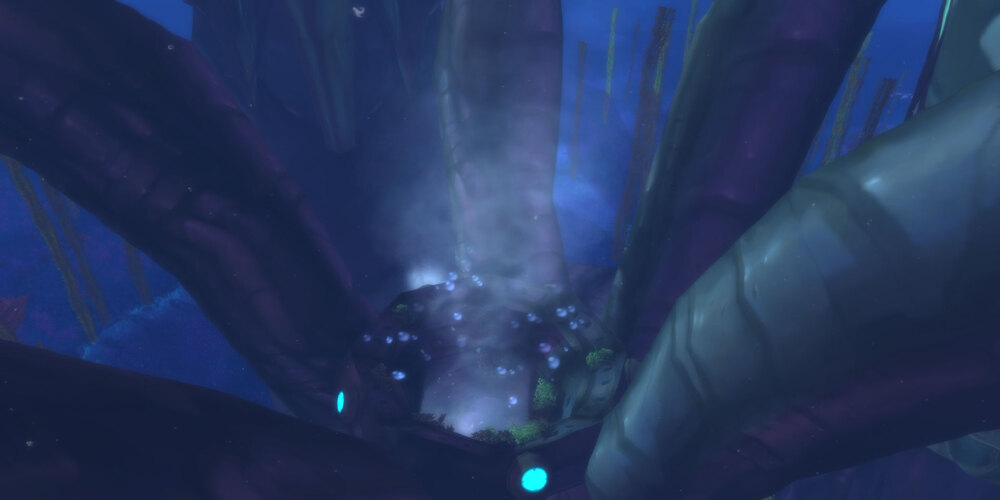
You will need to swim towards the middle of the lake until you come across the structure in the picture Above. After that swim down and you will see a pipe opening, shown below, to swim through. Swim through to the other side to emerge with the summoning stone in front of you and all three Coilfang dungeons before you. The Slave Pens is the dungeon portal located on the far left.
Layout of The Slave Pens
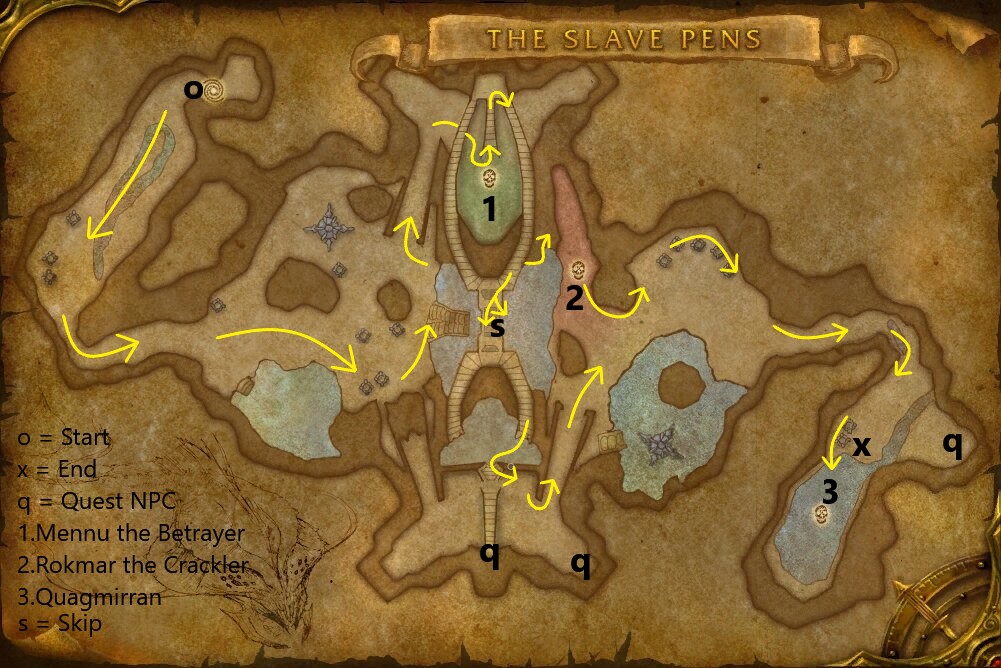
The Slave Pens is very divergent in the options it offers regarding how you approach the dungeon. There are many trash packs that can be outright skipped and a few different pathing options your party may choose to take when running through this dungeon.
In the picture above, there is a common skip marked with an "s". While it is not a requirement to do this skip, it is very common to do this on Heroic difficulty.
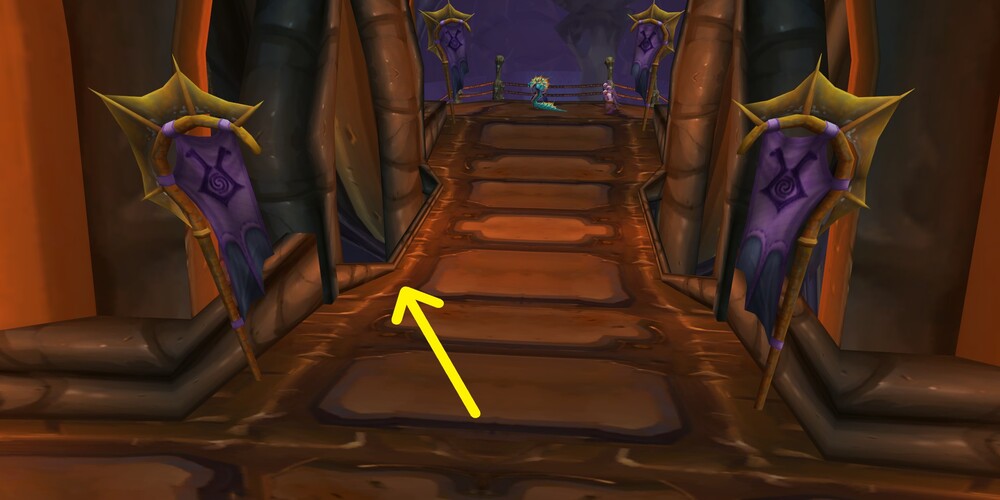
When you come to this bridge avoid the patrols and head towards the left side.
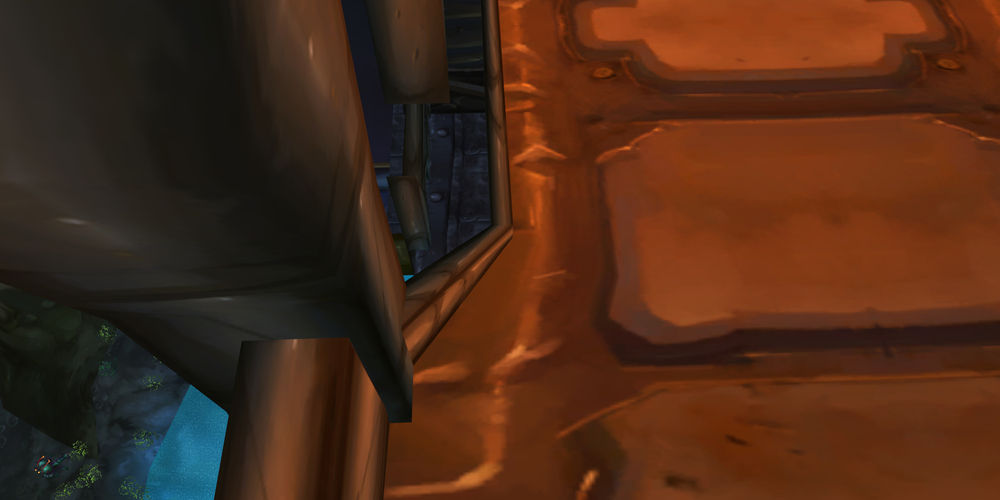
Jump over this ledge and land on the platform below. Heal or eat food after as you will take a large amount of fall damage.
Turn around and head through the opening behind you, running along the ledge.
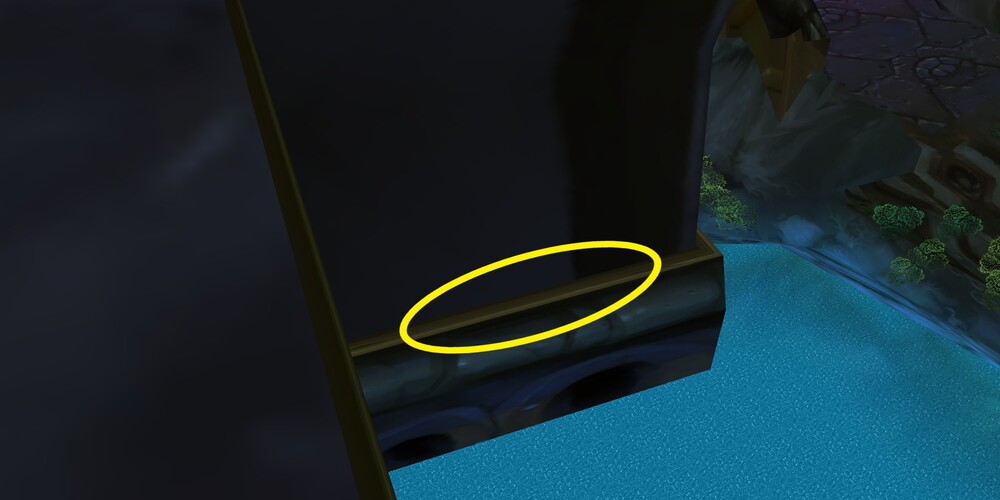
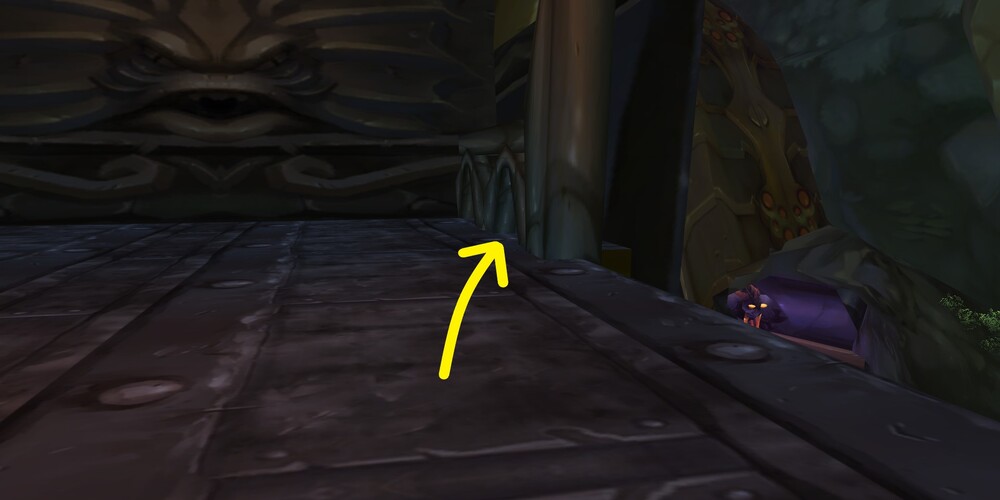
From here your goal is to run off the ledge and fall down to the lower ledge, marked in the picture above. Then simply walk along the ledge until you round the corner and you have completed the skip.
Reputation From The Slave Pens
Killing mobs in this instance grants Cenarion Expedition reputation.
Normal Difficulty
- The majority of monsters will grant 5 reputation each.
- Each boss grants 50 reputation.
- A Normal run of The Slave Pens will give around 500 reputation.
- Reputation gains in Normal stop at (5999/6000) Friendly, including bosses.
Heroic Difficulty
- The majority of monsters will grant 15 reputation each.
- Each boss grants 250 reputation.
- A Heroic run of The Slave Pens will give around 1,200 reputation.
Overview of Trash Mobs in The Slave Pens
In this section, we will briefly go over each of the trash mobs that pose a threat to you in this dungeon.
Coilfang Slavemaster
When engaged in combat, these will aggro any nearby Wastewalker Slave and Wastewalker Worker. If you focus-fire the Slavemaster first, these will stop attacking you and thank you for freeing them.
Coilfang Champion

Ranged players should attempt to stand away from the mob to avoid the
![]() Frightening Shout. If a fear does occur, be mindful
of the
Frightening Shout. If a fear does occur, be mindful
of the ![]() Cleave.
Cleave.
Coilfang Soothsayer

Attempt to line-of-sight these to avoid taking too many
![]() Arcane Missiles and force them into melee range.
You will want to either kill these first or use crowd control on them as the
Arcane Missiles and force them into melee range.
You will want to either kill these first or use crowd control on them as the
![]() Domination can be quite deadly if used on a strong target such as
the tank or a geared DPS.
Domination can be quite deadly if used on a strong target such as
the tank or a geared DPS.
Coilfang Defender

These can hit somewhat hard, especially when paired with a stun from
![]() Shield Slam. Casters should be cautious to not reflect
too many spells back at themselves. Try to use AoE spells to deal damage while
the
Shield Slam. Casters should be cautious to not reflect
too many spells back at themselves. Try to use AoE spells to deal damage while
the ![]() Spell Reflection is up.
Spell Reflection is up.
Coilfang Scale-Healer

These have a very high healing output and should either be killed first or be the focus of crowd control abilities and kicks.
Coilfang Ray

These are worth noting as the horrify can be quite annoying at times. Depending on your party, you may want to CC these or focus them down quickly.
Overview of Bosses in The Slave Pens
Here we will give you a full rundown of what you can expect from each of the bosses found here on both Normal and Heroic difficulties as well as the items they drop.
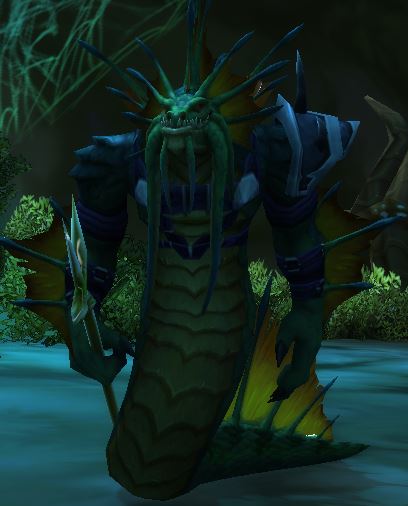
Mennu the Betrayer

 Corrupted Nova Totem
 Mennu's Healing Ward
 Tainted Earthgrab Totem
 Tainted Stoneskin Totem
 Lightning Bolt
Mennu the Betrayer himself is not very threatening; most of his power
comes from his totems. ![]() Mennu's Healing Ward,
Mennu's Healing Ward,
![]() Tainted Earthgrab Totem, and
Tainted Earthgrab Totem, and ![]() Tainted Stoneskin Totem should
all be killed as quickly as possible. However, it is very important to avoid killing
Tainted Stoneskin Totem should
all be killed as quickly as possible. However, it is very important to avoid killing
![]() Corrupted Nova Totem. When the Corrupted Nova Totem expires
OR is killed, it will deal massive AoE damage around it.
Corrupted Nova Totem. When the Corrupted Nova Totem expires
OR is killed, it will deal massive AoE damage around it.
Loot from Normal
| Item | Required Level | Item Type | Slot |
|---|---|---|---|
| 62 | Chest | ||
| 62 | Waist | ||
| 62 | Cloth | Legs | |
| 62 | One-Handed Sword | Main-Hand | |
| 62 | Dagger | Weapon | |
| 340 | Leatherworking Pattern | Misc |
Loot from Heroic
| Item | Required Level | Item Type | Slot |
|---|---|---|---|
| 70 | Accessory | Neck | |
| 70 | Waist | ||
| 70 | Cloth | Waist | |
| 70 | Leather | Legs | |
| 70 | Dagger | Main-Hand | |
| 70 | Totem | Relic | |
| BoP | Gem | Misc | |
| BoP | Gem | Misc | |
| BoP | Gem | Misc |
Rokmar the Crackler

This is a fairly straightforward fight. Heal whoever has
![]() Grievous Wound on them to full health. This fight may
be tough if you have an undergeared healer.
Grievous Wound on them to full health. This fight may
be tough if you have an undergeared healer. ![]() Ensnaring Moss on the
healer can also cause issues as this will make their casts longer.
Ensnaring Moss on the
healer can also cause issues as this will make their casts longer.
Loot from Normal
| Item | Required Level | Item Type | Slot |
|---|---|---|---|
| 62 | Cloak | Back | |
| 62 | Accessory | Trinket | |
| 62 | One-Handed Mace | Main-Hand | |
| 62 | Crossbow | Ranged Weapon | |
| 62 | Wand | Ranged Weapon |
Loot from Heroic
| Item | Required Level | Item Type | Slot |
|---|---|---|---|
| 70 | Accessory | Neck | |
| 70 | Cloak | Back | |
| 70 | Plate | Waist | |
| 70 | Leather | Waist | |
| 70 | Feet | ||
| BoP | Gem | Misc | |
| BoP | Gem | Misc | |
| BoP | Gem | Misc |
Quagmirran
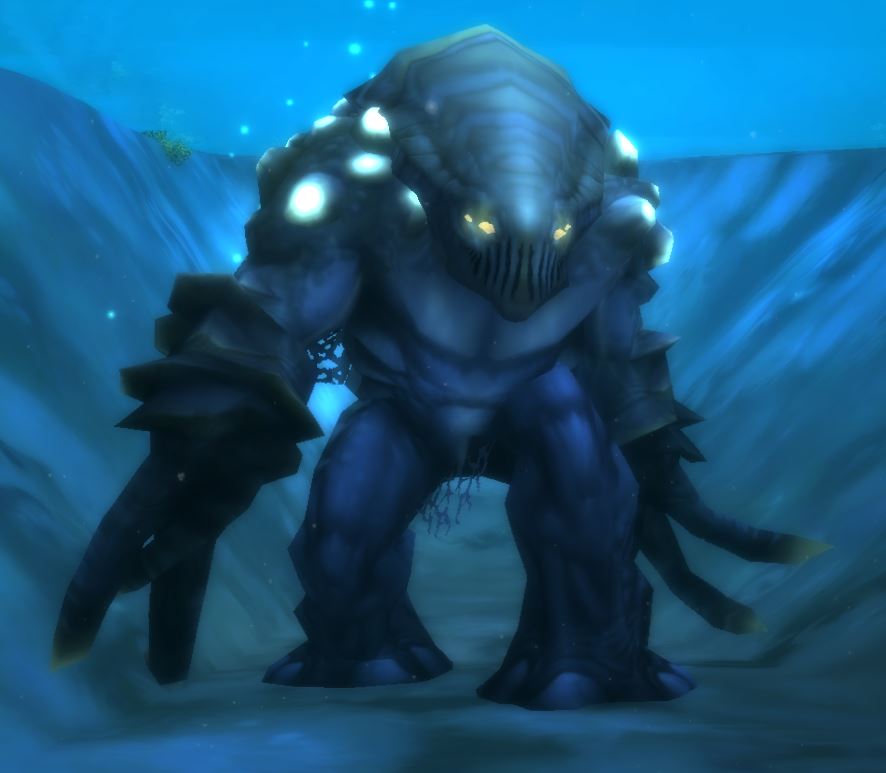
While he deals fairly high damage to the tank with his multiple abilities,
Quagmirran's real danger comes from his ![]() Acid Spray and
Acid Spray and
![]() Poison Bolt Volley abilities. Make sure to face him away from
the group, especially melee.
Poison Bolt Volley abilities. Make sure to face him away from
the group, especially melee.
To properly deal with the ![]() Acid Spray, have the party spread
out as much as possible while still staying within range of your healer. When
Quagmirran turns around to target a player with the spray, use any
defensive cooldowns such as
Acid Spray, have the party spread
out as much as possible while still staying within range of your healer. When
Quagmirran turns around to target a player with the spray, use any
defensive cooldowns such as ![]() Ice Block,
Ice Block, ![]() Feign Death, or
Feign Death, or
![]() Divine Shield to stop the channel. Tanks can also taunt the boss
during this to be targeted by a few ticks of the spray instead.
Divine Shield to stop the channel. Tanks can also taunt the boss
during this to be targeted by a few ticks of the spray instead.
![]() Poison Bolt Volley can be just as, if not more, deadly than
Poison Bolt Volley can be just as, if not more, deadly than
![]() Acid Spray depending on your gear level and group
composition. The high initial damage coupled with the damage-over-time
afterward makes for very high party-wide damage. Use any
Acid Spray depending on your gear level and group
composition. The high initial damage coupled with the damage-over-time
afterward makes for very high party-wide damage. Use any
![]() Cleanse-like abilities at your disposal to remove the poisons
from the entire group as soon as possible.
Cleanse-like abilities at your disposal to remove the poisons
from the entire group as soon as possible.
Loot from Normal
| Item | Required Level | Item Type | Slot |
|---|---|---|---|
| 62 | Plate | Legs | |
| 62 | Leather | Hands | |
| 62 | Shoulder | ||
| 62 | Cloak | Back | |
| 62 | Plate | Chest |
Loot from Heroic
| Item | Required Level | Item Type | Slot |
|---|---|---|---|
| 70 | Accessory | Neck | |
| 70 | Shoulder | ||
| 70 | Cloth | Shoulder | |
| 70 | Shoulder | ||
| 70 | Plate | Chest | |
| 70 | Leather | Wrist | |
| 70 | Plate | Waist | |
| 70 | Cloth | Waist | |
| 70 | Leather | Legs | |
| 70 | Leather | Legs | |
| 70 | Cloth | Feet | |
| 70 | Accessory | Finger | |
| 70 | Accessory | Trinket | |
| 70 | One-Handed Mace | Main-Hand | |
| 70 | One-Handed Sword | Weapon | |
| 70 | Off-Hand Weapon | Off-Hand | |
| BoP | Gem | Misc | |
| BoP | Gem | Misc | |
| BoP | Gem | Misc |
Recommended Group Composition
The pulls in The Slave Pens are small, so no significant amount of AoE is needed.
There is no real need for any crowd control in The Slave Pens. It is strongly
recommended to have a Shaman in the party for
![]() Tremor Totem as well as
Tremor Totem as well as ![]() Poison Cleansing Totem. This
will trivialize almost all of the content.
Poison Cleansing Totem. This
will trivialize almost all of the content.
Changelog
- 30 Jun. 2021: Pictures added for mobs.
- 26 May 2021: Guide added.
This guide has been written by Abide, TBC veteran for nearly a decade. Abide is a Warrior tank and multi-class expert currently playing on Faerlina as Horde. You can find him in the the Icy Veins Discord. You can also see him live on Twitch.
- Arathi Basin, Higher Honor Ranks, and Battleground Weekends Live Now on Classic Anniversary Realms!
- Improvements to Black Lotus Accessibility Coming Soon to Anniversary Realms
- Hardcore DDoS Resurrections Start: Dates and Future Plans
- Blizzard Revives Hardcore Characters Affected by DDoS Attacks
- Blizzard Releases Remastered WoW Classic 20th Anniversary Trailer “The Return”
- WoW Classic 20th Anniversary Edition Phase 3 Now Live: BWL, Darkmoon Faire, and More
- Season of Discovery Phase 8 Arrives on April 8th
- Season of Discovery Hotfixes: March 4th