Temple of the Jade Serpent Dungeon Guide: Location, Boss Strategies, Trash, and Loot
Welcome to our guide to the Temple of the Jade Serpent dungeon in Season 1 of the Dragonflight World of Warcraft expansion. This guide will cover everything you need to know about the dungeon, including how to get to it, its layout, the trash and boss mechanics within, and its loot.
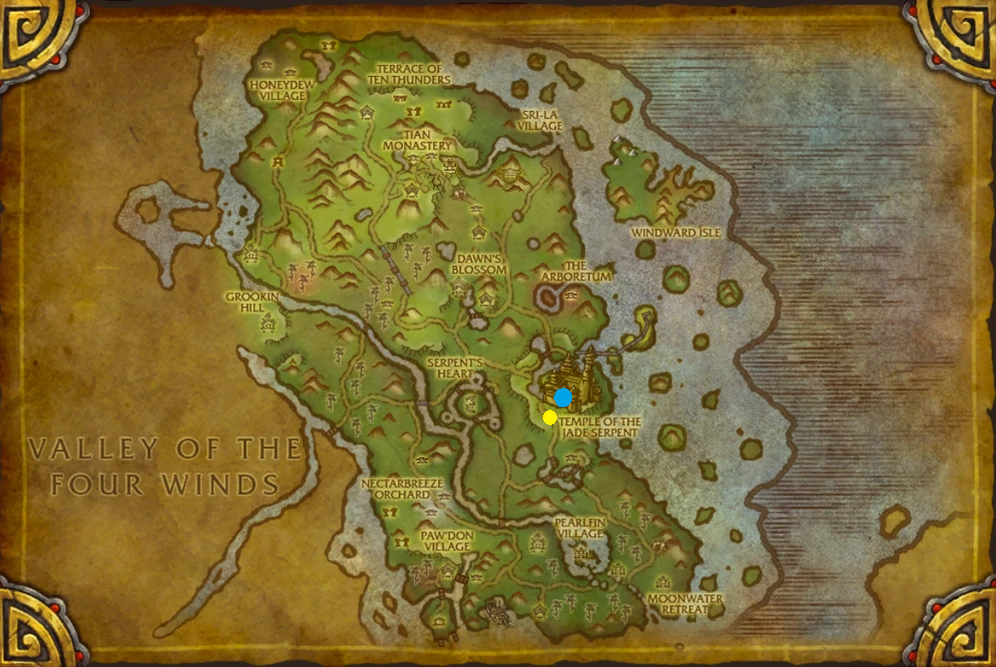
Temple of the Jade Serpent is a level 70 dungeon located on the east coast of - The Jade Forest, Pandaria. The nearest flight point for Alliance and Horde players is Jade Temple Grounds, Jade Forest. Upon landing, head further to the north until you uncover the dungeon's entrance.
This guide will focus on an extensive overview of the dungeon, providing vital information
to complete it on ![]() Mythic and Mythic Keystone difficulty. We will cover all 4 boss
fights supported by the most notable trash enemies in the
dungeon and their important abilities. If you would like to learn about the other
Dragonflight Dungeons or the upcoming Mythic+ season instead, please see our
overviews linked below. Otherwise, without further ado, let us begin!
Mythic and Mythic Keystone difficulty. We will cover all 4 boss
fights supported by the most notable trash enemies in the
dungeon and their important abilities. If you would like to learn about the other
Dragonflight Dungeons or the upcoming Mythic+ season instead, please see our
overviews linked below. Otherwise, without further ado, let us begin!
Boss order in Temple of the Jade Serpent
You will be able to choose which boss you want to approach first in Temple of the Jade Serpent, as the dungeon, gives you the full flexibility of doing so, with the only requirement being that Liu Flameheart and Sha of Doubt unlocks once you have defeated the previous 2 bosses — Wise Mari and Lorewalker Stonestep. Below you will see our recommendation for the boss order.
Fountain of the Overseeing and Wise Mari
Notable Trash Before Wise Mari
Upon starting the dungeon, turn left and head towards Wise Mari. The distance is relatively short; however, there are some extremely dangerous mobs you should be aware of:
- Although Corrupt Droplets are non-elites, they will continuously
cast
 Splash, dealing AoE damage to all players. You cannot interrupt
the cast, but you can stun and quickly nuke them.
Splash, dealing AoE damage to all players. You cannot interrupt
the cast, but you can stun and quickly nuke them. - Use all of your group interrupts towards Fallen Waterspeaker and
its
 Hydrolance +
  Tidal Burst casts. We advise to use
stun effects to cover up if you lack the interrupts!
Tidal Burst casts. We advise to use
stun effects to cover up if you lack the interrupts! - Corrupt Living Water is the most dangerous trash mob in this area,
pay attention to its
 Tainted Ripple cast as it does serious initial damage,
plus it will apply an additional damage-over-time effect. You can line of sight
the cast if you are quick enough! At last, sidestep the
Tainted Ripple cast as it does serious initial damage,
plus it will apply an additional damage-over-time effect. You can line of sight
the cast if you are quick enough! At last, sidestep the  Surging Deluge
ground animation.
Surging Deluge
ground animation.
Wise Mari Boss Guide

All Roles
- Assigned an interrupt order for Hydrolance as it will be present
throughout the fight.
- Once you get targeted by the
 Corrupted Vortex, put the vortex
ground animation away from your team at the end of the cast.
Corrupted Vortex, put the vortex
ground animation away from your team at the end of the cast. - Watch out for the
 Corrupted Geyser; the water will appear
"bubbly" a second before triggering the Corrupted Geyser ability.
Corrupted Geyser; the water will appear
"bubbly" a second before triggering the Corrupted Geyser ability. - Avoid being hit by the
 Wash Away cast at all costs. This ability is
likely to turn deadly. Always pay attention to Corrupted Geyser, so you
are not caught by surprise!
Wash Away cast at all costs. This ability is
likely to turn deadly. Always pay attention to Corrupted Geyser, so you
are not caught by surprise!
Tank
- As there is not any tank-specific mechanic you need to deal with, you can
help your team with assigning the interrupts for the Hydrolance
cast.
Healer
- Spot heal the party member that gets targeted by the Corrupted Vortex.
The Scrollkeeper's Sanctum and Strife & Peril
Notable Trash Before Peril and Strife
Once you defeat Wise Mari, get back to the starting point of the dungeon and head right towards the The Scrollkeeper's Sanctum area where you will meet the second boss of the dungeon — Peril and Strife. Here is what you should know about the trash mobs there:
- Interrupt the Haunting Sha's
 Haunting Scream AoE Fear. If this
ability goes through, there is a high probability of ninja polling other
trash packs or simply wiping. The mob will also cast
Haunting Scream AoE Fear. If this
ability goes through, there is a high probability of ninja polling other
trash packs or simply wiping. The mob will also cast  Haunting Gaze on your tank, so keep him healthy at all costs!
 - Beware of
 Throw Torch from Xiang and Jiang; they will
occasionally throw it on a random target, dealing serious damage over time. Heads up, your
Healer can dispel it!
Throw Torch from Xiang and Jiang; they will
occasionally throw it on a random target, dealing serious damage over time. Heads up, your
Healer can dispel it! - Interrupt the
 Sleepy Soliloquy cast from The Talking Fish,
it goes on a random player, and it will put them asleep for 6 sec.
Sleepy Soliloquy cast from The Talking Fish,
it goes on a random player, and it will put them asleep for 6 sec. - Run away from the The Songbird Queen's
 Territorial Display,
it has 6 yards radius so pay close attention. In addition, your tank
must pay close attention to
Territorial Display,
it has 6 yards radius so pay close attention. In addition, your tank
must pay close attention to  Vicious Peck; it does high frontloaded damage and a follow-up Bleed effect.
 - Avoid the
 Tears of Pain ground puddles coming from The Crybaby Hozen.
In addition, use your interrupts on
Tears of Pain ground puddles coming from The Crybaby Hozen.
In addition, use your interrupts on  Fit of Rage to stop the
The Crybaby Hozen from further empowering itself.
Fit of Rage to stop the
The Crybaby Hozen from further empowering itself. - Your tank must watch out for the stackable
 Staggering Blow
debuff coming from The Golden Beetle. In addition, use Dispel or Purge
effects once you see The Golden Beetle casting
Staggering Blow
debuff coming from The Golden Beetle. In addition, use Dispel or Purge
effects once you see The Golden Beetle casting  Golden Barrier,
not only will it create an absorb shield, but also, upon breaking, it will deal massive
damage to everyone within 40 yards.
Golden Barrier,
not only will it create an absorb shield, but also, upon breaking, it will deal massive
damage to everyone within 40 yards. - The Nodding Tiger will always leap on the cast
 Savage Leap
on the furthest target, dealing initial damage and leaving a Bleed
effect. Make sure to stop its
Savage Leap
on the furthest target, dealing initial damage and leaving a Bleed
effect. Make sure to stop its  Cat Nap ability; otherwise, it will restore
health every second.
Cat Nap ability; otherwise, it will restore
health every second.
Peril and Strife Boss Guide
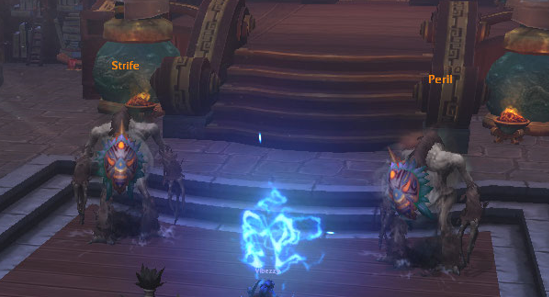
You must engage the Corrupted Scroll in order to activate
Peril and Strife encounter. It is important to know how
![]() Intensity works: Each time you attack either Peril or
Strife, they will gain a stack of
Intensity works: Each time you attack either Peril or
Strife, they will gain a stack of ![]() Intensity, upon reaching a
maximum of 10 stacks they will be immune to all damage for
15 sec. The key to dropping stacks is to ignore either Peril
or Strife, causing them to suffer from
Intensity, upon reaching a
maximum of 10 stacks they will be immune to all damage for
15 sec. The key to dropping stacks is to ignore either Peril
or Strife, causing them to suffer from ![]() Dissipation.
Never attack both of them, and always swap from one to another (once one
has 5-6 stacks, it is a good time to swap). You can read more details below:
Dissipation.
Never attack both of them, and always swap from one to another (once one
has 5-6 stacks, it is a good time to swap). You can read more details below:
All Roles
- Do not use cleave abilities, else you will risk each of the bosses to gain
a stack of
 Intensity. Using direct attacks is the best source of
damage. We are uncertain at this point if damage-over-time effects
(Bleeds included) trigger Intensity, as soon as we know, we will
update the guide.
Intensity. Using direct attacks is the best source of
damage. We are uncertain at this point if damage-over-time effects
(Bleeds included) trigger Intensity, as soon as we know, we will
update the guide. - If you have high stacks of the
 Feeling of Superiority, use a
defensive cooldown!
Feeling of Superiority, use a
defensive cooldown!
Tank
- Hold aggro on both targets to avoid your team from being accidentally cleaved.
Healer
- Both Strife and Peril will continuously cast
 Agony throughout the entire fight, a good place to use your
healing cooldowns is when either of the bosses has high stacks of
Intensity.
Agony throughout the entire fight, a good place to use your
healing cooldowns is when either of the bosses has high stacks of
Intensity. - Watch out for the Feeling of Superiority buff, if your
party member has a high stack, spot-heal them.
Terrace of the Twin Dragons and Liu Flameheart
Notable Trash Before Liu Flameheart
After you have defeated Peril and Strife, head straight towards the Terrace of the Twin Dragons area where you will meet the third boss of the dungeon — Liu Flameheart. In addition, there are going to be a few new enemies you will uncover, paired with some old ones that you have previously faced. Here is what you should know about those who you have not seen yet:
- Shambling Infester is the only "mini-boss" in this dungeon.
The trash mob has significantly more health than the rest of the mobs
so it will take much longer to defeat. Make sure you sidestep his
 Flames of Doubt frontal cone ability (or out-range if you are
further than 25 yards away) and use defensives if you have
low health during the
Flames of Doubt frontal cone ability (or out-range if you are
further than 25 yards away) and use defensives if you have
low health during the  Summon Sha cast. Remember, once you defeat
the Lesser Sha they will cast
Summon Sha cast. Remember, once you defeat
the Lesser Sha they will cast  Sha Eruption.
 - Run avoid from the Sha-Touched Guardians
 Leg Sweep cast,
it will deal damage to everyone within 6 yards from it. In addition,
the trash mob will strike your tank with
Leg Sweep cast,
it will deal damage to everyone within 6 yards from it. In addition,
the trash mob will strike your tank with  Setting Sun Kick, which
not only going to deal high initial damage but also apply a 20%
healing debuff to your tank, so watch out!
Setting Sun Kick, which
not only going to deal high initial damage but also apply a 20%
healing debuff to your tank, so watch out! - Depraved Mistweaver is the only important caster in this area,
interrupt its
 Defiling Mist and watch out for
  Touch of Ruin
(since it is a Curse effect, you can use any de-cursing ability or
just defensive to survive it).
Touch of Ruin
(since it is a Curse effect, you can use any de-cursing ability or
just defensive to survive it). - Avoid Minion of Doubt's
 Shattered Resolve ground orbs.
In addition, the trash mob will cast
Shattered Resolve ground orbs.
In addition, the trash mob will cast  Dark Claw to the highest
threat target (your tank), make sure you keep them healthy at
all costs!
Dark Claw to the highest
threat target (your tank), make sure you keep them healthy at
all costs!
Liu Flameheart Boss Guide
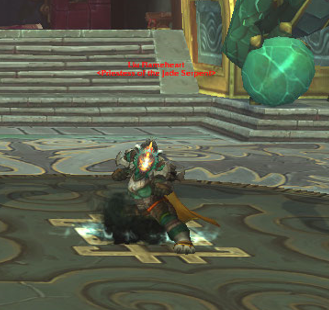
Liu Flameheart is one of the few 3 phase boss encounter in the whole Dragonflight Mythic+ Season 1 choice of dungeons. Each phase: Serpent Dance (from 100% to 70%), Jade Serpent Dance (from 70% to 30%) and The Jade Serpent allows the boss to have different abilities. Here is what each of you should do and watch out for:
All Roles
- Dodge the incoming
 Serpent Waves during Phase 1
(Serpent Dance phase).
Serpent Waves during Phase 1
(Serpent Dance phase). - Dodge the incoming
 Jade Serpent Waves during Phase 2
(Jade Serpent Dance phase. In addition, the Jade Serpent Waves
will leave a trail of lingering pools; avoid them at all costs as they deal
damage each second you stay in.
Jade Serpent Waves during Phase 2
(Jade Serpent Dance phase. In addition, the Jade Serpent Waves
will leave a trail of lingering pools; avoid them at all costs as they deal
damage each second you stay in. - Avoid the
 Jade Fire Breath frontal during Phase 3
(The Jade Serpent phase).
Jade Fire Breath frontal during Phase 3
(The Jade Serpent phase).
Tank
- Watch out for
 Serpent Kick; the boss will cast that on you as soon
as she is finished casting
Serpent Kick; the boss will cast that on you as soon
as she is finished casting  Serpent Strike (During Phase 1).
 - Watch out for
 Jade Serpent Strike; the initial damage and the
follow-up absorb effect will put you to the test.
Jade Serpent Strike; the initial damage and the
follow-up absorb effect will put you to the test. - As soon as Liu Flameheart is done casting Jade Serpent Strike,
she will follow up with
 Jade Serpent Kick, it will knock all players
within 9 yards, so be prepared with active mitigation to avoid dying.
Jade Serpent Kick, it will knock all players
within 9 yards, so be prepared with active mitigation to avoid dying. - Beware how you position yourself during Phase 3, as the boss will cast
Jade Fire Breath based on your location.
- Watch out for her
 Jade Fire during Phase 3 of the boss fight; you want to be healthy at all times.
Healer
- Dispel the Serpent Strike debuff from your tank during the
Phase 1 (Serpent Dance phase).
- Pay attention to Jade Serpent Strike during Phase 2 (Jade Serpent Dance Phase),
it will deal initial damage to your tank and add an absorb effect; use your
healing cooldowns to top them up quickly!
The Heart of Jade and Sha of Doubt
Sha of Doubt Boss Guide
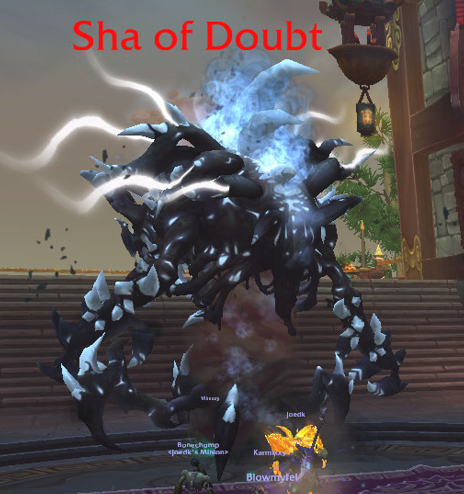
Once you defeat Liu Flameheart, you will face one pack of trash mobs, followed by the dungeon's final boss - Sha of Doubt. Here is what you should know about this boss:
All Roles
- During
 Bounds of Reality, use defensives and stack up altogether.
This way, you can easily cleave your Figments of Doubt simultaneously before
they siphon enough energy. Keep in mind; if they reach maximum energy, they will
deal AoE damage to all players and heal Sha of Doubt for 10% of its
total health. A side note, you can use stun effects on them!
Bounds of Reality, use defensives and stack up altogether.
This way, you can easily cleave your Figments of Doubt simultaneously before
they siphon enough energy. Keep in mind; if they reach maximum energy, they will
deal AoE damage to all players and heal Sha of Doubt for 10% of its
total health. A side note, you can use stun effects on them! - If you do not get dispelled from your
 Touch of Nothingness debuff,
use personal defensive.
Touch of Nothingness debuff,
use personal defensive.
Tank
- Do your best to stack the existing Figments of Doubt so your DPS can cleave all of them simultaneously.
Healer
- Sha of Doubt will occasionally cast Touch of Nothingness,
be ready to dispel 1 target off their debuff and spot-heal the
other one.
- Watch out for
 Wither Will ability, the boss will cast it on 2
random players from your party, keep all of them healthy at all times!
Wither Will ability, the boss will cast it on 2
random players from your party, keep all of them healthy at all times!
Temple of the Jade Serpent Loot Table
Wise Mari
| Type | Item | Stats |
|---|---|---|
| Mail Head | Mastery/Crit | |
| Back | Crit/Mastery | |
| Plate Chest | Crit/Haste | |
| Leather Feet | Crit/Mastery | |
| Ring | Vers/Crit |
Lorewalker Stonestep
| Type | Item | Stats |
|---|---|---|
| Cloth Waist | Crit/Haste | |
| Mail Waist | Crit/Mastery | |
| Leather Legs | Mastery/Crit | |
| Plate Feet | Mastery/Crit | |
| Trinket | Agility |
Liu Flameheart
| Type | Item | Stats |
|---|---|---|
| Gun | Crit/Haste | |
| Plate Shoulder | Mastery/Crit | |
| Back | Crit/Haste | |
| Cloth Boots | Crit/Mastery | |
| Ring | Crit/Haste |
Sha of Doubt
| Type | Item | Stats |
|---|---|---|
| Staff | Haste/Crit | |
| 1H Axe | Str, Crit/Haste | |
| Neck | Crit/Haste | |
| Leather Shoulder | Crit/Haste | |
| Mail Shoulder | Mastery/Haste | |
| Back | Mastery/Crit | |
| Leather Chest | Crit/Mastery | |
| Mail Hands | Haste/Crit | |
| Cloth Hands | Crit/Mastery | |
| Plate Waist | Crit/Mastery |
Temple of the Jade Serpent Achievements
There are 7 total achievements to obtain in Temple of the Jade Serpent:
| Achievement | Criteria |
|---|---|
| Defeat the Sha of Doubt in Temple of the Jade Serpent. | |
| Defeat the Sha of Doubt in Temple of the Jade Serpent
on |
|
| Defeat the Sha of Doubt in Temple of the Jade Serpent while under the effects of Purified Water. | |
| Defeat Wise Mari without being hit by |
|
| Defeat the Sha of Doubt in Temple of the Jade Serpent while under
the effect of 4 Seeds of Doubt on |
Changelog
- 19 Dec. 2022: Guide added.
This guide has been written by Petko, one of the top Mythic players of all time. He has accomplished several Europe- and World #1 Team and Solo Seasonal rankings with multiple specialization and classes. Moreover, he competes in the MDI and streams his runs live on Twitch, and shares his personal opinions on YouTube and Twitter.
- Blizzard Breaks Silence on Puzzling Cartel Chips in Patch 11.1.5
- Chalice Quest NPC Rewards Temporarily Disabled Disabled in Season of Discovery
- Has The Catalyst Killed Raiding or Improved the Game? WoW Heroic Raid Progression Since Legion
- Undercoin Transfers Now Possible on 11.1.5 PTR — Bug or Feature?
- The Music of Azeroth: Community’s Favorite Soundscapes
- This Hunter Transmog Turned Heads on Reddit—and Here’s the Full Item List
- What’s Still in Your Bags? Players Reveal the Weirdest Items They Can’t Delete
- Two Mounts Drop in the Scarlet Enclave Raid — Here’s Where to Get Them