Thorim Encounter Guide: Strategy, Abilities, Loot
Thorim is the ninth boss of Ulduar. This boss' hard mode is activated by running through the gauntlet in less than three minutes. Do not forget to be aware of the various Raid Buffs and Debuffs as you work to optimize your Raid Composition for this encounter's mechanics!
Overview of Thorim in Wrath of the Lich King Classic
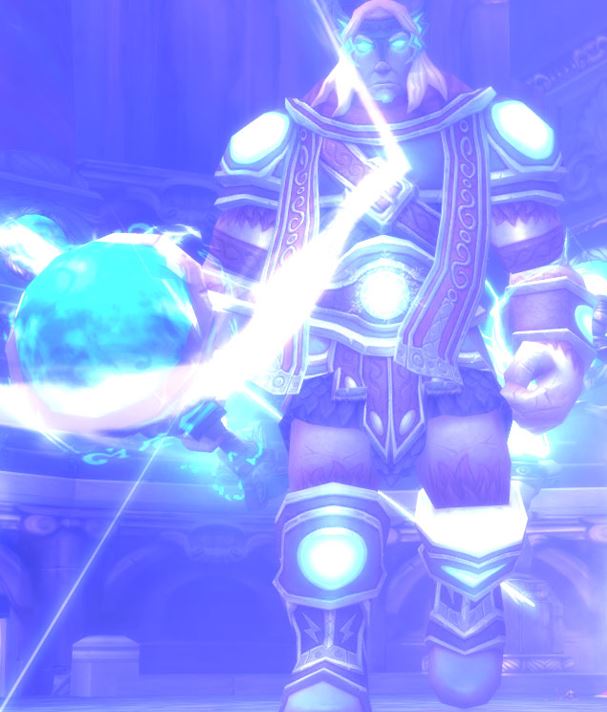
Thorim is the second Keeper you encounter in Ulduar and has multiple Lightning-based attacks and abilities. Players will first need to battle with multiple waves of enemies while Thorim watches you, refusing to fight. The raid must be split into multiple groups, one fighting the enemies in the arena. In contrast, the other group works through a gauntlet to force Thorim from his throne and into the fight.
Role-Specific Tips for Thorim
DPS Tips
- Melee DPS will want to split up into 2 or 3 groups around the boss to avoid
 Chain Lightning killing people.
 - Melee DPS should use a defensive cooldown to survive the
 Lightning Charge later into the fight instead of moving as the
Chain Lightning is more threatening for melees.
Lightning Charge later into the fight instead of moving as the
Chain Lightning is more threatening for melees. - Ranged will want to spread out around the arena, making sure not to allow
Chain Lightning to bounce off them to other nearby players.
Healer Tips
- Melee DPS will most likely not move out of Lightning Charge and
will prefer to take the damage to prevent Chain Lightning from
killing all of the melees at once. Be sure to quickly top the melee up after
this damage so they can survive the next.
- Be sure not to stack with too many other players to prevent
Chain Lightning from bouncing too much.
- Thorim continually gains stacks of Lightning Charge,
increasing the damage done throughout the fight. You will need to
coordinate defensive cooldowns towards the end of the fight on the tank and
keep them quickly topped up.
Tank Tips
- Positioning for this fight is very similar to Kel'Thuzad; Keep Thorim in the center of the room and allow ranged players to spread around the room, and the melee split up into multiple groups around the boss.
- Thorim continually gains stacks of Lightning Charge,
increasing the damage done throughout the fight. You will need to
coordinate defensive cooldowns toward the end of the fight to survive his
damage.
- Be ready to quickly taunt the boss when the current tank is afflicted
with
 Unbalancing Strike.
Thorim Encounter Abilities
Thorim Phase 1 Abilities
Thorim Arena Adds
Thorim Gauntlet Adds
Thorim Phase 2 Abilities
Sif Hardmode Abilities
Strategy for Thorim
Phase One
Before actually engaging with Thorim, you will first need to split your raid group into 2 "teams ."One of these teams will be assigned to staying in the arena and defeat the constant waves of enemies that Thorim sends; while the other team will need to run through a gauntlet to reach Thorims throne and force him to join the fight.
Both teams will need a tank and a couple of healers. Typically your
gauntlet team will consist of most of your ranged DPS, as there are multiple
mobs in the gauntlet that are deadly to melee DPS via different abilities, such
as ![]() Whirling Trip and
Whirling Trip and ![]() Runic Barrier. Ranged caster DPS will
also prefer not to be in the arena, as Thorim will frequently target random
areas with
Runic Barrier. Ranged caster DPS will
also prefer not to be in the arena, as Thorim will frequently target random
areas with ![]() Stormhammer, stunning and silencing all players in the
area. For this reason, you will want to keep your melee DPS in the arena team
and your ranged DPS in the gauntlet team.
Stormhammer, stunning and silencing all players in the
area. For this reason, you will want to keep your melee DPS in the arena team
and your ranged DPS in the gauntlet team.
In both the arena and the gauntlet, the tanks will need to keep all mobs faced away from the raid group, and there are multiple deadly, frontal cone-based attacks in both areas. Be sure to give the tanks a few seconds to gather the mobs and establish threat, using any threat redirection abilities available.
The arena team will want quickly focus down any Dark Rune Evokers to prevent them from healing, followed by any Dark Rune Champions to stop their severe AoE damage. These are the 2 most essential mobs to handle in the arena; be sure to quickly kill both of these mobs whenever they appear. Healers and any ranged DPS staying in the arena will want to spread out around the room, with healers remaining more towards the center as adds will likely target you as they first spawn in.
Thorim himself will also attack players in the arena with a couple of
abilities. The main reason healers and ranged DPS will want to spread out is for
the ![]() Stormhammer. This will get thrown at a random player, stunning
and silencing all nearby allies near the target. Next, Thorim will
frequently use
Stormhammer. This will get thrown at a random player, stunning
and silencing all nearby allies near the target. Next, Thorim will
frequently use ![]() Charge Orb, powering up one of the Lightning pillars
in the arena. After a short delay, it will shoot nearby players with
Charge Orb, powering up one of the Lightning pillars
in the arena. After a short delay, it will shoot nearby players with
![]() Lightning Shock. Move away from this pillar and any others that
become active to help mitigate this avoidable damage.
Lightning Shock. Move away from this pillar and any others that
become active to help mitigate this avoidable damage.
The gauntlet team will, as the name suggests, be fighting their way through a timed gauntlet. Be sure to frequently use any threat redirections to the tank, as they will constantly be getting stunned by the many different mobs. For this reason, it is essential to watch your threat while still pushing serious damage to make it through the gauntlet quickly and regroup with the rest of your raid.
The first hallway in the gauntlet will constantly be swarmed by enemies until
you can reach the Runic Colossus at the end of it and stop it from
continually spawning in new enemies. In addition to the Runic Colossus
continually spawning enemies, it will also shoot ![]() Runic Smash from
either its left or right arm, covering half of the hallway on the same side. The
raid must constantly move to whichever side the
Runic Smash from
either its left or right arm, covering half of the hallway on the same side. The
raid must constantly move to whichever side the ![]() Runic Smash is not
covering to avoid taking serious Fire damage and getting knocked back a great
distance.
Runic Smash is not
covering to avoid taking serious Fire damage and getting knocked back a great
distance.
After engaging the Runic Colossus in combat, it will stop using its
![]() Runic Smash and spawning in fresh enemies. Instead, you will need to
worry about its deadly
Runic Smash and spawning in fresh enemies. Instead, you will need to
worry about its deadly ![]() Charge and
Charge and ![]() Runic Barrier. Have your raid stack up behind the mob to prevent it from using
Runic Barrier. Have your raid stack up behind the mob to prevent it from using
![]() Charge. Be mindful of your health when attacking the Colossus, as the
Charge. Be mindful of your health when attacking the Colossus, as the
![]() Runic Barrier can easily kill anyone with high Attack Speed, including
tanks.
Runic Barrier can easily kill anyone with high Attack Speed, including
tanks.
Rounding the next corner, you will find a much shorter hallway protected by a
Ancient Rune Giant. Have your tank put their back against the nearby wall
to avoid the constant knockback from ![]() Stomp. The rest of the raid
will want to spread out and be away from anyone targeted with
Stomp. The rest of the raid
will want to spread out and be away from anyone targeted with
![]() Rune Detonation. This will root the player in place and, after 4
seconds deal serious Fire damage to all nearby allies. Move away from the
player rooted by this spell quickly to avoid the damage and finish off the
Ancient Rune Giant.
Rune Detonation. This will root the player in place and, after 4
seconds deal serious Fire damage to all nearby allies. Move away from the
player rooted by this spell quickly to avoid the damage and finish off the
Ancient Rune Giant.
Once the Ancient Rune Giant is defeated, the door it was previously guarding will open, exposing Thorim as he spectates the other group down in the arena. The open space now between you and Thorim is rigged with multiple traps that will trigger from any player stepping on them. You will want to hug the walls as closely as possible to avoid these traps and reach Thorim safely. Dealing any damage to Thorim will force him into the fight, where you can also jump down and return to the rest of your raid group.
The gauntlet group must be mindful of how quickly they run through the
gauntlet, as this is how the hard mode of Thorim is activated. If
Sif is still channeling her ![]() Touch of Dominion spell on
Thorim, attacking Thorim will activate the hard mode. If you do
not wish to do this boss on hard mode, you will need to wait for the channel to
finish before attacking Thorim and forcing him into the arena.
Touch of Dominion spell on
Thorim, attacking Thorim will activate the hard mode. If you do
not wish to do this boss on hard mode, you will need to wait for the channel to
finish before attacking Thorim and forcing him into the arena.
Phase Two
Finally, you will now be dealing with Thorim himself. Quickly finish off any remaining adds and get in position. Keep Thorim in the center of the room while your ranged DPS and healers spread throughout the area. Your melee DPS will want to split up into 2 or 3 groups around Thorim depending on how many melees you have, similar to the Kel'Thuzad fight in Naxxramas.
The main danger of this phase is the constant ![]() Chain Lightning that
he will cast, which deals 50% more damage each time it bounces. This is why your
melee needs to split up into multiple groups, and your ranged are spread out
completely around the room. This mustn't be allowed to bounce too
many times each cast; even if it is not killing people, the increased damage will
increase over time, overwhelming your healers.
Chain Lightning that
he will cast, which deals 50% more damage each time it bounces. This is why your
melee needs to split up into multiple groups, and your ranged are spread out
completely around the room. This mustn't be allowed to bounce too
many times each cast; even if it is not killing people, the increased damage will
increase over time, overwhelming your healers.
Thorim will also frequently power up a random pillar in the arena,
causing it to shoot a ![]() Lightning Charge out, dealing severe Nature
damage to all enemies in the area in front of that pillar. Each time
Thorim charges a pillar, and he absorbs a bit of the Lightning; he gains a
stack of
Lightning Charge out, dealing severe Nature
damage to all enemies in the area in front of that pillar. Each time
Thorim charges a pillar, and he absorbs a bit of the Lightning; he gains a
stack of ![]() Lightning Charge, increasing his melee Attack Damage
and Attack Speed by 15%, and his Nature damage dealt by 10% per stack. This acts
as a soft enrage timer. After gaining multiple stacks, people will slowly
start dying off to the numerous sources of damage going out.
Lightning Charge, increasing his melee Attack Damage
and Attack Speed by 15%, and his Nature damage dealt by 10% per stack. This acts
as a soft enrage timer. After gaining multiple stacks, people will slowly
start dying off to the numerous sources of damage going out.
As the ![]() Lightning Charge stacking buff that Thorim
gains increase his Nature damage dealt, the
Lightning Charge stacking buff that Thorim
gains increase his Nature damage dealt, the ![]() Chain Lightning and
Chain Lightning and
![]() Lightning Charge damage will increase the longer the fight lasts. This
is why it is crucial to be spread out throughout the room, as the
Lightning Charge damage will increase the longer the fight lasts. This
is why it is crucial to be spread out throughout the room, as the
![]() Chain Lightning can easily start killing people after only a few
bounces late into the fight. That also makes
Chain Lightning can easily start killing people after only a few
bounces late into the fight. That also makes ![]() Lightning Charge almost a
guaranteed one-shot death in the later stages of the fight, making it important
to avoid the longer the fight goes on. Try to save as many defensive and
immunity abilities available as late as possible to ensure you and your raid's
survival.
Lightning Charge almost a
guaranteed one-shot death in the later stages of the fight, making it important
to avoid the longer the fight goes on. Try to save as many defensive and
immunity abilities available as late as possible to ensure you and your raid's
survival.
Lastly, tanks will need to worry about the dangerous
![]() Unbalancing Strike spell that Thorim will frequently cast on
his current target. This deals double his melee damage and reduce the current
tank's defense by 200, making them vulnerable to crits and greatly reducing
their avoidance and mitigation stats. Tanks will need to be ready to taunt swap
Thorim whenever he applies this debuff to one of the tanks. Towards the
end of the fight, this ability will start hitting very hard as Thorim
gains stacks of
Unbalancing Strike spell that Thorim will frequently cast on
his current target. This deals double his melee damage and reduce the current
tank's defense by 200, making them vulnerable to crits and greatly reducing
their avoidance and mitigation stats. Tanks will need to be ready to taunt swap
Thorim whenever he applies this debuff to one of the tanks. Towards the
end of the fight, this ability will start hitting very hard as Thorim
gains stacks of ![]() Lightning Charge. Be sure to save cooldowns for
your tanks to help them survive this.
Lightning Charge. Be sure to save cooldowns for
your tanks to help them survive this.
Thorim Hardmode
As mentioned above, Thorims hard mode is activated by having your
gauntlet team complete the gauntlet while Sif is still channeling her
![]() Touch of Dominion spell on Thorim. This will activate the
hard mode of the fight, greatly increasing Thorims health and damage.
Touch of Dominion spell on Thorim. This will activate the
hard mode of the fight, greatly increasing Thorims health and damage.
Sif will join in the fight, bombarding the raid with spells
for the rest of the fight. The main threat from her spells is having them coincide with Thorims spells. Getting hit by a combo of
![]() Frostbolt or
Frostbolt or ![]() Frostbolt Volley at the same time as a
Frostbolt Volley at the same time as a
![]() Chain Lightning or
Chain Lightning or ![]() Lightning Charge will almost certainly
kill any player without a defensive ability ready. Sif will
periodically root nearby players with
Lightning Charge will almost certainly
kill any player without a defensive ability ready. Sif will
periodically root nearby players with ![]() Frost Nova, which can be deadly
when combined with a
Frost Nova, which can be deadly
when combined with a ![]() Lightning Charge, as you will not be able to move
without being dispelled or waiting out the debuff duration.
Lightning Charge, as you will not be able to move
without being dispelled or waiting out the debuff duration.
You will want to use all major offensive cooldowns as soon as Thorim is attackable and fully debuffed while you still have as many people alive as possible, as deaths throughout the fight are almost guaranteed. Save as many raid defensive abilities as possible till later into the fight to try and keep DPS players alive, and be sure to rotate tank defensive cooldowns once Thorim starts meleeing for deadly damage.
Thorim Loot
Thorim 10-Player Normal Loot
| Item | Type/Slot |
|---|---|
| Leather Helm | |
| Tier Token | |
| Tier Token | |
| Tier Token | |
| Cloth Hands | |
| Mail Waist | |
| Cloth Legs | |
| One Hand Mace |
Thorim 10-Player Hardmode Loot
| Item | Type/Slot |
|---|---|
| Neck | |
| Plate Hands | |
| One Hand Dagger | |
| Trinket | |
| Trinket |
Thorim 25-Player Normal Loot
| Item | Type/Slot |
|---|---|
| Tier Token | |
| Tier Token | |
| Tier Token | |
| Mail Waist | |
| Cloth Legs | |
| Finger | |
| Trinket | |
| One Hand Mace | |
Thorim 25-Player Hardmode Loot
| Item | Type/Slot |
|---|---|
| Plate Helm | |
| Mail Shoulder | |
| Leather Chest | |
| Finger | |
| Shield | |
| Crossbow |
Further Reading
Thorim is just one of the 14 encounters present in the Ulduar raid of Wrath of the Lich King Classic. If you would like to learn more about the other fights and their respective loot, please see our Ulduar Raid Hub page below.
Changelog
- 18 Jan. 2023: Page added.
This guide has been written by Abide, TBC and WotLK veteran for nearly a decade. Abide is a Warrior tank and multi-class expert currently playing on Faerlina Horde. You can find him in the Icy Veins Discord if you have any questions or concerns.
- Could WoW Be Added to Xbox Game Pass Ultimate?
- MoP Classic Escalation PTR Update Details New Content
- TBC Classic Players Are Earning Arena Points Differently Now
- Population Density Adjustments Coming to Burning Crusade Classic Zones
- Blizzard Are Fixing the Incorrect Armor Values in BCC!
- WoW Players Were Already Arguing About This on Launch Day
- Burning Crusade Classic Hotfixes, February 4th
- Free Riding Skill Fix: Burning Crusade Classic Hotfixes, February 3rd