Scholomance Dungeon Guide
Scholomance is one of the end-game dungeons in WoW Classic and features a number of class quests for Paladins, Shamans, and Warlocks. It is recommended for players between Levels 55 and 60.
Scholomance is a place of learning for the future necromancers of the Scourge, led by Darkmaster Gandling, the Headmaster and head of Necromancy. He betrayed his fellow Mages in Dalaran to seek a path of power in the Scourge.
Phase 4 Season of Discovery Loot in Scholomance
With Phase 4 of Season of Discovery, new loot has been added into Scholomance to help players prepare for raiding. Below you can find a full list of all of the new loot and each boss they drop from.
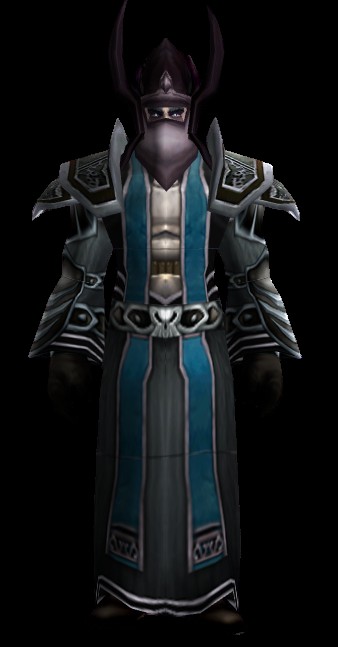
Kirtonos the Herald
| Item |
|---|
Jandice Barov
| Item |
|---|
Rattlegore
| Item |
|---|
Marduk Blackpool
| Item |
|---|
Vectus
| Item |
|---|
Ras Frostwhisper
| Item |
|---|
Shared Loot
| Item |
|---|
Darkmaster Gandling
| Item |
|---|
Entering Scholomance
The entrance to Scholomance is located in the South East of the zone Western Plaguelands on a small island. At the top of this island is a large structure with the entrance to Scholomance behind a locked gate. To open the gate and enter the instance your group will need one of:
- The
 Skeleton Key obtained from completing
The Key to Scholomance quest chain, which starts from obtaining the
A Call to Arms: The Plaguelands! quest in any capital city.
Skeleton Key obtained from completing
The Key to Scholomance quest chain, which starts from obtaining the
A Call to Arms: The Plaguelands! quest in any capital city. - A Rogue with high lockpicking to open the door.
- A
 Powerful Seaforium Charge to temporarily open the door.
 - A party member dying and resurrecting on the other side of the gate and opening it.
Quests in Scholomance
The quests are all outlined in our separate dungeon quest guide for this instance. Most quests are part of chains that exist primarily outside of Scholomance and need to be obtained before entering the instance.
Layout of Scholomance
The main dungeon run for Scholomance is quite linear, with only a small amount of backtracking required. There are however a number of optional and quest bosses which require you to deviate a little from the normal path to engage them.
Upon entering the instance, walk over the bridge directly ahead then down the
stairs to the left. Go through the doorway and into another large room. An
optional boss, Kirtonos the Herald, can be spawned on a balcony out to the
right of this room if you have ![]() Blood of Innocents. Blood of the
Innocents can be obtained from Blood Steward of Kirtonos,
Doctor Theolen Krastinov, and Jandice Barov after you have
completed the quest Kirtonos the Herald. Continue out the opposite end of
this room into another large room.
Blood of Innocents. Blood of the
Innocents can be obtained from Blood Steward of Kirtonos,
Doctor Theolen Krastinov, and Jandice Barov after you have
completed the quest Kirtonos the Herald. Continue out the opposite end of
this room into another large room.
This room has an exit on each side. The stairway on the right side leads down
to Jandice Barov, which is typically skipped unless someone needs her
for a particular reason. Straight ahead is a door leading to a room with stairs
down to Rattlegore, which needs to be killed and
![]() Viewing Room Key is looted from his corpse. The exit on the left
leads to the final part of the instance.
Viewing Room Key is looted from his corpse. The exit on the left
leads to the final part of the instance.
After looting the ![]() Viewing Room Key from Rattlegore, head
back up and open the gate to the final part of the instance, then use the key to
open the door and enter the Viewing Room.
Viewing Room Key from Rattlegore, head
back up and open the gate to the final part of the instance, then use the key to
open the door and enter the Viewing Room.
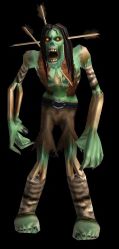
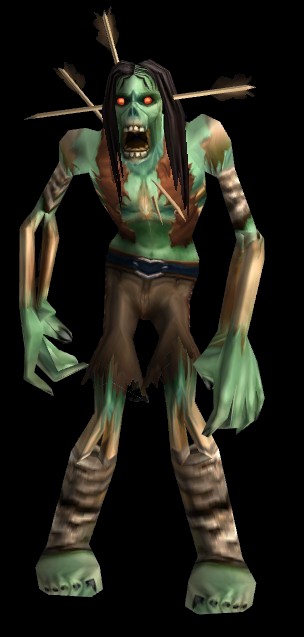
The students in the Viewing Room are elite mobs, which require a lengthy quest chain to have been completed to make them normal quality mobs. This room and its bosses are typically skipped, unless someone has completed this chain, which starts with Broodling Essence. At the opposite end of this room is the door to Ras Frostwhisper, which is usually killed. On the left wall of the Viewing Room is a stairway down to Darkmaster Gandling.
Once Ras Frostwhisper is defeated and your party head back through the Viewing Room into Darkmaster Gandling's arena, you need to clear out all 6 rooms and their associated minibosses. There are 3 on the upper floor, 3 on the bottom floor before he will spawn.
It is suggested to clear the bottom 3 rooms first, and then clear the top 3 to avoid accidentally engaging the final boss of Scholomance, Darkmaster Gandling, before the party is ready.
Notable Trash in Scholomance
In the first room, be careful to pull individual packs back towards the entrance. Many of these packs and patrols have casters which can inadvertently pull other packs, potentially resulting in a group wipe.
The room containing Rattlegore has trash which hits very hard and will stun the tank. Pulling multiple packs at once or packs with the boss can result in extreme damage and be difficult to survive through, especially for undergeared groups.
The viewing room containing the elite students should not be engaged unless someone has completed the Dawn's Gambit questline and can begin the event with Vectus.
Bosses in Scholomance
There are 13 main bosses in Scholomance, including the 6 minibosses prior to
Darkmaster Gandling at the end of the instance. The bosses and
minibosses drop both ![]() Corruptor's Scourgestone and
Corruptor's Scourgestone and
![]() Invader's Scourgestone, which are lootable by eligible party members.
Invader's Scourgestone, which are lootable by eligible party members.
![]() Dark Rune and
Dark Rune and ![]() Skin of Shadow can also be found on bosses and
trash inside Scholomance.
Skin of Shadow can also be found on bosses and
trash inside Scholomance.
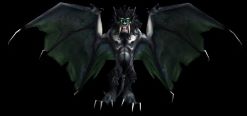
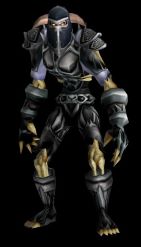
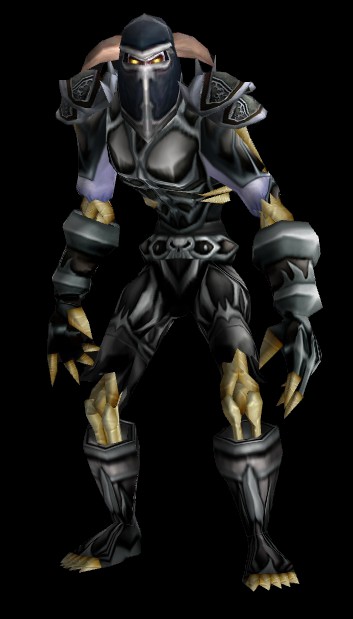
Kirtonos the Herald
-
 Disarm
 Pierce Armor
 Swoop
Swoop Wing Flap
 Kirtonos Transform
 Curse of Tongues
 Dominate Mind
 Shadow Bolt Volley
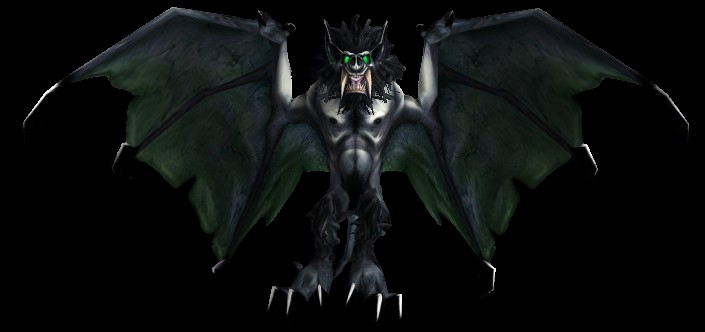
Kirtonos the Herald is an optional boss that only spawns when
summoned by someone who has a ![]() Blood of Innocents, which can be
obtained from killing Blood Steward of Kirtonos,
Doctor Theolen Krastinov and Jandice Barov.
Blood of Innocents, which can be
obtained from killing Blood Steward of Kirtonos,
Doctor Theolen Krastinov and Jandice Barov.
Kirtonos the Herald has a knockback and, if the tank is not positioned correctly with their back to the wall, they may get knocked out of the window.
Loot from Kirtonos the Herald
| Item | Required Level | Slot |
|---|---|---|
| 54 | Feet | |
| 56 | Waist | |
| 56 | Weapon | |
| 56 | Hands | |
| 57 | Weapon | |
| 56 | Neck | |
| 56 | Wrist | |
| 56 | Shoulder | |
| 56 | Feet |
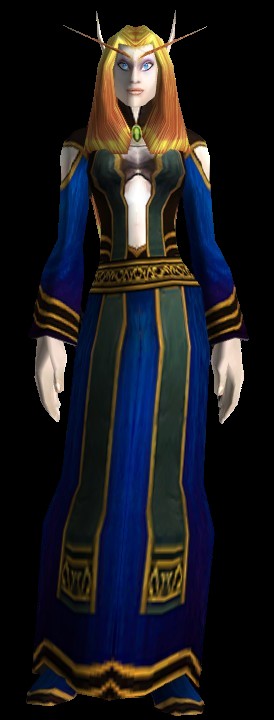
Jandice Barov
-

 Banish
 Curse of Blood
- Summon Illusions
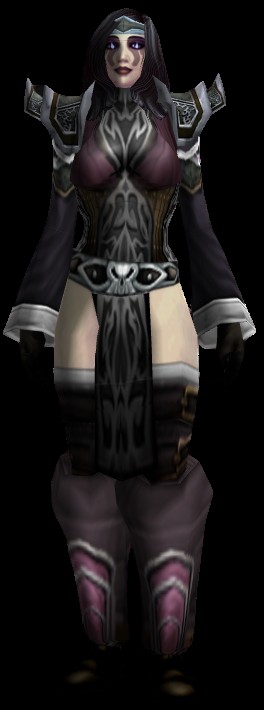
Jandice Barov is an optional boss that will disappear and spawn copies of herself all over the room. These need to be damaged down until the real version of her is found. Your party can then choose to kill Jandice or, if the damage going out from the copies is too high, kill the copies off first before killing her.
Jandice Barov drops ![]() Blood of Innocents, which is used to
spawn Kirtonos the Herald.
Blood of Innocents, which is used to
spawn Kirtonos the Herald.
Loot from Jandice Barov
| Item | Required Level | Slot |
|---|---|---|
| 57 | Staff | |
| 56 | Weapon | |
| 57 | Hands | |
| 55 | Shoulder | |
| 57 | Legs | |
| 57 | Shoulder | |
| 57 | Weapon |
Rattlegore
-

 Knock Away
 Strike
 War Stomp
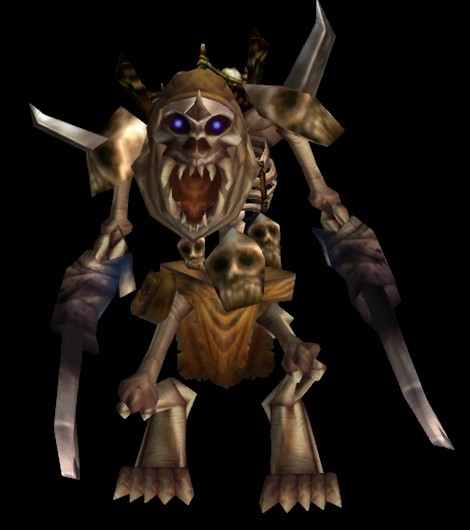
Rattlegore does a lot of single-target damage on to the tank and will periodically stun the current target, causing threat to drop. DPS should be careful to let the tank get sufficient threat at the start of the encounter, as pulling aggro will almost certainly result in death.
Rattlegore drops ![]() Viewing Room Key, which is required for
accessing the final part of Scholomance. He also drops
Viewing Room Key, which is required for
accessing the final part of Scholomance. He also drops
![]() Top Half of Advanced Armorsmithing: Volume II.
Top Half of Advanced Armorsmithing: Volume II.
Loot from Rattlegore
| Item | Required Level | Slot |
|---|---|---|
| 57 | Shoulder | |
| 57 | Head | |
| 57 | Feet | |
| 57 | Shoulder | |
| 54 | Weapon | |
| 57 | Shield | |
| 54 | Feet |
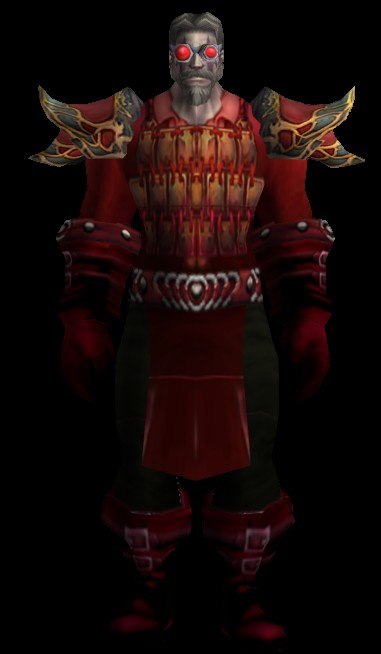
Marduk Blackpool
-
 Cleave
 Defiling Aura
- Shadow Bolt Volley
 Shadow Shield
Marduk Blackpool is one of two optional bosses in the Viewing Room.
They will become hostile after someone in your group has used a
![]() Dawn's Gambit in the Viewing Room. Dawns Gambit is obtained by
completing the quest Dawn's Gambit and further ones can be obtained
by talking to Betina Bigglezink at Light's Hope Chapel in Eastern Plaguelands.
Dropping a Dawns Gambit also causes all the students in the room to transform
into weak skeletons and attack the group at once.
Dawn's Gambit in the Viewing Room. Dawns Gambit is obtained by
completing the quest Dawn's Gambit and further ones can be obtained
by talking to Betina Bigglezink at Light's Hope Chapel in Eastern Plaguelands.
Dropping a Dawns Gambit also causes all the students in the room to transform
into weak skeletons and attack the group at once.
Marduk Blackpool has no dangerous abilities, however melee should
watch their HP when he casts ![]() Shadow Shield on himself, as it will
reflect some damage back on to them each time he is hit. Melee should also be
sure to stand behind the boss, so his
Shadow Shield on himself, as it will
reflect some damage back on to them each time he is hit. Melee should also be
sure to stand behind the boss, so his ![]() Cleave does not hit them.
Cleave does not hit them.
Loot from Marduk Blackpool
| Item | Required Level | Slot |
|---|---|---|
| 54 | Feet | |
| 54 | Weapon |
Vectus
-
 Blast Wave
 Flamestrike
Vectus is one of two optional bosses in the Viewing Room. They will
become hostile after someone in your group has used a ![]() Dawn's Gambit in
the Viewing Room. Dawns Gambit is obtained by completing the quest
Dawn's Gambit and further ones can be obtained by talking to
Betina Bigglezink at Light's Hope Chapel in Eastern Plaguelands. Dropping a Dawn's
Gambit also causes all the students in the room to transform into weak skeletons
and attack the group at once.
Dawn's Gambit in
the Viewing Room. Dawns Gambit is obtained by completing the quest
Dawn's Gambit and further ones can be obtained by talking to
Betina Bigglezink at Light's Hope Chapel in Eastern Plaguelands. Dropping a Dawn's
Gambit also causes all the students in the room to transform into weak skeletons
and attack the group at once.
Vectus has no difficult abilities, with the fight focusing around
dodging the ![]() Flamestrike casts on the ground.
Flamestrike casts on the ground.
Loot from Vectus
| Item | Required Level | Slot |
|---|---|---|
| 56 | Neck | |
| 56 | Legs |
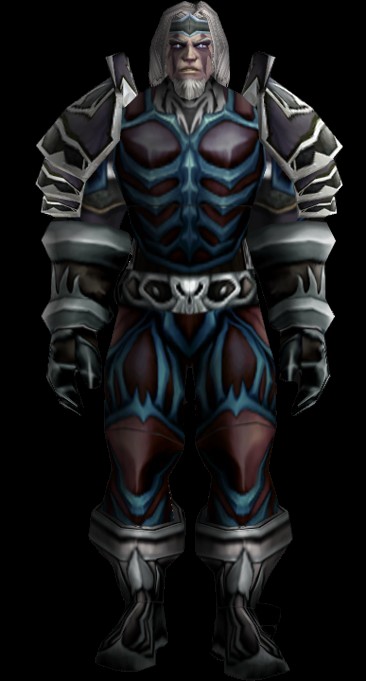
Ras Frostwhisper
-
 Chill Nova
 Fear
Fear Freeze
 Frost Armor
 Frostbolt Volley
- Knock Away
Ras Frostwhisper is an optional boss with an array of frost
abilities, and a ![]() Fear. You should either clear the room or pull Ras
away from other trash to prevent people being feared into packs. Most of his
spellcasts can be interrupted, significantly reducing the amount of incoming
damage on the group. He should be tanked facing away from the group at all times
to prevent
Fear. You should either clear the room or pull Ras
away from other trash to prevent people being feared into packs. Most of his
spellcasts can be interrupted, significantly reducing the amount of incoming
damage on the group. He should be tanked facing away from the group at all times
to prevent ![]() Freeze stunning other members of the party when cast.
Freeze stunning other members of the party when cast.
Ras Frostwhisper drops ![]() Recipe: Flask of Supreme Power. His room
also contains an Alchemy Lab which is required for Alchemists to craft Flasks.
The only other Alchemy Lab is found in Blackwing Lair, available
from Phase 3 onwards.
Recipe: Flask of Supreme Power. His room
also contains an Alchemy Lab which is required for Alchemists to craft Flasks.
The only other Alchemy Lab is found in Blackwing Lair, available
from Phase 3 onwards.
Loot from Vectus
| Item | Required Level | Slot |
|---|---|---|
| 57 | Chest | |
| 57 | Weapon | |
| 57 | Hands | |
| 57 | Shoulder | |
| 57 | Chest | |
| 57 | Waist | |
| 57 | Weapon | |
| 57 | Shield | |
| 57 | Legs | |
| 55 | Shoulder | |
| 57 | Feet | |
| 57 | Hands | |
| 57 | Offhand |
Instructor Malicia
-

 Call of the Grave
 Corruption
 Heal
Heal Renew
Renew Slow
Slow
Instructor Malicia is one of the six guardians that must be slain to
spawn the final boss Darkmaster Gandling. She is located to the south,
on the top floor of Gandling's Arena. She can drop ![]() Skin of Shadow and
Skin of Shadow and
![]() Dark Rune.
Dark Rune.
Instructor Malicia is a simple fight as long as her ![]() Heal
and
Heal
and ![]() Renew abilities are interrupted or dispelled.
Renew abilities are interrupted or dispelled.
Like all of the guardians, gear from the Bloodmail Regalia, Cadaverous Garb, Deathbone Guardian, and Necropile Raiment sets can also drop.
Loot from Instructor Malicia
| Item | Required Level | Slot |
|---|---|---|
| 60 | Libram | |
| 56 | Ranged Weapon | |
| 56 | Shoulders | |
| 56 | Finger | |
| 56 | Legs | |
| 56 | Weapon | |
| 52 | Wrist |
Doctor Theolen Krastinov
-
 Knock Away
 Enrage
 Rend
Rend
Doctor Theolen Krastinov is one of the six guardians that must be
slain to spawn the final boss Darkmaster Gandling. He is located in the
east, on the top floor of Gandling's Arena. He can drop ![]() Skin of Shadow
and
Skin of Shadow
and ![]() Blood of Innocents.
Blood of Innocents.
Doctor Theolen Krastinov has a knockback the tank should be wary of, as well as enraging at 50%, increasing the damage he dishes out. The group should aim to save cooldowns to safely burn him down from this point.
Like all of the guardians, gear from the Bloodmail Regalia, Cadaverous Garb, Deathbone Guardian, and Necropile Raiment sets can also drop.
Loot from Doctor Theolen Krastinov
| Item | Required Level | Slot |
|---|---|---|
| 60 | Libram | |
| 60 | Totem | |
| 56 | Ranged Weapon | |
| 56 | Shoulders | |
| 56 | Finger | |
| 56 | Legs | |
| 56 | Weapon | |
| 54 | Hands |
Lorekeeper Polkelt
-
 Corrosive Acid
 Noxious Catalyst
- Volatile Infection
Lorekeeper Polkelt is one of the six guardians that must be
slain to spawn the final boss Darkmaster Gandling. He is located in the
north, on the top floor of Gandling's Arena. He can drop ![]() Skin of Shadow
and
Skin of Shadow
and ![]() Dark Rune.
Dark Rune.
Lorekeeper Polkelt is a fairly straightforward boss with little
damage. Your group may want to dispel the ![]() Volatile Infections if group
DPS is low, to prevent too much damage being taken.
Volatile Infections if group
DPS is low, to prevent too much damage being taken.
Like all of the guardians, gear from the Bloodmail Regalia, Cadaverous Garb, Deathbone Guardian, and Necropile Raiment sets can also drop.
Loot from Lorekeeper Polkelt
| Item | Required Level | Slot |
|---|---|---|
| 56 | Ranged Weapon | |
| 56 | Shoulders | |
| 56 | Finger | |
| 54 | Hands | |
| 56 | Legs | |
| 56 | Weapon |
The Ravenian
-
 Cleave
- Knock Away
 Sundering Cleave
 Trample

The Ravenian is one of the six guardians that must be
slain to spawn the final boss Darkmaster Gandling. He is located in the
south, on the bottom floor of Gandling's Arena. He can drop ![]() Skin of Shadow
and
Skin of Shadow
and ![]() Dark Rune.
Dark Rune.
Lorekeeper Polkelt is a fairly straightforward boss with little damage. There is a knockback that can drop threat, so the tank should be ready to taunt after the knockback to keep The Ravenian on them.
Like all of the guardians, gear from the Bloodmail Regalia, Cadaverous Garb, Deathbone Guardian, and Necropile Raiment sets can also drop.
Loot from The Ravenian
| Item | Required Level | Slot |
|---|---|---|
| 60 | Libram | |
| 56 | Ranged Weapon | |
| 56 | Shoulders | |
| 56 | Finger | |
| 56 | Legs | |
| 56 | Weapon | |
| 53 | Waist |
Lord Alexei Barov
-

 Immolate
- Unholy Aura
 Veil of Shadow
Lord Alexei Barov is one of the six guardians that must be slain to
spawn the final boss Darkmaster Gandling. He is located in the south, on
the bottom floor of Gandling's Arena. He can drop ![]() Skin of Shadow.
Skin of Shadow.
Lord Alexei Barov comes with two bodyguards which should be CC-ed or
killed quickly to reduce the extra damage to the group. Ranged and Healers can
stand at maximum range to avoid taking damage from his ![]() Unholy Aura.
Care should be taken with
Unholy Aura.
Care should be taken with ![]() Veil of Shadow to either decurse the debuff from
party members, or ensure they are well topped up prior to the cast going
out.
Veil of Shadow to either decurse the debuff from
party members, or ensure they are well topped up prior to the cast going
out.
Like all of the guardians, gear from the Bloodmail Regalia, Cadaverous Garb, Deathbone Guardian, and Necropile Raiment sets can also drop.
Loot from Lord Alexei Barov
| Item | Required Level | Slot |
|---|---|---|
| 60 | Libram | |
| 60 | Totem | |
| 56 | Ranged Weapon | |
| 56 | Shoulders | |
| 56 | Finger | |
| 56 | Legs | |
| 56 | Weapon | |
| 52 | Wrist |
Lady Illucia Barov
-

 Curse of Agony
- Dominate Mind
- Fear
- Shadow Shock
 Silence

Lady Illucia Barov is one of the six guardians that must be slain to
spawn the final boss Darkmaster Gandling. She is located in the, south on
the bottom floor of Gandling's Arena. She can drop ![]() Skin of Shadow and
Skin of Shadow and
![]() Dark Rune.
Dark Rune.
Lady Illucia Barov has a ![]() Fear which can cause party members
to pull additional packs in the area if they are not cleared before combat with
her begins.
Fear which can cause party members
to pull additional packs in the area if they are not cleared before combat with
her begins. ![]() Dominate Mind can be dispelled, or the target simply CC-ed
until the duration is over. Care should be taken not to cleave on to Dominate
Mind targets and accidentally kill them.
Dominate Mind can be dispelled, or the target simply CC-ed
until the duration is over. Care should be taken not to cleave on to Dominate
Mind targets and accidentally kill them.
Like all of the guardians, gear from the Bloodmail Regalia, Cadaverous Garb, Deathbone Guardian, and Necropile Raiment sets can also drop.
Loot from Lady Illucia Barov
| Item | Required Level | Slot |
|---|---|---|
| 56 | Ranged Weapon | |
| 56 | Shoulders | |
| 56 | Finger | |
| 56 | Legs | |
| 56 | Weapon |
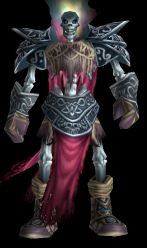
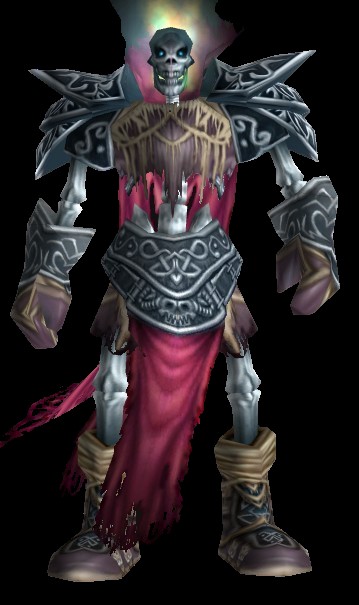
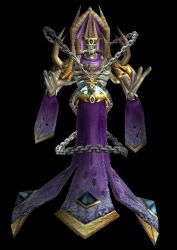
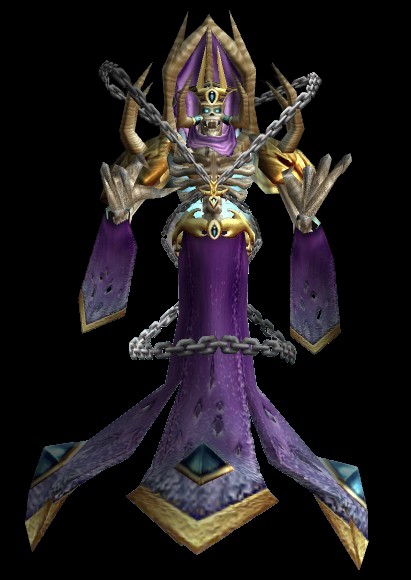
Darkmaster Gandling
-

 Arcane Missiles
- Curse of the Darkmaster
 Shadow Portal
- Shadow Shield
Darkmaster Gandling is the final boss in Scholomance. All 6
guardians in the 3 upper and 3 lower wings must be slain for him to spawn. He
also drops ![]() Pattern: Robe of the Void and the T0 class helmets.
Pattern: Robe of the Void and the T0 class helmets.
Darkmaster Gandling has a unique mechanic that will occasionally
teleport a party member into one of the guardian rooms, which remains locked
until all the mobs inside it are killed. Players who are teleported should kill
the mobs as soon as possible to return to the group and continue helping to kill
Gandling. It is possible for the tank and healer to be teleported as well, and care
should be taken when either of these are not present to reduce incoming damage
by getting as many interrupts on ![]() Arcane Missiles as possible, and
decurse
Arcane Missiles as possible, and
decurse ![]() Improved Shadow Bolt from affected party members.
Improved Shadow Bolt from affected party members.
Loot from Darkmaster Gandling
| Item | Required Level | Slot |
|---|---|---|
| 58 | Ring | |
| 57 | Head | |
| 57 | Ranged | |
| 57 | Feet | |
| 57 | Head | |
| 57 | Waist | |
| 57 | Head | |
| 57 | Head | |
| 57 | Staff | |
| 57 | Head | |
| 57 | Head | |
| 57 | Head | |
| 57 | Head | |
| 57 | Weapon | |
| 5576 | Chest | |
| 57 | Head | |
| 57 | Head | |
| 57 | Head |
Recommended Classes for Scholomance
The dungeon contains a huge number of Undead mobs in this wing, so any class that brings CC that can be used on Undead enemies will be of huge help to your party.
Priests are a great choice for your healer, not only
because of their solid output, but their ![]() Shackle Undead is extremely
useful to CC enemies.
Shackle Undead is extremely
useful to CC enemies.
Changelog
- 18 Nov. 2024: Page updated for Classic Anniversary.
- 09 Jul. 2024: Added section for new loot in Phase 4 of Season of Discovery.
- 05 Apr. 2024: Added boss pictures and abilities.
- 28 Jul. 2020: Added Phase 5 loot additions.
- 17 Nov. 2019: Guide added.
Classic Leveling Guides
Classic Dungeon Guides
Classic Profession Guides

This guide has been written by Abide, TBC veteran for nearly a decade. Abide is a Warrior tank and multi-class expert currently playing on Faerlina as Horde. You can find him in the the Icy Veins Discord. You can also see him live on Twitch.
- Chalice Quest NPC Rewards Temporarily Disabled Disabled in Season of Discovery
- Two Mounts Drop in the Scarlet Enclave Raid — Here’s Where to Get Them
- This Level 42 Gnome Reached Exalted with Darnassus by Turning In 1,800 Eggs One at a Time—Over 800 Hours Played
- Season of Discovery Hotfixes, April 15th
- Fan-Made WoW Armory Lets You Track Characters, Talents, PvP, and More in Cataclysm Classic
- Gold Swapping/Trading in Classic and Between Classic and Retail Now Prohibited by Blizzard
- Beatrix Encounter in Scarlet Enclave Raid Has Special Features, as Blizzard Explain in Detail
- Season of Discovery Phase 8 Raid Adjustments Now Live