Brewmaster Monk Tank Uldir Raid Guide — Dragonflight 10.2.5
On this page, you will find tips, tricks, and strategies tailored to your Brewmaster Monk for each boss of the following raid: Uldir. All our content is updated for World of Warcraft — Dragonflight 10.2.5.
Introduction for Brewmaster Monk Boss Advice in Uldir
This page will be a rough outline of the bosses and mechanics in Uldir from a Brewmaster Monk and general tank point of view. Initially this page will focus on heroic mode and lower, however, as more bosses are being killed on Mythic, the guide will also include optimizations for Mythic bosses.
On Trinkets for Brewmaster Monk
Trinkets are highly flexible for Brewmaster. We sometimes recommend trinkets that we consider to be the most suitable for the encounter, but mix and match as you please for more offense or defense depending on your raid group and comfort level.
Talent Cheatsheet
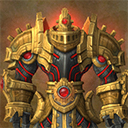
Taloc
More Taloc Guides on Icy Veins
While your raid may have a different strategy, generally the boss will be kept in the middle of the room.
In Phase One, you should attempt to clear as much ![]() Blood Storm
pools as possible when targeted with
Blood Storm
pools as possible when targeted with ![]() Cudgel of Gore. This is a
good time to use
Cudgel of Gore. This is a
good time to use ![]() Dampen Harm or
Dampen Harm or ![]() Celestial Brew. You can also
cast
Celestial Brew. You can also
cast ![]() Transcendence: Transfer as Taloc reaches you to take almost no
damage instead of rolling away. Ideally you will be able to clear a large amount
of Blood Storm pools every time — ask your raid to place them reasonably close to
each other.
Transcendence: Transfer as Taloc reaches you to take almost no
damage instead of rolling away. Ideally you will be able to clear a large amount
of Blood Storm pools every time — ask your raid to place them reasonably close to
each other.
In Phase Two, Coalesced Blood adds will spawn. It is convenient to have
a Black Ox Statue up to help you or the other tank pick them up. One tank will
likely have to soak Volatile Droplets unless you choose to kill them — these deal
reasonably high damage, so be careful and use external cooldowns when necessary.
You may wish to use ![]() Celerity or
Celerity or ![]() Tiger's Lust instead of
Tiger's Lust instead of
![]() Chi Torpedo to avoid rolling off the edge and making a fool of yourself!
Chi Torpedo to avoid rolling off the edge and making a fool of yourself!
In Phase Three, Volatile Droplets will continue to spawn and fixate players. Your raid may choose to kill these, or have someone — probably you or the fixated player pop them by running into them. Since there is no blood already on the floor it is much safer than in Phase Two. Otherwise, the mechanics from Phase One continue.
Mythic Taloc
The only change for tanks on Mythic Taloc is the addition of
![]() Enlarged Heart. The boss will apply this to the active tank, and when
this happens the other tank should taunt. The tank with the debuff should stand
under or behind the boss with as many raid members as possible to share the
explosion. Typical raids will get 4 of these, with 2 in each boss phase. If
there are many dead players later in the fight, it may be better to sacrifice
the last debuff instead of killing more raid members.
Enlarged Heart. The boss will apply this to the active tank, and when
this happens the other tank should taunt. The tank with the debuff should stand
under or behind the boss with as many raid members as possible to share the
explosion. Typical raids will get 4 of these, with 2 in each boss phase. If
there are many dead players later in the fight, it may be better to sacrifice
the last debuff instead of killing more raid members.
Taloc technically does not require a second tank on Mythic difficulty, though since DPS requirements are very low most guilds will opt to take a second.
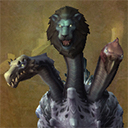
M.O.T.H.E.R.
More M.O.T.H.E.R. Guides on Icy Veins

MOTHER is a 3-phase fight, with the raid having to make their way through 3 chambers slowly while dealing with adds and other mechanics.
MOTHER has two tanking roles, both being quite simple. One tank stays on the
boss at all times, while the other goes through the ![]() Defense Grid to
tank and interrupt the adds which spawn.
Defense Grid to
tank and interrupt the adds which spawn.
The MOTHER tank (some may call this the "main" tank) should position her next
to the Defense Grid in the first two chambers, with their back against a wall.
MOTHER will cast ![]() Sanitizing Strike, which may seem like a tank swap
mechanic — actually, the boss will not turn while casting this. Simply do not be
in front of the boss to avoid it. If you are hit, you will have to use defensive
cooldowns, as your co-tank and raid will be very inconvenienced by MOTHER moving
chambers.
Sanitizing Strike, which may seem like a tank swap
mechanic — actually, the boss will not turn while casting this. Simply do not be
in front of the boss to avoid it. If you are hit, you will have to use defensive
cooldowns, as your co-tank and raid will be very inconvenienced by MOTHER moving
chambers.
If you are the add tank (or the "off" tank), you will run through the Defense
Grid early and pick up any spawning Remnants of Corruption. These will cast
![]() Clinging Corruption frequently — you must interrupt this every time,
with your
Clinging Corruption frequently — you must interrupt this every time,
with your ![]() Spear Hand Strike,
Spear Hand Strike, ![]() Leg Sweep and
Leg Sweep and ![]() Ring of Peace.
An uninterrupted cast will put a large DOT on the entire raid.
Ring of Peace.
An uninterrupted cast will put a large DOT on the entire raid.
Due to the low melee damage of the adds, your group may choose to drop the
add tank, and just use your ![]() Summon Black Ox Statue to tank them. You can
drop this through the Defense Grid.
Summon Black Ox Statue to tank them. You can
drop this through the Defense Grid.
Both tanks must deal with ![]() Wind Tunnel. The MOTHER tank should position
themselves against a wall at the Defense Grid. On the beta, MOTHER sometimes
cast Sanitizing Strike during this. It is recommended to turn the boss before
if this is the case, as melee DPS may be in front of the boss. The best way to
do this is to have a
Wind Tunnel. The MOTHER tank should position
themselves against a wall at the Defense Grid. On the beta, MOTHER sometimes
cast Sanitizing Strike during this. It is recommended to turn the boss before
if this is the case, as melee DPS may be in front of the boss. The best way to
do this is to have a ![]() Transcendence portal up. If you do not have a boss
mod installed, you can tell when MOTHER will cast this by paying attention to
her Energy bar. She casts it at 100 Energy. Particularly kind tanks will let the
DPS be behind the boss while being pushed against the wall by fighting against
the pushback for the entire duration. The add tank just has to fight against it
and avoid being pushed into the fire, but this is not an issue due to high
mobility.
Transcendence portal up. If you do not have a boss
mod installed, you can tell when MOTHER will cast this by paying attention to
her Energy bar. She casts it at 100 Energy. Particularly kind tanks will let the
DPS be behind the boss while being pushed against the wall by fighting against
the pushback for the entire duration. The add tank just has to fight against it
and avoid being pushed into the fire, but this is not an issue due to high
mobility.
In the second and third chamber MOTHER will sometimes cast
![]() Uldir Defensive Beam beams, causing beams to move from the walls or the
roof with one safe spot. Sanitizing Strike will be dangerous here, especially
during the Wind Tunnel. Try to face her to the outside of the room at 100 Energy.
You may want to have a
Uldir Defensive Beam beams, causing beams to move from the walls or the
roof with one safe spot. Sanitizing Strike will be dangerous here, especially
during the Wind Tunnel. Try to face her to the outside of the room at 100 Energy.
You may want to have a ![]() Transcendence portal down for emergencies.
Transcendence portal down for emergencies.
Mythic MOTHER
The primary difference in Mythic difficulty is an additional tank and healer
add, spawned when players of these roles go through the Defense Grid. The tank
add must be tanked due to its high damage ![]() Bacterial Outbreak cast. This
is not interruptible and will also increase the damage of other adds. The healer
add places a debuff on a player which should be dispelled when they are away
from other raid members. The DPS add still casts and must be interrupted.
Bacterial Outbreak cast. This
is not interruptible and will also increase the damage of other adds. The healer
add places a debuff on a player which should be dispelled when they are away
from other raid members. The DPS add still casts and must be interrupted.
There change to ![]() Uldir Defensive Beam in the second and third chambers.
Instead of roof and wall beams being seperate, they will come very quickly one
after another. When MOTHER reaches 100 Energy, try to face her away from raid
members as
Uldir Defensive Beam in the second and third chambers.
Instead of roof and wall beams being seperate, they will come very quickly one
after another. When MOTHER reaches 100 Energy, try to face her away from raid
members as ![]() Sanitizing Strike will likely kill a non tank. The best way
to do this is to wait until the wall beams have passed and move her from the
spot towards either the entrance or exit of the room. If the cast would come
while moving MOTHER to the safe spot, stand in line with the wall gap and move
to the roof gap when she begins casting rather than facing her towards the raid
and hoping you make it in time.
Sanitizing Strike will likely kill a non tank. The best way
to do this is to wait until the wall beams have passed and move her from the
spot towards either the entrance or exit of the room. If the cast would come
while moving MOTHER to the safe spot, stand in line with the wall gap and move
to the roof gap when she begins casting rather than facing her towards the raid
and hoping you make it in time.
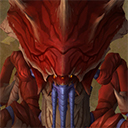
Fetid Devourer
More Fetid Devourer Guides on Icy Veins
Fetid Devourer has 2 entirely different tank roles: one tank will take
standard boss melee attacks, and the other will take a giant hit,
![]() Terrible Thrash, every 6 seconds.
Terrible Thrash, every 6 seconds.
Brewmasters can do either tanking role well. Ideally you will be the "main"
tank, taking boss melees instead of the "off" tank taking the ![]() Terrible Thrash.
Terrible Thrash.
If you are in a position where you will be the ![]() Terrible Thrash tank,
you can consider using Guard instead of
Terrible Thrash tank,
you can consider using Guard instead of ![]() High Tolerance to
greatly mitigate the stagger damage from one hit — you should use it when
you are a little lower than normal to allow healers to catch up.
High Tolerance to
greatly mitigate the stagger damage from one hit — you should use it when
you are a little lower than normal to allow healers to catch up.
Choosing between ![]() Bob and Weave and
Bob and Weave and ![]() Dampen Harm is tougher than
it initially seems. Having a cooldown that covers 2 thrashes is great when you
fall behind, but Bob and Weave will reduce the stagger ticks you are taking,
making you significantly easier to heal up between each thrash — so that you
do not fall behind. Your choice of talents will depend on what you and your
healers find more comfortable.
Dampen Harm is tougher than
it initially seems. Having a cooldown that covers 2 thrashes is great when you
fall behind, but Bob and Weave will reduce the stagger ticks you are taking,
making you significantly easier to heal up between each thrash — so that you
do not fall behind. Your choice of talents will depend on what you and your
healers find more comfortable.
Regardless, you should maintain 100% ![]() Ironskin Brew uptime and use
Ironskin Brew uptime and use
![]() Purifying Brew immediately after as many thrashes as possible. Never
purify twice in a row, as your second purify will have a massively diminished
value compared to using it after a thrash. This is a fight where you may
consider gearing for more Haste, probably by using trinkets that give both
Haste and Agility.
Purifying Brew immediately after as many thrashes as possible. Never
purify twice in a row, as your second purify will have a massively diminished
value compared to using it after a thrash. This is a fight where you may
consider gearing for more Haste, probably by using trinkets that give both
Haste and Agility.
On Heroic difficulty, the boss will cast ![]() Shockwave Stomp every 30
seconds. Ideally you will be able to position yourself next to a wall to avoid
the heavy knockback from this ability, as
Shockwave Stomp every 30
seconds. Ideally you will be able to position yourself next to a wall to avoid
the heavy knockback from this ability, as ![]() Transcendence: Transfer is not
up for every cast.
Transcendence: Transfer is not
up for every cast.
Boss positioning is dependent on your raid. If you choose to move the boss
to Corruption Corpsucles, be careful to be on top of your cotank when
![]() Terrible Thrash is coming.
Terrible Thrash is coming.
Zek'voz, Herald of N'Zoth
More Zek'voz, Herald of N'Zoth Guides on Icy Veins
If your group lacks control for the Silithid Warriors, you can cast
![]() Ring of Peace on your raid members or near the enemies. They cannot
pass through and will simply run into it over and over. They will often
stack themselves up around the boss, so a ring with its edge just behind the
boss is usually good. Make sure not to spread them around erratically — this will
only make them tougher to kill.
Ring of Peace on your raid members or near the enemies. They cannot
pass through and will simply run into it over and over. They will often
stack themselves up around the boss, so a ring with its edge just behind the
boss is usually good. Make sure not to spread them around erratically — this will
only make them tougher to kill.
Zek'voz's ![]() Might of the Void ability deals extremely high damage and
will cause you to take less healing after it. When you take
Might of the Void ability deals extremely high damage and
will cause you to take less healing after it. When you take
![]() Shatter you will not be taking any damage afterwards — this
is important because
Shatter you will not be taking any damage afterwards — this
is important because ![]() Stagger cannot kill you! So long as
Stagger cannot kill you! So long as
![]() Surging Darkness is not being cast soon, you can tell your healers to
ignore you completely until your
Surging Darkness is not being cast soon, you can tell your healers to
ignore you completely until your ![]() Void Lash debuff is gone. Surging
Darkness is the only damage you will take — Titan Spark and Void Bolt do
not actually target tanks. You should have a cooldown up for every Might of the
Void — remember that
Void Lash debuff is gone. Surging
Darkness is the only damage you will take — Titan Spark and Void Bolt do
not actually target tanks. You should have a cooldown up for every Might of the
Void — remember that ![]() Zen Meditation works reasonably well for the
Shatter combo.
Zen Meditation works reasonably well for the
Shatter combo.
One exception exists for the strategy of going to 1 health for Might of the Void — the 8th cast will line up with a Surging Darkness which will hit you. Make sure to not go too low on this, or just begin the fight so you only take odd (1, 3, 5...) combos.
One option to deal with ![]() Might of the Void is for one tank to take all
three hits. The alternative is just taunting after the
Might of the Void is for one tank to take all
three hits. The alternative is just taunting after the ![]() Shatter. Discuss
with your cotank which will be easier, but both are fine for Brewmaster.
Shatter. Discuss
with your cotank which will be easier, but both are fine for Brewmaster.
In Phase Three, the boss will spawn zones that give players a debuff that increases their damage but eventually mind controls them. If the zones appear in front of the boss, just rotate it to ensure you do not cleave the soakers. One tip you may want to share with your raid is that the zones move in the direction the soaker is facing when they land — so you can bounce them between ranged and melee if the melee turns round in time, avoiding excess movement.
Make sure the boss is on top of a caster add when they spawn and help
interrupt and stun their Void Bolt cast, as it is very dangerous. On normal
mode, they can be interrupted with ![]() Ring of Peace, but this is not
possible on heroic. You may be asked to pull the boss from add to add as they
die if your raid crowd controls them and focuses down one — make sure to pay
attention to when the boss is going to cast its combo so you do not cleave any
raiders while moving.
Ring of Peace, but this is not
possible on heroic. You may be asked to pull the boss from add to add as they
die if your raid crowd controls them and focuses down one — make sure to pay
attention to when the boss is going to cast its combo so you do not cleave any
raiders while moving.
If your raid spawns a Guardian of Yogg-Saron from a ![]() Roiling Deceit
cloud, it is not a wipe. Tank the add, and when it is quite low place a
Roiling Deceit
cloud, it is not a wipe. Tank the add, and when it is quite low place a
![]() Ring of Peace over yourself. The add will not explode. This is very
liable to be fixed in the future, but in the meantime it will save a few pulls.
Ring of Peace over yourself. The add will not explode. This is very
liable to be fixed in the future, but in the meantime it will save a few pulls.
Mythic Zek'voz
Nothing significant changes on Mythic for you, other than the normal increased damage the boss does. Deal with the adds the same way you would normally, them coming at the same time makes little difference.
Vectis
More Vectis Guides on Icy Veins
This boss is very simple. Tank swap at 2 stacks, pick up adds, and soak pools.
Maintain a Black Ox Statue underneath the boss to pick up the add spawning
from ![]() Gestate easily. It will also pick up any Plague Amalgams that
spawn from missed soaks in Phase Two.
Gestate easily. It will also pick up any Plague Amalgams that
spawn from missed soaks in Phase Two.
As you are a very high mobility tank, especially with ![]() Chi Torpedo,
when Phase Two starts you should be ready to dash to the furthest away
Chi Torpedo,
when Phase Two starts you should be ready to dash to the furthest away
![]() Plague Bomb zone. To ensure the final add is killable for melee, you
may also want to move the boss away from the raid just before it spawns at the
very end of Phase One.
Plague Bomb zone. To ensure the final add is killable for melee, you
may also want to move the boss away from the raid just before it spawns at the
very end of Phase One.
If you gain the ![]() Omega Vector debuff, you should move into the raid
when it is almost over, to avoid bouncing one copy between both tanks.
Omega Vector debuff, you should move into the raid
when it is almost over, to avoid bouncing one copy between both tanks.
Mythic Vectis
There are no significant changes on Mythic Vectis for tanks. You should however, pay attention to how your raid manages the Omega Vector in case it bounces to you — putting it into the wrong group could be disastrous.
If you gain 6 stacks of ![]() Lingering Infection, make sure you are not
on top of your cotank or other raid members during and after the
Lingering Infection, make sure you are not
on top of your cotank or other raid members during and after the
![]() Contagion cast, as you will trigger AoE damage for a few seconds
afterwards. If any raid member have 11 stacks, they will spawn small adds that
do not need to be tanked, but do need to be stunned and killed.
Contagion cast, as you will trigger AoE damage for a few seconds
afterwards. If any raid member have 11 stacks, they will spawn small adds that
do not need to be tanked, but do need to be stunned and killed.
Zul, Reborn
More Zul, Reborn Guides on Icy Veins

You should consider your choice between ![]() Ring of Peace and
Ring of Peace and
![]() Summon Black Ox Statue in this encounter. Ring of Peace can protect
players from Minions of Zul while they are dispelled and killed and also
stop the Congealed Blood from reaching the boss for a very long time, meaning
you have to put significantly less damage on it. Black Ox Statue is great
for the frequent add spawns during the fight which can be tough to respond
to every time.
Summon Black Ox Statue in this encounter. Ring of Peace can protect
players from Minions of Zul while they are dispelled and killed and also
stop the Congealed Blood from reaching the boss for a very long time, meaning
you have to put significantly less damage on it. Black Ox Statue is great
for the frequent add spawns during the fight which can be tough to respond
to every time.
In Phase One, Zul attacks with adds, which all must be tanked. Bloodthirsty
Crawgs heal from the damage they do, Nazmani Crushers perform a frontal cleave
and at 100 Energy buff enemies within 30 yards with ![]() Thrumming Pulse, and
Nazmani Bloodhexers spawn an Animated Ichor at 100 Energy, which runs towards
the boss. Focus on keeping these adds on top of Zul, as he still must be damaged
to progress through the encounter.
Thrumming Pulse, and
Nazmani Bloodhexers spawn an Animated Ichor at 100 Energy, which runs towards
the boss. Focus on keeping these adds on top of Zul, as he still must be damaged
to progress through the encounter.
While either tank can take Crawgs (and often they will be split between tanks to share damage), the Crusher and Bloodhexers should be on different tanks, as both must be moved away from Zul at different times.
Make sure to have a ![]() Transcendence portal up before you move the
Nazmani Crusher out so his
Transcendence portal up before you move the
Nazmani Crusher out so his ![]() Thrumming Pulse does not affect other enemies
to get back to the raid faster. Remember that
Thrumming Pulse does not affect other enemies
to get back to the raid faster. Remember that ![]() Provoke causes targets
to run faster — this will help you position the Crusher faster. For the
Bloodhexer, most raids will keep her adjacent to the Animated Ichor until it is
dead, but this is not strictly necessary.
Provoke causes targets
to run faster — this will help you position the Crusher faster. For the
Bloodhexer, most raids will keep her adjacent to the Animated Ichor until it is
dead, but this is not strictly necessary.
If your group has trouble killing the Bloodthirsty Crawgs, consider kiting
them using your ![]() Roll and
Roll and ![]() Transcendence — they will not
heal if they cannot hit you! Bear in mind it will be tough to hold aggro while
kiting, so use misdirects and get some damage onto them first. Remember that
taunting your Black Ox Statue taunts everything near it.
Transcendence — they will not
heal if they cannot hit you! Bear in mind it will be tough to hold aggro while
kiting, so use misdirects and get some damage onto them first. Remember that
taunting your Black Ox Statue taunts everything near it.
During Phase Two, Zul will be tankable, and will cast ![]() Rupturing Blood.
You should take 3-4 stacks of this, and when your co-tank taunts off run to the
position your raid has decided (almost certainly opposite of the raid stack) and
drop a pool of blood. If you can, place your pool on top of old ones. Maintain
a
Rupturing Blood.
You should take 3-4 stacks of this, and when your co-tank taunts off run to the
position your raid has decided (almost certainly opposite of the raid stack) and
drop a pool of blood. If you can, place your pool on top of old ones. Maintain
a ![]() Transcendence portal to get back to Zul quickly, as you will likely
be low Health.
Transcendence portal to get back to Zul quickly, as you will likely
be low Health.
This is the hardest part of the fight for most tanks, as they will find
the ![]() Rupturing Blood deals a very high amount of damage. When you hit
your desired stacks, use
Rupturing Blood deals a very high amount of damage. When you hit
your desired stacks, use ![]() Fortifying Brew and
Fortifying Brew and ![]() Dampen Harm
as you walk out with a healer accompanying you. Use
Dampen Harm
as you walk out with a healer accompanying you. Use ![]() Zen Meditation when
you reach the place you want to drop your blood pool. If you have any Paladins,
this is made much easier: simply go out to your dropoff point, and ask the
Paladin to
Zen Meditation when
you reach the place you want to drop your blood pool. If you have any Paladins,
this is made much easier: simply go out to your dropoff point, and ask the
Paladin to ![]() Blessing of Protection you. This removes the debuff and drops
the pool instantly. When you drop your second or third pool, if you have no
cooldowns or Blessings left, you can opt to die if the boss is close to dead to
reduce healing requirements.
Blessing of Protection you. This removes the debuff and drops
the pool instantly. When you drop your second or third pool, if you have no
cooldowns or Blessings left, you can opt to die if the boss is close to dead to
reduce healing requirements.
Groups having great difficulty in this phase due to tank deaths may consider taking 3 tanks, which simplifies the last phase considerably.
Mythic Zul
The major change on Mythic Zul is the ![]() Decaying Flesh — any
adds that do not have this debuff on them when they die will revive. Most
guilds will choose to deal with this by having one tank for Crawgs exclusively,
who will begin to kite later in the fight. You should use
Decaying Flesh — any
adds that do not have this debuff on them when they die will revive. Most
guilds will choose to deal with this by having one tank for Crawgs exclusively,
who will begin to kite later in the fight. You should use ![]() Leg Sweep and
Leg Sweep and
![]() Ring of Peace to assist this tank, and resist AoEing while they pick up
threat on respawning or new Crawgs.
Ring of Peace to assist this tank, and resist AoEing while they pick up
threat on respawning or new Crawgs.
The fight is similar otherwise, though the mostly useless third tank in
Phase One can soak the ![]() Pool of Darkness if they want. The tank damage in
the last phase is still gigantic, and the third Crawg tank will not be able to
assist in tanking the boss except for a brief period of time if both other
tanks die.
Pool of Darkness if they want. The tank damage in
the last phase is still gigantic, and the third Crawg tank will not be able to
assist in tanking the boss except for a brief period of time if both other
tanks die.
Mythrax the Unraveler
More Mythrax the Unraveler Guides on Icy Veins
The primary tank mechanic in this fight is dealing with
![]() Annihilation, which reduces your HP. Obviously, this is problem
for a tank. You will primarily gain this when hit by
Annihilation, which reduces your HP. Obviously, this is problem
for a tank. You will primarily gain this when hit by ![]() Essence Shear. When
a tank is hit by this, the other tank should taunt off and the afflicted tank
should go and collect
Essence Shear. When
a tank is hit by this, the other tank should taunt off and the afflicted tank
should go and collect ![]() Existence Fragments throughout the room to restore
their Health. You do not need to have 0 stacks of Annihilation, and soaking too
many Existence Fragments will cause the rest of your raid to have lower Health.
Just maintain your max HP at a comfortable level for you.
Existence Fragments throughout the room to restore
their Health. You do not need to have 0 stacks of Annihilation, and soaking too
many Existence Fragments will cause the rest of your raid to have lower Health.
Just maintain your max HP at a comfortable level for you.
In Phase One, Mythrax will cast ![]() Oblivion Sphere which will mind
control a player and damage them. You can use
Oblivion Sphere which will mind
control a player and damage them. You can use ![]() Ring of Peace to quickly
free players from this. You may have to move the boss during Phase One away
from old spheres to ensure your raid has enough room.
Ring of Peace to quickly
free players from this. You may have to move the boss during Phase One away
from old spheres to ensure your raid has enough room.
In Phase Two, each tank will tank one N'raqi Destroyer and must have them 40
yards away from each other. These adds will cast ![]() Essence Shear and
Essence Shear and
![]() Void Volley. Void Volley must absolutely be interrupted. Mythrax will
cast
Void Volley. Void Volley must absolutely be interrupted. Mythrax will
cast ![]() Obliteration Beam in the direction of a player, so pay attention
and move if it is near you. At the end of this phase if your add is dead, pick
up the boss and some
Obliteration Beam in the direction of a player, so pay attention
and move if it is near you. At the end of this phase if your add is dead, pick
up the boss and some ![]() Existence Fragments if possible — you will
have high stacks of
Existence Fragments if possible — you will
have high stacks of ![]() Annihilation.
Annihilation.
Mythic Mythrax
In Mythic Phase One the only change is the addition of an add that will do
some raidwide damage and cast an extra ![]() Obliteration Blast. Naturally
you should avoid this. If you are the only Monk in the raid, attack it to apply
Obliteration Blast. Naturally
you should avoid this. If you are the only Monk in the raid, attack it to apply
![]() Mystic Touch. Make sure to call when you will be able to use
Mystic Touch. Make sure to call when you will be able to use
![]() Ring of Peace to free a player so player attention is not wasted, and do
not use it to free multiple people unless you know the raid will be able to
take the damage.
Ring of Peace to free a player so player attention is not wasted, and do
not use it to free multiple people unless you know the raid will be able to
take the damage.
Phase Two is technically similar with a large difference in how the
![]() Obliteration Beam works. There will be two beams, one pointed towards
the add which will change positions throughout the phase (so the room will be
roughly cut in half), and one from the add going directly to a raid member.
The majority of raids deal with this by stacking up and moving each cast, often
in a tiny corner so add spawns are clumped. If you are tanking in this group,
make sure to move with them and not face them when
Obliteration Beam works. There will be two beams, one pointed towards
the add which will change positions throughout the phase (so the room will be
roughly cut in half), and one from the add going directly to a raid member.
The majority of raids deal with this by stacking up and moving each cast, often
in a tiny corner so add spawns are clumped. If you are tanking in this group,
make sure to move with them and not face them when ![]() Essence Shear
occurs.
Essence Shear
occurs.
If you are the other tank, you will be on the other side of the room with a
healer and a DPS (or just a Restoration Shaman ideally). You should easily be
able to avoid the beam (remember: one beam to the weapon add, one to the raid).
You should take the first and third interrupts, the Shear and by this time move
as soon as a beam cast ends to the raid (your DPS or Shaman will have to
interrupt during the move!). At this point, the tank with fewer
![]() Annihilation stacks takes the add and the other tank goes to
collect orbs to increase their health. Raids with a DPS Warrior can have the
player taunt the add, use
Annihilation stacks takes the add and the other tank goes to
collect orbs to increase their health. Raids with a DPS Warrior can have the
player taunt the add, use ![]() Die by the Sword to take an Essence Shear safely
and dramatically reduce the amount of stacks each tank has.
Die by the Sword to take an Essence Shear safely
and dramatically reduce the amount of stacks each tank has.
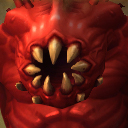
G'huun
More G'huun Guides on Icy Veins

In Phase One, there are two tankable enemies: Dark Young and, in Heroic mode, Blightspreader Tentacles.
Monks should tank Dark Young if possible, as they cast ![]() Massive Smash
frequently, knocking the tank back. Monk mobility, especially
Massive Smash
frequently, knocking the tank back. Monk mobility, especially
![]() Transcendence, makes them well suited to this. In Normal difficulty,
you can taunt off on each cast if you desire. The Dark Young also cast
Transcendence, makes them well suited to this. In Normal difficulty,
you can taunt off on each cast if you desire. The Dark Young also cast
![]() Dark Bargain at 100 Energy, which is an AoE that increases the damage
and healing, as well as damage taken of afflicted players. You should position
the Dark Young on top of enemies before this is cast to affect them, and you
will learn the fixed spawn positions of adds as you progress through the fight.
If you are comfortable taking more damage, feel free to get hit by this —
but getting hit by two in a row will mind control you, likely causing a
wipe.
Dark Bargain at 100 Energy, which is an AoE that increases the damage
and healing, as well as damage taken of afflicted players. You should position
the Dark Young on top of enemies before this is cast to affect them, and you
will learn the fixed spawn positions of adds as you progress through the fight.
If you are comfortable taking more damage, feel free to get hit by this —
but getting hit by two in a row will mind control you, likely causing a
wipe.
Blightspreader Tentacles will frequently cast ![]() Decaying Eruption,
dealing huge damage to the raid. You should set up an interrupt rotation to deal
with this. At 100 Energy they will cast
Decaying Eruption,
dealing huge damage to the raid. You should set up an interrupt rotation to deal
with this. At 100 Energy they will cast ![]() Burrow, changing position.
Get to the add as quickly as possible to tank and interrupt it.
Burrow, changing position.
Get to the add as quickly as possible to tank and interrupt it.
You can and should use ![]() Paralysis and
Paralysis and ![]() Leg Sweep
to interrupt
Leg Sweep
to interrupt ![]() Torment, which is chaincast by Cyclopean Terrors.
Torment, which is chaincast by Cyclopean Terrors.
Ideally, the phase will end soon after one Blightspreader spawns.At the end
of Phase One, all adds will be stunned and killed and G'huun will be active.
Every time he melees a tank, he gains a stack of ![]() Growing Corruption,
adding and increasing magic damage on each of his swings.
Growing Corruption,
adding and increasing magic damage on each of his swings.
He will also apply ![]() Explosive Corruption to the active tank often.
When this happens, the other tank should taunt and the debuffed tank should move
out of the raid to drop a damaging zone and emit 5 balls. Be careful when
moving back in, as hitting a ball will give you the debuff again on Heroic
mode.
Explosive Corruption to the active tank often.
When this happens, the other tank should taunt and the debuffed tank should move
out of the raid to drop a damaging zone and emit 5 balls. Be careful when
moving back in, as hitting a ball will give you the debuff again on Heroic
mode.
Occasionally the boss will cast ![]() Blood Feast. If you have high stacks
of
Blood Feast. If you have high stacks
of ![]() Putrid Blood from
Putrid Blood from ![]() Wave of Corruption, stand on top of them
to clear your stacks. After Blood Feast expires, a Gibbering Horror will spawn
which must be tanked.
Wave of Corruption, stand on top of them
to clear your stacks. After Blood Feast expires, a Gibbering Horror will spawn
which must be tanked.
There are two tanking strategies: one is to taunt on the ![]() Explosive Corruption
cast, holding both G'Huun and the Gibbering Horror until the debuffed tank
can taunt the Horror. The probably superior strategy is to have one tank take
all Explosive Corruptions, and one tank take the Horror permanently. This
reduces damage from G'huun significantly. To do this, start by the Explosive
Corruption tank taking 6 stacks, at which point the debuff is cast. After this,
swap at 4. The add tank will take high damage after it spawns, and should use
personal and external cooldowns.
Explosive Corruption
cast, holding both G'Huun and the Gibbering Horror until the debuffed tank
can taunt the Horror. The probably superior strategy is to have one tank take
all Explosive Corruptions, and one tank take the Horror permanently. This
reduces damage from G'huun significantly. To do this, start by the Explosive
Corruption tank taking 6 stacks, at which point the debuff is cast. After this,
swap at 4. The add tank will take high damage after it spawns, and should use
personal and external cooldowns.
In Phase Three, the boss will cast ![]() Gaze of G'huun — face away
from the boss before this finishes or you will be feared.
Gaze of G'huun — face away
from the boss before this finishes or you will be feared.
![]() Malignant Growths will spawn too, covering around half the room. Move
into an empty area, and once the first set explodes move onto them. Make sure
you have healers in range of you. Always swap at 4 stacks in this phase.
Malignant Growths will spawn too, covering around half the room. Move
into an empty area, and once the first set explodes move onto them. Make sure
you have healers in range of you. Always swap at 4 stacks in this phase.
Changelog
- 25 Jun. 2019: This page has been reviewed for the release of Patch 8.2 and no changes are necessary.
- 10 Dec. 2018: This page has been reviewed for Patch 8.1 and no changes are necessary.
- 16 Oct. 2018: Added Mythic strategies for every boss other than G'huun, minor improvements and tips elsewhere.
- 19 Sep. 2018: Altered Mythic tips.
- 11 Sep. 2018: Updated after week one, and added early Mythic tips.
- 04 Sep. 2018: Extensive rework for Uldir launch.
- 03 Sep. 2018: Added more content.
- 13 Aug. 2018: Updated for Battle for Azeroth launch.
- 23 Jul. 2018: Updated some talents and Legendary recommendations.
More Monk Guides
Guides from Other Classes
Raid Guides
This guide has been written by Quotey, who has been tanking as a Brewmaster Monk since they first rolled onto the scene. He currently raids in Echoes and is reachable on the friendly Monk Discord.
- Blizzard Breaks Silence on Puzzling Cartel Chips in Patch 11.1.5
- Chalice Quest NPC Rewards Temporarily Disabled Disabled in Season of Discovery
- Has The Catalyst Killed Raiding or Improved the Game? WoW Heroic Raid Progression Since Legion
- Undercoin Transfers Now Possible on 11.1.5 PTR — Bug or Feature?
- The Music of Azeroth: Community’s Favorite Soundscapes
- This Hunter Transmog Turned Heads on Reddit—and Here’s the Full Item List
- What’s Still in Your Bags? Players Reveal the Weirdest Items They Can’t Delete
- Two Mounts Drop in the Scarlet Enclave Raid — Here’s Where to Get Them