Freehold Dungeon Guide: Location, Boss Strategies, Trash, and Loot
Welcome to our guide to the Freehold dungeon in Season 2 of the Dragonflight World of Warcraft expansion. This guide will cover everything you need to know about the dungeon, including how to get to it, its layout, the trash and boss mechanics within, and its loot.
Getting into Freehold
Freehold is a max-level dungeon located in Tiragarde Sound, Kul Tiras. You can quickly access the portals in each capital city (Orgimmar or Stormwind).
tiragarde-soundThis guide will focus on an extensive overview of the dungeon, providing vital information to increase your chance of completing the key. We will cover all 4 boss fights supported by the most notable trash enemies in the dungeon and their important abilities. If you would like to learn about the rest of the dungeon in Season 2, please see our overviews linked below. Otherwise, without further ado, let us begin!
Freehold Layout
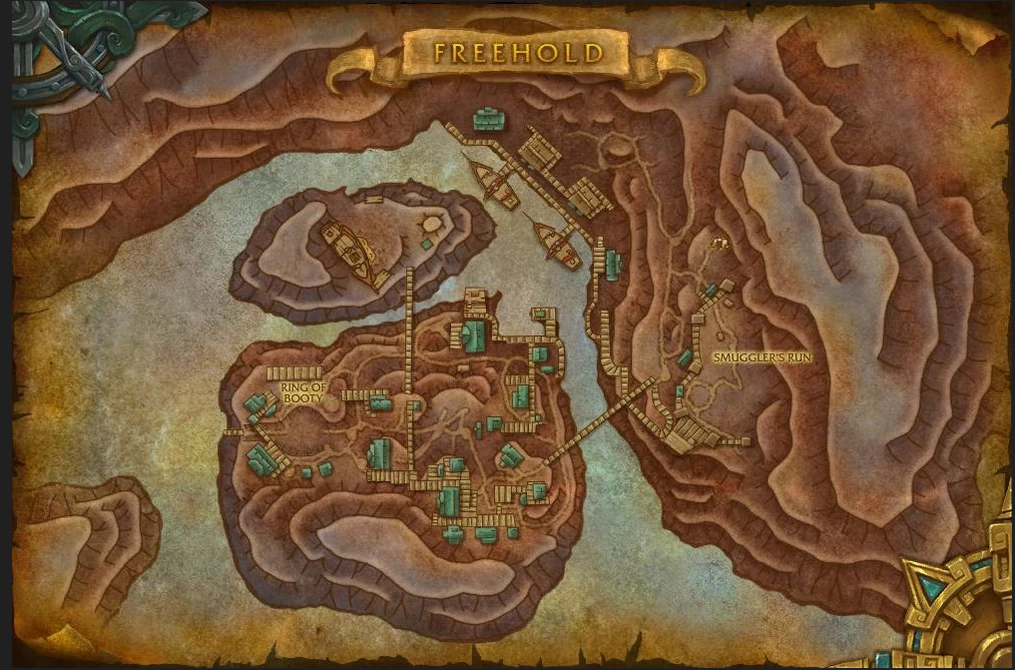
Smuggler's Run and Skycap'n Kragg
Notable Trash Before Skycap'n Kragg
Throughout the whole Smuggler's Run area (up until the first boss of the dungeon),
you will be thrown ![]() Vile Coating; as soon as it lands, get out
of the vile pool!
Vile Coating; as soon as it lands, get out
of the vile pool!
- Irontide Enforcer is arguably the deadliest non-boss-enemy prior to
engaging the first boss of the dungeon due to its lethal frontal ability -
 Brutal Backhand (beware if you are in melee). In addition, watch out
for
Brutal Backhand (beware if you are in melee). In addition, watch out
for  Shattering Bellow, the uninterruptible cast can cause you trouble.
 - Irontide Mastiff will cast
 Crippling Bite to the highest
threat target (your tank) and also
Crippling Bite to the highest
threat target (your tank) and also  Bestial Wrath when its health
reaches 50% (you can use Enrage Dispel abilities like
Bestial Wrath when its health
reaches 50% (you can use Enrage Dispel abilities like  Soothe to
remove its damage buff).
Soothe to
remove its damage buff). - Irontide Corsair is the hardest trash mob for every tank due to its
stackable
 Poisoning Strike
  Poison debuff (yes, you can use
Poison removal effects to remove all of the stacks from your tank).
Poison debuff (yes, you can use
Poison removal effects to remove all of the stacks from your tank). - Beware of Irontide Bonesaw and its
 Infected Wound
(caused by
Infected Wound
(caused by  Filthy Blade)
  Disease effect, in a combination
with Poisoning Strike can create a ton of pressure on your
tank's survivability. In addition, make sure to interrupt the
Disease effect, in a combination
with Poisoning Strike can create a ton of pressure on your
tank's survivability. In addition, make sure to interrupt the  Healing Balm
cast to prevent them from healing any nearby enemies.
Healing Balm
cast to prevent them from healing any nearby enemies. - At last, Irontide Crackshot is one of the only static mobs in the dungeon,
to let it stack with the rest of the mobs, you have to line of sight until
it gets closer to melee. Watch out for its
 Azerite Grenade ground animation
while doing so, it turns lethal on the higher-end keys!
Azerite Grenade ground animation
while doing so, it turns lethal on the higher-end keys!
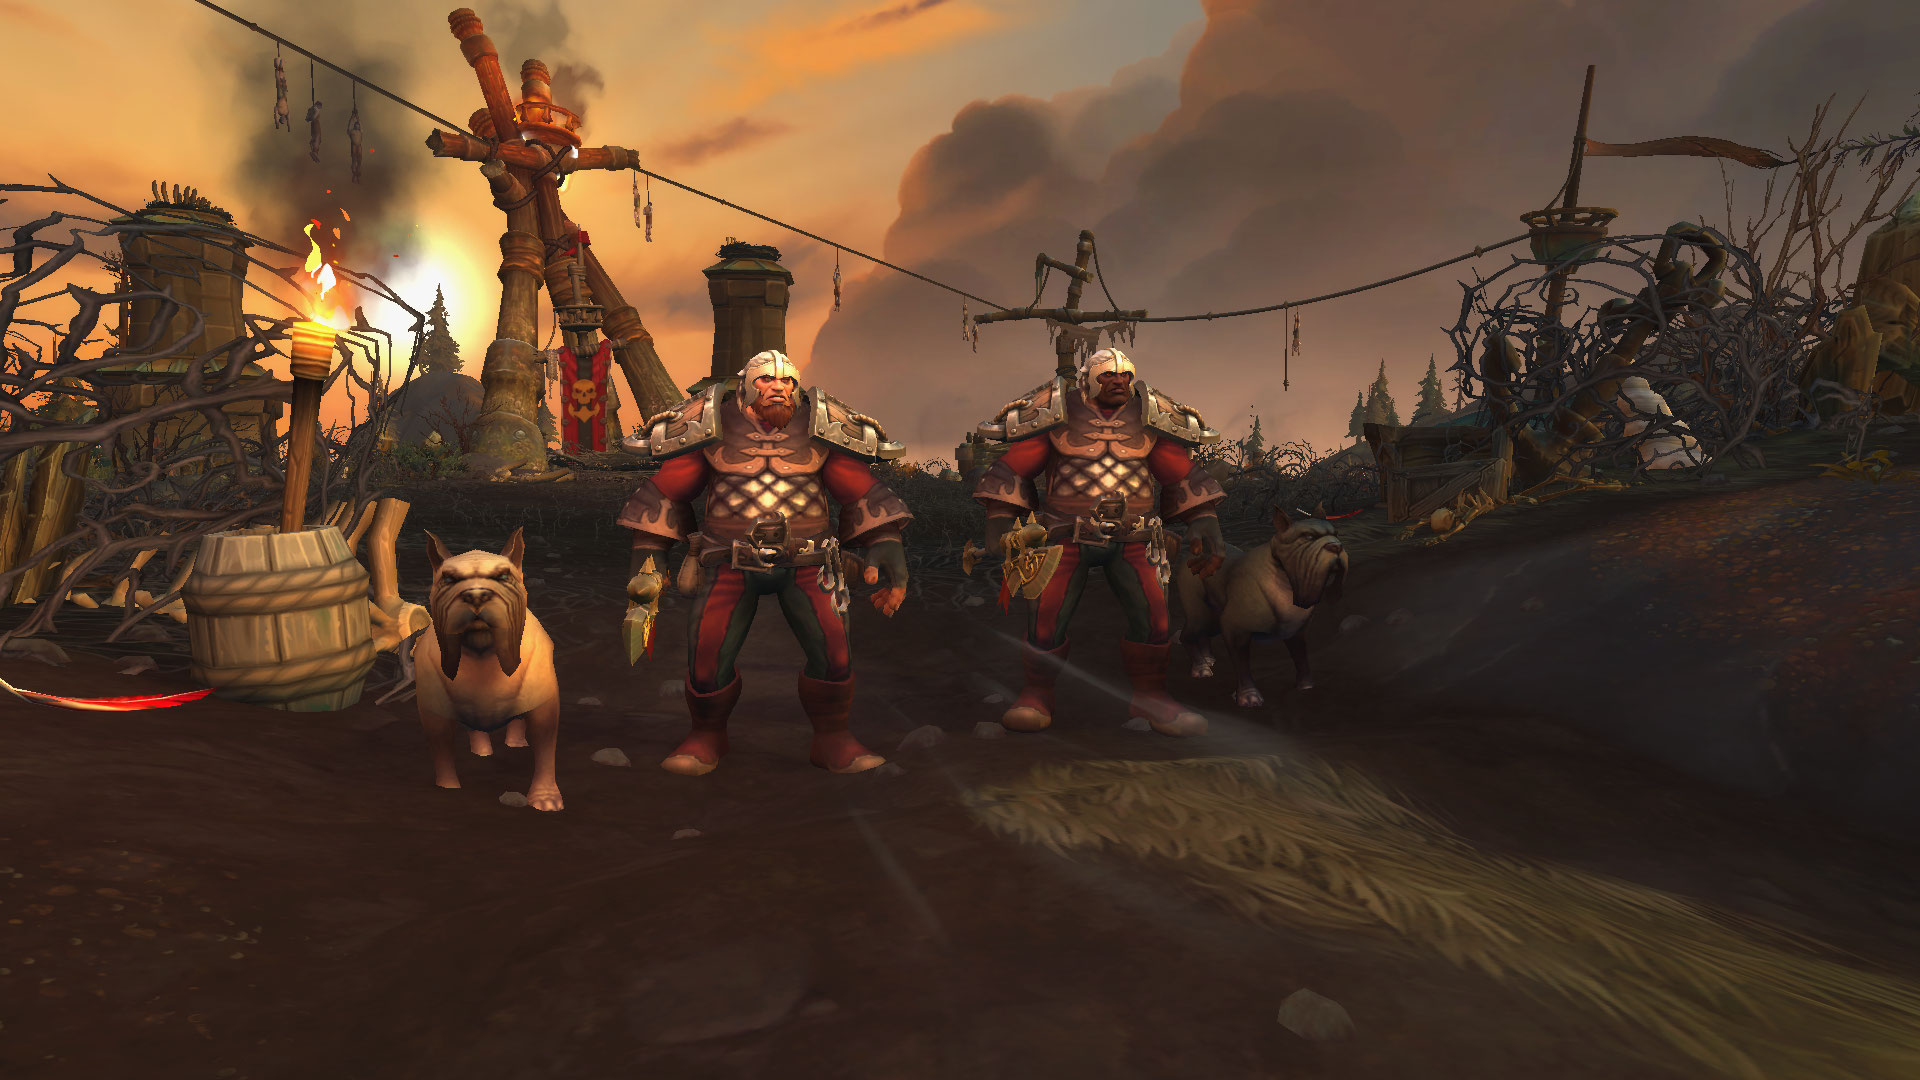
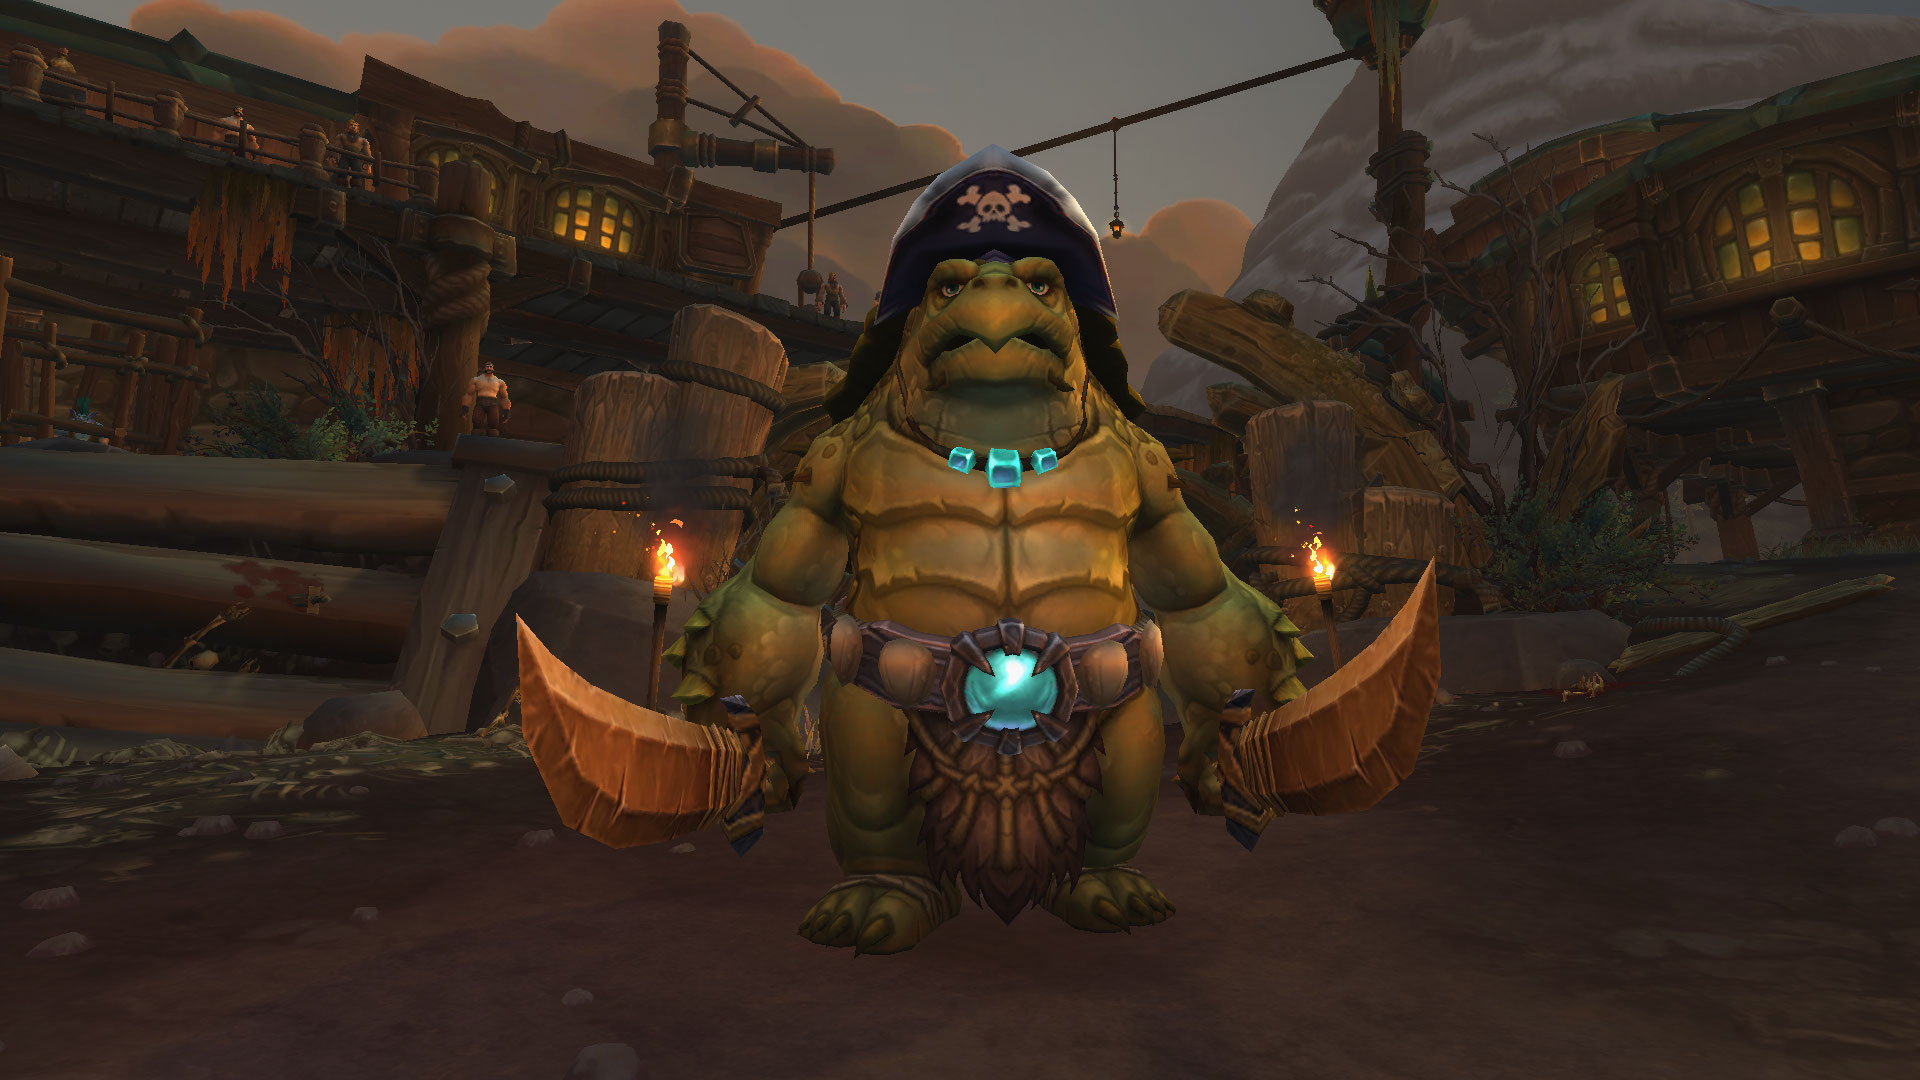
Make sure to defeat one of the two packs of Irontide Enforcer & Irontide Mastiff located nearby Skycap'n Kragg (either in front of the boss or behind the stairs, look at the picture down below).
Skycap'n Kragg Boss Guide
Skycap'n Kragg boss fight is a two-stage encounter, each of the phases
being entirely different for tackle. Stage: Mounted Assault is the first
stage of the boss fight, which lasts until the boss reaches 75% health,
after which the second stage of the encounter activates - Stage: Death Rains from Above.
During Phase 1, you want to keep yourself close to full health because of
![]() Pistol Shot and avoid getting hit by
Pistol Shot and avoid getting hit by ![]() Charrrrrge.
Once Phase 2 is activated, the boss will gain several new abilities
(and lose the old ones); for more information, read down below:
Charrrrrge.
Once Phase 2 is activated, the boss will gain several new abilities
(and lose the old ones); for more information, read down below:
All Roles
- Avoid being hit by
 Charrrrrge during Stage: Mounted Assault.
Be aware that the boss can "charge" on anyone (although he prefers ranged targets), so it
would be better to stay closer to melee for higher damage uptime on all melee players.
Charrrrrge during Stage: Mounted Assault.
Be aware that the boss can "charge" on anyone (although he prefers ranged targets), so it
would be better to stay closer to melee for higher damage uptime on all melee players. - Skycap'n Kragg will cast 2x
 Pistol Shot before
Charrrrrge, use your defensive cooldowns accordingly.
Pistol Shot before
Charrrrrge, use your defensive cooldowns accordingly. - Avoid being hit by
 Dive Bomb; this ability will become lethal
on the higher keys.
Dive Bomb; this ability will become lethal
on the higher keys. - Run away if there is a
 Vile Bombardment puddle on the ground.
Tank
- Keep a distance between you and any Ranged players as this way, you can avoid
the Vile Bombardment if it targets them.
Healer
- Quickly top up your party members during the Stage: Mounted Assault (Phase 1) of the boss encounter.
- Dispel the
 Azerite Powder Shot Shot follow up damage-over-time effect.
The Rum Quarter and Council o' Captains
Notable Trash Before Council o' Captains
- Beware of Cutwater Duelist and its
 Duelist Dash, it also
stuns all players caught in its path.
Duelist Dash, it also
stuns all players caught in its path. - Bilge Rat Padfoot is one of the harder non-boss-enemies for your tank
due to its
 Plague Step. Trying to "kite" it will result in the mob
shadow-stepping behind you, so removing the Disease effect will help immensely.
Plague Step. Trying to "kite" it will result in the mob
shadow-stepping behind you, so removing the Disease effect will help immensely. - Interrupt the
 Sea Spout from Irontide Oarsman; this
ground effect will turn lethal on the higher-end keys.
Sea Spout from Irontide Oarsman; this
ground effect will turn lethal on the higher-end keys. - Do NOT jump during the
 Slippery Suds debuff coming from
Bilge Rat Swabby, you can't dispel it so let it expire!
Slippery Suds debuff coming from
Bilge Rat Swabby, you can't dispel it so let it expire! - Vermin Trapper has only one ability to watch out for, and that its
 Rat Traps. You can "soak" all the traps from the ground with
any immunity effect or movement-impairing immunity (like
Rat Traps. You can "soak" all the traps from the ground with
any immunity effect or movement-impairing immunity (like  Hand of Freedom
&
Hand of Freedom
&  Tiger's Lust, etc.). In addition, the Vermin Trapper is
surrounded by 4x Soggy Shiprats, which die rather easily, heads up they
have a nasty stackable debuff -
Tiger's Lust, etc.). In addition, the Vermin Trapper is
surrounded by 4x Soggy Shiprats, which die rather easily, heads up they
have a nasty stackable debuff -  Scabrous Bite.
 - Blacktooth Brute will cast
 Earth Shaker, do your best
to stand further than 5 yds away from the mob so you avoid all damage.
Earth Shaker, do your best
to stand further than 5 yds away from the mob so you avoid all damage. - Irontide Buccaneer is quite an easy mob to deal with; just make
sure to stay away during its
 Blade Barrage (or stop it with any disturbing effects).
 - Interrupt Shattering Bellow coming from Blacktooth Knuckleduster
to prevent being locked on spell.
- At last, Blacktooth Scrapper, use
 Enrage Dispel effects or
drop-combat once you get targetted by
Enrage Dispel effects or
drop-combat once you get targetted by  Blind Rage.
Captain Eudora & Raoul Boss Guide
It is important to note that regardless of which boss combination you are facing, you will always have Rummy Mancomb available on your side, throwing several brews that upon soaking will be able to grant you bonuses or harm you, which can make the boss fight easier or harder, depending on how well you manage the brews (and your luck as well!). At last, several members from your team can soak the brews, beware that bosses can also soak them, so you really need to pay attention to their positioning at all times:
 Confidence-Boosting Freehold Brew increases critical strike chance
by 30% for 8 seconds.
Confidence-Boosting Freehold Brew increases critical strike chance
by 30% for 8 seconds.- Invigorating Freehold Brew increases haste by 30% for 8 seconds.
- Caustic Freehold Brew deals ticking damage over 8 seconds.
This can also work on any other mobs entering the brew, regardless of their
quantity as long last they stay in the visual they will gain the debuff.
The damage scales with keystone level as well!
I recommend using a WeakAura to determine what the next brew will be, something that I personally use is this - > https://wago.io/Hysgq68SX .
All Roles
- Be mindful of your health during Captain Eudora's
 Powder Shot.
Here is a good place to use your self-sustain abilities and defensive cooldowns.
Keep in mind that any spells that grant you a physical damage immunity or drop
your combat will prevent the shot from doing any damage to you.
Powder Shot.
Here is a good place to use your self-sustain abilities and defensive cooldowns.
Keep in mind that any spells that grant you a physical damage immunity or drop
your combat will prevent the shot from doing any damage to you. - Avoid at all cost
 Grapeshot coming from Captain Eudora.
Using movement speed abilities to get closer to her will be the key to survival.
Grapeshot coming from Captain Eudora.
Using movement speed abilities to get closer to her will be the key to survival. - When Captain Raoul casts
 Blackout Barrel, quickly focus
it and nuke it down. Pre-immunity and movement-impairing neutralizing effects
will completely remove the spell.
Blackout Barrel, quickly focus
it and nuke it down. Pre-immunity and movement-impairing neutralizing effects
will completely remove the spell. - Run away from the Captain Raoul's
 Barrel Smash.
 - Do your best to soak as many Confidence-Boosting Freehold Brew &
Invigorating Freehold Brew as you can to speed up the boss fight.
Tank
- Always make sure to tank both bosses close to each other to enable your party members to effectively "cleave".
- Be mindful of which brews Rummy Mancomb is throwing on the ground,
and make sure to let both bosses soak Caustic Freehold Brew so
you can speed up the boss fight.
Healer
- Quickly top up players to prevent casualties from Captain Eudora's
Powder Shot.
Ring of Booty and Trothak
Notable Trash Before Trothak
- Always have a distance when you fight Cutwater Knife Juggler due to
its
 Ricocheting Throw.
 - Interrupt
 Frost Blast &
  Water Bolt at all cost
from Bilge Rat Brinescale. This is the most important non-boss-enemy in
this area, so always focus on it first!
Water Bolt at all cost
from Bilge Rat Brinescale. This is the most important non-boss-enemy in
this area, so always focus on it first! - Watch out for Cutwater Harpooner's
 Dragging Harpoon.
It can target anyone, so as long as you are close to full health, you shouldn't worry!
Dragging Harpoon.
It can target anyone, so as long as you are close to full health, you shouldn't worry! - Avoid being hit by Irontide Crusher's
 Ground Shatter AoE ground
effect and its avoidable skill shot -
Ground Shatter AoE ground
effect and its avoidable skill shot -  Boulder Throw.
Ring of Booty Event Tips and Tricks

Before engaging the third boss of the dungeon - Trothak, you first complete the Ring of Booty Event to summon the boss. The first obstacle is to catch Lightning. The second one is to defeat the only mini-boss in this dungeon - Ludwig Von Tortollan, after which the boss will spawn. Here are more tips on how to be quicker in finishing the Event:
- Lightning will spawn in a different location, so it's best to either have all 5 members from your party finish the Event or send your Healer to do it. At the same time, the rest of the group fights a pack for maximum efficiency.
- It takes 3 clicks until you finally manage to catch Lightning; each time you try, you will also get stunned for 2 sec. Keep in mind that you can click it multiple times even while you are under the stun effect.
- Ludwig Von Tortollan will not only be tough for your tank to handle,
but it will also cast multiple
 Shell Bounce. The longer the fight
goes, the more of Shell Bounce you will have to dodge.
Shell Bounce. The longer the fight
goes, the more of Shell Bounce you will have to dodge. - Whatever you do, make sure to NOT leave the arena, else you will
likely get 1 shot by Booty Fanatic and their
 Throw Rotten Food cast.
Trothak Boss Guide
All Roles
- Avoid staying in the
 Shark Tornado.
 - When Trothak casts
 Shark Toss make sure to kite it to
the nearby
Shark Toss make sure to kite it to
the nearby  Throw Chum. The same applies when you have a
 Flailing Shark, just kite it towards nearby Throw Chum
or just run away from it, as the sharks will always target the closest enemy to them.
Flailing Shark, just kite it towards nearby Throw Chum
or just run away from it, as the sharks will always target the closest enemy to them. - Use defensive cooldowns if you get the
 Ripper Punch
  Bleed
effect. Your pets can also get the Bleed effect.
Bleed
effect. Your pets can also get the Bleed effect. - Avoid staying nearby any sharks to avoid getting hit by the
 Rearm charge.
Tank
- Do your best to be the closest target to the boss so that you can soak all of
the Ripper Punch effects.
Healer
- Helping with kiting each shark will increase the overall damage output from your team, as the damage dealers will not have to worry about the mechanics. Do your best to help your team when you can!
Sweete's Landing and Harlan Sweete
Notable Trash Before Trothak
- Interrupt Irontide Stormcaller's
 Lightning Bolt &
 Thundering Squall as frequently as you can, this is the only
important mob in this area that you should be focused on kicking.
Thundering Squall as frequently as you can, this is the only
important mob in this area that you should be focused on kicking. - Irontide Ravager is the most important mob in this area
because of its
 Painful Motivation cast, which will damage 2 random enemies
around him. You should NOT stop its cast under no circumstance. If this is played
correctly, it can help you defeat the trash mobs quicker!
Painful Motivation cast, which will damage 2 random enemies
around him. You should NOT stop its cast under no circumstance. If this is played
correctly, it can help you defeat the trash mobs quicker! - Sidestep the Irontide Buccaneer's Blade Barrage.
- Beware of Irontide Officer's
 Oiled Blade ability, as it will
make the life of your tank significantly harder. Keep in mind that they also have
Painful Motivation cast, once again, don't interrupt it!
Oiled Blade ability, as it will
make the life of your tank significantly harder. Keep in mind that they also have
Painful Motivation cast, once again, don't interrupt it!
At last, before you engage the final boss of the dungeon - Harlan Sweete, you first must defeat the pack just in front of him (see the picture below). Otherwise, it will pull automatically once you engage the boss.
Harlan Sweete Boss Guide
Harlan Sweete will gain additional buffs throughout the fight at 60% health
(![]() Loaded Dice: All Hands!) and again at 30% health (
Loaded Dice: All Hands!) and again at 30% health (![]() Loaded Dice: Man-O-War),
which will make the fight extra difficult as time goes on.
More information, down below:
Loaded Dice: Man-O-War),
which will make the fight extra difficult as time goes on.
More information, down below:
All Roles
- When the boss has
 Loaded Dice: All Hands! stay slightly spread
to avoid getting hit by the same
Loaded Dice: All Hands! stay slightly spread
to avoid getting hit by the same  Swiftwind Saber.
 - During
 Cannon Barrage, make sure that you leave the
ground puddles away from the boss fight. During the Loaded Dice: All Hands!
phase, all members of your team should be stacked together for better
Flaming Shrapnel management.
Cannon Barrage, make sure that you leave the
ground puddles away from the boss fight. During the Loaded Dice: All Hands!
phase, all members of your team should be stacked together for better
Flaming Shrapnel management. - Help your team to crowd-control the incoming Irontide Grenadier,
if one of them gets close to you, it might turn lethal (depending on the key level)
because of its
 Black Powder Bomb.
Tank
- Use your defensive cooldowns during the Loaded Dice: Man-O-War phase
of the boss as he will have 100% increased Attack Speed.
Healer
- Top up players after every single Swiftwind Saber as that is
one of the major details of the fight. If your party goes with low health to
the next Swiftwind Saber, they will likely end up dying.
- Watch out for
 Whirling Dagger, it will leave a Bleed
effect on a random member of your party. During the Loaded Dice: All Hands! phase,
it will bounce on all 5 members of your team without leaving the Bleed effect.
Whirling Dagger, it will leave a Bleed
effect on a random member of your party. During the Loaded Dice: All Hands! phase,
it will bounce on all 5 members of your team without leaving the Bleed effect.
Freehold Loot Table
Skycap'n Kragg
| Type | Item | Stats |
|---|---|---|
| 1H Mace | Vers/Crit | |
| Back | Crit/Mastery | |
| Cloth Wrist | Vers/Mastery | |
| Mail Waist | Vers/Mastery | |
| Plate Waist | Haste/Vers | |
| Leather Feet | Crit/Mastery |
Council o' Captains
| Type | Item | Stats |
|---|---|---|
| Dagger | Vers/Mastery | |
| Gun | Vers/Crit | |
| Plate Wrist | Vers/Crit | |
| Mail Wrist | Haste/Vers | |
| Cloth Waist | Crit/Haste | |
| Leather Legs | Mastery/Haste | |
| Cloth Boots | Crit/Mastery | |
| Ring | Haste/Crit |
Trothak
| Type | Item | Stats |
|---|---|---|
| 2H Sword | Haste/Vers | |
| Leather Wrist | Vers/Haste | |
| Mail Hands | Haste/Vers | |
| Cloth Hands | Vers/Crit | |
| Leather Hands | Mastery/Vers | |
| Plate Hands | Vers/Haste | |
| Cloth Legs | Mastery/Crit | |
| Plate Legs | Mastery/Haste | |
| Mail Boots | Mastery/Crit |
Harlan Sweete
| Type | Item | Stats |
|---|---|---|
| 1H Sword | Haste/Crit | |
| Trinket | Agility | |
| Mount |
Freehold Achievements
There are 7 total achievements to obtain in Freehold:
| Achievement | Criteria |
|---|---|
| Freehold | Defeat Harlan Sweete in Freehold |
| Defeat Harlan Sweete in Freehold on
|
|
| Defeat Harlan Sweete in Freehold on
|
|
| Defeat Harlan Sweete in Freehold on
|
|
| Complete Freehold at |
|
| Defeat Skycap'n Kragg after summoning and defeating
Patches in Freehold on |
|
| Defeat Harlan Sweete after destroying three
Chests o' Botty in Freehold on |
Changelog
- 04 Sep. 2023: No further changes required for 10.1.7 Patch.
- 10 Jul. 2023: No further changes required for the 10.1.5 Patch.
- 09 May 2023: Page added.
This guide has been written by Petko, one of the top Mythic players of all time. He has accomplished several Europe- and World #1 Team and Solo Seasonal rankings with multiple specialization and classes. Moreover, he competes in the MDI and streams his runs live on Twitch, and shares his personal opinions on YouTube and Twitter.
- How to Make a Level 70 Twink and Boost Yourself to Level 80 in 3 Hours!
- War Within 11.1 Hotfixes, April 8th: Raid Nerfs
- Classic Anniversary Realms Black Lotus Drop Increases
- Winds of Mysterious Fortune Experience and BIG Reputation Boost Coming on April 22nd!
- Comprehensive To-Do List for The War Within Season 2 Week 6
- Patch 11.1.5 Arrives on April 22: Not All Features Available at Launch
- The Great Vault Best-in-Slot Picks for Every Specialization
- Patch 11.1.5 Releases April 22—But Most Content Arrives Weeks Later