Garalon Detailed Strategy Guide (Heroic Mode included)

Table of Contents
Introduction
This guide is intended to provide a comprehensive description of the encounter with Garalon in Heart of Fear. It is targeted at anyone who desires to understand the fight mechanics.
This guide is updated for World of Warcraft WoD 6.1.2.
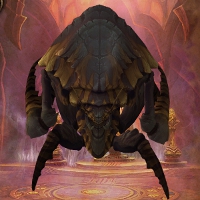
Garalon is the third boss of the Heart of Fear raid instance. During the encounter, you will be fighting Garalon, as well as damaging and regularly killing his four legs.
There are several other important mechanics, all of which are centered around your ability to move and kite the boss. There are, naturally, some fairly intense damage and healing requirements, as well.
General Information
| Difficulty | Health Values | Enrage Timer | Raid Composition | |||
|---|---|---|---|---|---|---|
| Garalon | Garalon's Legs | Tanks | Healers | DPS | ||
| 10-man | 218M | 6.5M | 12 minutes | 2 | 2-3 | 5-6 |
| 10-man Heroic | 290M | 8.7M | 7 minutes | 2 | 2-3 | 5-6 |
| 25-man | 654M | 20M | 12 minutes | 2 | 5-6 | 17-18 |
| 25-man Heroic | 872M | 26M | 7 minutes | 2 | 5-6 | 17-18 |
| LFR | 348M | 10.5M | 7 minutes | 2 | 5-6 | 17-18 |
Loot
Armor
| Item Name | Armor | Slot | Main Stats |
|---|---|---|---|
| Cloth | Head | Intellect | |
| Cloth | Feet | Intellect/Hit | |
| Leather | Chest | Intellect | |
| Leather | Hands | Agility | |
| Hands | Agility | ||
| Plate | Hands | Intellect | |
| Plate | Chest | Strength | |
| Plate | Head | Strength/Parry |
Amulets, Cloaks, and Rings
| Item Name | Type | Main Stats |
|---|---|---|
| Amulet | Strength/Mastery | |
| Cloak | Agility | |
| Cloak | Intellect/Hit | |
| Ring | Strength/Dodge |
Overview of the Fight
Garalon is a single-phase fight. The boss does not melee, and must instead be kited for the duration of the encounter. Tanks are still required, however.
Garalon will always fixate on a random raid member, and move towards them. Who he fixates on is determined by a debuff that the boss applies, which can be passed from one player to another. Therefore, your raid can control who the boss is following. The same player cannot have the debuff for very long, though, since it deals increasing damage to them.
All 4 of Garalon's legs are separate NPCs which can be attacked and killed. Killing one of his legs damages and slows Garalon (the slow effect is proportional to the number of legs killed). Slowing Garalon makes kiting him considerably easier and ensures that the kiter does not get close enough to get hit by very damaging abilities that Garalon uses. Garalon will periodically revive his legs, so killing them is something that must be done throughout the entire fight. Note that attacking the legs is not a DPS loss as the damage dealt to the legs is transferred to Garalon.
The tanks' only role in the encounter is to soak the damage from a frontal cone attack that the boss does and that needs to hit at least two players.
Abilities
There are three separate elements to the Garalon fight, and you must understand them all, as well as their synergy, in order to understand the fight.
Pheromones Debuff
You must understand the debuff that Garalon applies, since this is
the key to the encounter. When engaged, Garalon will cast ![]() Pheromones on
the player that pulls him. He only casts this debuff once, but it will remain
active for the entire duration of the fight. Pheromones has several effects.
Pheromones on
the player that pulls him. He only casts this debuff once, but it will remain
active for the entire duration of the fight. Pheromones has several effects.
- While Pheromones is active (so, always), it will constantly deal a small, yet increasing amount of Nature damage to the entire raid, every 2 seconds.
- Garalon fixates on the player who is currently carrying Pheromones, and moves towards them.
- The player who is currently carrying the Pheromones is affected in two
ways.
- They receive a stacking debuff, called
 Pungency, which increases the
damage that
Pungency, which increases the
damage that  Pheromones deals (to all raid members), by 10% of its
base damage, per stack. Pungency lasts for 2 minutes in 10-man, 4 minutes in
25-man, and 20 seconds in LFR. A new stack is applied every 2 seconds, and in
LFR, the stacks are capped at 20.
Pheromones deals (to all raid members), by 10% of its
base damage, per stack. Pungency lasts for 2 minutes in 10-man, 4 minutes in
25-man, and 20 seconds in LFR. A new stack is applied every 2 seconds, and in
LFR, the stacks are capped at 20. - They leave a trail of damaging void zones behind, called
Pheromone Trail.
- They receive a stacking debuff, called
- Pheromones can be passed on to a different player, simply by coming into contact with them. This is to say, when the player currently carrying the debuff comes within 2 yards or so of another player, the debuff will move to the new player.
The damage of Pheromones is reset to its base value each time the carrying player changes. So, for example, if the player currently carrying the debuff has 10 stacks of Pungency, then Pheromones will deal 100% extra damage to all raid members. When the debuff passes to a new player (who has no stacks of Pungency), Pheromones will deal its base damage to all raid members (including to the player with the Pungency stacks). Therefore, the damage that the raid takes from Pheromones will have a predictable pattern of low-medium-high-low.
If, however, a player who already has stacks of Pungency takes the debuff when it is passed on, Pheromones will deal its damage based on this player's stacks of Pungency.
If the player currently carrying the debuff dies, the debuff will remain on their corpse, and its number of stacks will continue to increase. If this happens, someone has to move over to the player's corpse and take the debuff from them just as they would if the player were alive.
Garalon's Attacks
The next aspect that you must understand is the damage that Garalon deals. Garalon has two damaging abilities.
 Crush is a raid-wide damaging attack that Garalon can cast.
It deals a high amount of damage to all raid members, and an extremely high
amount of damage to any raid members who are under Garalon. The boss casts
this when one of the following two conditions is met:
Crush is a raid-wide damaging attack that Garalon can cast.
It deals a high amount of damage to all raid members, and an extremely high
amount of damage to any raid members who are under Garalon. The boss casts
this when one of the following two conditions is met:- the Pheromones debuff passes to a new target (only in 10/25-man, not in LFR);
- a raid member is under Garalon.
 Furious Swipe is a frontal cone attack that Garalon casts roughly
every 8 seconds. This deals a high amount of Physical damage. While this
attack can be avoided, if it does not hit at least two players each time, the
boss gains a stack of a stacking buff, called Fury.
Furious Swipe is a frontal cone attack that Garalon casts roughly
every 8 seconds. This deals a high amount of Physical damage. While this
attack can be avoided, if it does not hit at least two players each time, the
boss gains a stack of a stacking buff, called Fury.- Fury increases Garalon's damage and movement speed by 10% per
stack.
For the purpose of the mechanics in the encounter, under Garalon means within 12 yards of the center of his hitbox. Since Garalon has a massive model, the 12 yard radius is still under his model. This 12-yard radius is indicated visually by a circle on the ground, under Garalon.
Garalon's Legs
Garalon's legs are separate NPCs which can be targeted, attacked, and killed. They do not share a health pool, neither with each other, nor with Garalon himself. These legs are located on the outer edges of Garalon's massive model, in the four corners (if you imagine Garalon as being a square).
Each time one of Garalon's legs is killed, Garalon takes 3% of his maximum health in damage, and receives a stack of a debuff that slows him for 15% per stack, stacking up to 4 times.
Killing the legs is made easy by ![]() Weak Points, a buff that players
receive when they are within 12 yards of one of Garalon's legs. This increases
the damage that they deal to that leg by 100%. Players who are in the 12-yard
radius around a leg must be careful not to accidentally move under Garalon.
Weak Points, a buff that players
receive when they are within 12 yards of one of Garalon's legs. This increases
the damage that they deal to that leg by 100%. Players who are in the 12-yard
radius around a leg must be careful not to accidentally move under Garalon.
Garalon will periodically cast ![]() Mend Leg, which instantly revives one
of his legs.
Mend Leg, which instantly revives one
of his legs.
Visual Aids
As you engage Garalon, you will notice a circle around his model. This is a
visual aid meant to indicate the area that counts as being under the
boss. If any raid member is in this area, the boss will cast
![]() Crush, and Crush will deal increased damage to players in this
area.
Crush, and Crush will deal increased damage to players in this
area.
There are also visual aids in place to help players see the exact range of
![]() Weak Points. These are only visible to players who are already near one of
Garalon's legs.
Weak Points. These are only visible to players who are already near one of
Garalon's legs.
Strategy
The strategy to defeating Garalon can be summarised as follows.
- Pass the Pheromones debuff between players. You must do this as
seldom as possible, so that Garalon does not cast Crush too much,
but you must also make sure that no one carries the Pheromones for too long,
so that the raid damage does not overwhelm the healers.
- Make sure that the player kiting Garalon does so in an efficient way,
which minimises the amount of space taken up by the Pheromone Trail.
- Have each Furious Swipe soaked by the two tanks, and make sure that no
one else is hit by it.
- Ensure that no one triggers a Crush by being under him, and
that no one is under him when a Crush occurs.
- Make sure that all 4 of Garalon's legs are dead at all times.
Keep in mind that in LFR, Crush is only cast when a player is under the boss, and not when the Pheromones are passed between players. Additionally, Crush has a cooldown in LFR, meaning that Garalon will only be able to cast it every so often, regardless of how frequently players are under him.
In the following sections, we will go into detail about each of these aspects.
Tank Duties
The tanks have a single task in this encounter, namely to always be in
front of Garalon. They will have to soak the damage of the
![]() Furious Swipe, which is cast quite often by Garalon. The damage of this
ability is not really problematic for tanks, unless they are already low on
health.
Furious Swipe, which is cast quite often by Garalon. The damage of this
ability is not really problematic for tanks, unless they are already low on
health.
Since Garalon will change direction based on the location of the player he is fixated upon, it is important that the tanks pay attention to this and make sure they adjust their position accordingly.
Rogue Tanking
It is possible to have two Rogues tanking Garalon instead of two actual
tanks. The Rogues can survive ![]() Furious Swipes each time by using
Furious Swipes each time by using
![]() Feint to mitigate the damage. Additionally, the Rogues can use the
Feint to mitigate the damage. Additionally, the Rogues can use the
![]() Elusiveness talent, and the Glyph of Feint, both of which provide
some nice perks for this strategy.
Elusiveness talent, and the Glyph of Feint, both of which provide
some nice perks for this strategy.
This increases the raid DPS, by allowing you not to take any tanks.
Managing Pheromones
The greatest challenge in the encounter will come from the way in which
your raid handles the ![]() Pheromones debuff. Your goal is have to have the
debuff passed among players as few times as possible. Given normal
circumstances, the debuff carrier should consider passing it on when they
reach around 20 stacks. At 20 stacks, you can expect Pheromones to tick for
about 45,000 every 2 seconds. Keep in mind also that a new stack is
added every 2 seconds, meaning that the same player can generally hold the
debuff for about 40 seconds. This means that you will need to pass it
between 3-4 players in 10-man, and between 6-8 players in 25-man, before the
first player's stacks wear off. In LFR, it is possible for a single player to
handle the Pheromones debuff for the entire fight.
Pheromones debuff. Your goal is have to have the
debuff passed among players as few times as possible. Given normal
circumstances, the debuff carrier should consider passing it on when they
reach around 20 stacks. At 20 stacks, you can expect Pheromones to tick for
about 45,000 every 2 seconds. Keep in mind also that a new stack is
added every 2 seconds, meaning that the same player can generally hold the
debuff for about 40 seconds. This means that you will need to pass it
between 3-4 players in 10-man, and between 6-8 players in 25-man, before the
first player's stacks wear off. In LFR, it is possible for a single player to
handle the Pheromones debuff for the entire fight.
You should assign specific players to handle this debuff. Because the player who is carrying it has to constantly move because of the void zones they leave behind, it is best to assign classes who do not suffer very much from movement. Hunters, tanks and healers are the preferred options, but you will not always have the luxury of choosing (especially in 10-man).
The first player who receives the debuff will be the player who is nearest to Garalon when he is engaged, so you can easily control the succession of players who get the debuff.
In LFR, you can assign the two tanks to handling the Pheromones debuff, if they are up to the task. Otherwise, any two players who are confident in their ability can do this.
You must also remember the interaction between passing the Pheromones
debuff and Garalon's ![]() Crush ability. Each time the debuff is
passed along, Garalon will cast this, dealing raid-wide damage and stunning
all players for 2 seconds. This does not apply to LFR, where Crush is only
cast when a player is under Garalon.
Crush ability. Each time the debuff is
passed along, Garalon will cast this, dealing raid-wide damage and stunning
all players for 2 seconds. This does not apply to LFR, where Crush is only
cast when a player is under Garalon.
While we cover the healing concerns brought about by Crush in a subsequent section, you must keep in mind the over-arching idea: do not pass the debuff along more than is absolutely necessary. You must especially avoid situations of miscommunication, where the players attempting to pass the debuff from one to the other remain in melee range and continue to pass the debuff between themselves.
Kiting Pattern
The player who is carrying the ![]() Pheromones is going to be fixated on
by Garalon. This player must kite the boss, keeping in mind two things.
Pheromones is going to be fixated on
by Garalon. This player must kite the boss, keeping in mind two things.
- They must always be far enough away from Garalon that his frontal cone attack will not hit them. The range of this attack is around 15-20 yards.
- They must move in such a way that the Pheromone Trail that they
leave behind does not impede the raid's movement and positioning.
Ideally, Garalon should be kited around the outer edges of the room. The player who is first fixated on should go to one corner of the room, wait until Garalon is near, and then begin moving along the side of the room.
Also, it is important to minimise the amount of space that the void zones left behind take up. This means that, as soon as a void zone is spawned, the player should move out of it only as much as needed, and should stand at the edge of the zone until a new one spawns. This will cause the void zones to partially overlap, taking up less space.
Healing Concerns
There are several significant sources of damage in this fight.
Firstly, the two tanks will regularly receive large hits, so they must remain at stable health values throughout the fight.
Secondly, the whole raid will constantly be taking a varying amount of Nature damage every 2 seconds. This damage is low each time Pheromones switches targets, but increases the longer the current target holds onto the debuff. As we stated earlier, you can expect ticks of over 40,000 every 2 seconds in the worst-case scenarios.
In addition to this, there are three other potential sources of damage.
- A large amount of raid-wide damage from Crush. If your raid's
execution is controlled, you should be able to anticipate when this happens
by knowing when the Pheromones debuff will be passed on.
- Damage from raid members who stand in or walk through the void zones left behind by the Pheromones carrier.
Any players who are under Garalon's model when he casts Crush will be instantly killed, so even though they technically do they take damage, they are not really a concern.
Killing the Legs
Throughout the course of the fight, your DPS players will have to kill Garalon's legs. More specifically, they will have to kill all 4 legs at the start, and kill any legs that Garalon revives later on.
When killing a leg, it is very important to take advantage of the
![]() Weak Points buff. This means that all players DPSing the legs should move
into melee range of that leg.
Weak Points buff. This means that all players DPSing the legs should move
into melee range of that leg.
When doing so, players must be careful not to enter the area that counts
as being under Garalon (as we mentioned, this is clearly marked by a circle),
since doing so will trigger a ![]() Crush, and kill them in the
process.
Crush, and kill them in the
process.
Note that Combat Rogues (thanks to ![]() Blade Flurry), Arms Warriors (thanks
to
Blade Flurry), Arms Warriors (thanks
to ![]() Sweeping Strikes), and Fire Mages (thanks to Inferno Blast) can
damage the boss while attacking his legs. This obviously results in a large DPS
increase. Maximising damage in this way will make it considerably easier to
beat the enrage timer. Until the 11th of November 2012, the damage that
splashed to the boss was also increased by 100%, thanks to the
Sweeping Strikes), and Fire Mages (thanks to Inferno Blast) can
damage the boss while attacking his legs. This obviously results in a large DPS
increase. Maximising damage in this way will make it considerably easier to
beat the enrage timer. Until the 11th of November 2012, the damage that
splashed to the boss was also increased by 100%, thanks to the
![]() Weak Points buff, however a hotfix made it so that only the damage
done to the leg is increased, whereas the boss will take normal damage.
Weak Points buff, however a hotfix made it so that only the damage
done to the leg is increased, whereas the boss will take normal damage.
When to Use Heroism/Bloodlust/Time Warp
We recommend using ![]() Heroism/
Heroism/![]() Bloodlust/
Bloodlust/![]() Time Warp at the start
of the fight. This is when everyone's cooldowns will be available, and you can
ensure that the entire raid will be alive.
Time Warp at the start
of the fight. This is when everyone's cooldowns will be available, and you can
ensure that the entire raid will be alive.
Learning the Fight
The main issues that you will encounter while your raid learns the
Garalon encounter are proper management of the ![]() Pheromones debuff,
proper arrangement of the
Pheromones debuff,
proper arrangement of the ![]() Pheromone Trail void zones, as well as generally
good positioning for your raid.
Pheromone Trail void zones, as well as generally
good positioning for your raid.
We recommend that you begin by focusing on making sure that no one except the tanks is in front of Garalon, while the person who has the Pheromones debuff runs as far away as possible from the boss. This will give you a lot of time to get accustomed to the mechanics.
Your DPS players should always focus on killing Garalon's legs, since this slows him down and will buy you a considerable amount of time.
Next, you will have to set up an order for players to take the Pheromones debuff.
Once these aspects are sorted out, you can begin to fine-tune your
execution, focusing on optimising the DPS on the legs and the boss, and on
improving the arrangement of the void zones from ![]() Pheromone Trail.
Pheromone Trail.
Heroic Mode
The Heroic mode of Garalon is extremely similar to the Normal mode version of the fight, although there are two key differences.
Differences from Normal Mode
In addition to Garalon dealing increased damage with all abilities, and having increased health, there are a few changes in mechanics.
- Garalon no longer casts Crush when the Pheromones are
passed between players, and instead casts it regularly every 35 seconds.
- The Pungency debuff lasts 4 minutes in 10-man, and 6 minutes in
25-man.
- When Garalon reaches 33% health, he ceases to follow the player carrying Pheromones, and instead melees his main aggro target. He also travels much quicker, essentially meaning that he must be tanked. He continues to cast all of his normal abilities during this time.
Strategy
General Strategy
The strategy for the fight does not change much, but there are a few things to take note of.
Due to the fact that ![]() Crush is on a fixed timer, you
must be careful not to have many stacks of
Crush is on a fixed timer, you
must be careful not to have many stacks of ![]() Pheromones when Crush is being
cast, since the combination of these two sources of damage can be fatal (in
Normal mode, this is not an issue since Crush is always cast just as the
Pheromones have been passed to a new player). Because of this, it may be
tempting to pass the Pheromones around more freely, in order to keep their
damage low, but remember that you cannot do this easily because of the
increased duration of the
Pheromones when Crush is being
cast, since the combination of these two sources of damage can be fatal (in
Normal mode, this is not an issue since Crush is always cast just as the
Pheromones have been passed to a new player). Because of this, it may be
tempting to pass the Pheromones around more freely, in order to keep their
damage low, but remember that you cannot do this easily because of the
increased duration of the ![]() Pungency debuff. Indeed, the duration of
Pungency will make it so that even when switching at roughly 20 stacks, you
will need to have most of your raid members in the rotation.
Pungency debuff. Indeed, the duration of
Pungency will make it so that even when switching at roughly 20 stacks, you
will need to have most of your raid members in the rotation.
You will have to evaluate the situation for your raid, and see how many players you can reliably have in the rotation for the debuff. The more players you can have in the rotation, the less likely it will be that Crush will catch you at a moment of having high stacks, and the easier the fight will be.
Sub-33% Phase
Dealing with Garalon's sub-33% phase is not complicated. One of
your tanks will simply have to pick up and tank Garalon, and both tanks will
have to continue soaking every ![]() Furious Swipe. Players who are carrying the
Pheromones no longer need to worry very much about Garalon's position, since he
no longer follows them, and instead can just focus on DPS, and on placing the
Furious Swipe. Players who are carrying the
Pheromones no longer need to worry very much about Garalon's position, since he
no longer follows them, and instead can just focus on DPS, and on placing the
![]() Pheromone Trail in an efficient way.
Pheromone Trail in an efficient way.
Tip: Reducing the Duration of the Sub-33% Phase
As a tip to help you get through the last phase quicker, in the event that tank damage is a problem for you, we point out that you can bring all of Garalon's legs to low health as he approaches 33% health. Then, as soon as the boss reaches 33% health, simply finish off all 4 legs. This will take down a large chunk of Garalon's remaining health. Keep in mind that it is unlikely that you will be able to do this if you are also struggling against the enrage timer.
Achievement: Like an Arrow to the Face
The ![]() Like an Arrow to the Face achievement is part of the
Like an Arrow to the Face achievement is part of the
![]() Glory of the Pandaria Raider meta achievement. The achievement requires that
you defeat Garalon without destroying any of his legs.
Glory of the Pandaria Raider meta achievement. The achievement requires that
you defeat Garalon without destroying any of his legs.
While this achievement makes the fight more difficult due to Garalon's
increased movement speed (which makes kiting him properly much harder), the
true difficulty comes from the DPS race that your raid will have to go
through. Indeed, since you cannot kill any of the legs, you will not benefit
from the ![]() Weak Points buff, and the enrage timer of the fight will be more
pressing than ever.
Weak Points buff, and the enrage timer of the fight will be more
pressing than ever.
There are no tips or tricks for getting around this problem, and you will simply have to have a very large amount of raid DPS (due, in no small part, to your gear).
Concluding Remarks
This concludes our raid guide for Garalon. We hope you have found it helpful. Please do not hesitate to post any feedback you may have on our forums.
- Zen Flight Stealth Nerf: No More Interactions
- War Within 11.1.5 and Season of Discovery Hotfixes: April 28th
- Hall of Fame Deadline Pushed to May 6
- Mists of Pandaria Classic Beta Reveals Mysterious Sha-Touched Drake Mount
- Liberation of Undermine Raid DPS Log Rankings, Week 8: The Age of Devastation
- Official Children’s Week 2025 Overview
- RPGLootFeed: Clean Up Your Chat and Upgrade Your Loot Experience
- 10 Playable Races World of Warcraft Should Add, According to Crendor