Halls of Infusion Dungeon Guide: Location, Boss Strategies, Trash, and Loot
Welcome to our guide to the Halls of Infusion dungeon in the Dragonflight World of Warcraft expansion. This guide will cover everything you need to know about the dungeon, including how to get to it, its layout, the trash and boss mechanics within, and its loot.
Getting into Halls of Infusion
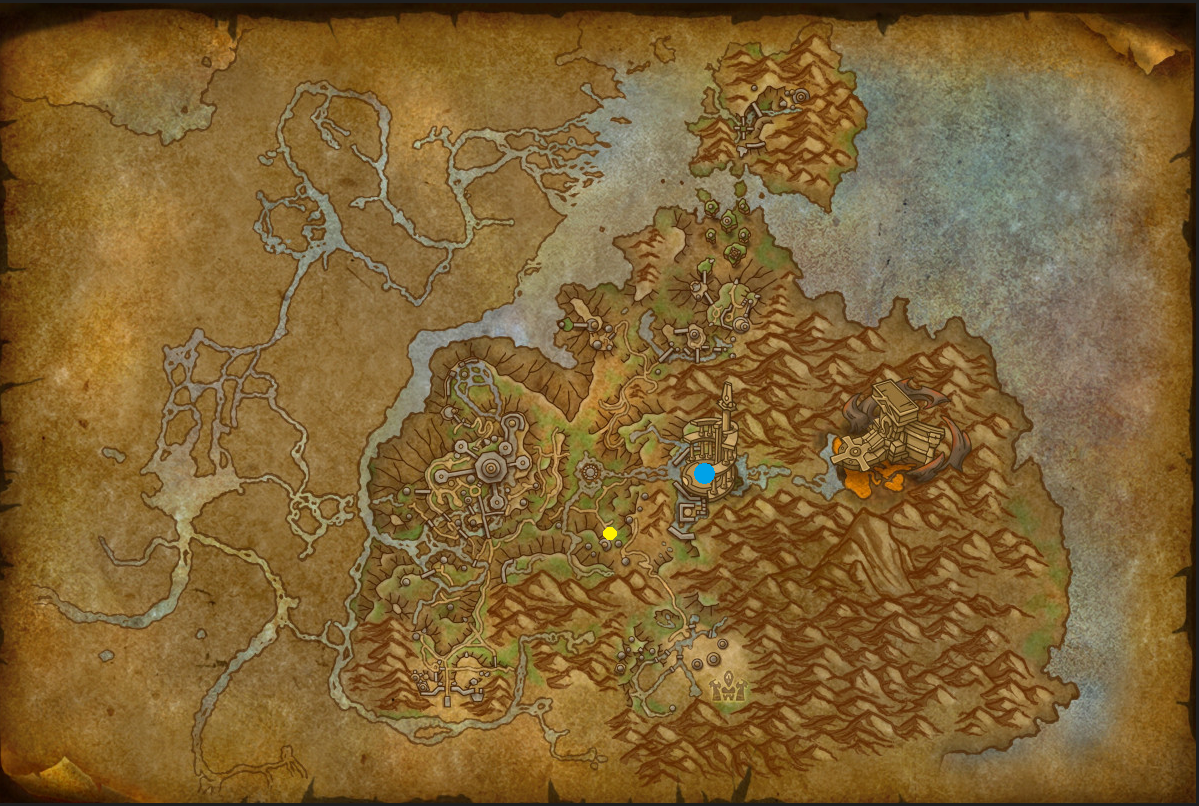
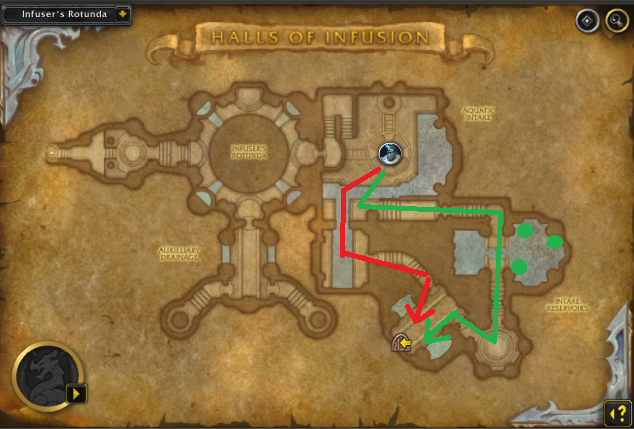
Halls of Infusion is a level 70 dungeon that can be found in the Thaldraszus zone on the Dragon Isles (marked with blue on the minimap below). The nearest flight point for both Alliance and Horde players are Gelikyr Post, Thaldraszus (marked with yellow on the minimap below). Upon landing, head to the east, where you will see the entrance of the dungeon once you get closer to Tyrhold ruins.
This guide will focus on an extensive overview of the dungeon, providing vital information
to complete it across all difficulties (Normal, ![]() Heroic,
and
Heroic,
and ![]() Mythic). We will cover all 4 boss fights supported by the most
notable trash enemies in the
dungeon and their important abilities. If you would like to learn about the other
Dragonflight Dungeons or the upcoming Mythic+ season instead, please see our
overviews linked below. Otherwise, without further ado, let us begin!
Mythic). We will cover all 4 boss fights supported by the most
notable trash enemies in the
dungeon and their important abilities. If you would like to learn about the other
Dragonflight Dungeons or the upcoming Mythic+ season instead, please see our
overviews linked below. Otherwise, without further ado, let us begin!
Halls of Infusion Layout
Unlock Unique Bonuses in Halls of Infusion
 There are two bonuses available in this dungeon, one from
Engineering and one from Herbalism. Below you can find
more information on what buffs you can acquire and where they are located:
There are two bonuses available in this dungeon, one from
Engineering and one from Herbalism. Below you can find
more information on what buffs you can acquire and where they are located:
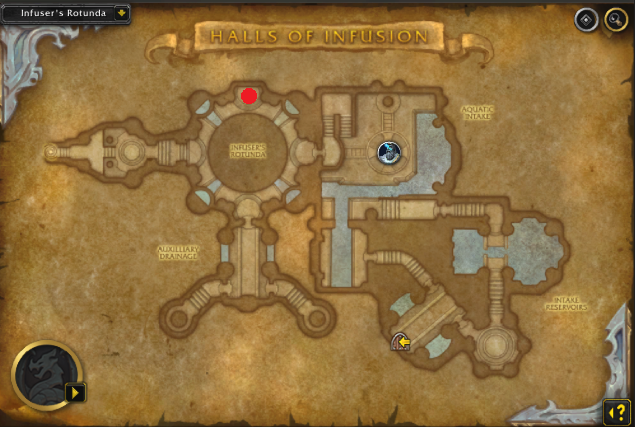
- Limited Immortality Device is located in the Infuser's Rotunda — check the screenshot below — there is only one of its kind.
- You must have at least 25 skill in Dragon Isles Engineering in order to activate it.
- Only one member from your team is required to have the profession, and upon
"unlocking" the device, it will grant each member of your party
the
 Limited Immortality buff lasting for 60 minutes.
 - This buff will prevent you from dying a single time when you take lethal damage, and it will disappear as soon as it procs.
-
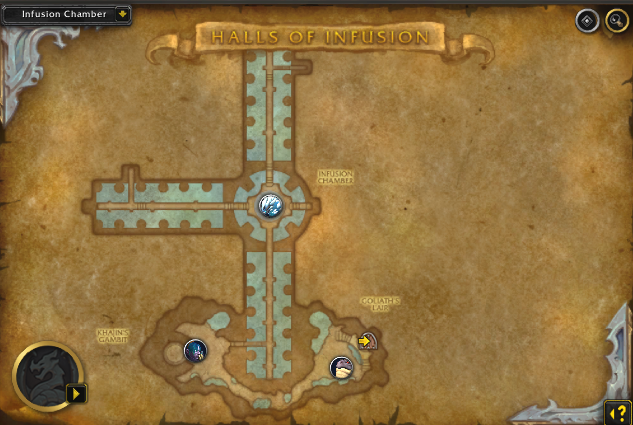
 Infused Mushroom can be found in the Intake Reservoirs
(to the left after defeating Watcher Irideus) and in the
Khajin's Gambit area on the way to the third boss of the
dungeon, Khajin the Unyielding).
Infused Mushroom can be found in the Intake Reservoirs
(to the left after defeating Watcher Irideus) and in the
Khajin's Gambit area on the way to the third boss of the
dungeon, Khajin the Unyielding). - You must have at least 25 skill in Dragon Isles Herbalism to activate one.
- Only one member from your team is required to have the profession, and upon interacting
with the Infused Mushroom, it will grant each member of your party the
 Cleansing Spores buff for 30 minutes.
 - This buff will cure one application of a
 Poison or
  Disease
effect every 5 seconds.
Disease
effect every 5 seconds.

Aquatic Intake and Watcher Irideus
Notable Trash before Watcher Irideus
- Interrupt the
 Earth Shield coming from Primalist Geomancer.
If the shield goes through, it will heal a random mob and reduce their damage taken
by 10%. In addition, sidestep the
Earth Shield coming from Primalist Geomancer.
If the shield goes through, it will heal a random mob and reduce their damage taken
by 10%. In addition, sidestep the  Seismic Slam ground animation
at all costs (it is 5 yards wide).
Seismic Slam ground animation
at all costs (it is 5 yards wide). - Refti Defender will be the first "tank-buster" trash mob you will face
in this dungeon because of its
 Gushing Wound
  Bleed effect and
 Spear Flurry ability. Use your remaining interrupts for
  Demoralizing Shout
to prevent him from decreasing your damage output.
Demoralizing Shout
to prevent him from decreasing your damage output.  Containment Beam, coming from Containment Apparatus, is the most
important channel cast to watch out for; it will deal serious damage until
the channel is over. In addition, the mob has
Containment Beam, coming from Containment Apparatus, is the most
important channel cast to watch out for; it will deal serious damage until
the channel is over. In addition, the mob has  Expulse, a heavy AoE spell
that damages everyone within 20 yards, hence why you want to stop it
at all costs!
Expulse, a heavy AoE spell
that damages everyone within 20 yards, hence why you want to stop it
at all costs!- Beware of chaining Primalist Ravagers with any other trash enemies
due to its
 Tailwind aura. Avoid their
  Blasting Gust
ground animation, as it will likely turn lethal for you.
Blasting Gust
ground animation, as it will likely turn lethal for you.
Watcher Irideus Boss Guide

Watcher Irideus's boss fight is a two-stage encounter, each of
them being completely different to tackle. Stage Two: Watcher's Last Stand
begins once the boss starts to channel his ![]() Ablative Barrier.
For more information, check the detailed guide below:
Ablative Barrier.
For more information, check the detailed guide below:
All Roles
-
 Watch out for the
  Spark Volley ground puddles. If you do get hit
by one, it will leave a magical debuff that damages you over time.
Spark Volley ground puddles. If you do get hit
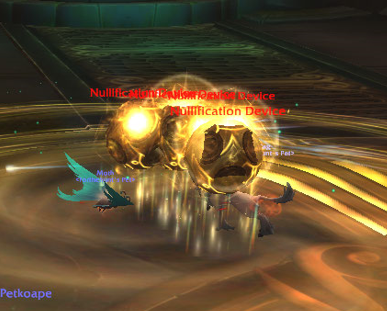
by one, it will leave a magical debuff that damages you over time. - Once the boss casts
 Ablative Barrier, kill 3 Nullification Devices
on top of the boss so they can remove his Ablative Barrier applications
with the
Ablative Barrier, kill 3 Nullification Devices
on top of the boss so they can remove his Ablative Barrier applications
with the  Nullifying Pulse cast. Just remember, the longer the boss stays
in Ablative Barrier, the more stacks of
Nullifying Pulse cast. Just remember, the longer the boss stays
in Ablative Barrier, the more stacks of  Siphon Power he gets.
 - Interrupt the
 Purifying Blast cast from Nullification Devices.
 -
- Each time you remove an application of the Ablative Barrier,
the boss will trigger a Reactive Spark; dodge the ground puddles at all costs!


Tank
- Aim the
 Titanic Fist frontal away from your party.
 - During Stage Two, gather threat on the nearby Nullification Devices and
stack them under the Watcher Irideus so you can destroy his
Ablative Barrier.
Healer
- Prepare to use healing cooldowns once Watcher Irideus in casting
 Static Surge.
 - The boss will periodically apply 2
 Power Overload
  Magic debuffs
to your team members. There are different strategies on hold to handle this boss and you
should discuss them with your party beforehand, either you don't dispel the debuff and
let it expire or dispel one / spot-heal the other, both can work depending on the spec setup.
As soon as the debuff runs out, it will trigger a follow-up spell -
Magic debuffs
to your team members. There are different strategies on hold to handle this boss and you
should discuss them with your party beforehand, either you don't dispel the debuff and
let it expire or dispel one / spot-heal the other, both can work depending on the spec setup.
As soon as the debuff runs out, it will trigger a follow-up spell -  Power Field.
Goliath's Lair and Gulping Goliath
Notable Trash before Gulping Goliath
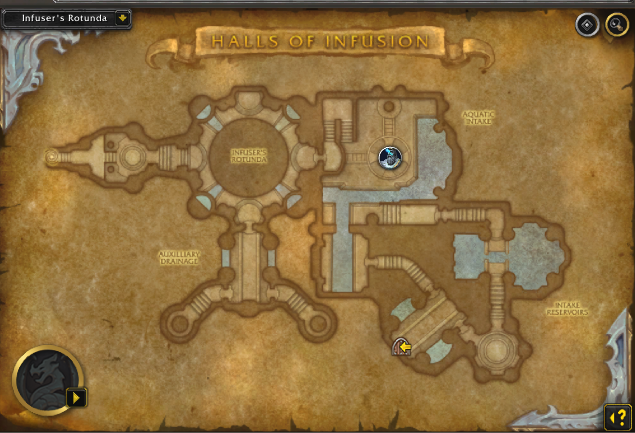
Upon defeating Watcher Irideus, you can go to the right or the left. I recommend you take the left path (see the screenshot with the green arrow), since you will be able to collect Infused Mushroom. Here is what you should know about the trash mobs that can be found in this area:
- Stop the
 Elemental Focus cast from Primalist Shocktrooper,
or else they will transform their
Elemental Focus cast from Primalist Shocktrooper,
or else they will transform their  Lightning Blast into Chain Lightning.
 - There will be
 Stealthed Skulking Zealots around the area that
will stun the first target that they get in combat with
Stealthed Skulking Zealots around the area that
will stun the first target that they get in combat with  Cheap Shot.
As a Healer, be ready to top up the health of your Tank since they will be unable to
use their active mitigation during the stun. The longer the mob takes to defeat, the harder it
will hit due to its
Cheap Shot.
As a Healer, be ready to top up the health of your Tank since they will be unable to
use their active mitigation during the stun. The longer the mob takes to defeat, the harder it
will hit due to its  Rising Squall passive, so watch out!
 - Interrupt the
 Dazzle frontal disorient from Dazzling Dragonfly
at all costs. You can also sidestep or outrange it by moving at least
10 yards away if you want to save your interrupt for more important casts.
Dazzle frontal disorient from Dazzling Dragonfly
at all costs. You can also sidestep or outrange it by moving at least
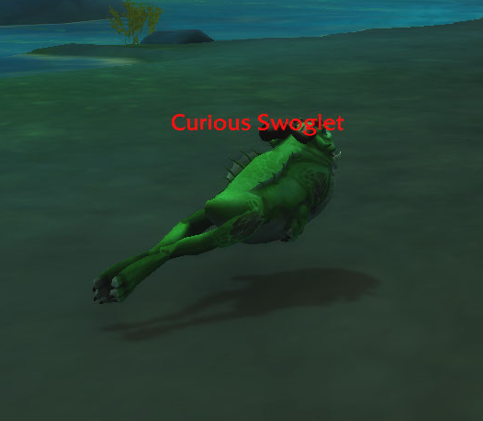
10 yards away if you want to save your interrupt for more important casts. - There are going to be some Curious Swoglets around the area. They are harmless
frogs that have only one ability known as
 Gulp Swog Toxin. This Poison effect stacks and instantly kills you upon reaching 10 applications. Having
an Infused Mushroom buff will save you a lot of headaches here!
Gulp Swog Toxin. This Poison effect stacks and instantly kills you upon reaching 10 applications. Having
an Infused Mushroom buff will save you a lot of headaches here! - Interrupt the
 Pyretic Burst and coming from Flamecaller Aymi. Avoid
being hit by the
Pyretic Burst and coming from Flamecaller Aymi. Avoid
being hit by the  Molten Subduction ground animation.
 - Squallbringer Cyraz is another unique mob you will only meet once in
this dungeon, just like Flamecaller Aymi. Your Tank must gather threats
from the nearby Zephyrlings once they are spawned with Zephyr's Call.
Gulping Goliath Boss Guide

All Roles
- Sidestep the
 Cave In ground animation.
 -
 Quickly nuke the Curious Swoglets; they will leave a stackable
Gulp Swog Toxin Poison effect on you that will instantly
kill you upon reaching 10 stacks.
Quickly nuke the Curious Swoglets; they will leave a stackable
Gulp Swog Toxin Poison effect on you that will instantly
kill you upon reaching 10 stacks. - Once the boss casts
 Gulp, select one player from your party to be
deliberately "consumed" to prevent him from getting the
Gulp, select one player from your party to be
deliberately "consumed" to prevent him from getting the  Hangry
  Enrage effect,
which you cannot dispel. Keep in mind once you are Gulped you,
will take initial damage and get 3 applications of Gulp Swog Toxin!
Enrage effect,
which you cannot dispel. Keep in mind once you are Gulped you,
will take initial damage and get 3 applications of Gulp Swog Toxin! - Sidestep the Belly Slam ground animation at all costs.

Tank
- Move Gulping Goliath closer to the Curious Swoglets to enable your DPS to cleave all targets.
Healer
- Top your teammates quickly once Gulping Goliath in casting
 Overpowering Croak.
 - Spot heal the target that gets Gulped; here is a good place to
use your external defensive cooldowns!
- Use healing cooldowns once the boss is casting
 Toxic Effluvia, as
the AoE damage will become especially dangerous if the boss is enhanced by
Hangry effect.
Toxic Effluvia, as
the AoE damage will become especially dangerous if the boss is enhanced by
Hangry effect.
Khajin's Gambit and Khajin the Unyielding
Notable Trash before Khajin the Unyielding
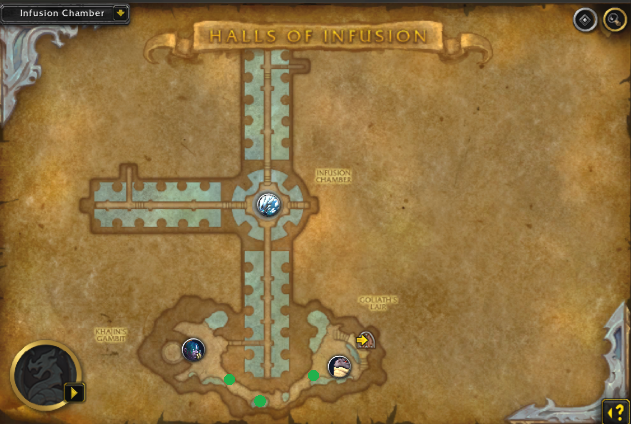
Upon defeating Gulping Goliath, continue down the river toward the third boss of the dungeon, Khajin the Unyielding. Remember, alongside the river, there will be a few locations where you can find Infused Mushroom! The entire area leading toward Khajin the Unyielding is packed with Proto dragons and caster mobs that will empower them. Here are more details on what to expect:
- Avoid being hit by the Primalist Earthshaker ground effect -
Rumbling Earth.
- Beware of Primalist Galesinger's Thunderstorm,
use defensive if you are at low HP.
- Primalist Icecaller will only cast its single-target ability -
 Ice Shards
on your tank, disturb as many as you can to help your team.
Ice Shards
on your tank, disturb as many as you can to help your team. - Sidestep the
 Oceanic Breath frontal coming from Glacial Proto-Dragon.
Use defensive cooldowns during
Oceanic Breath frontal coming from Glacial Proto-Dragon.
Use defensive cooldowns during  Deep Chill cast (any dispel effect works too).
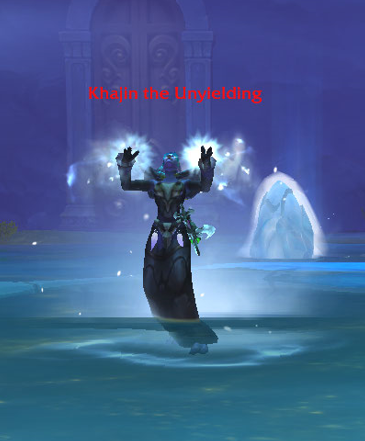
Khajin the Unyielding Boss Guide
All Roles
-
 Once Khajin the Unyielding begins to cast
  Hailstorm
hide behind any nearby
Hailstorm
hide behind any nearby  Ice Boulders or use immunity to survive.
One important note is that once you have used the Ice Boulders, they will
become damaged and destroyed with the next Hailstorm,
triggering
Ice Boulders or use immunity to survive.
One important note is that once you have used the Ice Boulders, they will
become damaged and destroyed with the next Hailstorm,
triggering  Avalanche, so always make sure to find a new boulder
to hide behind after each Hailstorm. You can still deal damage through the
Ice Boulders!
Avalanche, so always make sure to find a new boulder
to hide behind after each Hailstorm. You can still deal damage through the
Ice Boulders! - Avoid being hit by the
 Glacial Surge rings at all costs.
 - Khajin the Unyielding will periodically cast Frost Cyclone.
Make sure to avoid it and not "bait" it toward any existing Ice Boulders
otherwise, they will become damaged.

Tank
- Bring the boss closer to any existing Ice Boulders to increase
the damage uptime of your melee DPS when they exit melee to hide
during Hailstorm casts.
Healer
- Throughout the whole fight, players will have the
 Polar Winds
debuff on them; do not forget to top them up frequently!
Polar Winds
debuff on them; do not forget to top them up frequently! - Top up the health of the party member that is targeted by
 Frost Shock and dispel the slow follow-up effect.
Infusion Chamber and Primal Tsunami
Notable Trash before Primal Tsunami
Once you have defeated Khajin the Unyielding, the last
gate of the dungeon will open, allowing you to enter the Infusion Chamber
where you will find Primal Tsunami. Along the way, you will face
some familiar foes like Glacial Proto-Dragon and Primalist Icecaller
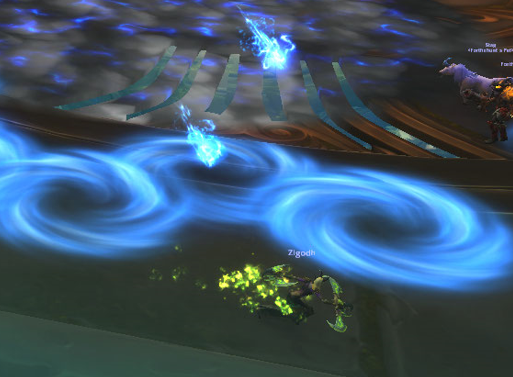
paired with several new mob types. Once you approach the bridge leading to the
final boss, there will be a constant ![]() Crashing Tsunami coming either
from the left or right. If you fail to dodge it, you will get knocked back.
Here is more information on the trash mobs you will face on the way:
Crashing Tsunami coming either
from the left or right. If you fail to dodge it, you will get knocked back.
Here is more information on the trash mobs you will face on the way:
- Aqua Rager is the first unique mob you will face. It
has only one important cast to watch for: its
 Boiling Rage Enrage effect. Once it reaches 20%
health, it will begin casting
Boiling Rage Enrage effect. Once it reaches 20%
health, it will begin casting  Tidal Divergence, dividing
itself into 4 Aqualings. It is a 6 sec long cast, so
it will be quite easy to interrupt once you see it!
Tidal Divergence, dividing
itself into 4 Aqualings. It is a 6 sec long cast, so
it will be quite easy to interrupt once you see it! - Once you approach the end of the bridge, Infuser Sariya will be available to be
attacked. She will have unavoidable AoE damage coming from
Inundate (non-interruptible) and a
 Aqueous Barrier
absorb shield cast that must be interrupted at all times.
Finally, get away from her Flash Flood AoE cast, as it will knock
you back and damage you! Once Infuser Sariya has been defeated
Infuser Sariya,
Aqueous Barrier
absorb shield cast that must be interrupted at all times.
Finally, get away from her Flash Flood AoE cast, as it will knock
you back and damage you! Once Infuser Sariya has been defeated
Infuser Sariya,  Crashing Tsunami will stop.
Primal Tsunami Boss Guide

 The Primal Tsunami boss encounter has two stages: Stage One: Violent Swells
and Stage Two: Infused Waters. During Stage One, you will be fighting
on the main platform (from where you pull the boss) until the boss reaches
60% HP. Once that happens, it will cast
The Primal Tsunami boss encounter has two stages: Stage One: Violent Swells
and Stage Two: Infused Waters. During Stage One, you will be fighting
on the main platform (from where you pull the boss) until the boss reaches
60% HP. Once that happens, it will cast ![]() Cast Away and
begin Stage Two. During this stage, you will be sent back to the beginning
of the bridge (where you have entered originally) and need to return
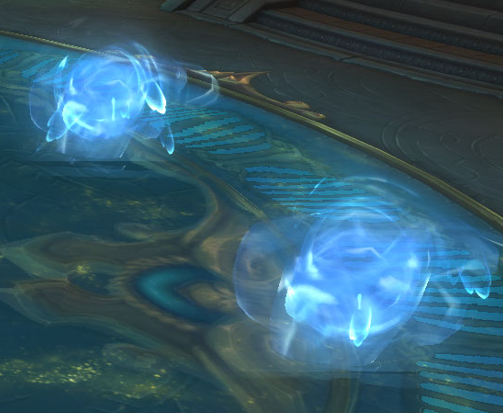
to the boss. Keep in mind your team will be split in two (3 players in one
corridor and 2 players in the other), and the water swirls
(
Cast Away and
begin Stage Two. During this stage, you will be sent back to the beginning
of the bridge (where you have entered originally) and need to return
to the boss. Keep in mind your team will be split in two (3 players in one
corridor and 2 players in the other), and the water swirls
(![]() Crashing Tsunami) will be present once again! Here is a more
detailed breakdown of the fight:
Crashing Tsunami) will be present once again! Here is a more
detailed breakdown of the fight:
All Roles
- Avoid being hit by the
 Infused Globule ground spheres during Stage One and
Stage Two. Failing to do so will deal serious initial damage and trigger a secondary
Waterlogged debuff.
Infused Globule ground spheres during Stage One and
Stage Two. Failing to do so will deal serious initial damage and trigger a secondary
Waterlogged debuff. -
 During Stage Two, avoid the incoming Crashing Tsunami.
Once you get to the boss, you will have to deal with 4 Primalist Infusers
and defeat them in order to get back to Stage One.
During Stage Two, avoid the incoming Crashing Tsunami.
Once you get to the boss, you will have to deal with 4 Primalist Infusers
and defeat them in order to get back to Stage One. - Speaking about Primalist Infusers, it is important to interrupt the
 Infuse ability since it empowers the boss. In addition, watch out for the
Inundate cast!
Infuse ability since it empowers the boss. In addition, watch out for the
Inundate cast! - Dodge the incoming
 Rogue Waves.

Tank
- Always be present in melee to prevent
 Undertow from
being cast.
Undertow from
being cast. - Use active mitigation once the boss is casting Squall Buffet.
Not only will it knock you back, but it will also apply a follow-up
debuff of
 Focused Deluge. You aim to get back to melee as quickly
as possible to prevent it from casting Undertow.
Focused Deluge. You aim to get back to melee as quickly
as possible to prevent it from casting Undertow.
Healer
- Periodically, Primal Tsunami will cast
 Tempest's Fury,
dealing AoE damage to all players. Be ready to top up the health of your
teammates!
Tempest's Fury,
dealing AoE damage to all players. Be ready to top up the health of your
teammates! - Dispel the slow effect from Waterlogged as quickly as possible.
Halls of Infusion Loot Table
Watcher Irideus
| Type | Item | Stats |
|---|---|---|
| Plate Hands | Mastery/Crit | |
| Trinket | Mastery | |
| Off-Hand | Haste/Mastery | |
| Gun | Mastery/Vers | |
| Leather Waist | Vers/Mastery |
Gulping Goliath
| Type | Item | Stats |
|---|---|---|
| Mail Head | Crit/Mastery | |
| Leather Shoulder | Haste/Vers | |
| Dagger | Agi, Vers/Crit | |
| Cloth Wrist | Vers/Mastery | |
| Plate Waist | Crit/Mastery | |
| Mail Feet/td> | Vers/Mastery | |
| 1H Axe | Str, Vers/Haste |
Khajin the Unyielding
| Type | Item | Stats |
|---|---|---|
| Finger | Haste/Vers | |
| Plate Head | Mastery/Vers | |
| Trinket | Agi | |
| Mail Chest | Vers/Crit | |
| Cloth Feet | Mastery/Vers |
Primal Tsunami
| Type | Item | Stats |
|---|---|---|
| Plate Shoulder | Vers/Mastery | |
| Cloth Chest | Crit/Mastery | |
| Mail Hands | Haste/Vers | |
| Leather Feet | Haste/Vers | |
| 2H Sword | Str, Crit/Mastery | |
| Trinket | Int |
Halls of Infusion Achievements
There are 8 total achievements to obtain in Halls of Infusion:
| Achievement | Criteria |
|---|---|
| Defeat the Primal Tsunami in Halls of Infusion. | |
| Defeat the Primal Tsunami in
Halls of Infusion on |
|
| DEfeat the Primal Tsunami in
Halls of Infusion on |
|
| Defeat Primal Tsunami in
Halls of Infusion on |
|
| Complete Halls of Infusion on |
|
| Defeat the Primal Tsunami after slaying
three Flow Control Units in Halls of Infusion on
|
|
| Defeat the Gulping Goliath after forcing it to become Hangry and devour 10 Curious Swoglets in Halls of Infusion. | |
| Defeat the Toxic Swogmother after Purging the
Water intakes in Halls of Infusion on |
Changelog
- 23 Apr. 2024: Guide updated for Season 4.
- 04 Sep. 2023: No further changes required for 10.1.7 Patch.
- 10 Jul. 2023: No further changes required for the 10.1.5 Patch.
- 18 Apr. 2022: Guide updated for Season 2.
- 25 Nov. 2022: Guide added.

This guide has been written by Petko, one of the top Mythic+ players of all time. He has accomplished several Rank 1 World & Europe Team and Solo seasonal rankings, with multiple classes over the span of multiple expansions. You can catch his daily streams on Twitch, and find many of his educational videos on YouTube and TikTok.
- Frost DK and Arms Buffs, Guardian Nerfs: Additional Class Tuning, March 24th
- 5 Dungeons Changed: Mythic+ Tuning With the March 24th Reset
- Fastest Way to Complete Saltheril’s Soiree Cleanup in WoW Midnight
- Where Does Your Spec Stand? Week 1 DPS and Popularity Rankings Revealed
- Every Class Change Coming in Tomorrow’s (Extended) March 24th Maintenance
- New Trial of Style 2026 Rewards: Don’t Miss the Silver Chainkini Before It’s Gone!
- Class Tuning, Cheaper Housing, Performance Improvements, Faster Rares, Delve Tuning: Midnight Weekly Hotfix Summary, March 16 – 23
- Monk on Top: The Best Tanks for Midnight Mythic+ and Raid Season 1