King Rastakhan Strategy Guide in Battle of Dazar'alor Raid
Welcome to our guide for King Rastakhan, an Alliance-only encounter in the Battle of Dazar'alor raid. Here, you will first find a quick breakdown by role following by a detailed strategy to defeat King Rastakhan.
Lore
For over two hundred year, King Rastakhan has ruled the Zandalari empire. Since the fall of Rezan, he has turned to a new patron--Bwonsamdi, the loa of death. The dark bargain he has made grants him the power to crush his enemies... but at what cost?
Fight Overview
The fight against King Rastakhan is a 4-phase encounter during which the raid faces Rastakhan, Bwonsamdi, and several important adds. There are many proximity based mechanics during this fight, so high situational awareness among raiders is rewarded.
TL;DR
Tanks
- During Phase One
- One Tank needs to pull King Rastakhan out to
the entrance of the room and keep him there. Dodge the fire breath from the
 Greater Serpent Totem.
 - The other Tank needs to handle the adds. Use active mitigation for the
 Crushing Leap, and use all your cooldowns plus some externals if
you are going to get a second stack.
Crushing Leap, and use all your cooldowns plus some externals if
you are going to get a second stack.
- One Tank needs to pull King Rastakhan out to
the entrance of the room and keep him there. Dodge the fire breath from the
- During Phase Two
- Swap with the other tank during each
 Scorching Detonation.
 - Aim to be as healthy as possible before being struck by
 Caress of Death.
- Swap with the other tank during each
- During Phase Three
- Have one Tank on the Phantom of Rage, preferably a mobile
tank like Monks, so they can dodge
 Necrotic Smash.
 - The other tank should be on Rastakhan and the rest of the adds.
- Have one Tank on the Phantom of Rage, preferably a mobile
tank like Monks, so they can dodge
- During Phase Four, run away from King Rastakhan when he casts
 Inevitable End to avoid being killed.
Healers
- Be ready to top the raid off after each Scorching Detonation
explosion.
- Watch for people targeted by
 Grievous Axe, and heal them to full to
remove the DoT.
Grievous Axe, and heal them to full to
remove the DoT. - During Phase Two, top off the Bwonsamdi Tank before
Caress of Death is cast on them.
- During Phase Three, be aware of when people are clearing their
stacks of
 Deathly Withering and be ready to heal the raid damage caused
by
Deathly Withering and be ready to heal the raid damage caused
by  Withering Burst.
DPS
- During Phase One, cleave and multi-DoT the adds as much as possible, while following the kill order of Siegebreaker Roka > Prelate Za'lan > Headhunter Gal'wana.
- Focus
 Zombie Dust Totems whenever they spawn to break your fellow
raiders free.
Zombie Dust Totems whenever they spawn to break your fellow
raiders free.
Everyone
- Avoid
 Plague of Toads.
 - Run into melee if targeted by
 Meteor Leap.
 - Run
 Seal of Purification out of the raid if it is focused on
you.
Seal of Purification out of the raid if it is focused on
you. - When leaving the Death Realm, be aware of your raid's Health before you
leave; avoid triggering a Withering Burst when someone is too low to
survive.
- When either Bwonsamdi or Rastakhan cast Inevitable End, run from
then to avoid being instantly killed.
Positioning
- During Phase One, the adds should be tanked near the throne, while King Rastakhan is tanked near the entrance to the room. The group should be loosely spread near melee.
- For Phase Two, the raid needs to move near Rastakhan, while the add Tank picks up Bwonsamdi near the throne.
- The group should remained relatively spread to avoid spreading
 Plague of Fire.
 - When Rastakhan nears 60% Health, the half of the group intending on fighting Bwonsamdi needs to be closest to him. Or conversely, the group intending on remaining in the Living Realm should run away from him.
Bloodlust/Heroism/Time Warp
We advise you to use
![]() Bloodlust/
Bloodlust/![]() Heroism/
Heroism/![]() Time Warp upon entering Phase Three.
Pushing Bwonsamdi to 50% health and bringing the rest of the group up into the
living realm to finish off the adds will help to secure a kill.
Time Warp upon entering Phase Three.
Pushing Bwonsamdi to 50% health and bringing the rest of the group up into the
living realm to finish off the adds will help to secure a kill.
Abilities in Phase One: Zandalari Honor Guard
In this first phase, there are 2 (3 on Heroic) adds in addition to King
Rastakhan. These adds are affected by ![]() Bind Souls, causing any damage
dealt to Rastakhan to instead be evenly divided amongst these adds.
Bind Souls, causing any damage
dealt to Rastakhan to instead be evenly divided amongst these adds.
The adds are called Prelate Za'lan, Siegebreaker Roka, and Headhunter Gal'wana (on Heroic), and we explain all of their abilities below.
Phase One ends when all 3 adds are killed.
King Rastakhan Abilities
Scorching Detonation
![]() Scorching Detonation causes a player to be targeted by Rastakhan,
suffering Fire damage every second for 3 seconds. After the channel is
finished, the player will explode, dealing heavy Fire damage to all players.
The distance between Rastakhan and the target will decrease the final burst of
damage.
Scorching Detonation causes a player to be targeted by Rastakhan,
suffering Fire damage every second for 3 seconds. After the channel is
finished, the player will explode, dealing heavy Fire damage to all players.
The distance between Rastakhan and the target will decrease the final burst of
damage.
Plague of Toads
![]() Plague of Toads causes toads to spawn from Rastakhan and leap
forward, leaving pools of poison behind them. These pools will deal Nature
damage to anyone that stands in them every second and slow their movement speed
by 30%. If anyone touches the toads, they will explode and leave a DoT on
anyone within a 5-yard radius, which deals damage every 1.5 seconds for 21
seconds. This DoT can stack.
Plague of Toads causes toads to spawn from Rastakhan and leap
forward, leaving pools of poison behind them. These pools will deal Nature
damage to anyone that stands in them every second and slow their movement speed
by 30%. If anyone touches the toads, they will explode and leave a DoT on
anyone within a 5-yard radius, which deals damage every 1.5 seconds for 21
seconds. This DoT can stack.
Greater Serpent Totem
On Heroic Difficulty and higher, every 30 seconds Rastakhan will summon a
![]() Greater Serpent Totem. This totem will choose a random target within 30
yards and cast
Greater Serpent Totem. This totem will choose a random target within 30
yards and cast ![]() Serpent's Breath at them. This is a conical wave of jet
of Fire, dealing moderate initial Fire damage, as well as leaving a DoT which
deals light Fire damage every second for 5 seconds.
Serpent's Breath at them. This is a conical wave of jet
of Fire, dealing moderate initial Fire damage, as well as leaving a DoT which
deals light Fire damage every second for 5 seconds.
Prelate Za'lan
Seal of Purification
Prelate Za'lan will frequently cast ![]() Seal of Purification on a
random player, causing a beam of light to chase them for 6 seconds. Anyone
caught in the beam will take moderate Radiant damage every 1 second.
Seal of Purification on a
random player, causing a beam of light to chase them for 6 seconds. Anyone
caught in the beam will take moderate Radiant damage every 1 second.
Siegebreaker Roka
Meteor Leap
Siegebreaker Roka will leap at a player and deal huge Nature damage
to them, splitting the damage in an 8-yard radius. Immediately after casting
this, Roka will cast ![]() Crushing Leap and leap back to the target with the
highest threat.
Crushing Leap and leap back to the target with the
highest threat.
Crushing Leap
![]() Crushing Leap will cause Roka to leap back to the target with the
highest threat, dealing massive Physical damage and applying
Crushing Leap will cause Roka to leap back to the target with the
highest threat, dealing massive Physical damage and applying
![]() Crushed for 40 seconds. Crushed will cause subsequent Crushing
Leaps to deal 500% more damage. This debuff stacks.
Crushed for 40 seconds. Crushed will cause subsequent Crushing
Leaps to deal 500% more damage. This debuff stacks.
Headhunter Gal'wana
Headhunter Gal'wana throws an axe at a player, dealing high Physical damage and leaving a DoT on the target that deals further damage every 1.5 seconds until they are healed above 90% health.
Abilities in Phase Two: Bwonsamdi's Pact
This phase begins once the 3 adds from Phase One are killed. It causes Bwonsamdi to join fight with a few abilities. The phase ends when Rastakhan reaches 60% health.
King Rastakhan
Rastakhan keeps his ![]() Scorching Detonation and
Scorching Detonation and
![]() Plague of Toads abilities, but also gains 2 new ones.
Plague of Toads abilities, but also gains 2 new ones.
Plague of Fire
![]() Plague of Fire is an ability that Rastakhan uses to deal Fire damage
to a target and put a short debuff on them that, after 1 second, detonates and
launches Fire out from the target at all players in a 7-yard radius. This will
continue firing until no players are within a 7-yard radius of the initial
target.
Plague of Fire is an ability that Rastakhan uses to deal Fire damage
to a target and put a short debuff on them that, after 1 second, detonates and
launches Fire out from the target at all players in a 7-yard radius. This will
continue firing until no players are within a 7-yard radius of the initial
target.
Zombie Dust Totem
Every 45 seconds, Rastakhan will summon a ![]() Zombie Dust Totem that mind
controls 2 players until the totem is destroyed.
Zombie Dust Totem that mind
controls 2 players until the totem is destroyed.
Bwonsamdi
Bwonsamdi cannot be damaged (all damage he takes is absorbed), due to a
passive called ![]() Unliving.
Unliving.
Aura of Death
![]() Aura of Death applies a stack of
Aura of Death applies a stack of ![]() Deathly Withering every
3 seconds to anyone within 30 yards of Bwonsamdi. Deathly Withering deals light
Shadow damage every 3 seconds for 12 seconds.
Deathly Withering every
3 seconds to anyone within 30 yards of Bwonsamdi. Deathly Withering deals light
Shadow damage every 3 seconds for 12 seconds.
Death's Door
![]() Death's Door causes a fragment to be placed on a target, dealing
Shadow damage every 2 seconds for 8 seconds. Once the DoT expires, a "Death
Rift" is opened at the player's location.
Death's Door causes a fragment to be placed on a target, dealing
Shadow damage every 2 seconds for 8 seconds. Once the DoT expires, a "Death
Rift" is opened at the player's location.
Death Rift
![]() Death Rift is a portal connecting the Living Realm (the default
realm where everything happens) to the Death Realm. Anytime a player in the Death
Realm touches a Death Rift,
Death Rift is a portal connecting the Living Realm (the default
realm where everything happens) to the Death Realm. Anytime a player in the Death
Realm touches a Death Rift, ![]() Deathly Withering is removed and a
Deathly Withering is removed and a ![]() Withering Burst is
triggered, dealing a small amount of Shadow damage to the entire raid.
Withering Burst is
triggered, dealing a small amount of Shadow damage to the entire raid.
The Death Realm is where part of Phase Three takes place (explained below).
Caress of Death
Occasionally, Bwonsamdi will cast ![]() Caress of Death on the active
Tank, dealing moderate Shadow damage, and preventing all healing done to them
for 5 seconds.
Caress of Death on the active
Tank, dealing moderate Shadow damage, and preventing all healing done to them
for 5 seconds.
Abilities in Phase Three: Enter the Death Realm
When Rastakhan reaches 60% health, the half of the raid closest to Bwonsamdi will be transported into the Death Realm, and Phase Three will begin. This phase lasts until Bwonsamdi (whom the raid will be fighting in the Death Realm) reaches 50% health.
In the Living Realm, the raid will continue facing Rastakhan, as well as 2 (3 in Heroic) adds (Phantom of Rage and Phantom of Retribution, and Phantom of Slaughter in Heroic).
Living Realm
Rastakhan
Rastakhan retains all his abilities from Phase Two except
![]() Plague of Toads.
Plague of Toads.
In addition to this, Bwonsamdi grants Rastakhan ![]() Bwonsamdi's Boon at
the start of this phase, which permanently increases Rastakhan's damage dealt
by 2% every 15 seconds. This buff remains on Rastakhan for the rest of the
encounter.
Bwonsamdi's Boon at
the start of this phase, which permanently increases Rastakhan's damage dealt
by 2% every 15 seconds. This buff remains on Rastakhan for the rest of the
encounter.
Phantom of Retribution
![]() Grave Bolt is an interruptible cast that will fire a
bolt at the Phantom's current target, dealing moderate Shadow damage.
Grave Bolt is an interruptible cast that will fire a
bolt at the Phantom's current target, dealing moderate Shadow damage.
![]() Seal of Bwonsamdi will target 4 locations and fire a bolt towards
them. If no one is in the zone when they land, they will deal heavy Shadow
damage to everyone within 40 yards. However, if soaked, they will instead only
deal damage to whoever soaked it.
Seal of Bwonsamdi will target 4 locations and fire a bolt towards
them. If no one is in the zone when they land, they will deal heavy Shadow
damage to everyone within 40 yards. However, if soaked, they will instead only
deal damage to whoever soaked it.
The Phantom of Retribution, as well as the other two adds, is passively imbued with ![]() Undying Relentlessness, causing
them to become immune to crowd control after 60 seconds.
Undying Relentlessness, causing
them to become immune to crowd control after 60 seconds.
Phantom of Rage
The only ability the Phantom of Rage has is ![]() Necrotic Smash.
This pounds the ground in front of him, dealing heavy Shadow damage and
decreasing the healing taken of anyone stuck by 75% for 8 seconds.
Necrotic Smash.
This pounds the ground in front of him, dealing heavy Shadow damage and
decreasing the healing taken of anyone stuck by 75% for 8 seconds.
This add also benefits from ![]() Undying Relentlessness.
Undying Relentlessness.
Phantom of Slaughter
Similar to the Phantom of Retribution, the Phantom of Slaughter will also use
![]() Grave Bolt, but also has access to
Grave Bolt, but also has access to ![]() Focused Demise. This
will target a random player and deal moderate Shadow damage every second for 5
seconds. This channel is interruptible, but only by the person it is being
channeled on.
Focused Demise. This
will target a random player and deal moderate Shadow damage every second for 5
seconds. This channel is interruptible, but only by the person it is being
channeled on.
This add also benefits from ![]() Undying Relentlessness.
Undying Relentlessness.
Death Realm
In the Death Realm, Bwonsamdi can be damaged and uses 3 abilities.
Caress of Death
![]() Caress of Death functions similarly to the way it did in Phase Two,
however it is cast on random members of the raid, and the debuff only lasts 3
seconds.
Caress of Death functions similarly to the way it did in Phase Two,
however it is cast on random members of the raid, and the debuff only lasts 3
seconds.
Inevitable End
A zone of death is created around Bwonsamdi drawing in all players. If anyone touches the zone, they are killed instantly.
Dread Reaping
![]() Dread Reaping radiates from the edges of the
room. These small orbs will deal moderately high Shadow damage every second
to anyone who steps in them. If they collide with a Death Rift, they will phase
into the Living Realm.
Dread Reaping radiates from the edges of the
room. These small orbs will deal moderately high Shadow damage every second
to anyone who steps in them. If they collide with a Death Rift, they will phase
into the Living Realm.
Abilities in Phase Four: Uncontrollable Power
Phase Four begins once Bwonsamdi reaches 50%, at which point he will teleport everyone to the Living Realm, while he remains in the Death Realm, removing himself from the fight.
During this phase, Rastakhan will have access to the following abilities.
- Scorching Detonation;
- Plague of Toads;
- Plague of Fire;
 Death's Door;
- Inevitable End.
All of these abilities have been described previously, and they work the same way.
Additionally, Rastakhan will have ![]() All Encompassing Death, causing him
to periodically spawn
All Encompassing Death, causing him
to periodically spawn ![]() Death Rifts around himself.
Death Rifts around himself.
Strategy
Phase One
When the fight begins, Tank the adds where they stand while the second Tank
pulls Rastakhan to the entrance of the room. He should be more than 30 yards
away from the group, so no one else is targeted by the ![]() Serpent's Breath
from the
Serpent's Breath
from the ![]() Greater Serpent Totem. The Rastakhan Tank will be the only
target in range, so the totem will pick them every time, making the mechanic
very easy to side-step and dodge.
Greater Serpent Totem. The Rastakhan Tank will be the only
target in range, so the totem will pick them every time, making the mechanic
very easy to side-step and dodge.
Equally, keeping Rastakhan away from the
group will spread out the ![]() Plague of Toads, making it very easy to
dodge, as well as ensure the tank is always far from the group, minimizing the
damage from
Plague of Toads, making it very easy to
dodge, as well as ensure the tank is always far from the group, minimizing the
damage from ![]() Scorching Detonation.
Scorching Detonation.
The group should focus on killing Siegebreaker Roka first, while
heavily cleaving onto the other two adds. Ranged should be loosely spread
around so that they can quickly run into melee when ![]() Meteor Leap is
about to happen. Alternatively, they can remain in melee range, so long as they
do not spawn
Meteor Leap is
about to happen. Alternatively, they can remain in melee range, so long as they
do not spawn ![]() Seal of Purification on the entire group. For the second
Seal of Purification on the entire group. For the second
![]() Meteor Leap, the Tank handling the adds will need to use a lot of
cooldowns as well as externals in order to survive the second application of
Meteor Leap, the Tank handling the adds will need to use a lot of
cooldowns as well as externals in order to survive the second application of
![]() Crushed.
Crushed.
Once Roka is dead, the group should focus Prelate Za'lan, before
moving on to Headhunter Gal'wana (on Heroic only). Healers need to keep
an eye out for the person targeted by the ![]() Grievous Axe, and heal them
above 90% to remove the DoT.
Grievous Axe, and heal them
above 90% to remove the DoT.
Phase Two
After all the adds are killed, Bwonsamdi will join the fight and Phase Two
will begin. Keep Bwonsamdi on the throne where he spawns, while the raid moves
towards Rastakhan, and out of range of the ![]() Aura of Death. The raid
should be spread out as much as they can to prevent
Aura of Death. The raid
should be spread out as much as they can to prevent ![]() Plague of Fire
from spreading. When
Plague of Fire
from spreading. When ![]() Zombie Dust Totems spawn, DPS need to swap and kill
them to free the people they mind control. Players afflicted with
Zombie Dust Totems spawn, DPS need to swap and kill
them to free the people they mind control. Players afflicted with
![]() Death's Door should run out of the raid to spawn the
Death's Door should run out of the raid to spawn the
![]() Death Rift. It is a good idea to spawn all the Death Rifts close to
each other, so that any
Death Rift. It is a good idea to spawn all the Death Rifts close to
each other, so that any ![]() Dread Reaping that come into the living realm
will all come from the same direction.
Dread Reaping that come into the living realm
will all come from the same direction.
When the Rastakhan Tank is afflicted by ![]() Scorching Detonation,
the Tanks should swap. This will bring the Scorching Detonation out to a safe
range, while also letting the Bwonsamdi Tank drop their
Scorching Detonation,
the Tanks should swap. This will bring the Scorching Detonation out to a safe
range, while also letting the Bwonsamdi Tank drop their
![]() Deathly Withering.
Deathly Withering.
Phase Three
Death Realm
When Rastakhan reaches 60%, Phase Three will begin by Bwonsamdi pulling the
closest half of the raid to him, and dragging them into the Death Realm. Here
Bwonsamdi is unable to be tanked, so you should only send DPS and a few
Healers. Players will need to dodge ![]() Dread Reaping, and run from
Dread Reaping, and run from
![]() Inevitable End when it is cast. Players will also need to offset
clearing their stacks of
Inevitable End when it is cast. Players will also need to offset
clearing their stacks of ![]() Deathly Withering in order to prevent
Deathly Withering in order to prevent
![]() Withering Burst from potentially killing anyone.
Withering Burst from potentially killing anyone.
Living Realm
In the Living Realm, one Tank should tank the Phantom of Rage away
from the group, while the other Tank handles Rastakhan and the other adds. The
![]() Necrotic Smash cast by the Phantom of Rage is targeted on the Tank's
location, not actually on the Tank, so it is possible for high mobility Tanks
to avoid it entirely. Monks for example can use
Necrotic Smash cast by the Phantom of Rage is targeted on the Tank's
location, not actually on the Tank, so it is possible for high mobility Tanks
to avoid it entirely. Monks for example can use ![]() Transcendence: Transfer
or
Transcendence: Transfer
or ![]() Chi Torpedo to move away before it lands. As for the other adds, the
group should be interrupting them as much as possible, while keeping an eye out
to soak any
Chi Torpedo to move away before it lands. As for the other adds, the
group should be interrupting them as much as possible, while keeping an eye out
to soak any ![]() Seal of Bwonsamdi that spawn. Players should be aware if
they are targeted by
Seal of Bwonsamdi that spawn. Players should be aware if
they are targeted by ![]() Focused Demise and either interrupt it, or tell
healers they need some extra attention.
Focused Demise and either interrupt it, or tell
healers they need some extra attention.
Phase Four
Once Bwonsamdi reaches 50%, all players will be forced into the Living
Realm, and Bwonsamdi will leave the fight. The raid should finish off the adds
before getting back on Rastakhan. The fight continues as normal from this
point, except Rastakhan can now cast ![]() Inevitable End, so players need to
run against it sucking them in when it is cast.
Inevitable End, so players need to
run against it sucking them in when it is cast.
Tank Concerns
The major concerns for Tanks come in the form of the healing reductions from
![]() Caress of Death and
Caress of Death and ![]() Necrotic Smash. All other damage is fairly
tame, however taking a healing reduction like that at the wrong time can be
fatal.
Necrotic Smash. All other damage is fairly
tame, however taking a healing reduction like that at the wrong time can be
fatal.
Outside of that, the only thing tanks need to worry about is making sure
they run out of the group with ![]() Scorching Detonation.
Scorching Detonation.
Healing Concerns
The deadliest part of this encounter for healers would come from death realm
players clearing their stacks of ![]() Deathly Withering too close together,
or too late. Making sure your raid communicates their stacks if they get too
high, so you can react with healing cooldowns is very important.
Deathly Withering too close together,
or too late. Making sure your raid communicates their stacks if they get too
high, so you can react with healing cooldowns is very important.
The Tanks also need to be topped off before taking ![]() Caress of Death,
but that is fairly simple to do.
Caress of Death,
but that is fairly simple to do.
Mythic Mode
Abilities
There are no new abilities in Mythic mode, but there are changes to how several of the Normal/Heroic abilities work, detailed below.
Grievous Axe
Headhunter Gal'wana will now throw three ![]() Grievous Axes instead of
one.
Grievous Axes instead of
one.
Plague of Toads
![]() Plague of Toads will now release 5 toads instead of 3. The size of the
cone that the Toads spread out within remains the same, however.
Plague of Toads will now release 5 toads instead of 3. The size of the
cone that the Toads spread out within remains the same, however.
Aura of Death
Bwonsamdi's ![]() Aura of Death now extends 45 yards, instead of 30.
Aura of Death now extends 45 yards, instead of 30.
Caress of Death
The duration of Bwonsamdi's ![]() Caress of Death has been increased by 2
seconds, making it last 7 seconds in Phase Two, and 5 seconds in Phase
Three.
Caress of Death has been increased by 2
seconds, making it last 7 seconds in Phase Two, and 5 seconds in Phase
Three.
Empowered Spirit
The Phantoms of Rage, Slaughter, and Retribution now are affected by
![]() Empowered Spirit. This will cause them to be transported to the death
realm when killed, dropping a
Empowered Spirit. This will cause them to be transported to the death
realm when killed, dropping a ![]() Death Rift in the process.
Death Rift in the process.
Strategy
Phase One is handled exactly the same way as in Heroic: focus down
Siegebreaker Roka, while one Tank keeps Rastakhan out of range of the group,
near the entrance. The goal should be to kill Roka before he his able to cast a
second ![]() Crushing Leap. Healers need to be slightly more aware of
Crushing Leap. Healers need to be slightly more aware of
![]() Grievous Axe, and should aim to use a few cooldowns for each
Grievous Axe, and should aim to use a few cooldowns for each
![]() Scorching Detonation, not necessarily because they are needed, more so
just to get efficient use out of them, and save a little Mana.
Scorching Detonation, not necessarily because they are needed, more so
just to get efficient use out of them, and save a little Mana.
Once Phase Two begins, tank Bwonsamdi as close to the throne as possible, and
move Rastakhan to the left or right of the entrance to the room. Be sure to set
up a ![]() Demonic Gateway between the two bosses to help the Tanks swap
quickly.
Demonic Gateway between the two bosses to help the Tanks swap
quickly.
During this phase, Bwonsamdi's ![]() Aura of Death is much larger, making
it such that the only way healers will be able to heal the Tank, while also not
gaining stacks themselves, is to have the Tank position themselves between
Bwonsamdi and the healers. This way, the Tank will be within 40 yards to
receive heals, but Bwonsamdi will be roughly 46 yards away from the healers.
This makes positioning for healers very tight, often with only a 1-2 yard grace
window. As such, ranged need to be spread away from the healers so as not to
hit them with
Aura of Death is much larger, making
it such that the only way healers will be able to heal the Tank, while also not
gaining stacks themselves, is to have the Tank position themselves between
Bwonsamdi and the healers. This way, the Tank will be within 40 yards to
receive heals, but Bwonsamdi will be roughly 46 yards away from the healers.
This makes positioning for healers very tight, often with only a 1-2 yard grace
window. As such, ranged need to be spread away from the healers so as not to
hit them with ![]() Plague of Fire.
Plague of Fire.
Paladins are ideal for tanking Bwonsamdi, as they have multiple ways to
mitigate stacks of from ![]() Deathly Withering without tank swapping,
through the use of
Deathly Withering without tank swapping,
through the use of ![]() Divine Shield and
Divine Shield and ![]() Blessing of Spellwarding.
Restoration Shamans are also excellent to offer another way to drop stacks, by
simply having the Tank die while
Blessing of Spellwarding.
Restoration Shamans are also excellent to offer another way to drop stacks, by
simply having the Tank die while ![]() Ancestral Protection Totem is active.
If none of these options are available to your raid, then simply have the Tanks
swap during each
Ancestral Protection Totem is active.
If none of these options are available to your raid, then simply have the Tanks
swap during each ![]() Scorching Detonation.
Scorching Detonation.
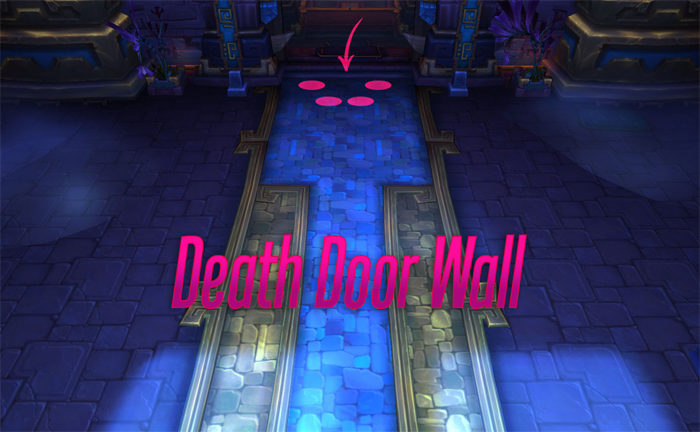
Lastly, during this phase, the raid's placement of ![]() Death's Door is
critical. The goal is to place 4 Death's Doors in a small semi-circle against
the door at the entrance. The reason for this is that during the next phase,
the group that is pulled into the death realm is going to hide within the
semi-circle. This will shield them from any
Death's Door is
critical. The goal is to place 4 Death's Doors in a small semi-circle against
the door at the entrance. The reason for this is that during the next phase,
the group that is pulled into the death realm is going to hide within the
semi-circle. This will shield them from any ![]() Dread Reaping orbs,
allowing them to stand still and DPS Bwonsamdi. This also has the added benefit
of placing the Doors in such a way that the trajectory of any Orbs passing into
the living realm, will cause them to simply exit the encounter area harmlessly,
effectively removing that mechanic from the fight.
Dread Reaping orbs,
allowing them to stand still and DPS Bwonsamdi. This also has the added benefit
of placing the Doors in such a way that the trajectory of any Orbs passing into
the living realm, will cause them to simply exit the encounter area harmlessly,
effectively removing that mechanic from the fight.
Once Phase Three begins, send down 1 healer (preferably a Resto Shaman or
Discipline Priest) and ideally 9 ranged DPS. Make sure before this phase begins
that both Monks and Demon Hunters have applied their debuffs to Bwonsamdi. Upon
being sucked down into the Death Realm, the group needs to quickly make their
way into the safe zone discussed above. When Bwonsamdi casts
![]() Inevitable End, the group needs to already be running against it, as
touching a Death Rift all at once will likely result in a wipe. Using movement
speed buffs, such as
Inevitable End, the group needs to already be running against it, as
touching a Death Rift all at once will likely result in a wipe. Using movement
speed buffs, such as ![]() Wind Rush Totem is strongly advised. The group
needs to be vocal about clearing their stacks, allowing healers to prepare with
the appropriate cooldowns.
Wind Rush Totem is strongly advised. The group
needs to be vocal about clearing their stacks, allowing healers to prepare with
the appropriate cooldowns.
Meanwhile, in the Living Realm, the raid should crowd control the Phantoms
of Slaughter and Retribution, while cleaving down Rage with Rastakhan. After a
minute the adds will become immune to crowd control, and the group will have to
start dealing with them. The raid will need to interrupt whatever casts they
can, and soak the ![]() Seal of Bwonsamdi. If at all possible, try to make
sure the Phantoms die near a wall, as they will drop a
Seal of Bwonsamdi. If at all possible, try to make
sure the Phantoms die near a wall, as they will drop a ![]() Death Rift when
killed, though this is a small optimization and should not be
over-prioritized.
Death Rift when
killed, though this is a small optimization and should not be
over-prioritized.
Once Bwonsamdi reaches 50%, and sends the group from the Death Realm back
into the Living Realm, the fight is effectively over. The difficulty of this
phase is supposed to come from the addition of needing to dodge
![]() Dread Reaping, but thanks to the strategy from the previous phase,
those do not become an issue until much later. Simply finish off the remaining
adds, and slowly kite Rastakhan around the room as needed until you secure the
kill.
Dread Reaping, but thanks to the strategy from the previous phase,
those do not become an issue until much later. Simply finish off the remaining
adds, and slowly kite Rastakhan around the room as needed until you secure the
kill.
Class-specific Advice for King Rastakhan
Changelog
- 24 Feb. 2019: Mythic section added.
- 29 Jan. 2019: Fixed Death Rift ability description.
- 27 Jan. 2019: Updated the guide to reflect the live version of the fight.
- 21 Jan. 2019: TL;DR and Strategy sections added.
- 23 Oct. 2018: Guide added.
Class Guides
BfA Guides
Patch 8.3 Profession Changes


This guide has been written by Dhaubbs, a Mistweaver Monk theorycrafter, and founder of the once World 4th guild Big Dumb Guild (BDG) on Illidan-US. You can follow him on Twitter, Twitch, and YouTube.
- Shadow, Arms, and More: Big Post-Mythic Class Tuning Details Announced!
- Recraft Crests Lost Bug Is Fixed, Blizzard Working on Restoration, If Possible
- Several WoW Promotion Items Joining the Trading Post in 12.0.5
- The First RWF Week Is Done! All Bosses Cleared on a Thursday! Liquid Down Crown and Head to 7/9
- Are You Taller Than Your Character? WoW’s Wild Height Scale Revealed
- Alnseer Nerf, Voidspire Adjustments, Very Rare Item Levels Fixed, Dungeon Finder Spec Gold Rewards Tuned: Midnight Hotfixes, Match 26th
- Where Is The Horde? The Question Midnight’s Newest Chapter Has Players Asking
- WoW’s FOMO Problem Is Getting Worse — Miss It Once, Lose It Forever