Plunderstorm Guide
Plunderstorm is a pirate-themed limited-time battle royale event in World of Warcraft available to anyone with an active subscription. The following guide contains everything you need to know about the event.
- 1. Introduction
- 2. Plunderstorm Availability
- 3. Who Can Participate in the Event?
- 4. Plunderstorm Map
- 5. Event Start
- 6. Plunderstorm Abilities
- 7. Upgrading Plunderstorm Abilities
- 8. A List of all Plunderstorm Abilities
- 9. The Best Offensive Spell Combos for Solo Play
- 10. The Best Utility Spell Combos for Solo Play
- 11. Consumable Items
- 12. Plunder
Introduction
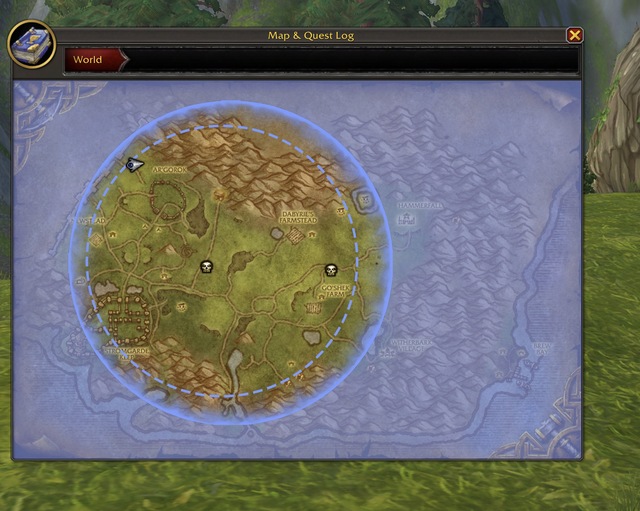
Plunderstorm is a battle royale 60-player pirate-themed event taking place in Arathi Highlands. The goal is to be the last man standing and survive the incoming storm to claim victory.
Plunderstorm Availability
Plunderstorm is available from January 15, 2025, through February 24, 2025.
Who Can Participate in the Event?
Plunderstorm is open to all players with an active World of Warcraft subscription. You will not be playing your own character so the Event does not have any level requirement.
To participate in the Event, you must download Modern WoW through Battle.net.
When you launch Modern WoW, select Plunderstorm from the World of Warcraft game menu and create a new ready-to-play character. Choose between Practice, Solo or Duo to play alone, with a friend, or a random player.
You can access chat, customize characters, and see the queue from the Character Select Screen. However, you cannot use any addons to customize your UI.
Plunderstorm Map
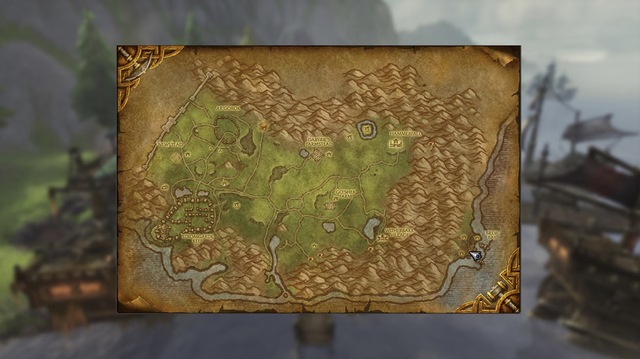
The zone used for the battle royale is Arathi Highlands.
Event Start
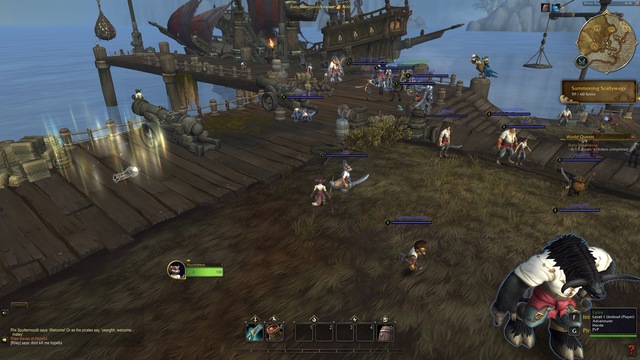
When you enter the game, you will find yourself along with all the other players in Brew Bay. Here, you can fight NPCs, open treasure chests, or talk to the Keg Leg's Crew quartermaster, before the game begins. However, note that all progress done in this lobby area is temporary and will be removed when the match starts.
Choose Your Drop Spot
In the top right corner of the screen, you will see three buttons. Clicking on the middle one allows you to set your drop spot. Use the map to assess risk levels:
- Green zones: Low-risk areas for avoiding PvP at the start.
- Yellow zones: Moderate risk, prepare for occasional PvP.
- Red zones: High PvP activity, not recommended for early-game survival.
Customize Your Character
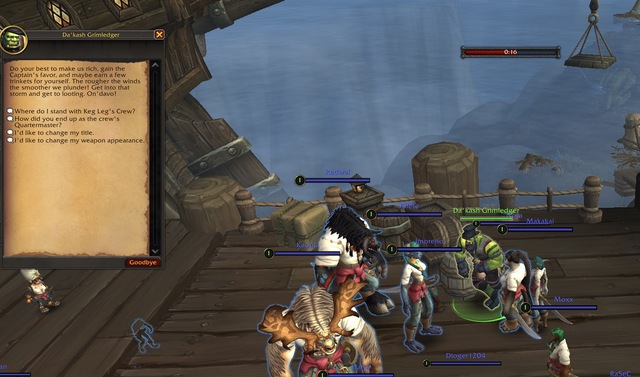
You can talk to Da'kash Grimledger to customize your character before the match starts. to customize your character.
The Dropoff
When the 30-second timer expires, your character will be cannoned in the air and placed on a parrot mount and you must steer to your landing location. This is simply done by right-clicking and holding the mouse button in the direction you would like to land. Try to land into creatures so you kill them upon landing.
Plunderstorm Abilities
At the beginning of a match, you will start with 3 abilities — a main attack ability (R), a healing ability (T), and a usable item (5).
 Slash (R) — Slash enemies in a short range in front of you.
 Health Brew (T) — Chug Keg Leg's restorative brew, restoring health
immediately and an additional amount over time. Direct damage interrupts this effect.
 Barrel Consumable (5) — Use: Move at rapid speed for a short duration.
Jumping or running into other units will cause the barrel to explode. Can roll on water.
All characters also have access to a double jump by hitting the space bar twice. The "F" key is used to Interact with objects, and "G" is bound to the Ping function.
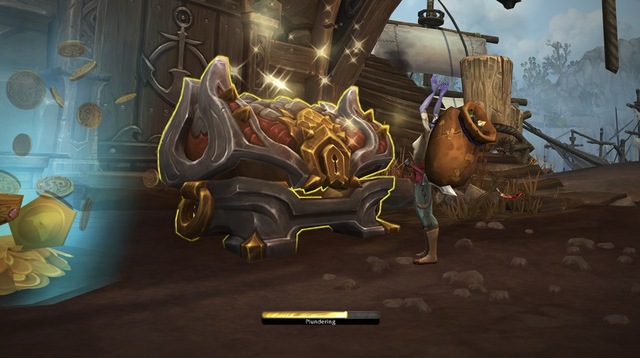
You can collect spells, abilities, and upgrades by opening treasure chests and killing enemies.
Upon picking up, spells and abilities are automatically added to your Action Bar, with 2 slots dedicated to offensive skills and two for utilities such as leaps, speed boosts, and crowd-control.
The default keybinds for the abilities are R, T and 1 through 5.
Some abilities are more action-based and require good positioning and player targeting.
You can replace abilities by looting a different one from the ground.
Upgrading Plunderstorm Abilities
Your abilities can be upgraded by discovering higher-quality versions from treasure chests or finding the same ability elsewhere and stacking it to Rank 3 (epic).
A List of all Plunderstorm Abilities
Here is a list of all Plunderstorm spells that you can collect and upgrade during the Event. Please note that we only list the base abilities that are not upgraded.
Offensive Spells
Upgrades increase the damage, range, and decrease cooldown of abilities by 2 seconds each.
 Aura of Zealotry — Passively increase movement speed for your allies. Cast
to consecrate the ground damaging enemies periodically. While in your consecration, gain enhanced
movement speed and melee attacks.
 Celestial Barrage — Call down a barrage of moonbeams, damaging enemies. This spell
can be empowered to greatly increase its range.
 Earthbreaker — Sunder the earth in an area around the caster,
damaging and stunning enemies hit. (2-second cast, 12-yard range, 18-second cooldown)
 Fire Whirl — Engulf yourself in flames and rush forward, damaging enemies you
pass through. (1-second cast, 8-yard range, 18-second cooldown)
 Holy Shield — Hurl a blessed shield forward, damaging enemies in its path
before returning to you. Recast to trigger a holy explosion at the shield's location.
(1-second cast, 40-yard range, 14-second cooldown)
 Mana Sphere — COnjure a Mana Sphere, then project it forward
, damaging and knocking back enemies it passes through. Hold to increase sphere size.
(1.8-second cast, 60-yard range, 14-second cooldown)
 Rime Arrow — Fires an icy arrow that seeks your current target,
damaging them and nearby enemies. (0.5-second cast, 45-yard range, 10-second cooldown)
 Searing Axe — Slam down a molten axe, spewing molten lava forward that
damages and knocks back enemies struck. (Instant, 15-yard range, 12-second cooldown)
 Slicing Winds — Envelop yourself in razor-sharp winds, then lunge
forward, damaging enemies in your path. Hold to increase lunge distance. (1.4 second cast,
12 second cooldown)
 Star Bomb — Channel the cosmic void, compressing it into a bomb that
explodes after a short delay. Enemies struck are pulled into the blast. (2.25 second cast,
40-yard range, 18-second cooldown)
 Storm Archon — Call forth elements, unleashing a destructive barrage
in front of the caster. Recast Storm Archon to call another element. Can be cast twice.
(Instant, 20 second cooldown)
 Toxic Smackerel — Smacks the target in front of you with a toxic
mackerel, poisoning them and inflicting damage. Poison inflicts damage-over-time.
If a target is already poisoned, Toxic Smackerel deals bonus damage.
The Best Offensive Spell Combos for Solo Play
Here are the best offensive spell combos for Solo Play.
 Fire Whirl +
  Rime Arrow.
 Fire Whirl +
  Holy Shield.
 Fire Whirl +
  Storm Archon.
Utility Spells
Upgrades reduce cooldown by 2 seconds.
 Call Galefeather — Call forth Galefeather to knock enemies back with heavy
winds for a short duration.
 Explosive Caltrops — Evade backwards while spreading explosive
caltrops that slow and damage enemies that trigger them. (Instant, 18 second cooldown)
 Fade to Shadow — Fade into the shadows, teleporting in the direction you
are moving while entering stealth for a short duration.
 Faeform — Transform into a Fae creature, gaining immunity to harmful debuffs,
increased movement speed, and damage reduction for a short duration. Cannot attack
while transformed. (Instant, 18 second cooldown)
 Hunter's Chains — Chain yourself to your current target. While chained,
recast Hunter's Chains to advance to your target's position. If your chained target
moves out of the chain's range, they will be pulled towards you. (0.25 second cast,
35-yard range, 18-second cooldown)
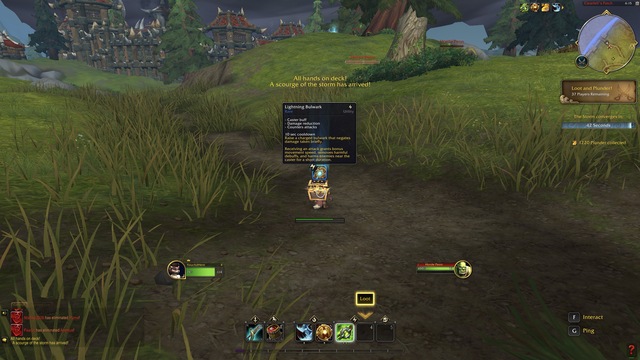
 Lightning Bulwark — Raise a charged bulwark that negates damage taken
briefly. Receiving an attack grants bonus movement speed, removes harmful debuffs, and
harms enemies near the caster for a short duration. (1.25-second cast, 14-second cooldown)
 Quaking Leap — Leap forward in a large arc, then crash down damaging and
stunning enemies you land on. Recast while airborne to crash down early. (0.5 second cast,
40-yard range, 14-second cooldown)
 Repel — Erect a powerful arcane barrier that repels all damage and harmful
debuffs. Then, silence and knockback enemies around the caster. (Instant, 10 yard range,
22 second cooldown)
 Snowdrift — Create a snowy blizzard in an area around the caster,
periodically affecting enemies with a stacking slow. (0.5-second cast, 15-yard range,
14-second cooldown)
 Steel Traps — Toss a cluster of steel traps directly in front of
the caster, rooting and damaging enemies that trigger them. (Instant, 12-yard range,
18-second cooldown)
 Void Tear — Tear into the Void, placing a Void mark. Recast Void Tear
to instantly return to the mark, damaging and slowing enemies. The recast can be performed
instantly while casting any spell without interruption.
 Windstorm — Turbulent winds form in front of the caster that
surge forward, damaging and stunning the first enemy struck. (Instant, 60-yard range,
14-second cooldown)
The Best Utility Spell Combos for Solo Play
Here are the best utility spell combos for Solo Play.
 Steel Traps +
  Fade to Shadow.
 Steel Traps +
  Quaking Leap.
 Steel Traps +
  Repel.
Consumable Items
The "5" key is bound to consumable items that you will find scattered throughout the map.
Everyone begins with the ![]() Barrel consumable.
Barrel consumable.

Plunder
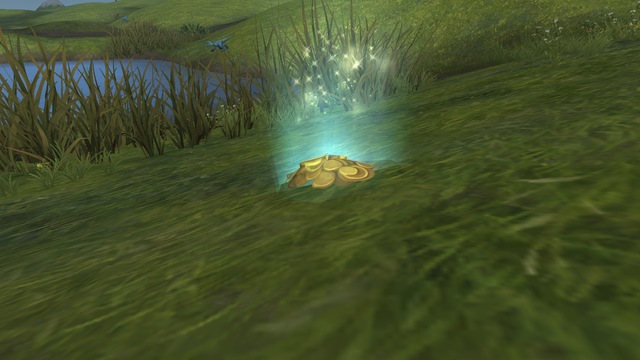
![]() Plunder is the main currency of the event. Plunder is immediately noticeable in-game
as gold piles on the ground. Collecting Plunder increases your reputation standing with Keg
Leg's Crew at a rate of 1:1.
Plunder is the main currency of the event. Plunder is immediately noticeable in-game
as gold piles on the ground. Collecting Plunder increases your reputation standing with Keg
Leg's Crew at a rate of 1:1.
Sources of Plunder
There are multiple sources of Plunder:
- You can collect gold piles on the ground near enemies to gain Plunder.
- Plunder drops from enemies you kill. Elites drop more Plunder than standard mobs.
- You can earn Plunder from completing match and daily quests.
Experience
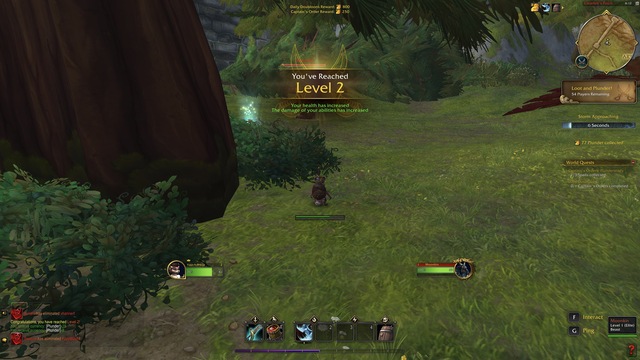
Gather Experience by killing mobs and opening treasure chests to increase your player level. Your health and damage of your abilities will increase with each level.
Plunderstorm Activities
During a Plunderstorm, you want to collect as much Plunder as you can to increase your Renown with the Plunderstorm Faction, collect XP to increase your level, and collect spells and upgrade them.
This is done by opening treasure chests, killing mobs, enemy players, and completing quests.
Match Quests
When you land, you will receive one of six quests that rewards 250 ![]() Plunder.
Plunder.
Daily Quests
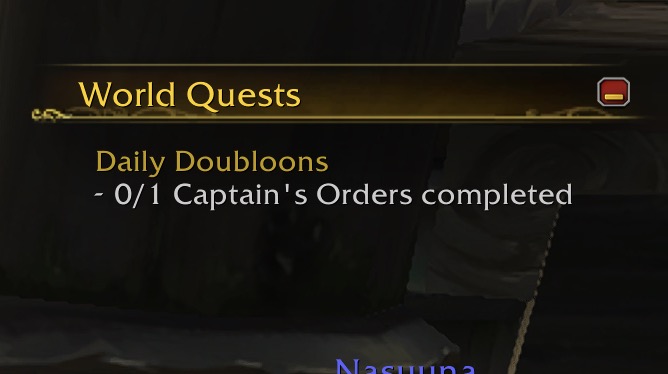
A daily quest called Captain's Orders is available every day and
rewards you 800 ![]() Plunder.
Plunder.
The Encroaching Storm
The storm will converge every so often, forcing players to move into the marked area. You must avoid the storm by being in the designated area before the timer is up.
Event End
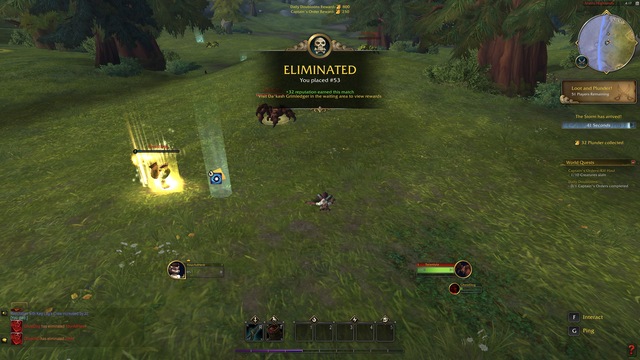
Plunderstorm ends when your character dies or when you are the last man standing. Upon death, you can either leave the game or spectate others.
Practice Mode
Players can now test the waters in a new Practice Mode, designed to help newbies get familiar with the event before diving into competitive matches. Practice Mode is great for learning the basics without the pressure of live competition.
Plunderstore
Plunderstore is where you turn in all your hard-earned ![]() Plunder for various rewards.
You can bring it up in-game from anywhere by pasting the following command in your chat window:
run AccountStoreUtil.ToggleAccountStore().
Plunder for various rewards.
You can bring it up in-game from anywhere by pasting the following command in your chat window:
run AccountStoreUtil.ToggleAccountStore().
Plunderstorm Rewards
Participating in Plunderstorm earns you ![]() Plunder, which can be redeemed for the following rewards
in Patch 11.0.7:
Plunder, which can be redeemed for the following rewards
in Patch 11.0.7:
| Item Name | Item Category | Plunder Cost |
|---|---|---|
| Pets | 250 | |
| Pets | 500 | |
| Pets | 1000 | |
| Pets | 2000 | |
| Mounts | 1500 | |
| Mounts | 5000 | |
| Mounts | 5000 | |
| Mounts | 5000 | |
| Pets | 2000 | |
| Weapons | 250 | |
| Weapons | 250 | |
| Weapons | 250 | |
| Weapons | 250 | |
| Weapons | 1000 | |
| Weapons | 1000 | |
| Weapons | 1000 | |
| Weapons | 1000 | |
| Weapons | 1000 | |
| Weapons | 1000 | |
| Weapons | 1500 | |
| Weapons | 1500 | |
| Weapons | 1500 | |
| Weapons | 1500 | |
| Guns | 250 | |
| Guns | 500 | |
| Guns | 1000 | |
| Guns | 1500 | |
| Head | 250 | |
| Head | 250 | |
| Head | 1000 | |
| Head | 1000 | |
| Strapping | 250 | |
| Stormridden | 1000 | |
| Head | 2000 | |
| Head | 2000 | |
| Head | 500 | |
| Strapping | 250 | |
| Stormridden | 1000 | |
| Back | 250 | |
| Back | 250 | |
| Back | 500 | |
| Back | 1000 | |
| Swabbie | 250 | |
| Snazzy | 250 | |
| Strapping | 250 | |
| Stormridden | 1000 | |
| Tabard | 5000 | |
| Strapping | 250 | |
| Stormridden | 250 | |
| Swabbie | 250 | |
| Snazzy | 250 | |
| Strapping | 250 | |
| Stormridden | 250 | |
| Strapping | 250 | |
| Stormridden | 250 | |
| Swabbie | 250 | |
| Snazzy | 250 | |
| Strapping | 250 | |
| Stormridden | 500 | |
| Swabbie | 250 | |
| Snazzy | 250 | |
| Strapping | 250 | |
| Stormridden | 250 | |
| Mounts | 5000 | |
| Toys | 500 | |
| Toys | 500 | |
| Plundered Chest Of 250 Trader's Tender | Other | 1000 |
| Plundered Chest Of 500 Trader's Tender | Other | 2000 |
Tips for Winning Plunderstorm
The following section contains useful tips that help you survive longer and farm more ![]() Plunder.
Plunder.
- At the beginning of a match, select a green drop spot.
- Avoid PvP at all costs, Prioritize completing your Daily Quests first and collecting Utility spells that increase your mobility to escape danger faster.
- Focus on killing Elites and opening Epic Chests for XP and skills.
- Sick to the storm's outskirts, avoiding the central chaos.
- The final safe zone contains a bush that you can hide in to wait out the final duel and launch a surprise attack when the survivor is at low health with abilities on cooldown.
Changelog
- 15 Jan. 2025: Updated for launch.
- 08 Jan. 2025: Reviewed for launch.
- 15 Dec. 2024: Updated for Patch 11.0.7.
- 21 Mar. 2024: First post-launch guide update.
- 19 Mar. 2024: Guide added.

- Frost DK and Arms Buffs, Guardian Nerfs: Additional Class Tuning, March 24th
- 5 Dungeons Changed: Mythic+ Tuning With the March 24th Reset
- Fastest Way to Complete Saltheril’s Soiree Cleanup in WoW Midnight
- Where Does Your Spec Stand? Week 1 DPS and Popularity Rankings Revealed
- Every Class Change Coming in Tomorrow’s (Extended) March 24th Maintenance
- New Trial of Style 2026 Rewards: Don’t Miss the Silver Chainkini Before It’s Gone!
- Class Tuning, Cheaper Housing, Performance Improvements, Faster Rares, Delve Tuning: Midnight Weekly Hotfix Summary, March 16 – 23
- Monk on Top: The Best Tanks for Midnight Mythic+ and Raid Season 1
