Scholomance Heroic Dungeon Guide (WoD 6.1.2)
Table of Contents
Scholomance is a 5-man dungeon located in the Western Plaguelands. In Mists of Pandaria, it has been revamped to include a level 90 Heroic mode. It houses 5 encounters: Instructor Chillheart, Jandice Barov, Rattlegore, Lilian Voss, and Darkmaster Gandling.
Introduction
Scholomance is a 5-man dungeon located within the ruined keep of Caer Darrow in Western Plaguelands. With Mists of Pandaria, the dungeon has been revamped and now features a level 90 Heroic mode. Scholomance is a place of learning for necromancers and your goal is to put an end to their activities.
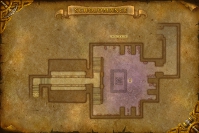
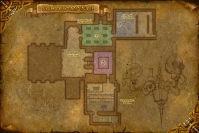
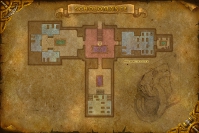
The dungeon has a linear layout during which you will descend through 3 sub-zones, until you reach Darkmaster Gandling. For level 90 players, only the Heroic mode of the dungeon will be of interest.
| The Reliquary | Upper Tree Ring |
|---|---|
|
|
| The Upper Study | Headmaster's Study |

|
|
This guide will cover all of the five boss encounters, as well as the quests and achievements that are available in the dungeon.
Loot
The level of the items you can obtain from Scholomance
is 463, with one exception, ![]() Headmaster's Will,
which has an item level of 476.
Headmaster's Will,
which has an item level of 476.
Armor
| Item Name | Armor | Slot | Main Stats | Source |
|---|---|---|---|---|
| Cloth | Head | Intellect/Hit | Jandice Barov | |
| Cloth | Wrists | Intellect/Hit | Rattlegore | |
| Cloth | Chest | Intellect | An End to the Suffering | |
| Cloth | Chest | Intellect/Hit | An End to the Suffering | |
| Cloth | Waist | Intellect/Hit | Darkmaster Gandling | |
| Cloth | Legs | Intellect | Lilian Voss | |
| Leather | Chest | Intellect | An End to the Suffering | |
| Leather | Hands | Intellect | Rattlegore | |
| Leather | Head | Agility | Lilian Voss | |
| Leather | Chest | Agility | An End to the Suffering | |
| Leather | Hands | Agility | Darkmaster Gandling | |
| Leather | Waist | Agility | Instructor Chillheart | |
| Leather | Legs | Agility | Jandice Barov | |
| Chest | Intellect | An End to the Suffering | ||
| Chest | Intellect | Lilian Voss | ||
| Wrists | Intellect | Instructor Chillheart | ||
| Hands | Intellect | Darkmaster Gandling | ||
| Chest | Agility | An End to the Suffering | ||
| Hands | Strength | Lilian Voss | ||
| Feet | Agility | Rattlegore | ||
| Plate | Shoulders | Intellect | Darkmaster Gandling | |
| Plate | Chest | Intellect | An End to the Suffering | |
| Plate | Shoulders | Strength/Parry | Darkmaster Gandling | |
| Plate | Chest | Strength | An End to the Suffering | |
| Plate | Chest | Strength/Parry | Instructor Chillheart | |
| Plate | Chest | Strength/Parry | An End to the Suffering | |
| Plate | Feet | Strength/Parry | Jandice Barov |
Weapons
| Item Name | Type | Main Stats | Source |
|---|---|---|---|
| Two-Handed Sword | Strength | Instructor Chillheart | |
| Shield | Intellect | Jandice Barov | |
| Two-Handed Axe | Strength | Rattlegore | |
| Wand | Intellect | Rattlegore | |
| Staff | Intellect/Hit | Darkmaster Gandling |
Amulets, Cloaks, and Trinkets
| Item Name | Type | Main Stats | Source |
|---|---|---|---|
| Amulet | Intellect/Hit | Instructor Chillheart | |
| Trinket | Intellect/Healing | Darkmaster Gandling | |
| Trinket | Agility | Darkmaster Gandling | |
| Amulet | Strength/Dodge | Lilian Voss | |
| Cloak | Strength/Dodge | Jandice Barov | |
| Trinket | Strength/Expertise | Darkmaster Gandling |
Quests
There are 2 quests that can be completed within the instance. They are both given by the Talking Skull, a strange NPC that follows you through the instance.
The first quest is The Four Tomes, which requires you to pick up books as you progress through the instance. Looking at the quest objectives on the map should be more than enough to find the books.
The second quest is An End to the Suffering, which requires you to kill Darkmaster Gandling, the final boss of the dungeon.
Only An End to the Suffering has rewards. They have an item level of 440 (see loot section above).
Instructor Chillheart
The fight against Instructor Chillheart is a two-phase fight.
- During Phase One, you will have to burn down the instructor as fast as you can.
- During Phase Two, you will fight her phylactery and will have to avoid bombs and void zones.
Phase One
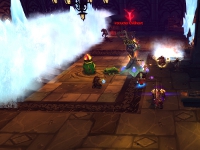 In Phase One, you are fighting Instructor Chillheart herself. As the phase
progresses, you will see an
 ![]() Ice Wall getting ever closer to your
group. The idea is to defeat Chillheart before the Ice Wall reaches your group
and kills everyone.
Ice Wall getting ever closer to your
group. The idea is to defeat Chillheart before the Ice Wall reaches your group
and kills everyone.
During this phase, all you have to do is focus on attacking her while making
sure to spread apart 2 yards (because of ![]() Ice Wrath) and to avoid the
ice patches from
Ice Wrath) and to avoid the
ice patches from ![]() Frigid Grasp.
Frigid Grasp.
Also, tanks and healers need to be respectively aware of
![]() Touch of the Grave, which causes Chillheart to deal additional Frost damage
with her 10 next melee attacks, and
Touch of the Grave, which causes Chillheart to deal additional Frost damage
with her 10 next melee attacks, and ![]() Wrack Soul, which is a DoT that jumps
from players to players.
Wrack Soul, which is a DoT that jumps
from players to players.
Phase Two
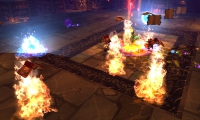 Once Chillheart is defeated, you enter Phase Two, where you get to fight her
Phylactery. During this phase, you will have to avoid
 ![]() Arcane Bombs
and patches of fire (
Arcane Bombs
and patches of fire (![]() Burn). Additionally, random players will
be regularly damaged by
Burn). Additionally, random players will
be regularly damaged by ![]() Shadow Bolt.
Shadow Bolt.
Jandice Barov
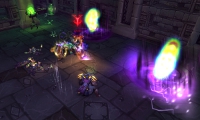 Most of the fight is very easy. Simply avoid standing in front of
Jandice Barov (because of
 ![]() Wondrous Rapidity) and get away from
Wondrous Rapidity) and get away from
![]() Gravity Flux, which has a very visible purple ground effect.
Gravity Flux, which has a very visible purple ground effect.
 At 66% and 33% health, she will create images of herself and hide behind one.
It is important that you kill the right image, as otherwise you will receive
damage from
 ![]() Flash Bang. The right image is the image that looks exactly
like Jandice (same hair color, same earrings, etc.). To find the right image,
you can mark Jandice at the beginning of the fight (with the Skull mark, for
example) or you can tab through all the images and look at their portrait in
your unit frames.
Flash Bang. The right image is the image that looks exactly
like Jandice (same hair color, same earrings, etc.). To find the right image,
you can mark Jandice at the beginning of the fight (with the Skull mark, for
example) or you can tab through all the images and look at their portrait in
your unit frames.
BarovHelper Addon
Using the BarovHelper addon will make it very easy to spot the real Jandice Barov during the phases when she creates copies of herself. This is especially useful when trying to run the dungeon in Challenge Mode.
Achievement: Attention to Detail
To complete ![]() Attention to Detail, you simply need to defeat
Jandice Barov without ever eliminating a false image.
Attention to Detail, you simply need to defeat
Jandice Barov without ever eliminating a false image.
Rattlegore
 The encounter with Rattlegore has one crucial mechanic to which you
need to pay special attention. Throughout the fight, everyone must maintain
the
 ![]() Bone Armor buff up on them by clicking the Bone Piles around the
room. The buff lasts 5 minutes and grants protection against
Bone Armor buff up on them by clicking the Bone Piles around the
room. The buff lasts 5 minutes and grants protection against ![]() Bone Spike,
a very damaging ability that Rattlegore often casts at a random player. Being
hit by Bone Spike removes Bone Armor, so the protection often needs to be
renewed.
Bone Spike,
a very damaging ability that Rattlegore often casts at a random player. Being
hit by Bone Spike removes Bone Armor, so the protection often needs to be
renewed.
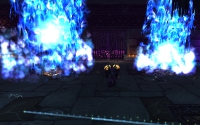 In addition, the locations where you find Bone Piles are sometimes engulfed in
damaging blue flames by
 ![]() Soulflame, so you need to be careful
not to stand in them.
Soulflame, so you need to be careful
not to stand in them.
Finally, tanks should be aware of ![]() Rusting, which causes
Rattlegore to deal increasing damage, but to move more and more slowly,
as the encounter progresses. The buff lasts 15 seconds, so you will
periodically want to kite Rattlegore to let the buff drop (because
the buff only stacks when he deals a successful melee attack).
Rusting, which causes
Rattlegore to deal increasing damage, but to move more and more slowly,
as the encounter progresses. The buff lasts 15 seconds, so you will
periodically want to kite Rattlegore to let the buff drop (because
the buff only stacks when he deals a successful melee attack).
Achievement: Rattle No More
To complete ![]() Rattle No More, your group needs to defeat Rattlegore
without letting him gain more than 5 stacks of
Rattle No More, your group needs to defeat Rattlegore
without letting him gain more than 5 stacks of ![]() Rusting.
Rusting.
Whenever Rattlegore reaches 4 or 5 stacks of ![]() Rusting, the tank
should start kiting him around until
Rusting, the tank
should start kiting him around until ![]() Rusting drops. Because of
the low uptime of the tank on Rattlegore, they will not manage to build
much threat, so DPS players must be careful not to over aggro.
Rusting drops. Because of
the low uptime of the tank on Rattlegore, they will not manage to build
much threat, so DPS players must be careful not to over aggro.
Flesh Horrors
In the next room, you will find Flesh Horrors. These mobs have a very large health pool, but they die as soon as you kill the 4 Meat Grafts attached to them.
Achievement: Sanguinarian
To complete ![]() Sanguinarian, you need to kill a Krastinovian Carver
that has 99 stacks of
Sanguinarian, you need to kill a Krastinovian Carver
that has 99 stacks of ![]() Boiling Bloodthirst.
Boiling Bloodthirst.
You will find Krastinovian Carvers in the same room as the
Flesh Horrors. Initially, all the Krastinovian Carvers have 1 stack of
![]() Boiling Bloodthirst. When you kill a Krastinovian Carver, its stack count
is added to that of nearby Krastinovian Carvers.
Boiling Bloodthirst. When you kill a Krastinovian Carver, its stack count
is added to that of nearby Krastinovian Carvers.
For example, if you are fighting 3 Krastinovian Carvers and kill one
of them, the other two will have 2 stacks of ![]() Boiling Bloodthirst (their
original stack count plus that of the Krastinovian Carver that just died). If
you kill one of the two remaining Krastinovian Carvers, the last one will have
4 stacks of Boiling Bloodthirst.
Boiling Bloodthirst (their
original stack count plus that of the Krastinovian Carver that just died). If
you kill one of the two remaining Krastinovian Carvers, the last one will have
4 stacks of Boiling Bloodthirst.
Our advice is to proceed through the room as you usually would and only kill a Krastinovian Carver if there are at least 2 other Krastinovian Carvers right next to it. If necessary, pull extra Carvers from the sides of the room.
Lilian Voss
The fight against Lilian Voss is rather complex and has three phases.
- During Phase One, you will fight her and will have to deal with her abilities. This phase lasts until Lilian reaches 60% health.
- During Phase Two, you will fight Lilian's Soul, which needs to be properly kited around. This phase lasts until you get the soul to 1% health.
- During Phase Three, you will simultaneously fight Lilian and her soul. Both retain their abilities from Phase One and Phase Two. The phase and the fight ends when Lilian reaches 1% health.
Phase One
When fighting Lilian, you should spread out 8 yards because of
![]() Shadow Shiv.
Shadow Shiv.
 She regularly pulls everyone to her location with
 ![]() Death's Grasp. When
this happens, you (and the other players in your party) become afflicted with
Death's Grasp. When
this happens, you (and the other players in your party) become afflicted with
![]() Dark Blaze. This debuff causes you to leave a trail of damaging flames
under you. You need to be constantly on the move for 8 seconds, until the
debuff runs out.
Dark Blaze. This debuff causes you to leave a trail of damaging flames
under you. You need to be constantly on the move for 8 seconds, until the
debuff runs out.
Other than that, the tank needs to survive her melee attacks.
Phase Two
 Darkmaster Gandling intervenes, disables Lilian, and makes you fight
her soul, which cannot be tanked. The soul will fixate on a random party member
with
 ![]() Fixate Anger. This player needs to kite the soul around and avoid
being hit by it, as it triggers
Fixate Anger. This player needs to kite the soul around and avoid
being hit by it, as it triggers ![]() Unleashed Anguish. While Unleash Anguish
reduces the soul's movement speed (making it easier to kite), it also causes it
to cast
Unleashed Anguish. While Unleash Anguish
reduces the soul's movement speed (making it easier to kite), it also causes it
to cast ![]() Blazing Soul, which deals damage to everyone in the party.
Blazing Soul, which deals damage to everyone in the party.
During that phase, healers can expect a significant amount of damage, because
![]() Blazing Soul is also regularly cast by the soul, in addition to being
a consequence of triggering
Blazing Soul is also regularly cast by the soul, in addition to being
a consequence of triggering ![]() Unleashed Anguish.
Unleashed Anguish.
Phase Three
In Phase Three, Darkmaster Gandling reactivates Lilian and you will face her alongside her soul. They both retain all their abilities from Phase One and Phase Two, but the soul cannot be damaged.
The key to success is to properly kite the soul, even when you have to run around
to let ![]() Dark Blaze expire.
Dark Blaze expire.
Professor Slate's Room
The next room is Professor Slate's classroom. There, you will
have to defeat a bunch of Bored Students. Everyone, except the tank
should stand behind them because of two abilities they use:
![]() Fire Breath Potion and
Fire Breath Potion and ![]() Shadow Nova.
Shadow Nova.
In the same room, you will also fight Professor Slate, whom you can
pull together with some of his student packs. Watch out for
![]() Fire Breath Potion, which he casts in front of him, and
Fire Breath Potion, which he casts in front of him, and ![]() Toxic Potion,
which he drops on the ground where it creates a damaging poison zone.
Toxic Potion,
which he drops on the ground where it creates a damaging poison zone.
Achievement: Polyformic Acid Science
Completing ![]() Polyformic Acid Science requires you to kill the following
bosses while under the effects of
Polyformic Acid Science requires you to kill the following
bosses while under the effects of ![]() Polyformic Acid Potion:
Polyformic Acid Potion:
- Commander Ri'mok in Gate of the Setting Sun;
- Gu Cloudstrike in Shado-Pan Monastery;
- Vizier Jin'bak in Siege of Niuzao Temple;
- Liu Flameheart in Temple of the Jade Serpent;
- Trial of the King in Mogu'shan Palace;
- Yan-Zhu the Uncasked in Stormstout Brewery.
You obtain the ![]() Polyformic Acid Potion buff by clicking the
Polyformic Acid Potion object in Professor Slate's classroom (first
row of desks).
Polyformic Acid Potion buff by clicking the
Polyformic Acid Potion object in Professor Slate's classroom (first
row of desks).
To avoid having to go back to Scholomance to obtain the buff again when it
drops, you can loot an ![]() Empty Polyformic Acid Vial from Professor Slate.
If you click the Polyformic Acid Potion object when you already have the
Empty Polyformic Acid Vial from Professor Slate.
If you click the Polyformic Acid Potion object when you already have the
![]() Polyformic Acid Potion buff, you will fill your vial and have up to 3 charges.
The vial changes name as you fill/empty it:
Polyformic Acid Potion buff, you will fill your vial and have up to 3 charges.
The vial changes name as you fill/empty it: ![]() Nearly Empty Vial of Polyformic Acid,
Nearly Empty Vial of Polyformic Acid,
![]() Half Full Vial of Polyformic Acid,
Half Full Vial of Polyformic Acid, ![]() Nearly Full Vial of Polyformic Acid.
Nearly Full Vial of Polyformic Acid.
Darkmaster Gandling
In the next room, you will finally get to fight Darkmaster Gandling.
This encounter is not difficult, but individual players (including healers)
are sometimes sent to a nearby room where they have to learn a
![]() Harsh Lesson and single-handedly defeat a number of enemies.
Harsh Lesson and single-handedly defeat a number of enemies.
Main Room
You will spend most of the encounter in the main room fighting the Darkmaster.
Tanks need to be aware of ![]() Incinerate, which the
Darkmaster uses to deal heavy Fire damage to his target.
Incinerate, which the
Darkmaster uses to deal heavy Fire damage to his target.
DPS players need to watch out for ![]() Rise!, which the boss
uses to summon Failed Students. These students attack random party
members. The channel of Rise! lasts for 26 seconds, during which
time the boss takes 50% less damage. Focus on the students while the boss is
channeling. When the channel is over, you can focus on the boss again and
finish remaining students with collateral damage.
Rise!, which the boss
uses to summon Failed Students. These students attack random party
members. The channel of Rise! lasts for 26 seconds, during which
time the boss takes 50% less damage. Focus on the students while the boss is
channeling. When the channel is over, you can focus on the boss again and
finish remaining students with collateral damage.
Healers need to pay attention to the damage that
![]() Incinerate does on the tank and the damage that the students
do to random players. Also, the Darkmaster will often cast
Incinerate does on the tank and the damage that the students
do to random players. Also, the Darkmaster will often cast
![]() Immolate at a random player, dealing large amounts of Fire
damage every 3 seconds for 21 seconds.
Immolate at a random player, dealing large amounts of Fire
damage every 3 seconds for 21 seconds.
Nearby Rooms
 The Darkmaster often casts
 ![]() Harsh Lesson, sending a random player to one
of the nearby rooms. There, they have to defeat a number of
Expired Test Subjects.
Harsh Lesson, sending a random player to one
of the nearby rooms. There, they have to defeat a number of
Expired Test Subjects.
- For Tanks and DPS players, things are straightforward, they just need to kill these units and come back to the main room.
- For Healers, things are slightly more complex. They need to gather the
Expired Test Subjects close to the Fresh Test Subjects at the back of the
room and then dispel
 Explosive Pain from the Fresh Test Subjects, this
will cause a large amount of damage to the Expired Test Subjects, eventually
killing them.
Achievement: School's Out Forever
To complete ![]() School's Out Forever, you need to defeat 50
Expired Test Subjects within 20 seconds. The main difficulty is that
all the nearby rooms are closed and the only way to enter them is to wait
for Darkmaster Gandling to cast
School's Out Forever, you need to defeat 50
Expired Test Subjects within 20 seconds. The main difficulty is that
all the nearby rooms are closed and the only way to enter them is to wait
for Darkmaster Gandling to cast ![]() Harsh Lesson on you.
Harsh Lesson on you.
When someone in your party is the target of ![]() Harsh Lesson, they should
not engage the Expired Test Subjects, but rather wait at the back of the room
that everyone has been sent to their own room. Then, everyone should engage
their Expired Test Subjects and defeat them.
Harsh Lesson, they should
not engage the Expired Test Subjects, but rather wait at the back of the room
that everyone has been sent to their own room. Then, everyone should engage
their Expired Test Subjects and defeat them.
Final Considerations
This concludes our Scholomance dungeon guide. If you find any inconsistency or mistake, feel free to comment or send us an e-mail.
- Blizzard Breaks Silence on Puzzling Cartel Chips in Patch 11.1.5
- Chalice Quest NPC Rewards Temporarily Disabled Disabled in Season of Discovery
- Has The Catalyst Killed Raiding or Improved the Game? WoW Heroic Raid Progression Since Legion
- Undercoin Transfers Now Possible on 11.1.5 PTR — Bug or Feature?
- The Music of Azeroth: Community’s Favorite Soundscapes
- This Hunter Transmog Turned Heads on Reddit—and Here’s the Full Item List
- What’s Still in Your Bags? Players Reveal the Weirdest Items They Can’t Delete
- Two Mounts Drop in the Scarlet Enclave Raid — Here’s Where to Get Them