The Butcher Detailed Strategy Guide (Heroic+Mythic Modes included)
Table of Contents
Introduction
This guide is intended to provide a comprehensive description of the encounter with The Butcher in Highmaul. It is targeted at anyone who desires to understand the fight mechanics.
This guide is updated for World of Warcraft WoD 6.1.2.
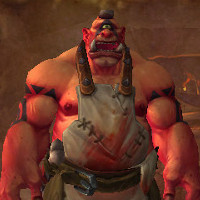
The Butcher is a boss in the Highmaul raid instance. The fight against The Butcher is a single-phase, single-target encounter, highly reminiscent of the Patchwerk encounter in Naxxramas. It will put a lot of strain on your tanks and healers, but it also requires accurate execution from your DPS players.
General Information
Normal, Heroic, and Mythic Difficulty
This main part of this guide covers both the Normal and Heroic versions of the encounter, as far as mechanics and general strategy is concerned. The only difference between these two modes is found in the tuning, with Heroic being more difficult.
When we speak of extreme situations (such as the difficulty of a soft enrage timer, or damage from a certain source being too high to survive), we mostly refer to Heroic mode.
In addition to this, we have a specific Mythic mode section, where we present all the differences between Normal/Heroic and Mythic, as well as the strategy to defeat the Mythic encounter.
Enrage Timer
The fight has a 5-minute hard enrage timer. There is no soft enrage mechanic, but The Butcher deals increased damage after he reaches 30% health, so this could eventually lead to deaths if your raid has to endure it for too long.
Summing Things Up
In this section, we will very briefly summarise what the players belonging to each of the three roles have to do during this fight. This is by no means meant to provide sufficient information to master the encounter, and it is only supposed to give you a very rough idea of what to watch out for.
Tanks
- The two tanks should stand within 5 yards of each other (preferably on top of each other).
- Perform a regular tank switch to deal with the debuffs applied by
 The Cleaver and
  The Tenderizer.
 - Make sure not to interfere with the positioning of the clumps of players
who are soaking
 Cleave.
 - In Mythic mode, tank The Butcher near to the edge of the fighting area, and not in the center.
Healers
- Watch out for the increased damage on a tank that has been tanking the boss for a longer period of time. Also keep in mind that both tanks will take damage at the same time.
- Watch out for additional damage after The Butcher reaches 30% health.
- In Mythic mode, pay attention to the health of the ranged DPS players who are incercepting and detonating the Night-Twisted Cadavers.
DPS
- DPS the boss.
- In Mythic mode, intercept the Night-Twisted Cadavers at the outer edges of the fighting area, if you are assigned to do so.
Everyone
- Be mindful of your assignment in groups, with regard to
Cleave, especially if you are assigned to move in and out to
alter the size of your group's clump. Tanks are excluded from this.
- When the boss casts
 Bounding Cleave, make sure not to stack
together with any other players unless you are specifically assigned to do
so.
Bounding Cleave, make sure not to stack
together with any other players unless you are specifically assigned to do
so. - In Mythic mode, make sure not to stand in the void zones left behind by the Night-Twisted Cadavers.
Overview of the Fight
The encounter against The Butcher is a single-phase fight. You will only face The Butcher, no other adds ever taking part in the fight. The main theme of the encounter is the fact that The Butcher regularly attacks and debuffs the largest group of players located in his melee range, and that after a certain number of debuff stacks, these players die. This means that throughout the fight, your raid will be using multiple groups of designated players to make sure that no one group will ever be killed.
Overall, The Butcher has a small number of abilities, and none of them are very complex.
We have released a video preview of the encounter against The Butcher, based on our (Heroic) Beta testing. You can watch this video to get a good idea of how the fight works, but keep in mind that some things can still change before the fight goes live.
A Note on Terminology
Throughout the guide, we will refer to clump to refer to a grouping of players that is susceptible to attract The Butcher's abilities. By contrast, we will use group to refer to a number of raid members organised by your raid leader to work together as a team (often to form a clump).
Abilities
 Heavy Handed passively causes all of The Butcher's auto attacks
to trigger a second attack on the next closest target within 5 yards of the
main target. If no such target exists, then the primary target is struck by
this second attack as well.
Heavy Handed passively causes all of The Butcher's auto attacks
to trigger a second attack on the next closest target within 5 yards of the
main target. If no such target exists, then the primary target is struck by
this second attack as well.- The Cleaver is an ability that The Butcher regularly uses to damage
his tank, applying a stacking 30-second bleed effect on them also called
The Cleaver. This ability requires a tank switch. The attack
will not apply its bleed component if it is avoided.
- The Tenderizer is another ability that The Butcher uses to damage
his tank. It deals high Physical damage to the target, and applies a 40-second
stacking debuff to them that causes them to take 50% increased damage from
The Tenderizer. This attack always hits, and it requires a tank switch.
- Cleave is The Butcher's main ability, which he uses
every 5 seconds throughout the fight. He targets the largest clump of
players in melee range and strikes them for a massive amount Physical damage.
The damage is split between all affected targets. All players hit by
Cleave are debuffed with
 Gushing Wounds.
- Gushing Wounds is a stacking bleed effect that lasts for 15
seconds. If Gushing Wounds reaches 5 stacks, the target instantly dies.
- Bounding Cleave is an ability that The Butcher uses when he
reaches 100 Energy (this happens exactly every 60 seconds before The Butcher
reaches 30% health, and every 30 seconds after that). The Butcher knocks
all players away from him, and then charges to the largest clump of players
(located away from The Butcher) a few seconds later, casting
Cleave on them.
 Meat Hook is an ability that The Butcher uses to pull his tank
to him. We assume that this ability exists to prevent The Butcher from
being kited, but it is not otherwise in use during the fight.
Meat Hook is an ability that The Butcher uses to pull his tank
to him. We assume that this ability exists to prevent The Butcher from
being kited, but it is not otherwise in use during the fight.- When The Butcher reaches 30% health, he goes into a Frenzy. He deals deals 10% more damage, and his attack speed is increased by 30%. During this time, he also regenerates Energy twice as fast (completing a full cycle in 30 seconds).
Strategy
The strategy for the fight against The Butcher revolves heavily on your
raid setting up two groups of players to handle ![]() Cleave.
Aside from this, your tanks will need to perform regular tank switches, and
have a relatively precise position, and lastly, your raid will have to handle
The Butcher's
Cleave.
Aside from this, your tanks will need to perform regular tank switches, and
have a relatively precise position, and lastly, your raid will have to handle
The Butcher's ![]() Bounding Cleave. We treat each of these issues in their
own sub-sections below, starting with the tasks of the tanks, because that is
the first step your raid must perform correctly.
Bounding Cleave. We treat each of these issues in their
own sub-sections below, starting with the tasks of the tanks, because that is
the first step your raid must perform correctly.
Tanking The Butcher
There are three constraints that your raid's tanks are subject to during this encounter.
- The off-tank must stand within 5 yards of the tank currently tanking The
Butcher. This needed to counter The Butcher's Heavy Handed
ability.
- The tanks will need to perform a tank switch whenever the number of stacks
from The Cleaver and The Tenderizer on the active tank are too
high.
- The tanks will have to make sure that they are not too close to any
clump of players that is meant to be hit by Cleave, so as to
avoid the Gushing Wounds debuff.
Giving more specific information is difficult. There is no ideal or highly recommended tanking position, though somewhere in the center of the arena is better because it gives your raid more space to work with.
Likewise, it is difficult to say at how many stacks of the debuffs your
tanks should perform a switch. This will depend greatly on the damage that the
boss does, the gear of the tanks, and the ability of the healers. Regarding
these debuffs, it is worth mentioning that the tank can try to reduce the
number of stacks applied by ![]() The Cleaver by using active mitigation
to attempt to avoid some applications. This will result in less overall damage,
and can make things safer, but it cannot eliminate the need for a tank switch,
since the debuff applied by
The Cleaver by using active mitigation
to attempt to avoid some applications. This will result in less overall damage,
and can make things safer, but it cannot eliminate the need for a tank switch,
since the debuff applied by ![]() The Tenderizer cannot in any way be
avoided.
The Tenderizer cannot in any way be
avoided.
The tanks should be able to remain perfectly still for the entire
duration of the fight (with The Butcher walking back to them after charging
players following a ![]() Bounding Cleave), so interfering with the
positioning of the groups of players assigned to handle the
Bounding Cleave), so interfering with the
positioning of the groups of players assigned to handle the
![]() Cleave is not really something that the tanks need to be
too concerned about, as long as they do not move around erratically.
Cleave is not really something that the tanks need to be
too concerned about, as long as they do not move around erratically.
Cleave and Bounding Cleave
As stated above, The Butcher will use ![]() Cleave every 5
seconds throughout the fight, targeting the largest clump of players in
his melee range. This applies a bleed effect called
Cleave every 5
seconds throughout the fight, targeting the largest clump of players in
his melee range. This applies a bleed effect called ![]() Gushing Wounds to
these players. The damage of Gushing Wounds was not very problematic on the
Beta. The problem comes from the fact that when Gushing Wounds reaches 5
stacks, affected players are instantly killed. So, in order to deal with
Cleave, you will have to form 2 groups in your raid. We call these groups
Group A and Group B.
Gushing Wounds to
these players. The damage of Gushing Wounds was not very problematic on the
Beta. The problem comes from the fact that when Gushing Wounds reaches 5
stacks, affected players are instantly killed. So, in order to deal with
Cleave, you will have to form 2 groups in your raid. We call these groups
Group A and Group B.
Split the Raid in 2 Groups
The 2 groups should have the same size, and they should be comprised of your raid's DPS players (ideally). In each group, one player should be designated to move in and out of the group to change its size as needed.
The 2 groups will spend the fight located on opposite sides of The Butcher, in his melee range (and away from the tanks). If we take the example of 2 groups of 6 players, here is what they should do during the encounter.
- Players 1-6 of Group A start the fight clumped together next to The Butcher, while players 1-5 of Group B do the same, with player 6 of Group B standing at range. This will cause Group A to be targeted by The Butcher's Cleave.
- When Group A reaches 4 stacks of Gushing Wounds, player 6 of Group A moves away from the clump, and player 6 of Group B moves into Group B's clump. This will force The Butcher to cleave Group B.
- When Group B reaches 4 stacks of Gushing Wounds, player 6 of Group B moves away from the clump, and player 6 of Group A moves back into Group A's clump. This will force The Butcher to cleave Group A again.
- Repeat this cycle until The Butcher dies.
Introducing Bounding Cleave in the Mix
When The Butcher knocks everyone back in preparation for
![]() Bounding Cleave, Group B should make sure to stay stacked up where
they are knocked back (so, away from The Butcher), while Group A can move
back into The Butcher's melee range and continue to DPS. The Butcher will
charge the largest clump of players at range (this should be Group B), Cleave
them (applying a stack of
Bounding Cleave, Group B should make sure to stay stacked up where
they are knocked back (so, away from The Butcher), while Group A can move
back into The Butcher's melee range and continue to DPS. The Butcher will
charge the largest clump of players at range (this should be Group B), Cleave
them (applying a stack of ![]() Gushing Wounds in the process), and
then resume his usual rotation of Cleaving the largest group in
his melee range. So, after being charged and cleaved, Group B will simply
move back into the Butcher's melee range and the strategy will continue as
outlined above.
Gushing Wounds in the process), and
then resume his usual rotation of Cleaving the largest group in
his melee range. So, after being charged and cleaved, Group B will simply
move back into the Butcher's melee range and the strategy will continue as
outlined above.
It goes without saying that you should time the rotation of the groups
in such a way that Group B does not have 4 stacks of ![]() Gushing Wounds when
Bounding Cleave happens. Otherwise, all the players in the group will get a
5th stack of Gushing Wounds and die.
Gushing Wounds when
Bounding Cleave happens. Otherwise, all the players in the group will get a
5th stack of Gushing Wounds and die.
Group Composition
Regarding the composition of the two groups, we recommend that Group A should contain all the melee DPS players in your raid as well as one ranged DPS player (who will move in and out when needed), while group B should be comprised exclusively of ranged DPS players. If you have more melee DPS players than ranged ones, place any additional melee DPS players in Group B. If you have fewer melee DPS players than ranged players, fill the rest of group A with ranged DPS players. Doing so ensures that your melee DPS can run up to the boss as soon as they are knocked back for Bounding Cleave and can continue to deal damage.
Alternate Bounding Cleave Strategy
Another option for handling ![]() Bounding Cleave is to use a third group
of players,
whose only purpose is to quickly stack up when Bounding Cleave happens, in
order to attract The Butcher to them. Obviously, this requires that none of
these players be part of the other two groups, and that no other raid
members accidentally form a larger clump (thus attracting The Butcher to that
group instead).
Bounding Cleave is to use a third group
of players,
whose only purpose is to quickly stack up when Bounding Cleave happens, in
order to attract The Butcher to them. Obviously, this requires that none of
these players be part of the other two groups, and that no other raid
members accidentally form a larger clump (thus attracting The Butcher to that
group instead).
Frenzy
When The Butcher reaches 30% health, he goes into a frenzy and deals slightly more damage with his attacks. In addition to this, however, he also attacks 30% faster and gains Energy 50% faster.
Despite the fact that The Butcher casts ![]() Bounding Cleave every 30
seconds instead of every 60 seconds at this time, the strategy remains
unchanged. Your raid will simply
be more prone to dying, and you will need to use every ability and cooldown
in your arsenal to finish off the boss before your raid dies (and before the
hard enrage timer is triggered).
Bounding Cleave every 30
seconds instead of every 60 seconds at this time, the strategy remains
unchanged. Your raid will simply
be more prone to dying, and you will need to use every ability and cooldown
in your arsenal to finish off the boss before your raid dies (and before the
hard enrage timer is triggered).
Note also that tank damage is greatly increased at this time.
When to Use Heroism/Bloodlust/Time Warp
We recommend using ![]() Heroism/
Heroism/![]() Bloodlust/
Bloodlust/![]() Time Warp when
The Butcher reaches 30% health. At this time, he goes into his Frenzy,
dealing more damage, attacking faster, and gaining Energy at a higher rate,
all of which makes it more difficult to survive.
Time Warp when
The Butcher reaches 30% health. At this time, he goes into his Frenzy,
dealing more damage, attacking faster, and gaining Energy at a higher rate,
all of which makes it more difficult to survive.
Mythic Mode
The Mythic mode of The Butcher encounter is a brutal gear check that will test your raid's DPS above all else. There is a single new mechanic in the encounter, meaning that overall the strategy remains very similar to the Normal/Heroic mode strategy.
Differences From Normal/Heroic Mode
As with all Mythic modes, the boss deals more damage with all his abilities and has more health. Aside from this, there is one new mechanic present in the encounter.
Throughout the fight, adds called Night-Twisted Cadavers will enter the fighting area. These adds always enter from the opposite side of where The Butcher is. They have no health pools, they cannot be damaged, and they walk slowly towards the boss. When they come in contact with the boss or with a player, they explode, and at this time two things happen.
- They cast
 Paleobomb, which deals a very high amount of Physical
damage in an 8-yard radius (this damage ignores armor).
Paleobomb, which deals a very high amount of Physical
damage in an 8-yard radius (this damage ignores armor). - They leave behind a void zone called
 Pale Vitriol. Any raid
members who enter the void zone take a high amount of Shadow damage every
second, and they are also debuffed to take 100% more damage from The Butcher's
Cleave. These players also have their movement speed
reduced by 30%.
Pale Vitriol. Any raid
members who enter the void zone take a high amount of Shadow damage every
second, and they are also debuffed to take 100% more damage from The Butcher's
Cleave. These players also have their movement speed
reduced by 30%.
The number of Night-Twisted Cadavers that enter the fight increases as
the encounter progresses, with their numbers growing each time The Butcher
casts ![]() Bounding Cleave.
Bounding Cleave.
On the Beta, it was the case that on Mythic, players would instantly die
when reaching 4 stacks of ![]() Gushing Wounds, instead of 5, but this is
no longer present in the dungeon journal. We will update the guide when we know
more.
Gushing Wounds, instead of 5, but this is
no longer present in the dungeon journal. We will update the guide when we know
more.
Strategy
The biggest change to the strategy for this fight is that your raid will have to assign several ranged DPS players (ideally Hunters and Mages) to intercept the Night-Twisted Cadavers as they enter the fight, detonating them around the edges of the fighting area. A few things should be kept in mind regarding this task.
- As the Pale Vitriol void zones are permanent, your raid will
have to make sure that the Night-Twisted Cadavers explode around the outside
of the room, where they will not inconvenience the raid's positioning.
- To conserve space, raid members should try to have the Night-Twisted Cadavers explode in such a way that the resulting void zones overlap slightly, or at the very least are right next to each other.
- The Butcher should not be tanked in the center of the room. Tanking him to one side ensures that the Cadavers will enter the fight from the opposite side, giving the raid more time and space to intercept them before they reach the boss.
- The players who intercept the Night-Twisted Cadavers should not be part of
any Cleave-soaking groups, and players in the Cleave-soaking
groups should make sure not to enter the Pale Vitriol void zones.
The damage done by ![]() Paleobomb is high, but it is not fatal. As long
as healers are making sure to keep the soakers topped off, these players should
not be in any danger of dying.
Paleobomb is high, but it is not fatal. As long
as healers are making sure to keep the soakers topped off, these players should
not be in any danger of dying.
If it is true that players can only take 4 stacks of
![]() Gushing Wounds before dying, then your raid will also need to adjust
the group set-up to include 3 groups instead of only 2, in order for the
debuff to have time to drop off (and especially to be able to deal with
Gushing Wounds before dying, then your raid will also need to adjust
the group set-up to include 3 groups instead of only 2, in order for the
debuff to have time to drop off (and especially to be able to deal with
![]() Bounding Cleave).
Bounding Cleave).
Aside from this, nothing changes in the execution of the fight, but it becomes even more of a DPS race.
Learning the Fight
Without a doubt, the most challenging aspect of this fight is making sure
your raid is properly set up for dealing with The Butcher's
![]() Cleave. You should make sure to have the best possible
group assignments for this task, and depending on how your attempts go, you
should try to tweak these groups to improve performance (like increasing the
number of players in each group if the damage is too high to heal).
Cleave. You should make sure to have the best possible
group assignments for this task, and depending on how your attempts go, you
should try to tweak these groups to improve performance (like increasing the
number of players in each group if the damage is too high to heal).
Aside from this, the fight will just test your raid's gear level, especially as far as DPS is concerned, with the enrage timer possibly being very punishing.
Loot
In this section, you will find the loot table for The Butcher. The section is divided in 3 subsections: armor, weapons, and the rest (neck, back, finger, and trinket items).
Armor
| Item Name | Armor | Slot | Secondary Stats |
|---|---|---|---|
| Cloth | Shoulders |
|
|
| Cloth | Hands |
|
|
| Cloth | Hands |
|
|
| Leather | Wrists |
|
|
| Leather | Wrists |
|
|
| Leather | Waist |
|
|
| Head |
|
||
| Feet |
|
||
| Plate | Hands |
|
|
| Plate | Feet |
|
|
| Plate | Feet |
|
Weapons
| Item Name | Type | Main Stats | Secondary Stats |
|---|---|---|---|
| 1H Mace | Intellect |
|
|
| 1H Axe | Strength |
|
|
| 1H Axe | Strength |
|
Amulets, Cloaks, Rings, and Trinkets
| Item Name | Type | Main Stats | Secondary Stats |
|---|---|---|---|
| Cloak |
|
|
|
| Cloak | Strength |
|
|
| Ring | Intellect |
|
|
| Ring | Agility |
|
|
| Ring |
|
|
|
| Trinket | Intellect | Haste | |
| Trinket | Agility | Multistrike on proc |
Concluding Remarks
This concludes our raid guide for The Butcher. We hope you have found it helpful. Please do not hesitate to post any feedback you may have on our forums.
Changelog
- 09 Dec. 2014: Added Mythic mode strategy.
- 03 Dec. 2014: Improved Cleave + Bounding Cleave explanations.
- Blizzard Breaks Silence on Puzzling Cartel Chips in Patch 11.1.5
- Chalice Quest NPC Rewards Temporarily Disabled Disabled in Season of Discovery
- Has The Catalyst Killed Raiding or Improved the Game? WoW Heroic Raid Progression Since Legion
- Undercoin Transfers Now Possible on 11.1.5 PTR — Bug or Feature?
- The Music of Azeroth: Community’s Favorite Soundscapes
- This Hunter Transmog Turned Heads on Reddit—and Here’s the Full Item List
- What’s Still in Your Bags? Players Reveal the Weirdest Items They Can’t Delete
- Two Mounts Drop in the Scarlet Enclave Raid — Here’s Where to Get Them