The Queen's Court Strategy Guide in The Eternal Palace Raid
Welcome to our strategy guide for the encounter with The Queen's Court in The Eternal Palace raid. Here, you will first find the strategy to defeat the boss, followed by a detailed analysis of the abilities.
To familiarize yourself with the encounter, we suggest you watch this short video guide from Hazel Nutty.
Fight Overview
The Queen's Court is a single-phase encounter where the raid faces two bosses at the same time: Silivaz the Zealous and Pashmar the Fanatical, with Queen Azshara providing support by casting spells at the raid. To defeat them, your raid will have to spend the entire fight mostly reacting to the various positioning and movement constraints imposed by the many abilities. On Heroic and Mythic difficulties, properly timed DPS against the Potent Spark adds is also very important.
Strategy / Fight Summary
Below, we will go over everything your raid needs to do to manage all that goes on in the fight and, and then we will also go over handling the various abilities used by Queen Azshara.
- Tanks must make sure the two bosses are always at least 22 yards apart so that they do not take reduced damage.
- Tanks must also switch the bosses before Pashmar's tank reaches
10 stacks of
 Pashmar's Touch.
 - DPS players must DPS the bosses evenly, so that they both die within 10 seconds of one another, or else they will heal.
- DPS players must make sure that the Potent Spark adds are killed one at a time, at least 5 seconds apart from one another.
- Players marked by
 Frenetic Charge need to move to an edge of the
room to drop the void zone that will result when Pashmar charges them.
Frenetic Charge need to move to an edge of the
room to drop the void zone that will result when Pashmar charges them.- A number of raid members will have to stack on the Frenetic Charge
player to split the damage the boss's charge does.
- A number of raid members will have to stack on the
- Players targeted by
 Fanatical Verdict must move at least 6 yards
away from allies when the debuff expires, to avoid damaging them.
Fanatical Verdict must move at least 6 yards
away from allies when the debuff expires, to avoid damaging them. - Everyone (except Pashmar's tank) must stack within the safe radius around
Silivaz when she casts
 Zealous Eruption.
 - Everyone will have to move at least 25 yards away from Pashmar when she
casts
 Violent Outburst.
 Bosses must be tanked at least 22 yards aparts
 Potent Spark add
 Stacking up for
  Build up of


In addition to the requirements above, players must also take into account the abilities of Queen Azshara, and handle them accordingly. She uses one of the following abilities every minute.
- When
 Form Ranks is cast, one player will have to make sure to
soak each of the resulting void zones, to reduce the amount of raid
damage.
Form Ranks is cast, one player will have to make sure to
soak each of the resulting void zones, to reduce the amount of raid
damage. - When
 Repeat Performance is active, players must avoid using the
same ability twice in a row. Abilities that are off the global cooldown
(such as interrupts) are a good way to split up sequences of the same
ability.
Repeat Performance is active, players must avoid using the
same ability twice in a row. Abilities that are off the global cooldown
(such as interrupts) are a good way to split up sequences of the same
ability. - When
 Stand Alone is active, all raid members must spread out at
least 6 yards apart.
Stand Alone is active, all raid members must spread out at
least 6 yards apart. - When
 Deferred Sentence is active, all players must make sure to
move often enough to keep the number of stacks that build up low, thus
reducing the damage they take from this ability.
Deferred Sentence is active, all players must make sure to
move often enough to keep the number of stacks that build up low, thus
reducing the damage they take from this ability. - When
 Obey or Suffer is active, all players must pay special
attention not to take damage.
Obey or Suffer is active, all players must pay special
attention not to take damage.

As you can tell, it is a challenge to handle all of the above positioning constraints. Simply put, some raid members will invariably take avoidable damage; this is something you should accept can happen, and unless the failures are chained together, your raid should still be able to pull through.
With that said, you must focus on the truly important tasks: making sure
the bosses die within 10 seconds of each other, staggering the deaths of the
Potent Sparks, and avoiding the most potentially damaging abilities
(unsoaked ![]() Form Ranks explosions, unsplit
Form Ranks explosions, unsplit ![]() Frenetic Charges).
Frenetic Charges).
Boss Positioning and Tanking
The first positioning constraint your raid needs to deal with is having the
two bosses at least 22 yards apart from one another, to prevent them taking
99% reduced damage due to ![]() Separation of Power. As your tanks swap
the bosses they are each tanking, the bosses may move and get within range of
one another, but this is not really a big issue if it happens for just a few
seconds, and it will mostly simply frustrate your DPS players slightly.
Separation of Power. As your tanks swap
the bosses they are each tanking, the bosses may move and get within range of
one another, but this is not really a big issue if it happens for just a few
seconds, and it will mostly simply frustrate your DPS players slightly.
When Pashmar's tank nears 10 stacks of ![]() Pashmar's Touch (but
definitely before reaching it), the tanks will need to perform a swap. It is
up to you if you want to keep the tanks in place and move the bosses, or vice
versa. The
Pashmar's Touch (but
definitely before reaching it), the tanks will need to perform a swap. It is
up to you if you want to keep the tanks in place and move the bosses, or vice
versa. The ![]() Commander's Fury buff that Silivaz stacks on herself will
also be reset by this tank swap, but this is not a debuff you need to worry
about especially (although Silivaz's tank may need to use some minor cooldowns
in the time leading up to the swap, when the stacks are at their highest).
Commander's Fury buff that Silivaz stacks on herself will
also be reset by this tank swap, but this is not a debuff you need to worry
about especially (although Silivaz's tank may need to use some minor cooldowns
in the time leading up to the swap, when the stacks are at their highest).
Pashmar's tank should remain with the boss when Silivaz casts
![]() Zealous Eruption. This means the tank will not be able to get to the
safe zone, and so will take a lot of damage; defensive cooldowns and
attention from the healers will be required.
Zealous Eruption. This means the tank will not be able to get to the
safe zone, and so will take a lot of damage; defensive cooldowns and
attention from the healers will be required.
Finally, tanks should beware that during ![]() Obey or Suffer there will
be times when they are affected by
Obey or Suffer there will
be times when they are affected by ![]() Suffer! and cannot receive healing.
This is partly the responsibility of the healers, who must ensure that the
tanks are topped off before Suffer is applied, but the tanks should also use
some damage mitigation abilities here to help out.
Suffer! and cannot receive healing.
This is partly the responsibility of the healers, who must ensure that the
tanks are topped off before Suffer is applied, but the tanks should also use
some damage mitigation abilities here to help out.
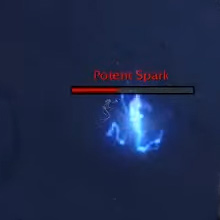
Killing Potent Sparks
If ignored, all 3 Potent Sparks will die at the same time due to
their progressive health degeneration. If this happens, the raid will almost
certainly wipe due to the concerted damage from their
![]() Potent Spark explosions.
Potent Spark explosions.
As a result, you will need to kill them in a staggered fashion. The easiest way of doing this is for the raid leader to mark one kill target at a time, and for DPS players to make sure that they take enough time in between kills to allow the raid to recover their health (and for the 5-second damage-increasing debuff to expire, in Heroic and Mythic modes).
Theoretically, you will "save" some DPS by ignoring the last Potent Spark and letting it die due to its own degeneration. At the same time, however, you may benefit from simply investing a bit of DPS into finishing it off, so that you can decide exactly when it dies and so that the damage does not overlap with something else going on in the fight.
Overlapping Abilities
Form Ranks and Zealous Eruption
If a ![]() Zealous Eruption happens during
Zealous Eruption happens during ![]() Form Ranks. To allow
players to soak the Zealous Eruption void zones while also being in Silivaz's
safe zone, she should be tanked near these void zones.
Form Ranks. To allow
players to soak the Zealous Eruption void zones while also being in Silivaz's
safe zone, she should be tanked near these void zones.
Stand Alone
![]() Stand Alone, which damages players who are within 5 yards of each
other and requires players to spread out, interferes with stacking up to split
the damage of
Stand Alone, which damages players who are within 5 yards of each
other and requires players to spread out, interferes with stacking up to split
the damage of ![]() Frenetic Charge and to stay in the safe zone for
Frenetic Charge and to stay in the safe zone for
![]() Zealous Eruption.
Zealous Eruption.
In both of these cases, taking damage from ![]() Stand Alone is preferable
to taking damage from the other abilities by trying to avoid Stand Alone.
Stand Alone is preferable
to taking damage from the other abilities by trying to avoid Stand Alone.
Heroism/Bloodlust/Time Warp
Since the fight is single-phase and does not get more difficult as it
progresses, we recommend using
![]() Heroism/
Heroism/![]() Bloodlust/
Bloodlust/![]() Time Warp at the pull, in order to
maximize raid DPS during cooldowns and potions.
Time Warp at the pull, in order to
maximize raid DPS during cooldowns and potions.
Summary for Tanks
- Tank the two bosses at least 22 yards apart from one another for the entire duration of the fight, to prevent them from taking reduced damage.
- Perform a tank swap before Pashmar's tank reaches 10 stacks of the
Pashmar's Touch debuff.
- During the Obey or Suffer decree, healing on you will be prevented
for 5 seconds at a time, and you should have cooldowns prepared for this.
Summary for Healers and DPS
- The player marked by Frenetic Charge must move to the edge of
the room to drop the
 Mighty Rupture void zone before they are
charged.
Mighty Rupture void zone before they are
charged.- Other raid members must stack on this player to split the damage of the charge.
- Players affected by Fanatical Verdict must move more than 6
yards away from other raid members when their debuff expires.
- Move in around Silivaz when Zealous Eruption is being cast, to
avoid taking damage.
- Move away from Pashmar when Violent Outburst is about to be
cast.
- DPS the 3 Potent Sparks down in such a way that they die in a staggered fashion, more than 5 seconds apart.
Additionally, you must deal with Queen Azshara's decrees.
- One player must soak each void zone created by Form Ranks.
- All players must avoid using the same spell or ability twice in a row
during Repeat Performance.
- All raid members must spread out more than 5 yards during
Stand Alone.
- Players must move frequently during Deferred Sentence.
- Players must avoid taking any damage during Obey or Suffer.
Abilities
The Queen's Court encounter is a single-phase encounter during which the raid must face two bosses at the same time: Silivaz the Zealous and Pashmar the Fanatical.
The bosses do not share health, and when either
boss is brought to 1 health (basically "killed"), they will become immune and
start casting ![]() Desperate Measures. This 10-second cast will heal the
boss to full health if it completes, and the only way to stop it is to also
bring the other boss to 1 health in time. In other words, the two bosses must
be killed within 10 seconds of one another, or they will heal up.
Desperate Measures. This 10-second cast will heal the
boss to full health if it completes, and the only way to stop it is to also
bring the other boss to 1 health in time. In other words, the two bosses must
be killed within 10 seconds of one another, or they will heal up.
The bosses are also affected by ![]() Separation of Power when they are
within 22 yards of one another, which reduces the damage that they take by
99%.
Separation of Power when they are
within 22 yards of one another, which reduces the damage that they take by
99%.
In the sections that follow we will look at each of the abilities used by the bosses, as well as at some abilities that Queen Azshara (who is not part of the fight) uses to complicate the fight further.
Silivaz the Zealous
Commander's Fury (Tank Swap Ability)
![]() Commander's Fury is a buff that Silivaz stacks on herself with each
consecutive attack against the same target. This increases her attack speed
by 8% per stack.
Commander's Fury is a buff that Silivaz stacks on herself with each
consecutive attack against the same target. This increases her attack speed
by 8% per stack.
Frenetic Charge
![]() Frenetic Charge is an ability that Silivaz uses to mark a player,
and then charge to them 4 seconds later. When Silivaz charges to the player,
they and anyone else in an 8-yard radius around them are knocked back and
take a large amount of Nature damage split between them.
Frenetic Charge is an ability that Silivaz uses to mark a player,
and then charge to them 4 seconds later. When Silivaz charges to the player,
they and anyone else in an 8-yard radius around them are knocked back and
take a large amount of Nature damage split between them.
Moreover, a ![]() Mighty Rupture void zone appears at the location where
the player was charged. This deals high Frost damage every 2 seconds to
player standing in it. Mighty Rupture void zones appear to last
indefinitely.
Mighty Rupture void zone appears at the location where
the player was charged. This deals high Frost damage every 2 seconds to
player standing in it. Mighty Rupture void zones appear to last
indefinitely.
Zealous Eruption
![]() Zealous Eruption is an ability that practically deals raid-wide
Frost damage every second for 10 seconds, except for an area around the boss
(about a 20-yard radius around the boss) which is safe from the damage.
Zealous Eruption is an ability that practically deals raid-wide
Frost damage every second for 10 seconds, except for an area around the boss
(about a 20-yard radius around the boss) which is safe from the damage.
Pashmar the Fanatical
Potent Spark
Throughout the fight, Pashmar spawns groups of 3 Potent Spark adds. These adds have no aggro, do not melee and do not need to be tanked.
While alive, these adds lose 2% of their health every second, and they
have no other abilities. When they are killed,
however, they cast ![]() Potent Spark, dealing a moderate amount of
raid-wide damage. On Heroic and Mythic difficulties, this explosion also
debuffs the raid to take 100% increased Potent Spark damage for 5
seconds.
Potent Spark, dealing a moderate amount of
raid-wide damage. On Heroic and Mythic difficulties, this explosion also
debuffs the raid to take 100% increased Potent Spark damage for 5
seconds.
Pashmar's Touch (Tank Debuff)
![]() Pashmar's Touch is a debuff that Pashmar stacks on her current
target. This debuff does nothing, but if it reaches 10 stacks, the target will
become charmed by Pashmar.
Pashmar's Touch is a debuff that Pashmar stacks on her current
target. This debuff does nothing, but if it reaches 10 stacks, the target will
become charmed by Pashmar.
Fanatical Verdict
![]() Fanatical Verdict is a debuff that the boss marks random players
with. The debuff lasts for 8 seconds (or so it seems from the PTR),
and while it is active it does nothing. When it expires, however, it deals
a moderate amount of Nature damage to all players in a 6-yard radius of the
target.
Fanatical Verdict is a debuff that the boss marks random players
with. The debuff lasts for 8 seconds (or so it seems from the PTR),
and while it is active it does nothing. When it expires, however, it deals
a moderate amount of Nature damage to all players in a 6-yard radius of the
target.
Fervent Bolt
![]() Fervent Bolt is an ability that Pashmar uses to target random
players with. It deals a low amount of Nature damage.
Fervent Bolt is an ability that Pashmar uses to target random
players with. It deals a low amount of Nature damage.
Violent Outburst
![]() Violent Outburst is an ability Pashmar uses to deal raid-wide
damage. It has a 5-second cast time, and at the end of the cast, everyone will
take an amount of Nature damage that is lower the farther away players are
from Pashmar.
Violent Outburst is an ability Pashmar uses to deal raid-wide
damage. It has a 5-second cast time, and at the end of the cast, everyone will
take an amount of Nature damage that is lower the farther away players are
from Pashmar.
Queen Azshara's Decrees
Throughout the fight, Queen Azshara will "pass decrees", which in most cases means that the raid will be debuffed by something and will need to perform a certain task to avoid taking damage.
Azshara uses her first decree ability 30 seconds into the fight, and then every 60 seconds after that (every 45 seconds in Heroic, and every 30 seconds in Mythic). She always uses the 5 abilities listed below in succession, after which point she re-starts from the beginning.
Form Ranks
![]() Form Ranks causes 3 void zones to appear in the center of the
encounter area which, which explode after 5 seconds, dealing very high
raid-wide Arcane damage. If a player soaks a void zone, then the amount of
raid-wide damage is much lower.
Form Ranks causes 3 void zones to appear in the center of the
encounter area which, which explode after 5 seconds, dealing very high
raid-wide Arcane damage. If a player soaks a void zone, then the amount of
raid-wide damage is much lower.
After the void zones explode there is a 5-second break, after which 3 more void zones appear, and this repeats 3 times over a total duration of 30 seconds.
Repeat Performance
![]() Repeat Performance is a 30-second debuff that Azshara applies to the
entire raid, which punishes raid members who cast the spell or use the same
ability twice in a row. Players who do this are silenced and pacified for 2
seconds.
Repeat Performance is a 30-second debuff that Azshara applies to the
entire raid, which punishes raid members who cast the spell or use the same
ability twice in a row. Players who do this are silenced and pacified for 2
seconds.
Stand Alone
![]() Stand Alone is a 30-second debuff that Azshara places on the entire
raid, which deals a low amount of Frost damage to any players who are within
5 yards of another player.
Stand Alone is a 30-second debuff that Azshara places on the entire
raid, which deals a low amount of Frost damage to any players who are within
5 yards of another player.
Deferred Sentence
![]() Deferred Sentence is a 30-second debuff that Azshara places on all
raid members, which gains stacks when the players stand still. When players
move, they take damage depending on how many stacks they have, and they also
lose stacks while moving. At the end of the 30-second duration of the debuff,
players will take a burst of damage depending on how many stacks they had
at the time.
Deferred Sentence is a 30-second debuff that Azshara places on all
raid members, which gains stacks when the players stand still. When players
move, they take damage depending on how many stacks they have, and they also
lose stacks while moving. At the end of the 30-second duration of the debuff,
players will take a burst of damage depending on how many stacks they had
at the time.
Obey or Suffer
![]() Obey or Suffer is a 30-second debuff that Azshara places on the
entire raid, which causes players who take damage during this time to
be debuffed by
Obey or Suffer is a 30-second debuff that Azshara places on the
entire raid, which causes players who take damage during this time to
be debuffed by ![]() Suffering for 5 seconds, preventing them from receiving
any healing.
Suffering for 5 seconds, preventing them from receiving
any healing.
It is important to note that the 5-second duration of ![]() Suffering
is not refreshed by taking damage multiple times while it is active, nor can it
be reapplied immediately after expiring (there is around a 5-second grace
period).
Suffering
is not refreshed by taking damage multiple times while it is active, nor can it
be reapplied immediately after expiring (there is around a 5-second grace
period).
Heroic Difficulty Changes
In Heroic mode, the Potent Sparks leave behind a 5-second debuff on
the entire raid when they die, which increases the damage taken from the
![]() Potent Spark detonations.
Potent Spark detonations.
Also, Queen Azshara's decrees are cast every 45 seconds in Heroic, down from 60.
Mythic Difficulty Changes
In Mythic mode, the decrees are cast every 30 seconds (down from 60/45 in the other modes).
Moreover, there are 5 flags located around the edges of the room, each
associated with one of Azshara's decrees. When that decree is cast by Azshara,
the respective flag activates (triggering a ![]() Sphere of Influence).
Depending on the flag, it will either increase the damage or the duration of
the respective decree, in a large area around the flag.
Sphere of Influence).
Depending on the flag, it will either increase the damage or the duration of
the respective decree, in a large area around the flag.
Screenshot Credit
We thank Gildart for the screenshots we used.
Loot
| Item> | Type | Slot |
|---|---|---|
| Dagger | ||
| Frill | Off Hand | |
| Wand | ||
| Cloth Armor | Shoulders | |
| Leather Armor | Chest | |
| Leather Armor | Feet | |
| Mail Armor | Head | |
| Mail Armor | Hands | |
| Plate Armor | Shoulders | |
| Plate Armor | Wrists | |
| Accessory | Ring | |
| Accessory | Trinket | |
| Accessory | Trinket | |
| Essence upgrades |
For more information, please refer to our Eternal Palace Loot and Essence guide.
Class-specific Advice for The Queen's Court
Changelog
- 08 Jul. 2019: Added loot.
- 05 Jul. 2019: Guide added.
Class Guides
BfA Guides
Patch 8.3 Profession Changes
- WoW’s Voidspire Finale Ends on the Best Cliffhanger in Years
- 30 Free Hero Dawncrests Await in WoW Midnight’s First Delve Nemesis
- Midnight Season 1 Changes Your Gear Plan for Every Class
- The Best Tanks and Healers in Midnight’s Season 1 Raids: Dreamrift and Voidspire Tier Lists
- The Best Specs for Midnight’s Raids: Dreamrift and Voidspire DPS Tier List
- Blood Elf Druids in WoW? Here’s Why Players Think It’s Possible
- Atal’Utek REVEALED: The Hidden Island in WoW Midnight Everyone Is Talking About
- More Class Tuning Added to This Week’s Batch: DK, Evoker, Priest