Warmaster Blackhorn Tank Strategy Guide (Heroic Mode included)
Table of Contents
Introduction
This guide is intended to provide a comprehensive description of the encounter with Warmaster Blackhorn in Dragon Soul. It is mostly targeted to tanks who desire to have a short but detailed overview of what is expected of them during that fight.
This guide is updated for World of Warcraft WoD 6.1.2.
The Warmaster Blackhorn encounter is a two-phase fight during which you will have to deal with many types of adds, before finally performing a DPS burn against Backhorn himself. The encounter is very reminiscent of the Gunship Battle from Icecrown Citadel, although much more difficult.
The tanks on this encounter will have to communicate with each other and coordinate a tank swap on the boss, but otherwise, the fight is not challenging for them.
Overview of the Fight
The Warmaster Blackhorn encounter takes place on a flying gunship. The ship has a health pool and can be damaged by various abilities during the encounter. Aside from defeating Warmaster Blackhorn, you will also have to ensure the survival of your ship, if you wish to succeed in this encounter.
The encounter is a two phase fight. During the first phase, your raid will mainly have to deal with 4 different types of adds (3 types of adds in LFR). You will also have to watch out for many void zones in which you must stand in order to protect the gunship. If 3 waves of adds are dealt with successfully, the second phase will begin. During this phase, your raid will have to deal with Warmaster Blackhorn himself.
| Phase One | Phase Two |
|---|---|
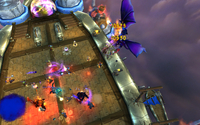
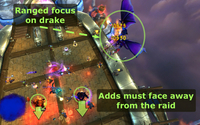
|
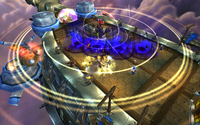
|
Phase One
As a tank, you will have a few tasks to perform during this phase.
-
 Tank the Twilight Elite Slayers and Twilight Elite Dreadblades.
All in all, there will be 3 Slayers and 3 Dreadblades, spawning in 3 waves
comprised of 1 Slayer and 1 Dreadblade each. Each of the two adds should
be tanked by a different tank, and for the second and third waves, you should
make sure that you tank a different type of add than the one you tanked in
the previous wave (Slayer - Dreadblade - Slayer, for example). This is required
so that the debuff that these adds stack on you wears out.
 - Face the Dreadblades away from the raid.
Phase Two
Phase Two begins as soon as all the Twilight Assault Drakes (a type of add that is of no concern to you) have been killed. The only target that can be tanked is Warmaster Blackhorn. During this phase, you will have to perform a few simple tasks.
-
 Perform a tank swap on the boss (because of
  Devastate,
a stacking debuff that the boss applies). We advise taunting at 2 stacks.
 - Be prepared to avoid:
- the large purple void zones that Goriona will place on the ground (she will abandon the fight after a short while and no longer place any void zones);
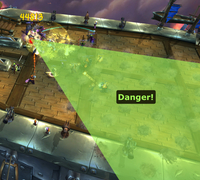
- Blackhorn's frontal cone
 Shockwave. While the boss does cast
this in front of him, he will face a random raid member before doing so. The
affected area is marked with a visible ground effect.
- Use defensive cooldowns when the boss' health drops below 30% or so (he has a soft enrage).
Heroic Mode
As a tank, the heroic mode of Warmaster Blackhorn is extremely similar to the normal mode, with only a few relevant changes.
Differences from Normal Mode
In addition to increased health and damage, the following changes are of importance to you:
- During Phase One, parts of the ship's deck will be randomly covered in fire. Simply move out of the fire. The fires will progressively be put out by NPCs, freeing up space.
- Taking damage from a
 Twilight Barrage (small void zone) will leave a
debuff on you for 15 seconds, that increases the Shadow damage you take by
50%.
 - During Phase Two, when Goriona reaches 80% health she lands and must be tanked and DPSed down. At 20% health, she flies away.
Strategy
Phase One
During Phase One, you only have two added concerns:
- Stay out of the fires on the deck of the ship;
- Make sure that, while soaking damage from
 Twilight Barrage, you do
not have the Shadow damage increasing debuff.
Phase Two
During Phase Two, when Goriona lands she will need to be picked up and tanked. She performs a breath attack and as a result she must be tanked away from the raid (and from Blackhorn's tank).
Your DPS will focus her down and then switch to Warmaster Blackhorn.
Because of Warmaster Blackhorn's ![]() Devastate, you will have to
perform a tank swap between Goriona and Blackhorn in order to let the
stacks drop off.
Devastate, you will have to
perform a tank swap between Goriona and Blackhorn in order to let the
stacks drop off.
- Blizzard Breaks Silence on Puzzling Cartel Chips in Patch 11.1.5
- Chalice Quest NPC Rewards Temporarily Disabled Disabled in Season of Discovery
- Has The Catalyst Killed Raiding or Improved the Game? WoW Heroic Raid Progression Since Legion
- Undercoin Transfers Now Possible on 11.1.5 PTR — Bug or Feature?
- The Music of Azeroth: Community’s Favorite Soundscapes
- This Hunter Transmog Turned Heads on Reddit—and Here’s the Full Item List
- What’s Still in Your Bags? Players Reveal the Weirdest Items They Can’t Delete
- Two Mounts Drop in the Scarlet Enclave Raid — Here’s Where to Get Them
