Waycrest Manor Dungeon Guide: Location, Boss Strategies, Trash, and Loot
Welcome to our guide to the Waycrest Manor dungeon in Season 3 of the Dragonflight World of Warcraft expansion. This guide will cover everything you need to know about the dungeon, including how to get to it, its layout, the trash and boss mechanics within, and its loot.
Short Introduction
This guide will focus on an extensive overview of the dungeon, providing vital information to increase your chance of completing the key. We will cover all 5 boss fights supported by the most notable trash enemies in the dungeon and their important abilities. If you would like to learn about the rest of the dungeons in Mythic+, please see our overviews linked below.
Getting into Waycrest Manor
Waycrest Manor is a max-level dungeon in Drustvar, Kul Tiras.
The dungeon is available in both ![]() Mythic and Mythic+ mode.
Mythic and Mythic+ mode.

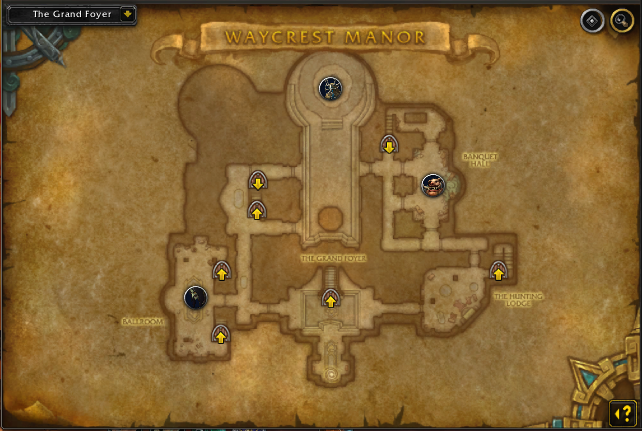
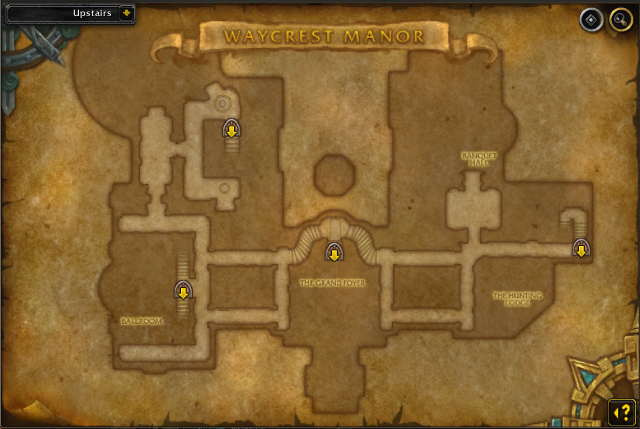
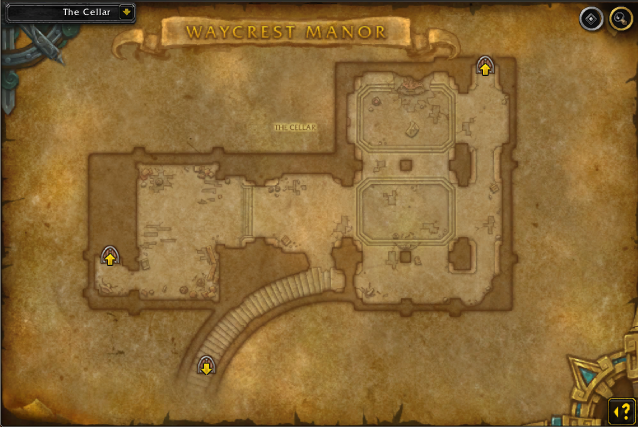
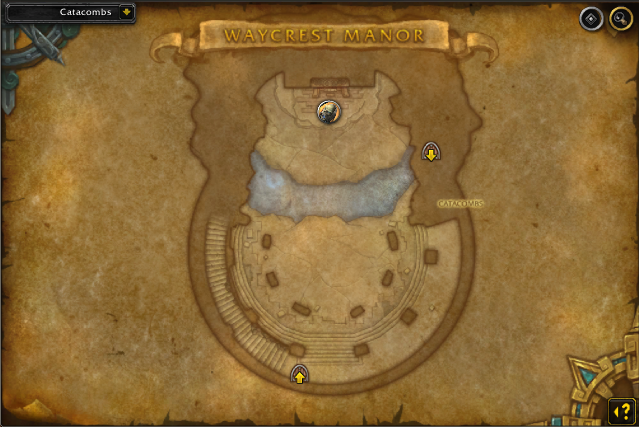
Waycrest Manor Layout

Heartsbane Triad
Notable Trash Before Heartsbane Triad
- Interrupt Soul Essence's
 Scar Soul at all costs. In the case of a danger,
you can line off the cast to avoid death.
Scar Soul at all costs. In the case of a danger,
you can line off the cast to avoid death. - Avoid the Bewitched Captain's
 Shadow Cleave 10 yards frontal while
keeping an eye for the
Shadow Cleave 10 yards frontal while
keeping an eye for the  Spirited Defense cast. If you can't interrupt it, you
can always use a Purge effect to remove the buff.
Spirited Defense cast. If you can't interrupt it, you
can always use a Purge effect to remove the buff. - Enthralled Guard will only strike your Tank with Captain's Strike and otherwise be harmless to your team.
- Runic Disciple is the mob you should absolutely focus on. Interrupt their
single-target damage
 Runic Bolt and stop at all costs the
  Spellbind
silence effect.
Spellbind
silence effect. - Interrupt Heartsbane Soulcharmer is the most important mob in this area. First,
interrupt her
 Soul Bolt / Soul Volley AoE damage ability.
Second, immediately move all mobs away from
Soul Bolt / Soul Volley AoE damage ability.
Second, immediately move all mobs away from  Warding Candles when she casts it.
 - Interrupt Thistle Acolyte's
 Drain Essence /
  Infected Thorn.
In case of a Infected Thorn going through, you can always
Infected Thorn.
In case of a Infected Thorn going through, you can always  Disease Dispel it.
 - At last several Blight Toads will surround Thistle Acolyte, remember that upon
death they will trigger
 Toad Blight, make sure to stand out of it.
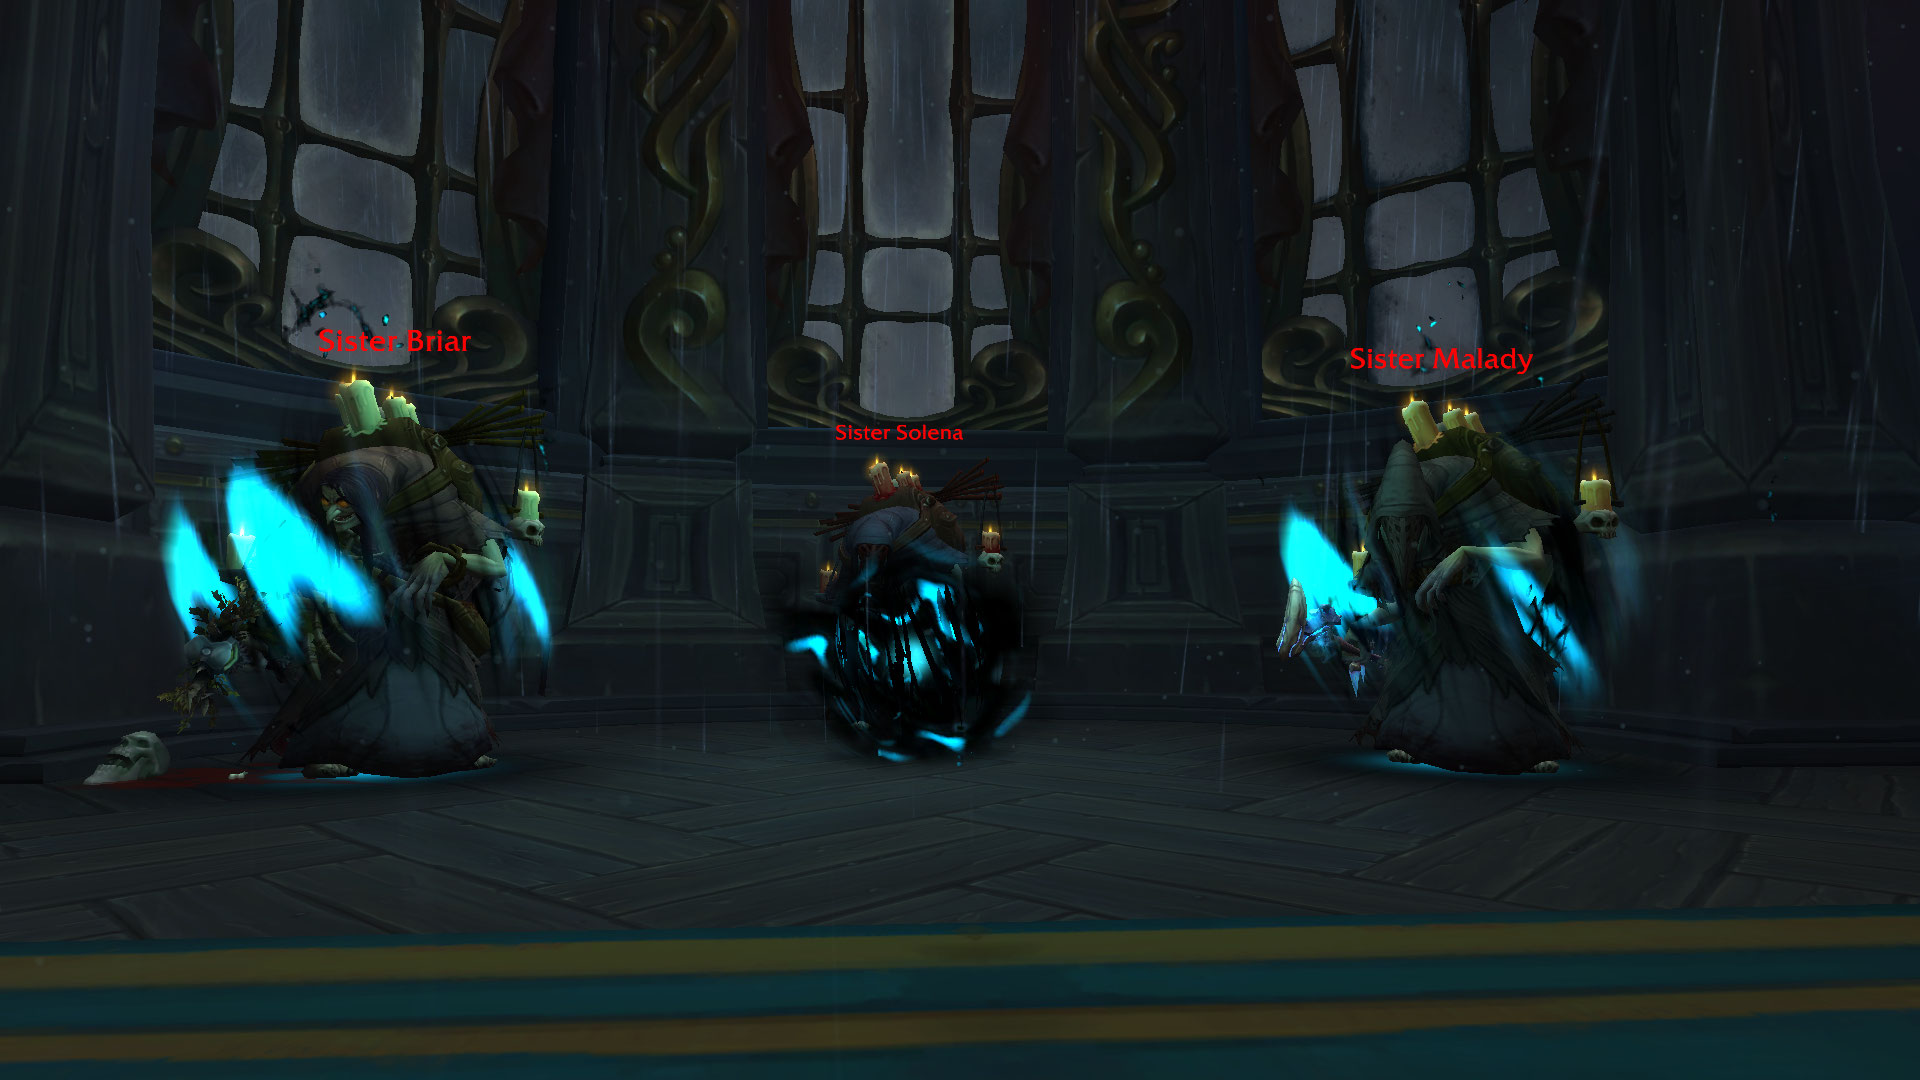
Heartsbane Triad Boss Guide
The Heartsbane Triad is the first and one of the hardest bosses in Waycrest Manor
in which the group will simultaneously fight Sister Solena first,
Sister Malady second and Sister Briar third. You must pay attention to
![]() Focusing Iris buff, as the boss that has it is the boss you must focus on,
while the rest of the sisters have the
Focusing Iris buff, as the boss that has it is the boss you must focus on,
while the rest of the sisters have the ![]() Ironbark Shield damage reduction aura.
The Heartsbane Triad will rotate once they lose 50% of their health, and
each time any of the sisters have
Ironbark Shield damage reduction aura.
The Heartsbane Triad will rotate once they lose 50% of their health, and
each time any of the sisters have ![]() Focusing Iris, they will gain a
unique spell and aura. At last, each of the sisters will have an energy bar,
gaining 2 energy every 1.5 seconds; upon reaching 100, they will cast
Focusing Iris, they will gain a
unique spell and aura. At last, each of the sisters will have an energy bar,
gaining 2 energy every 1.5 seconds; upon reaching 100, they will cast
![]() Dire Ritual, which essentially wipes the whole group
(unless you have a magical immunity to survive). More information down below:
Dire Ritual, which essentially wipes the whole group
(unless you have a magical immunity to survive). More information down below:
All Roles
- While all sisters will continuously cast single-target spells, like Soul Bolt,
Ruinous Bolt and
 Bramble Bolt depending on the sister, on a
random player, it is EXTREMELY important to always interrupt the sister that has the
Bramble Bolt depending on the sister, on a
random player, it is EXTREMELY important to always interrupt the sister that has the
 Focusing Iris since her bolt will do extra damage.
 - Sister Solena will occasionally cast
 Soul Manipulation,
making sure to damage the mind-controlled target to break them from the charm.
During the charm, Sister Solena will have
Soul Manipulation,
making sure to damage the mind-controlled target to break them from the charm.
During the charm, Sister Solena will have  Soul Armor self-aura,
reducing her damage taken by 99%. At last, during Sister Solena,
Soul Armor self-aura,
reducing her damage taken by 99%. At last, during Sister Solena,
 Aura of Apathy will be present at all times, and use defensive
cooldowns as appropriate. Bonus tip: always stun the mind-controlled person
to avoid any unnecessary use of abilities.
Aura of Apathy will be present at all times, and use defensive
cooldowns as appropriate. Bonus tip: always stun the mind-controlled person
to avoid any unnecessary use of abilities. - After Sister Solena, the second witch to receive Focusing Iris
will be Sister Malady. Be sure to be spread during the Unstable Runic Mark cast.
You can
 Curse Dispel the debuff or use a magical immunity (
 Stoneform works too)
to remove it. Sister Malady will have
Stoneform works too)
to remove it. Sister Malady will have  Aura of Dread present at all times,
to reduce the stacks, make sure to move consistently.
Aura of Dread present at all times,
to reduce the stacks, make sure to move consistently. - Once Sister Malady health drops below 50%, she will trigger the last
witch - Sister Briar, after which the sequence of the order will reset until
the triad is defeated. Outside of her
 Aura of Thorns, she will cast
 Jagged Nettles on a random target.
Tank
- Use your crowd-control abilities when Sister Solena is casting Soul Manipulation,
this way, you can save a global from your DPS and healer as they can focus on
breaking the person out.
Healer
- When Sister Solena is active, she will have Aura of Apathy.
This is a good place to remind your DPS players to use their defensive cooldowns
appropriately. Be mindful of your own healing as well!
- During Sister Malady make sure to focus on healing and topping low-health targets to prevent them from dying from the random bolts.
- During Sister Briar is the place to use your healing cooldowns as the
group will continuously take damage from Aura of Thorns and the
incredible dangerous Jagged Nettles (the only way to get rid of the
debuff is my
 Bleed dispel or top-up their health above 90%).
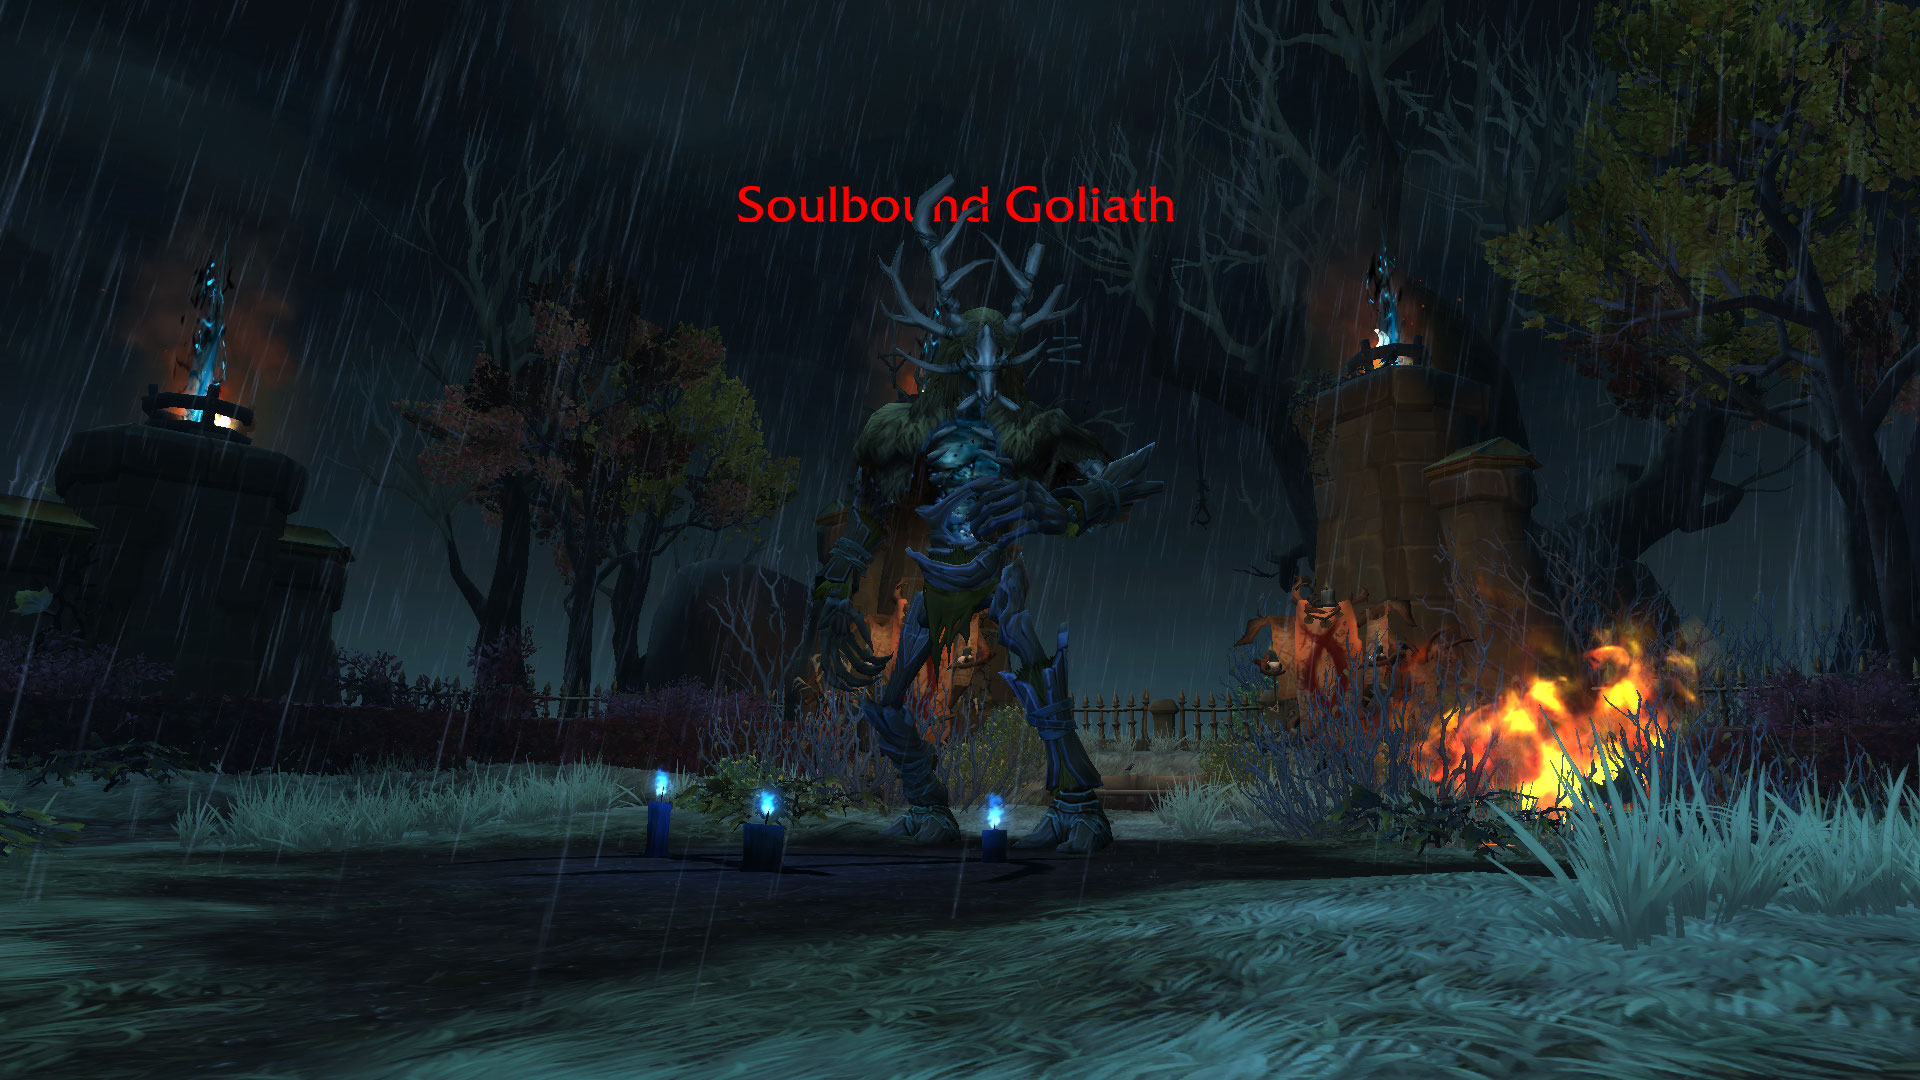
Soulbound Goliath
Notable Trash Before Soulbound Goliath
- Pro tip: The majority of the mobs in this area can be affected by
 Wildfire; simply drag them on top of the existing fire to take extra damage. This can save
you a few seconds throughout the key.
Wildfire; simply drag them on top of the existing fire to take extra damage. This can save
you a few seconds throughout the key.
------------------------------------------------------------------------------------
- Interrupt Coven Thornshaper's Infected Thorn, in case it goes
through, you can always Disease Dispel it. The mob will also occasionally cast
 Uproot, make sure to be spread so multiple party members do not overlap
at this, and avoid staying in it.
Uproot, make sure to be spread so multiple party members do not overlap
at this, and avoid staying in it. - Thornguard is one of the few tank busters in this dungeon. Beware of
 Tearing Strike
Bleed effect, which becomes quite dangerous during its Enrage
(you can Enrage Dispel it) buff. At last, upon death, they will trigger
Tearing Strike
Bleed effect, which becomes quite dangerous during its Enrage
(you can Enrage Dispel it) buff. At last, upon death, they will trigger  Shatter,
and make sure to get away from its body.
Shatter,
and make sure to get away from its body. - Jagged Hounds will exclusive do tank damage.
- Avoid Matron Bryndle's Splinter Spike ground-spawn. Your Tank must pay extra
attention to her
 Thorned Barrage channel as it is extremely
dangerous (use active mitigation).
Thorned Barrage channel as it is extremely
dangerous (use active mitigation). - Interrupt Dreadwing Raven's
 Pallid Glare.
Soulbound Goliath Boss Guide
All Roles
- When the tank resets the
 Soul Harvest, it will trigger
  Burning Brush
after-effect, use your defensive cooldowns to reduce the incoming damage and
help your healer.
Burning Brush
after-effect, use your defensive cooldowns to reduce the incoming damage and
help your healer. - When Burning Brush is present, Burning Souls will appear
on the field, attacking nearby enemies for 10 sec. If they get close to you,
they will hit you with
 Burning Fists, which is likely to be
lethal when combined with the Burning Brush channel damage.
Burning Fists, which is likely to be
lethal when combined with the Burning Brush channel damage.
Tank
- The boss will gain a stack of Soul Harvest every 2 sec,
making it harder to tank as the fight goes on. This will also make the
 Crush
tank-buster hit extremely hard. You must reset the stacks to avoid being one-shot
by walking the boss next to a Wildfire.
Crush
tank-buster hit extremely hard. You must reset the stacks to avoid being one-shot
by walking the boss next to a Wildfire. - Never reset Soulbound Goliath's Soul Harvest stacks when
 Soul Thorns is active; you will simply kill the player caught in it.
Healer
- When the tank resets the Soul Harvest, it will trigger an Burning Brush
after-effect, this is the best point to use your major healing cooldowns.
Raal the Gluttonous
Notable Trash Before Raal the Gluttonous
- Infected Peasant is the easiest non-boss-enemy in this area; they will
only autoattack your Tank and be surrounded by Devouring Maggots. Keep in mind
that upon killing Infected Peasant, he will trigger its passive -
 Infected,
spawning 3 Devouring Maggots. At last, each Devouring Maggot will cast a
Infected,
spawning 3 Devouring Maggots. At last, each Devouring Maggot will cast a
 Spit on a random target, dealing high initial damage.
 - Pro tip: Some Devouring Maggots carry a
 Parasitic debuff,
allowing them to cast
Parasitic debuff,
allowing them to cast  Infest on a random party member. If the cast goes
through, you will get no % count for the mob, and once the debuff expires, he
will spawn out of you another 3 Devouring Maggots that also does not give % count.
Infest on a random party member. If the cast goes
through, you will get no % count for the mob, and once the debuff expires, he
will spawn out of you another 3 Devouring Maggots that also does not give % count. - Gorestained Piglet will occasionally cast
 Snout Smack at your Tank
and otherwise be harmless to the rest of your group.
Snout Smack at your Tank
and otherwise be harmless to the rest of your group. - Beware of Pallid Gorgers as they will cast
 Ravaging Leap on the
furthest target applying Bleed-over-time effect to all enemies within 5 yards.
At last, interrupt their Retch! frontal or side-step it.
Ravaging Leap on the
furthest target applying Bleed-over-time effect to all enemies within 5 yards.
At last, interrupt their Retch! frontal or side-step it.
If you enter The Hunting Lodge area, here are the unique types of mobs that you should be aware of:
- Crazed Marksman is one of the few static mobs in this dungeon, which will continuously Shoot at random targets. If you line of sight them, they will stack in melee, making it much easier to cleave.
- Important mob: Interrupt Maddened Survivalist's
 Severing Serpent
and avoid staying in the
Severing Serpent
and avoid staying in the  Shrapnel Trap when it is cast. The trap is
thrown on a ranged player and will continuously stay on the ground until
the Maddened Survivalist is defeated.
Shrapnel Trap when it is cast. The trap is
thrown on a ranged player and will continuously stay on the ground until
the Maddened Survivalist is defeated. - Diseased Mastiff will only deal tank damage with their auto-attacks
and occasional
 Diseased Crunch.
Raal the Gluttonous Boss Guide

All Roles
- Periodically throughout the fight, Raal the Gluttonous will cast
 Call Servant,
enabling 4 Wasting Servants to slowly walk towards him. If they reach the
boss's range, they will be consumed and trigger its follow-up non-dispellable debuff -
Gluttonous Bile on all party members. This debuff is NOT dispellable and can stack.
Your priority must be killing them at all costs!
Call Servant,
enabling 4 Wasting Servants to slowly walk towards him. If they reach the
boss's range, they will be consumed and trigger its follow-up non-dispellable debuff -
Gluttonous Bile on all party members. This debuff is NOT dispellable and can stack.
Your priority must be killing them at all costs! - Avoid being hit by the
 Tenderize frontal. Raal the Gluttonous
will cast 3 waves of the frontal.
Tenderize frontal. Raal the Gluttonous
will cast 3 waves of the frontal. - Avoid being hit by the
 Rotten Expulsion initial frontal and focus
on killing the follow-up Bile Oozelings spawns quickly.
Rotten Expulsion initial frontal and focus
on killing the follow-up Bile Oozelings spawns quickly.
Tank
- Collect the aggro from all Bile Oozelings spawns.
Healer
- In case of a Gluttonous Bile debuff going through, use your major
healing cooldowns to keep your team alive.
Lord and Lady Waycrest
Notable Trash Before Lord and Lady Waycrest
- Beware of Heartsbane Runeweaver's
 Etch uninterruptible channel cast
(use your defensive if you are targetted). In addition, the witch will occasionally cast
Etch uninterruptible channel cast
(use your defensive if you are targetted). In addition, the witch will occasionally cast
 Runic Mark to a random party member. If you do have a Curse Dispel,
here is the perfect time to use it.
Runic Mark to a random party member. If you do have a Curse Dispel,
here is the perfect time to use it. - Interrupt Coven Diviner's Soul Bolt. In addition, she will occasionally
apply
 Fragment Soul to your Tank.
 - Matron Alma is the second and final "mini-boss" in this dungeon. She will exclusively
apply
 Decaying Touch debuff to your Tank, hence why it is important to dispel
it swiftly. In addition, interrupt her Ruinous Volley at all costs.
At last, Matron Alma will cast Dread Mark on a random player,
regardless of how you deal with it (Curse dispel it or let it expire),
be spread at the end of the duration to avoid the follow-up debuff - Lingering Dread.
Decaying Touch debuff to your Tank, hence why it is important to dispel
it swiftly. In addition, interrupt her Ruinous Volley at all costs.
At last, Matron Alma will cast Dread Mark on a random player,
regardless of how you deal with it (Curse dispel it or let it expire),
be spread at the end of the duration to avoid the follow-up debuff - Lingering Dread.
Lord and Lady Waycrest Boss Guide
Lord and Lady Waycrest is a two-phase boss encounter, with the Phase 1
being semi-exclusive to Lord Waycrest, while Phase 2 will allow you
to fight both bosses simultaneously. During Phase 1, you will have to deal with
![]() Virulent Pathogen coming from Lord Waycres while dodging
Virulent Pathogen coming from Lord Waycres while dodging
![]() Discordant Cadenza ground puddles coming from Lady Waycrest.
Once Lord Waycrest reaches ~35-37% HP, Lady Waycrest will cast
Discordant Cadenza ground puddles coming from Lady Waycrest.
Once Lord Waycrest reaches ~35-37% HP, Lady Waycrest will cast
![]() Vitality Transfer healing him, while she loses 30% HP of hers. This must
occur 3 (or until Lady Waycrest is at 10% HP) before Phase 2 starts.
More information down below:
Vitality Transfer healing him, while she loses 30% HP of hers. This must
occur 3 (or until Lady Waycrest is at 10% HP) before Phase 2 starts.
More information down below:

All Roles
- Avoid being hit by
 Discordant Cadenza ground puddles.
 - Lord Waycrest will cast Virulent Pathogen on a random target; if you do have Disease dispel in your party, here is the perfect opportunity
to use it. However, if you don't, be aware that when Virulent Pathogen runs out,
it will trigger a secondary effect -
 Contagious Remnants. Be sure to avoid getting
hit by the ground effect to avoid having Virulent Pathogen debuff re-applied.
Contagious Remnants. Be sure to avoid getting
hit by the ground effect to avoid having Virulent Pathogen debuff re-applied.
Tank
- Lord Waycrest will occasionally cast
 Wasting Strike on you; this is the time to use active mitigation.
 - Each time Lady Waycrest uses
 Vitality Transfer, Lord Waycrest
will gain a stack of
Vitality Transfer, Lord Waycrest
will gain a stack of  Putrid Vitality (maximum of 3 stacks when you fight the
boss in Phase 2). Be mindful and manage your defensive cooldowns properly.
Putrid Vitality (maximum of 3 stacks when you fight the
boss in Phase 2). Be mindful and manage your defensive cooldowns properly.
Healer
- Be mindful of Wracking Chord. Lady Waycrest will continuously
cast that through the boss fight.
- Spot-heal your Tank during Wasting Strike, as not only they will get
front-load damage but also a damage-over-time effect.
Gorak Tul
Notable Trash Before Gorak Tul
- When fighting Gloom Horrors the most important thing to remember is that
they will
 Dark Leap on the furthest enemy, cleaving everyone within
5 yards of the impact. A common strategy here is to pre-use your major defensive
cooldowns and "bait" the jumps away from your party.
Dark Leap on the furthest enemy, cleaving everyone within
5 yards of the impact. A common strategy here is to pre-use your major defensive
cooldowns and "bait" the jumps away from your party. - Pro tip: Be mind full at how many of the Gloom Horrors you will engage at once, as they will be quite tough on your Tank.
Gorak Tul Boss Guide
The final boss of the dungeon, Gorak Tul, is an incredibly tough encounter
to face, here is the detailed fight breakdown for you. The most important detail here
is to manage the Deathtouched Slaver spawns, as Gorak Tul will roughly
spawn them every 25 sec. They will ![]() Dark Leap out on the furthest
target and have a
Dark Leap out on the furthest
target and have a ![]() Death Lens cast to stop. Your goal is to kill them and
use
Death Lens cast to stop. Your goal is to kill them and
use ![]() Alchemical Fire (periodically spawning on the ground) on top of their
corpse before Gorak Tul finishes its
Alchemical Fire (periodically spawning on the ground) on top of their
corpse before Gorak Tul finishes its ![]() Dread Essence (once he reaches 100 energy)
resurrection cast. More details down below:
Dread Essence (once he reaches 100 energy)
resurrection cast. More details down below:

All Roles
- Swap your damage when Deathtouched Slaver is spawned. If the boss has a
while until he reaches maximum energy, or in other words,
 Dread Essence cast,
you can cleave them for more efficient boss damage. At last, if they begin to cast
Death Lens use any disturbing effect to stop it.
Dread Essence cast,
you can cleave them for more efficient boss damage. At last, if they begin to cast
Death Lens use any disturbing effect to stop it.
Tank
- Do your best to stack all Deathtouched Slavers on top of the Gorak Tul.
Healer
- When the boss casts Dread Essence, it will deal massive AoE damage
to the whole party, top them quickly before any Deathtouched Slavers use their
Dark Leap.
Waycrest Manor Loot Table
Heartsbane Triad
| Type | Item | Stats |
|---|---|---|
| Dagger | Int, Vers/Mastery | |
| Off-Hand | Mastery/Vers | |
| Leather Wrist | Mastery/Crit | |
| Cloth Hands | Mastery/Vers | |
| Plate Waist | Vers/Haste | |
| Leather Legs | Vers/Crit | |
| Mail Boots | Haste/Vers |
Soulbound Goliath
| Type | Item | Stats |
|---|---|---|
| Fist Weapon | Crit/Haste | |
| Cloth Wrist | Haste/Vers | |
| Mail Hands | Crit/Mastery | |
| Leather Waist | Mastery/Vers | |
| Plate Legs | Crit/Haste | |
| Ring | Vers/Haste | |
| Trinket | Mastery |
Raal the Gluttonous
| Type | Item | Stats |
|---|---|---|
| 1H Axe | Str/Special effect | |
| Back | Crit/Haste | |
| Mail Wrist | Mastery/Haste | |
| Cloth Legs | Mastery/Haste | |
| Plate Boots | Vers/Mastery | |
| Trinket | Str |
Lord and Lady Waycrest
| Type | Item | Stats |
|---|---|---|
| 1H Mace | Agi, Vers/Haste | |
| Plate Hands | Vers/Crit | |
| Cloth Waist | Vers/Mastery | |
| Mail Waist | Vers/Crit | |
| Leather Boots | Mastery/Haste | |
| Ring | Crit/Vers | |
| Trinket | Intellect |
Gorak Tul
| Type | Item | Stats |
|---|---|---|
| Staff | Agi, Vers/Mastery |
Waycrest Manor Achievements
There are 6 total achievements to obtain in Waycrest Manor:
| Achievement | Criteria |
|---|---|
| Defeat Goral Tul in Waycrest Manor. | |
| Defeat Goral Tul in Waycrest Manor on
|
|
| Defeat Gorak Tul in Waycrest Manor on
|
|
| Complete a Waycrest Manor at |
|
| Destroy three Deathtouched Slavers's corpses
using a single |
|
| Defeat the Soulbound Goliath without it gaining
12 stacks of |
Changelog
- 19 Mar. 2024: No further changes required for 10.2.6 Patch.
- 15 Jan. 2024: No further changes required for 10.2.5 Patch.
- 06 Nov. 2023: Guide added.
This guide has been written by Petko, one of the top Mythic players of all time. He has accomplished several Europe- and World #1 Team and Solo Seasonal rankings with multiple specialization and classes. Moreover, he competes in the MDI and streams his runs live on Twitch, and shares his personal opinions on YouTube and Twitter.
- Blizzard Breaks Silence on Puzzling Cartel Chips in Patch 11.1.5
- Chalice Quest NPC Rewards Temporarily Disabled Disabled in Season of Discovery
- Has The Catalyst Killed Raiding or Improved the Game? WoW Heroic Raid Progression Since Legion
- Undercoin Transfers Now Possible on 11.1.5 PTR — Bug or Feature?
- The Music of Azeroth: Community’s Favorite Soundscapes
- This Hunter Transmog Turned Heads on Reddit—and Here’s the Full Item List
- What’s Still in Your Bags? Players Reveal the Weirdest Items They Can’t Delete
- Two Mounts Drop in the Scarlet Enclave Raid — Here’s Where to Get Them